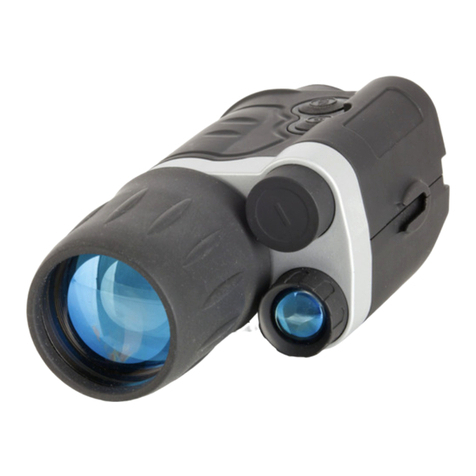
Helion 2 XP50 PRO User manual

Helion 2 Pro
Manual

Content
Description
Package Contents
Features
Components and Controls
Button Operation
Using the Battery Pack
Battery Charging
Battery Installation
Precautions
External Power Supply
Powering on and Image Setting
Microbolometer Calibration
Discrete Digital Zoom
Status Bar
Quick Menu Functions
Main Menu Functions
Enter the Main Menu
Mode
Image Detail Boost
Color Modes
Calibration Mode
Microphone
Icon Brightness
General Settings
Wi-Fi Activation
Wi-Fi Settings
Defective Pixel Repair
Defective Pixel Repair
Restore Default Pixel Map
Device Information
Video Recording and Photography
Wi-Fi Function
Stadiametric Rangefinder
Display-Off Function
PiP Function
Stream Vision 2
Firmware Update
USB Connection
Technical Inspection
Technical Maintenance and Storage
Troubleshooting
Specifications
Legal Compliances and Disclaimers

Description
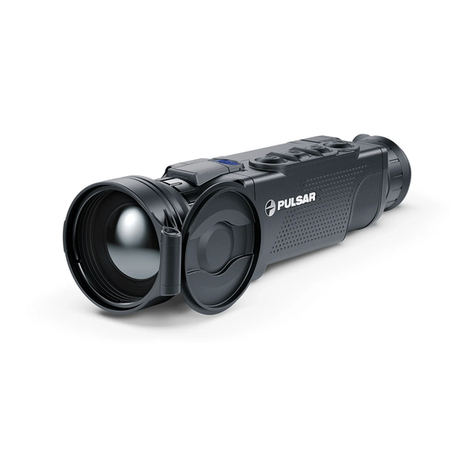
Helion 2 Pro thermal imaging scopes are based on an IR sensor (uncooled microbolometer).
The scopes are designed for use both at night-time and during the day and provide
exceptional image quality even in adverse weather conditions (fog, smog, rain) and beyond
obstacles like branches, tall grass, dense foliage, etc. known to hinder target detection.
Helion 2 Pro thermal imaging scopes do not require an external source of light and are not
affected by bright light exposure.
Helion 2 Pro thermal imaging scopes are designed for various applications including hunting,
observation, security, terrain orientation, search and rescue operations, etc.
Battery Charging
Battery Installation
Powering on and Image Setting
Microbolometer Calibration

Package Contents
Helion 2 Pro Thermal Monocular
IPS7 rechargeable battery
Battery Charger
Power adapter
USB cable
Carrying case
Hand strap
Quick-Start guide
Lens cloth
Warranty card

Features
NETD less than 25 mK
4 operating modes: Forest, Rocks, Identification, User
3 calibration modes: (Manual, Semi-Automatic, Automatic)
8 color display palettes
Defective pixel repair
Image Detail Boost technology
Stadiametric rangefinder
Display-Off function
Functional and ergonomic design
All-metal, light-alloy body
Updatable firmware
Wide operating temperature range of -25 to +50° C (-13° F to +122° F)
Video Recording
Built-in video with audio
iOS and Android compatible
Wi-Fi remote control and viewing using a smartphone
Storing photos and videos in Cloud when using the Stream Vision 2 App
Battery Pack
Quick-Release Li-Ion IPS7/IPS14 battery packs
Operating time in Wi-Fi mode up to 16 hours*
Operates on AA batteries**
USB charging capability for IPS7 / IPS14
* with IPS14 Battery Pack (purchased separately).
** with a special battery container (purchased separately).

Components and Controls

1. Lens cover

2. Lens focus ring
3. Battery Pack
4. Micro-USB connector
5. Eyeshade
6. Diopter adjustment ring
7. Record button REC
8. Navigation button DOWN
9. Button MENU
10. Navigation button UP
11. ON/OFF/Calibrationbutton
12. Latch for lens change
13. Lever for Battery Pack
14. Tripod socket

Button Operation
Operation Button
Power device on short press
Power device off long press for 3 secs
Turn display o? long press for less than 3 secs
Turn display on short press
Calibrate the microbolometer short press
Switch observation modes short press
Switch color palettes long press
Control discrete digital zoom short press
PiP on / off long press
Video Recorder Button
Start/pause/resume video recording short press
Stop video recording long press
Switch to video / photo long press
Capture Photo short press
Main Menu Button
Enter main menu long press
Navigation upwards/rightwards short press

Navigation downwards/leftwards short press
Con?rm selection short press
Exit submenu without con?rming
selection long press
Exit menu (switch to viewing mode) long press
Quick Menu Button
Enter quick menu short press
Switch between quick menu options short press
Increase value short press
Decrease value short press
Exit quick menu long press

Battery Charging
Helion 2 Prothermal imaging scopes are supplied with a rechargeable Li-Ion Battery Pack
IPS7 which allows operation for up to 8 hours. Please remember to charge the Battery Pack
before first use.
Charging
Step 1. Install the battery into the charger
1. Lift the lever (C) of the charger.
2. Remove the protective cover from the Battery Pack.
3. Insert the battery into the charger until it stops.
4. Lower the lever (C).
Step 2. ?heck the current battery level
Upon installation, a green indicator (D) on the charger will start to glow and begin flashing:
- once if the battery charge level is from 0% to 50%;
- twice if the battery charge level is from 51 to 75%;
- three times if the battery charge level is from 76% to 99%.

If the indicator lights green continuously, the battery is fully charged. You can disconnect
it from the charger.
If the indicator of the charger lights up red continuously upon battery installation, the
battery charge level is probably lower than acceptable (the battery has been in deep
discharge for too long). In this case, keep the battery in the charger for a long time (up to
several hours), then remove and re-insert it.
If the indicator then starts blinking green, the battery is good.
If the indicator keeps lighting up red it's defective. Do not use the battery!
The LED indicator (D) will display the battery charge status:
LED Indicator Battery Charge Status
Battery is empty
Image not found or type unknown Battery is full
Step 3. ?onnect the charger to the mains supply
1. To charge the battery, connect the micro-USB plug of the USB cable to port (E) of the
charger.
2. Connect the plug of the USB cable to the power adapter.
3. Plug the power adapter into a 100 - 240 V socket and the battery charging process will
start.

Battery Installation
1. Lift the lever(13).
2. Insert the battery (3) into the dedicated slot in the device body until it stops so that
element Fis located below.
3. Lock the battery (3) by lowering the lever (13).

Precautions
Only use the charger supplied with the Battery Pack. The use of any other charger may
irreparably damage the Battery Pack or the charger and may cause fire.
During long-term storage, the Battery Pack should be partially charged – the charge level
should be between 50% and 80%.
Do not charge the Battery Pack immediately after bringing it from a cold environment to a
warm one. Wait for 30-40 minutes for the Battery Pack to get warm.
Do not leave the Battery Pack unattended while charging.
Never use a modified or damaged charger.
Charge the Battery Pack at a temperature from 0° C to +45° C (32° F to +113° F),
otherwise the battery life will decrease significantly.
Do not leave the Battery Pack with a charger connected to the power adapter after
charging is complete.
Do not expose the Battery Pack to high temperatures or an open flame.
Do not submerge the Battery Pack in water.
Do not connect an external device with a current consumption that exceeds permitted
levels.
The Battery Pack is short circuit protected; however, any situation that may cause short-
circuiting should be avoided.
Do not dismantle or deform the Battery Pack.
When using the Battery Pack at sub-zero (sub 32° F) temperatures the battery capacity
decreases. This is normal and is not a defect.
Do not use the Battery Pack at temperatures above those shown in the table – this may
decrease battery life.
Do not drop or hit the Battery Pack.
Keep the Battery Pack out of the reach of children.

External Power Supply
☐
Show device diagram


The thermal imaging scope can be supplied from an external power source such as Power
Bank (5 V).
1. Connect the external power source to the USB port (4) of the device.
2. The device will switch to operation from the external power supply and the IPS7 Battery
Pack will be gradually recharged.
3. The battery icon will appear on the display showing the percentage charge level.
4. If the device operates on external power supply but the IPS7 Battery Pack is not
installed, the icon is shown.
5. When external power supply is disconnected, the device will switch to the internal IPS7
Battery Pack without powering off.
Warning! Charging IPS7 / IPS14 batteries at air temperatures below 0° C (32° F) may reduce
battery life. When using external power, connect the Power Bank to the device after it has
been turned on and working for several minutes.

Powering on and Image Setting
☐
Show device diagram


1. Open the lens cover (1).
2. Turn the device on with a short press of the ON/OFF (11).
3. To obtain a crisp image of the icons on the display, rotate the diopter adjustment ring (6).
After this, there is no need to rotate the diopter adjustment ring for distance or any other
conditions.
4. To focus on the object being observed, rotate the lens focus ring (2).
5. To set up display brightness and contrast and smooth digital zoom, please refer to the
Quick Menu Functions section.
6. After use, turn the device off by a long press of the ON/OFF (11) button.
Warning! Never point the lens at intensive energy sources such as laser radiation emitting
devices or the sun. It can damage electronic components in the device. The warranty does not
cover damage arising from failure to comply with operating instructions.
This manual suits for next models
1
Table of contents
Popular Monocular manuals by other brands
SYTONG
SYTONG XM Series quick start guide
Newcon Optik
Newcon Optik Phantom 150 Operation manual

Opticron
Opticron Marine-3 User instructions and warranty
ORION TELESCOPES & BINOCULARS
ORION TELESCOPES & BINOCULARS Tele-Extender 5125 instruction manual
InfiRay
InfiRay EYE III quick start guide
Swarovski Optik
Swarovski Optik CTS 85 Instructions For Use And Care, Warranty Card

