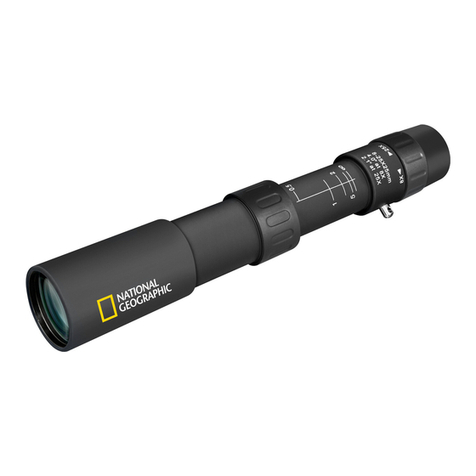
ThermTec CYCLOPS Series User manual

Thermal Imaging Monocular
CYCLOPS SERIES
User
Manual


Table of Contents
About This Manual
4
Regulatory Information
5
1. Introduction
6
1.1 Device Description
6
1.2 Features
7
1.3 Detection Range
8
1.4 Application Scenarios
8
1.5 Cautions
8
2. Packing List
9
3. Operation Guide
9
3.1 Battery Charging
9
3.2 Power on/off
10
3.3 Buttons and Controls
10
3.3.1 Buttons Features and
Introduction
10
3.3.2. Lens Adjustment
11
3.3.3 Rocker Button Operation
11
3.3.3.1 Zoom
11
3.3.3.2 Pseudo Color Switch
12
3.3.3.3 AI Ranging
13
3.3.4 Capture/Record
13
3.4 Settings
13
3.4.1 Image Setting
13
3.4.2 System Setting
14
3.4.3 Network Connection
15
3.4.3.1 App Download
15
3.4.3.2 Connect via Wi-Fi
16
3.4.3.3 Connect via Hotspot
16
3.4.4 APP Push Notification
17
3.4.5 File Management
18
3.5 External Video & Data Reading
19
3.6 System Software Upgrade
19
4. Technical Data
20
4.1 Product Size & Drawing
20
4.2 Specifications
21

About This Manual
COPYRIGHT © 2022 ThermTec Technology Co., Ltd. ALL RIGHTS RESERVED.
Any and all information, including, among others, wordings, pictures, graphs are
the properties of ThermTec Technology Co., Ltd. or its subsidiaries (hereinafter
referred to be “ThermTec”). This user manual (hereinafter referred to be “the
Manual”) cannot be reproduced, changed, translated, or distributed, partially or
wholly, by any means, without the prior written permission of ThermTec. Unless
otherwise stipulated, ThermTec does not make any warranties, guarantees or
representations, express or implied, regarding to the Manual.
This Manual is applicable to Thermal Imaging Monocular.
The Manual includes instructions for using and managing the product. Pictures,
charts, images and all other information hereinafter are for description and
explanation only. The information contained in the Manual is subject to change,
without notice, due to firmware updates or other reasons.
4

Regulatory Information
This product and, if applicable, the supplied accessories are
marked with “CE” and comply therefore with the applicable
harmonized European standards listed under the Radio Equipment
Directive 2014/53/EU, the EMC Directive 2014/30/EU, the RoHS
Directive 2011/65/EU.
2012/19/EU (WEEE directive): Products marked with this symbol
cannot be disposed of as unsorted municipal waste in the
European Union. For proper recycling, return this product to your
local supplier upon the purchase of equivalent new equipment,
or dispose of it at designated collection points. For
more information see: www.recyclethis.info.
5

Introduction
1.1 Device Description
ThermTec Cyclops Series Thermal Imaging Monocular, the new
generation intelligent thermal imaging monocular, is designed with a
12μm uncooled infrared detector and can be equipped with
15mm/25mm/35mm lens and 1024x768 OLED high-definition display.
With AI image recognition algorithm, it enables users to get clear
views under various lighting conditions, even in complete darkness,
providing reliable and high-quality visual images for night activities. In
particular, the function of easy connection to mobile phones enables
users to share views in real time.
6

1. Mechanical Rocker Design
It balances the central of gravity, providing an
easier and outstanding handheld experience.
2. 12μm VOx Detector
The 12μm VOx detector provides images with
better quality, and ensures perfect detail
recognition.
3. OLED Display
Designed with 1024x768 OLED display, it brings
outstanding HD image quality as well as great
durability, making it operable in a broader
temperature range as low as minus 20℃.
4. AI Intelligent Ranging
Based on the deep learning algorithm, the
monocular can automatically measure the
object distance.
5. Two-way Wi-Fi Design
It supports both WIFI and hotspot connection,
which allows users to share images and videos
with friends in real time.
6. Photo and Video Playback
Integrated pictures and video recording makes
sharing the thermal action quick and easy, with
the functions of playback and APP sharing.
7. Long Battery Life
Built-in battery with up to 12H super long standby,
recording every and instant moment of your
hunting and outdoor experience.
8. GPS Function
Enable user to know his own coordinates in real
time, which makes field activities safer.
9. Smooth Zooming
Continuous 1.0-6.0 HD zooming ensures excellent
sharpness and the highest resolution of details
from minimum to maximum magnification.
10. IP67 Protection Design
Provided with IP67-rated weatherproof
performance, it is capable of capturing
images/videos through rain, snow, smoke, smog,
or dust.
1.2 Features
7

1.3 Detection Range
The illustration below shows the comparative range
performance of the monocular with different lens
configurations. The data is based on detecting a man
of 1.8m tall, a wild boar of 0.7m tall, a wolf of 0.5m tall,
a rabbit of 0.3m tall and a bird of 0.2m tall.
1.4 Application Scenarios
•Animal Observation
•Outdoor Adventure
•Security Law Enforcement
•Emergency Search and Rescue
1.5 Cautions
Avoid hard objects.
Do not aim the lens directly at the sun
or high-temperature light sources.
Do not use the device in extremely
cold or hot environment.
Charge the battery once every three
months when it is not used for a long
period of time.
Make sure the USB cover is tightly
closed when used in water
environment.
Do not irradiate the laser indicator of
the device to human eyes.
Do not disassemble or modify the
device by yourself in any way.
CAUTION
8
2500
980
700
420
280
1800
700
500
300
200
1300
500
360
210
150
950
370
270
165
115
750
290
210
130
90
0 500 1000 1500 2000 2500 3000
(15mm)
(15mm)
(15mm)
(15mm)
(15mm)
(19mm)
(19mm)
(19mm)
(19mm)
(19mm)
(25mm)
(25mm)
(25mm)
(25mm)
(25mm)
(35mm)
(35mm)
(35mm)
(35mm)
(35mm)
(50mm)
(50mm)
(50mm)
(50mm)
(50mm)

Packing List
Monocular
1
Lanyard
1
USB cable
1
Video output cable
1
Carry bag
1
User manual
1
Monocular
(x1)
Lanyard
(x1)
USB cable
(x1)
Video output cable
(x1)
Carry bag
(x1)
Operation Guide
3.1 Battery Charging
The battery should be fully charged prior to use.
Note: The battery is not user replaceable.
Follow the below steps to charge the battery:
1. Lift the cover from the USB port.
2. Plug the cable provided into the USB port.
3. Plug the opposite end of the cable into a
USB power source.
User manual
(x1) 9

Notes: When the charging indicator on the
device becomes red, it means you need to
charge the device immediately. The indicator
turns to red when it is charging and turns to
green when it finishes charging. After it turns to
green, stop charging.
3.2 Power on/off
Power on
Power off
Hold the POWER
button for four
seconds and the
boost screen will
be shown.
When the device is
turned on, hold the
POWER button for
four seconds to
power off the
device.
3.3 Buttons and Controls
3.3.1 Button Features and Introduction
Note: Refer to Figure 1 for the main view of
the monocular.
3.3.2 Lens Adjustment
Press and
Hold
Press
Double-
Click
Power
on/off
Standby mode on/off
Laser
indicator
on/off
Take videos
Take photos
Zoom in
Zoom out
Peseudo color switch
AI ranging
Main
menu
Figure 1
10

Diopter Adjustment
Looking through the eyepiece, adjust the position of
diopter level to optimize the image sharpness on the
OLED display.
Objective Lens Focusing
Manually adjust the objective lens focus when
necessary.
3.3.3 Rocker Button Operation
3.3.3.1 Zoom
3.3.3.2 Pseudo Color Switch
11

There are six color palettes by default. You
can choose the pseudo color you want by
customizing. Unwanted colors can be turned
off in the system setting.
Color Palettes
White Black
Red
Golden
Green
Violet
Use rocker button towards right to switch
pseudo color.
12

3.3.4 Capture/Record
Press to take photos. Then the photo icon in
the upper left corner will flash once.
Press and hold to take videos. Then the
recording icon in the upper left corner starts
flashing, and the recording starts timing. Press
and hold again to stop recording.
3.4 Settings
Double-click the rocker button to enter Setting
menu.
Note: Select by moving the rocker button, and
short-press the rocker button to confirm the
selection.
AI Ranging Function
3.3.3.3 AI Ranging
Use the rocker button towards left to enable
or disable AI ranging function (before this
function is enabled, please make sure the
device is in AI ranging mode. Otherwise, refer
to Section 3.4 for setting).
3.4.1 Image Setting
Press to enter the Imaging Setting menu.
There are five sub-menus for image setting,
which are “Image Mode”, “Sharpness”,
“Denoise”, “Brightness” and “Contrast”.
13

Image Setting
Mode
Object
mode
Especially enhance target’s detail.
It’s recommended to be used in
bad weather conditions.
WDR
mode
Gain both background and
target’s detail with wide dynamic
algorithm.
Sharpness
0-10
Adjust image sharpness to make
the image edge sharper. The
recommended value is 5.
Denoise
0-10
Adjust image noise to make the
image cleaner. The
recommended value is 5.
Brightness
1-10
Adjust image brightness to make
the image brighter. The
recommended value is 5.
Contrast
1-10
Adjust image contrast to make the
target more prominent in the
image. The recommended value
is 5.
3.4.2 System Setting
Press to enter the System Setting menu.
Select by moving the rocker button, and
short-press the rocker button to confirm the
selection.
System Setting
EIS
Electronic Image
Stabilization. Can be
turned on/off in the system
setting.
Ranging
AI
AI distance measurement
MIL
MIL distance measurement
PIP
Picture-
in-
picture
In the picture, the image is
2x enlarged from the
center of the cross.
14

Coordinate
The position of the crosshair in
the picture can be adjusted
and separately saved.
Reticle
0-7
Choose the style of the
crosshair. “0” represents none,
and “1-7” represents seven
different styles.
OLED
Hue
Blue, purple and gray are
optional for OLED hue.
Brightness
Correction
Manual/
Auto
The mask works to calibrate
the uniformity of images.
System
Reset
All configuration parameters
are restored to the factory
default values after resetting.
Update
You can adjust and upgrade
the device system.
Language
Support multiple languages.
Time zone
Select local time zone and
adjust the date and time.
Blind pixel
The blind pixel in the picture
can be replaced.
Heat
Tracking
Turn on heat tracking to mark
the target with the highest
temperature in real time in the
screen.
GPS
Turn on GPS function to obtain
real-time satellite positioning,
longitude and latitude
coordinates and time
information.
OSD
Turn off OSD.
LED
Turn off LED. The work
indicator is turned off and the
hidden work mode is started.
EIS function: Turn on the EIS function to reduce
the impact of body shaking on the image and
keep the image stable when observing distant
targets.
Note: EIS function is only available for
CP635/CP650.
3.4.3 Network Connection
Press to enter the Network Connection
menu.
3.4.3.1 APP Download
15

Search "Smart Thermal" in APP store, or scan
the below QR code to download the APP.
3.4.3.2 Connect via Wi-Fi
① Open smart device’s personal hotspot.
② Short-press the rocker button to enter
the sub-menus of Network Connection,
and select WIFI for configuration.
③ Access the Wi-Fi sub-menu on
monocular and select the Wi-Fi released
by smart devices, and then enter the
password through the rocker button to
connect the Wi-Fi.
④ After the monocular is connected via
Wi-Fi, open the mobile APP to connect the
monocular.
3.4.3.3 Connect via Hotspot
16
3.4.3.2 ①3.4.3.2 ②
3.4.3.2 ③3.4.3.2 ④

① Short-press the rocker button to enter the sub-
menus of Network Connection, and select WIFI for
configuration.
② Access the Hotspot sub-menu, and the
monocular will release a hotspot network. Set the
hotspot name and password and confirm them
through the rocker button.
③ Enable mobile device to connect with
monocular Hotspot by setting the WLAN on mobile
device.
④ After mobile device is connected with
monocular Hotspot, open the mobile APP to
connect the monocular.
3.4.4 APP Push Notification
The APP push notification function can detect
and identify the target type (human or animal)
in real time, measure the distance, and pop
up a push notification on the APP.
The specific operation steps are as follows:
Note: Android phones can get push
notification always on display by launching
the APP in the background.
17
3.4.3.3 ①3.4.3.3 ②
3.4.3.3 ③3.4.3.3 ④

(1) Turn on AI and ranging function on the device.
(2) Connect the APP with the device (follow
Section 3.4.3). Select “Alarm”and “ Open” to turn
on the push notification.
3.4.5 File Management
Short-press to enter the File Management
menu. Select the image and video sub-menus
to view the images and videos and play the
videos.
18

File Setting
Image
Access the Image sub-
menu, and select photo
files through the rocker
button for management.
Video
Access the Video sub-
menu, and select video
files through the rocker
button for management.
3.5 External Video & Data Reading
Power on the device before using a type-C to AV
video cable to output analog video. When
external display is connected, the OLED of the
device automatically turns off the display.
Power on the device, use a type-C to USB cable
to connect with the computer to read the video
and image data in the memory.
Note: video and image taken in analog format
(usually taken by external display with analog
output) will be saved in folder named “720”,
video and image directly taken by monocular will
be saved in folder named “1024”.
3.6 System Software Upgrade
① Connect the device to your computer and
drag the upgrade file to the folder.
19
3.6 ①

② Access the Setup menu and select Upgrade.
③ The system will prompt that upgrading is in
progress. When the upgrade succeeds, the device
will restart automatically.
Technical Data
4.1 Dimensions
20
3.6 ②
3.6 ③
1. Before you update, make a backup
of your photos and videos.
2. Please keep the device fully charged.
3. It will restart after updates.
Other manuals for CYCLOPS Series
2
This manual suits for next models
7
Table of contents
Other ThermTec Monocular manuals

