Hellma Analytics 3in1 FLOW-THROUGH CUVETTE User manual
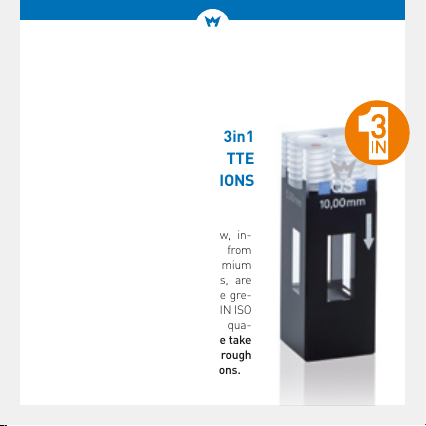
Thank you for choosing the new, in-
novative 3in1, precision cuvette from
Hellma Analytics. Hellma’s premium
cuvettes, for use in laboratories, are
manufactured and tested with the gre-
atest care and strictly adhere to DIN ISO
EN 9001 and 14001, ensuring high qua-
lity and a long working life. Please take
some time to carefully read through
the following important instructions.
FOR 3in1
FLOW-THROUGH CUVETTE
WITH SCREW CONNECTIONS
Instruction manual

1. PRODUCT DESCRIPTION
The 3in1 precision cuvette is made of 100% quartz glass; that offers
special characteristics and brings many advantages in day-to-day use.
–lexibility in applications, as the cuvette has two path lengths
–Fluorescence measurement possible for each path length
–No liquid leakage, monolithic quartz glass construction prevents
this by design
–Stress-free and extremely chemically resistant thanks to 100%
quartz glass construction
–Fully autoclavable
–Secure tube connection is ensured due to
the innovative quartz glass internal threads
–Tube set provided with the cuvette is made
of solvent-resistant material
Special features for TDA applications:
–Second path lengths can be set without
time consuming changing of the cuvette
respectively no longer screwing and
unscrewing of the tubings necessary
–Red point mark for the quick detection of
the path length position

2. SAFETY INFORMATION
The 3in1 precision cuvette is made out of 100% quartz glass. Like all
glass components, it must be handled with care to prevent damages
caused by tipping over, dropping, bumping or scratching.
To enjoy your 3in1 precision cuvette for as long as possible, please
observe the following information:
–DO NOT leave the cuvette on the bench unprotected.
–Clean the cuvette directly after use.
DO NOT allow the sample to dry in the cuvette!
–Follow the cleaning instructions (see section 4).
–After the cuvette has been used in the spectrophotometer and immedia-
tely cleaned, put the cuvette back in the storage box for safety reasons.
When using the cuvette, take care of the delicate measu-
rement windows, avoid contaminating or scratching them
through contact with your hands or objects.
Contamination or scratches on the measurement windows
can affect the accuracy of measurement results!

Connecting the tubes using M6 threaded
connectors.
1. Make sure you follow the instructions in
the correct sequence when connecting
the tubes provided.
–
Use the tube with the short screw
connection first of all,
–
followed by the tube with the long screw
connection.
2. Tighten the tube connections.
DO NOT use any tools (e.g. pliers)
–
Simply tighten the screws by hand as
much as possible. Such tightened
screw connections are used at Hellma
Analytics for their final inspection, where
a pressure of 3 bar is applied to test for
possible leaks.
3. Make sure that the inlet tube is screwed to
the thread with the arrow.
3. USING THE FLOW-THROUGH CUVETTE

IMPORTANT
–Clean the cuvette as soon after taking the measurement as possible.
DO NOT let the sample dry in the cuvette!
–Use soft, lint-free cloths or swabs to clean the exterior.
–DO NOT clean the cuvette using an ultrasonic cleaner.
It can cause micro-cracks which lead to the destruction of the cuvette!
4. CLEANING
Improper cleaning of the cuvette can impair its function and cause damage.
Cleaning the cuvette after taking the measurement:
1. After taking the measurement, immediately rinse the cuvette with the
same solvent used for the sample.
2. Next, thoroughly rinse the cuvette using clean ethanol or a similarly
volatile solvent and leave to dry (e.g. in a drying cabinet). Pure water
can also be used to rinse the cuvette, but this will slow down the
drying process.

Execution of routine cleanings:
The cuvette should primarily be cleaned in the flow-through operation.
This flow-through is achieved by using a pump to connect the inlet of
the cuvette to a storage tank filled with cleaning concentrate. Connect
the drainage tube to the storage tank as well. We recommend using
Hellmanex®III cleaning concentrate for this closed circuit. A 2% solution
of Hellmanex III solution is a tried and tested way of tackling the most
common cleaning problems. Please observe the information on the
bottle. Afterwards, thoroughly rinse the cuvette using pure water.
Removing stubborn contaminants
–You can remove protein-based contaminants using diluted
hydrochloric acid.
–Concentrated sulfuric acid can be used to remove many
organic substances.
–If neither hydrochloric acid nor sulfuric acid work, try removing the
impurity using mixtures such as H2SO4/H2O2. This type of cleaning,
however, should only be carried out by experienced employees. Please
make sure you follow the protective measures recommended by the
manufacturers in the use of these aggressive mixtures!
Removing external contaminants
External contaminants are best wiped away using a damp cloth or
lint-free microfiber cloth. Dampen the cloth with a solvent (e.g. alcohol).

5. TROUBLESHOOTING
1. The screw connection doesn’t seal, sample fluid is leaking from the
screw connection.
A The screws haven’t been tightened enough or have loosened.
–Check to see if this has happened, particularly after long use,
and retighten the screws if necessary.
B The flange on the tubes is broken or damaged.
–
Replace the screw tube connection with a new screw tube
C The bores on the upper surface of the cuvette are damaged
and showing cracks, preventing the flange from sealing.
–
Contact Hellma Analytics customer service.
D There are dirt particles between the upper surface of the cuvette
and the flange.
–
Clean the cuvette following the instructions in this manual.
–
DO NOT use any hard or sharp tools when cleaning.
E Parts of the screw connections provided have been replaced with
parts that do not have the correct size, e.g. screws with threads
that are too short.
–
ONLY use original Hellma Analytics screw connections.

If after following these steps (A–E) you are still experiencing problems
with the screw connection seal, please contact Hellma Analytics
customer service.
2. Measurement values are fluctuating strongly
– Loosened screw connections can cause leakage and
bubble entrapment.
– Ensure that all screw connections are screwed tightly
(by hand – DO NOT use tools).
3. Bubbles in the cuvette
– Loosened screw connections can cause leakage
and bubble entrapment.
– Insufficient cleaning can cause bubbles to be retained in the cuvette.
– Clean the cuvette following the instructions in this manual for to avoid
problems from bubbles.
– If, despite tight screw connections and optimally cleaned cuvettes,
bubbles are still formed in the cuvette, so it can be assumed that
they are already in the analyzed sample/solution, in this case it is
important to produce a bubble-free sample/solution.

MANUFACTURER
Hellma GmbH & Co. KG
Klosterrunsstraße 5 | 79379 Müllheim/Germany
phone: +49 7631182 1020 | fax: +49 7631182 1011
info.de@hellma.com | www.hellma.com
Subject to technical changes
064-500-725 04/2019 Printed in Germany
Table of contents
Popular Laboratory Equipment manuals by other brands

Endress+Hauser
Endress+Hauser Liquiline Mobile CML18 operating instructions

Sigma
Sigma 8KBS operating manual

Endress+Hauser
Endress+Hauser Analytik Jena Biometra TRIO operating manual

CETAC
CETAC ASX-520 Replacement

Binder
Binder MKF 400 operating manual

Agilent Technologies
Agilent Technologies 990 user manual

Abbott
Abbott ID NOW NAT-000 quick start guide

Agilent Technologies
Agilent Technologies G7166A user manual

Pall
Pall Allegro Instructions for use

TORREY PINES SCIENTIFIC
TORREY PINES SCIENTIFIC EchoTherm SC25 operating manual

Fluke
Fluke Ti450 PRO Quick reference guide

Molecular Devices
Molecular Devices SpectraMax iD3 installation guide