Hema HN5 User manual

HEMA NAVIGATOR 5”
ON & OFF ROAD GPS NAVIGATION
COMPREHENSIVE
QUICK-START GUIDE
HN5 Quick_start guide layout_Ver1_2:Layout 1 27/02/10 2:26 PM Page 1

QUICK-START GUIDE
2
YOUR WINDOW TO ADVENTURE
HN5 Quick_start guide layout_Ver1_2:Layout 1 27/02/10 2:26 PM Page 2

CONTENTS
1 SAFETY NOTES & MAINTENANCE 6
1.1 Operating Environment 6
1.2 Safety While Operating the Device 7
1.3 Safety While Travelling 7
1.4 Battery 7
1.5 Cleaning the Unit 8
1.6 Avoiding theft 8
2 PARTS OF THE HEMA NAVIGATOR 5” 9
3 GETTING STARTED 10
3.1 Box Contents 10
3.2 Inserting and Removing MicroSD Memory Card 11
3.3 Using the MicroSD Card Adaptor 12
3.4 Mounting the Hema Navigator 5” 12
3.5 Power On/Off and Sleep Mode 13
3.6 Charging the Battery 13
3.7 Stylus Techniques 14
4 HEMA NAVIGATOR 5” MENUS 15
4.1 Main Menu 15
4.2 Tools Menu 16
4.2.1 System Menu 17
4.2.2 Bluetooth Menu 23
4.2.3 Player Menu 30
4.2.4 Note 34
4.2.5 Calculator 36
4.2.6 Calendar 36
4.2.7 FM 37
4.2.8 AV IN – Reversing Camera 38
5 ROUTE 66 39
5.1 Acquiring a Satellite Fix 40
5.2 Navigation Main Display Screen 41
5.3 Scrolling Screens and Selection 42
5.4 Options Menu 43
5.4.1 Adjusting Volume 44
5.5 Navigating to a Destination Address 45
5.5.1 Entering an Address 45
5.5.2 Search Result Set 47
5.5.3 Partial Address Searches 49
5.5.4 Free Text Address Searches 50
5.6 Address Favourites 51
5.7 Address History 53
HN5 Quick_start guide layout_Ver1_2:Layout 1 27/02/10 2:26 PM Page 3

6 OZI EXPLORER 54
6.1 Acquiring a GPS Satellite Fix 55
6.2 Program Menu Bars 56
6.3 Map Overlay Buttons 56
6.4 Opening A Map 57
6.5 Exiting Ozi Explorer 58
6.6 Waypoints 59
6.6.1 Adding Waypoints 60
6.6.2 Deleting all Waypoints 60
6.6.3 Display Waypoint List 61
6.6.4 Load a Waypoint File 61
6.6.5 Save a Waypoint File 62
6.6.6 Show/Hide Waypoint Name 62
6.6.7 Auto Show Waypoint Properties 62
6.6.8 Close Waypoint Toolbar 63
6.6.9 Proximity Warning 63
6.7 Tracks 64
6.7.1 Track Selector 65
6.7.2 Add a Track Point 65
6.7.3 Inserting a Track Point 66
6.7.4 Deleting a Track 67
6.7.5 Display Track Properties 67
6.7.6 Load a Route File 67
6.7.7 Save a Track File 67
6.7.8 Close Track Toolbar 67
6.8 Routes 68
6.8.1 Adding a Route Waypoint 69
6.8.2 Inserting a Route Waypoint 70
6.8.3 Deleting a Route 70
6.8.4 Display Route Properties 71
6.8.5 Load a Route File 71
6.8.6 Save a Route File 71
6.8.7 Show/Hide Route Waypoint Names 71
6.8.8 Close Route Toolbar 71
6.9 Navigation 72
6.10 Ozi Explorer Tap and Hold Menus and Information 74
6.10.1 Popup Information 74
6.10.2 Popup Menus 74
CONTENTS
HN5 Quick_start guide layout_Ver1_2:Layout 1 27/02/10 2:26 PM Page 4

7 MEMORY-MAP 75
7.1 Tutorial Screens 76
7.2 Acquiring a GPS Satellite Fix 77
7.3 Navigation Mode 78
7.3.1 Mode Selector 78
7.3.2 Lock to GPS 78
7.3.3 Go to Mark 78
7.3.4 Zoom In 78
7.3.5 Zoom Out 78
7.4 Planning Mode 79
7.4.1 Mode Selector 79
7.4.2 Tools Menu 79
7.4.3 Object Menu 79
7.4.4 Data Box 80
7.4.5 GPS Status 80
7.4.6 Mark Place 80
7.4.7 Save & Close 80
7.4.8 Zoom In 80
7.4.9 Zoom Out 80
7.5 Selecting a Map 81
7.6 Marks/Waypoints 82
7.6.1 Creating Waypoints/Marks 82
7.6.2 Adjusting Waypoint/Mark Position 82
7.6.3 Editing Waypoint/Mark Information 82
7.6.4 Navigating to a Waypoint/Mark 83
7.7 Routes 84
7.7.1 Creating a Route 84
7.7.2 Adjusting Route Waypoint/Mark Positions 85
7.7.3 Inserting a Waypoint/Mark in a Route 85
7.7.4 Navigating Along a Route 86
7.8 Navigation Information Settings 87
7.9 Tracks 88
7.9.1 Creating a Track 88
7.10 Managing Overlay Objects 89
8 IMPORTANT PRODUCT INFORMATION 91
8.1 Software License Agreement 91
8.2 Important Street Navigation Data Information 91
8.3 Important Map Data Information 91
8.4 Declaration of Conformity 91
8.5 Hema Navigator Limited Warranty 92
TECHNICAL DATA SHEET 93
KEY TO HEMA REGIONAL MAPS 94
KEY TO GEOSCIENCE AUSTRALIA TOPOGRAPHIC MAPS 96
PC CONNECTION 97
CONTENTS
HN5 Quick_start guide layout_Ver1_2:Layout 1 27/02/10 2:26 PM Page 5

Please read through this section carefully and follow the safety notes as
outlined. Doing so will ensure your Navigator will operate reliably without
compromising your safety.
1.1 Operating Environment
External Influences
- Do not allow objects to drop onto the device from above. Do not place
objects on top of the device or rub the screen with abrasive materials
or objects such as car keys etc. Do not drop the device.
- Do not use sharp or abrasive objects to operate the touch screen other
than a stylus designed for this purpose.
- Avoid prolonged use in high-vibration and high-shock environments.
- Do not carry/transport inflammable liquids, gases or explosives in the
same compartment as the device and its accessories.
- Wireless devices could interfere with the reception of satellite signals
causing unstable signal reception.
GPS
- GPS signals are produced and monitored under the responsibility of
the United States government who is solely responsible for the
availability and accuracy of the system.
- GPS Satellite signals do not penetrate solid objects (apart from glass)
and as such will not operate from within a building unless an external
re-radiating GPS aerial is fitted.
- GPS signal reception may be impaired by dense obstacles above the
ground such as tall buildings, trees or extremely bad weather.
- In order to operate efficiently, the HEMA NAVIGATOR 5” should be
positioned with a view to the open sky (through glass is acceptable).
Temperature
- Do not leave your HEMA NAVIGATOR 5” lying or mounted on your
dashboard where it will be exposed to extreme temperature conditions
and can result in malfunctions and/or dangerous situations. The device
may be operated in temperature range of -20°C – 55°C or stored in a
temperature range of -20 – 35°C.
- Keep your device away from excessive moisture. The device should be
operated in an atmospheric humidity of 45 – 80% Non-Condensed and
stored in an atmospheric humidity of 30 – 90% Non-Condensed.
- Do not expose the device to sudden and extreme temperature
fluctuations. This may result in condensation forming in the device
causing malfunction or failure. When condensation forms, wait for the
device to completely dry out before operating.
SAFETY NOTES & MAINTENANCE
6
1 SAFETY NOTES & MAINTENANCE
HN5 Quick_start guide layout_Ver1_2:Layout 1 27/02/10 2:26 PM Page 6

1.2 Safety while Operating the Device
Failure to adhere to the following guidelines may result in potentially hazardous
situations and result in serious injury or even death.
- Never operate/interact with the device while you are driving.
- National road traffic regulations and local traffic conditions always take
precedence over the instructions given by the navigation device.
- Do not install the navigation device in such a manner as to obstruct the
driver’s view of the road or operation of a vehicle’s controls or safety
features such as airbag systems.
- The route calculated by the navigation device is a suggested route and
used for reference only. It is not a substitution for alert driver behavior and
common sense. Drivers must continue to pay attention to all road
regulations and hazards regardless of instructions from the navigation
device.
1.3 Safety while Travelling
While the HEMA NAVIGATOR 5” is a valuable tool for navigation, it is only
that – a tool – and as such should not be used as a replacement for hard-copy
maps and other traditional navigational aids while travelling, especially in remote
areas. Always ensure you have adequate backup systems in place to ensure
your safety.
1.4 Battery
This product works with a re-chargeable lithium-ion battery which is non-
serviceable and non-user-replaceable. Failing to adhere to these guidelines may
reduce the life expectancy of the battery or present the risk of electrolyte leak,
explosion and fire resulting in chemical burn, damage and/or injury.
- Only use the original 240V mains and 12/24V car charger supplied with
the HEMA NAVIGATOR 5”. Use of non-approved parts or accessories,
may result in malfunctions and/or severe damage to the device.
- Do not expose the device to damp, wet and/or a corrosive environment.
- Do not expose the device to excessive pressures, a heat source, high
temperatures or extreme sunlight conditions such as an unattended
vehicle on a hot day.
- Do not expose the device to operating temperatures in excess
of -20°C – 55°C and storage temperatures in excess of -20 – 35°C.
- Do not pierce, open or dismantle the battery. If the battery leaks and you
come in contact with the liquid, thoroughly rinse the contaminated area
with water and consult a doctor immediately.
7
SAFETY NOTES & MAINTENANCE
HN5 Quick_start guide layout_Ver1_2:Layout 1 27/02/10 2:26 PM Page 7
1.5 Cleaning the Unit
The HEMA NAVIGATOR 5” casing can be cleaned using a cloth slightly
dampened with a mild detergent and then wiped dry. Care must be taken not to
let moisture into the speaker holes or any of the ports, jacks and slots on the
device. The touch screen may be cleaned using lint free or microfiber cloth.
Isopropyl alcohol or water may be applied to the cloth where required to gently
wipe the touch screen. Do not use harsh or abrasive cloths and avoid the use of
chemical cleaners and solvents as these can damage the Navigator.
1.6 Avoiding Theft
To avoid theft, remove the Navigator and mount from sight when not in use.
Remove the residue on the windscreen left by the suction cup.
SAFETY NOTES & MAINTENANCE
8
HN5 Quick_start guide layout_Ver1_2:Layout 1 27/02/10 2:26 PM Page 8

9
PARTS OF THE HEMA NAVIGATOR 5”
RESET
3
12
3
44
1
7
8
9
10
11
2
6
5
LCD Touch Screen Display
5.0 inch high-brightness LCD display
LED power indicator
Glows red when charging and green
when fully charged
Power button
Powers the Navigator on/off
or activate sleep mode
Mounting cradle slots
Slots to locate and secure the
device to the mounting cradle
Stylus
Stylus for use with the Navigator
touch screen
Speaker
High quality speaker for audio output
System reset
Resets the Navigator system
to a stable state
AV IN
2.5mm Reversing camera input jack
Earphone jack
3.5mm earphone jack for
audio output
MicroSD card slot
Slot for inserting the supplied
pre-loaded 4GB MicroSD card
USB port
Connects the Navigator to a 12/24V
or 240V power source or computer
Microphone
Built in microphone for hands-free
Bluetooth functionality
12
11
10
9
8
7
6
5
4
3
2
1
TOP VIEW
SIDE VIEW
REAR VIEW
FRONT VIEW
2 PARTS OF THE HEMA NAVIGATOR 5”
HN5 Quick_start guide layout_Ver1_2:Layout 1 27/02/10 2:26 PM Page 9

GETTING STARTED
10
Congratulations on purchasing your HEMA NAVIGATOR 5” navigation system.
HEMA Maps takes great pride in providing its customers with quality navigational
solutions supported by friendly and effective customer service. HEMA Maps is
confident that the Navigator will prove to be a valuable tool in the pursuit of your
adventures and ensure a safe and pleasant journey wherever the road or track
may lead you.
3.1 Box Contents
•HEMA NAVIGATOR 5” with Stylus
•Pre-Installed 4GB MicroSD card
•MicroSD to SD card adapter
•Luxury Carry Pouch
•Superior German-Engineered Windscreen Mount
•HN5” Cradle
•12/24V DC Car Charger
•240V DC Charger
•USB Cable
•Rear-view camera adaptor cable
•Australia 4WD Raster Map Collection DVD
•Route 66 CD ROM
•Comprehensive Quick Start Guide
•Map Key
•Registration Card
HEMA Navigator Features
•Large 5” easy to view wide screen
•New 64-Channel GPS for improved location accuracy and faster GPS fix
•2GB on-board memory plus 4GB MicroSD Card for extra map and data
storage
•Bluetooth – Built-in hands free calling
•FM Transmitter
•Rear view camera ready
•Preloaded with Hema 4WD maps & Geoscience NATMAP 1:250K topos
3 GETTING STARTED
HN5 Quick_start guide layout_Ver1_2:Layout 1 27/02/10 2:26 PM Page 10

11
GETTING STARTED
3.2 Inserting and Removing MicroSD Memory Card
The HEMA NAVIGATOR 5” comes with a pre-installed 4GB MicroSD card.
To remove the MicroSD card from your HEMA Navigator:
1. Turn the Navigator so that the rear of the device is visible.
2. Locate the MicroSD card slot on the side of the device.
3. Using your fingernail, depress the card further into the slot and slowly
release.
4. The card should spring out of the slot far enough for removal.
NOTE: Avoid letting the MicroSD card eject quickly out of the slot.
To re-insert the MicroSD card
1 Turn the Navigator so that the rear of the device is visible.
2 Locate the MicroSD card slot on the side of the device.
3 Position the card with printed side facing you and as per illustration.
4 Slide the card gently into the slot until it clicks into place.
as per illustration.
RESET
4GB
HN5 Quick_start guide layout_Ver1_2:Layout 1 27/02/10 2:26 PM Page 11
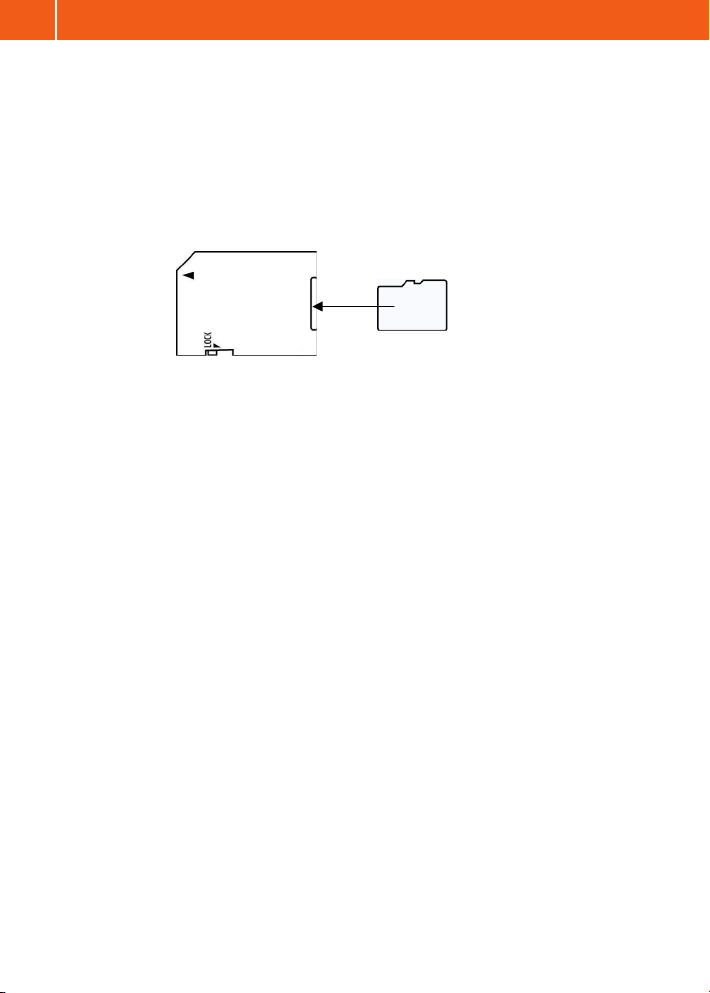
3.3 Using the MicroSD Card Adaptor
A MicroSD card adaptor has been included with the Navigator so that it can be
used in conjunction with an SD card reader. To use the SD Card adaptor; gently
slide the MicroSD card into the slot provided in the end of the adaptor. The SD
card can now be used by devices with standard SDHC (Secure Digital High
Capacity) compliant SD card readers for use with your personal computer.
Note: Do not move lock tab to LOCK
3.4 Mounting the HEMA NAVIGATOR 5”
The HEMA NAVIGATOR 5” comes with a windscreen mount to ensure vibration-
free operation, stability and quality.
To mount the HEMA NAVIGATOR 5” on your vehicle’s windscreen:
1. Attach the device cradle to the windscreen mount via the 4 pin system and
slide it down until it snaps/locks securely in place.
2. Select the desired location for your mount on the windscreen and ensure
the area is clean. Grip the base of the mount and place the suction cup
firmly against the windscreen. Whilst still firmly holding the mount, push
the lever on the base towards the windscreen to secure in place.
3. Adjust the cradle on the windscreen mount until the desired viewing angle
is achieved using the vertical and horizontal adjustment knobs.
4. Plug the USB connector of the car charger into the USB port located on
the left hand side of the Navigator.
5. Secure the HEMA NAVIGATOR 5” to the cradle on the windscreen mount
by aligning the base of the device with the tabs on the cradle. Snap the
top of the HN5” into the cradle.
6. Plug the car charger into the power outlet of the vehicle.
ADAPTOR
MicroSD CARD
MicroSD CARD
GETTING STARTED
12
HN5 Quick_start guide layout_Ver1_2:Layout 1 27/02/10 2:26 PM Page 12

3.5 Power On/Off and Sleep Mode
The power On/Off/Sleep button is located on the top of the Navigator device.
Power On: Gently press the power button for 3 seconds and release.
Note: There will be a delay before the start-up screen appears.
Power Off: To power off the device completely and to conserve battery
charge for long periods of storage, gently press the power
button until the unit displays the POWER OFF image and
message on the screen. Release the power button.
Sleep Mode: To put the device into sleep mode, hold the power button down
for 1 second and release. The unit will display SLEEP MODE
and power down. During sleep mode, the unit is not completely
shut down and will discharge the battery over the course of a
few days. Powering the unit on from sleep mode will restart the
Navigator on the same screen at which the sleep mode was
originally activated.
3.6 Charging the Battery
The HEMA NAVIGATOR 5” can be charged and powered from a vehicle using
the supplied 12/24V power charger or by using the supplied 240V power
adaptor/charger from a 240V mains socket.
The LED power indicator on the left of the device screen near the USB port
will glow red when charging. The LED will glow green when the battery is
fully charged.
Battery life: up to 5 hours depending on use
Battery charge time: 8 hours until fully charged
NOTE: Ensure the Navigator is fully charged prior to its initial use.
When the unit is powered on, the battery level indicator will display the current
charge state of the battery on the main screen and within each navigation
application.
13
GETTING STARTED
HN5 Quick_start guide layout_Ver1_2:Layout 1 27/02/10 2:26 PM Page 13

3.7 Stylus Techniques
The stylus is used for interacting with the touch screen of the HEMA
NAVIGATOR 5” device. Pull the stylus out of its storage slot from the back of the
device and extend it for ease of use. Store it in the slot when not in use.
The following terminology will be used in this guide when describing actions to be
taken with the stylus:
•Tap/Select/Activate/Press
Touch the screen once with the stylus to open items or select/activate
an option.
•Double Tap
Touch the screen with the stylus twice in quick succession to open or
select/activate an option.
•Drag
Hold the stylus on the screen and continue to hold down the stylus while
dragging up/down/left/right or across the screen.
•Tap and Hold
Tap and hold the stylus without moving until an action is complete, or a
result or menu is displayed.
•Flick
This is used in Memory-Map as an alternate way of closing an overlay
window. Hold the stylus on an open overlay window, and then quickly
drag/flick the window off the edge of the screen in one movement.
GETTING STARTED
14
HN5 Quick_start guide layout_Ver1_2:Layout 1 27/02/10 2:26 PM Page 14

There are three navigation programs installed on the HEMA Navigator:
1. Route 66
2. Ozi Explorer
3. Memory-Map
Route 66 is a street navigation application utilising vector mapping and auto-
routing. This application is best used around densely populated areas.
Ozi Explorer and Memory-Map are moving-map applications that display your
position in real time, chiefly over the top of raster maps using GPS input.
These programs are best suited for off-road navigation.
The Tools icon gives access to the tool and utility features of the unit.
The Battery Indicator displays the charge state of the battery. There are 6
charge states for the battery ranging from 100% to 0% and charging.
100% -> 0% Charging
The System Date/Time is displayed at the bottom of the Main Menu.
Access to
Navigation
Programs
Battery
Level
Indicator
Display the
Tools Menu
System
Date
System
Time
4.1 Main Menu
15
HEMA NAVIGATOR 5” MENUS
4 HEMA NAVIGATOR 5” MENUS
HN5 Quick_start guide layout_Ver1_2:Layout 1 27/02/10 2:26 PM Page 15

4.2 Tools Menu
The HEMA Navigator Tools Menu consists of the following elements:
Bluetooth Bluetooth is a wireless technology which enables the
transmission of voice and data over a short distance.
The HEMA Navigator is able to pair with a mobile phone
to make or receive mobile phone calls.
Player The Player allows you to read text files, listen to music,
view photographs, video and flash files.
Note Used for typing and storing small notes and reminders.
Calculator A scientific calculator for mathematical operations.
Calendar A calendar for viewing any day, month and year.
FM Transmits the audio signal from the Navigator through
to the FM receiver (car radio) in your vehicle at the
specified frequency.
AV IN Used in conjunction with a reversing camera to view video
signal produced by a reversing camera.
System Used to modify volume, power and backlight settings
as well as alter the date/time and interface language.
Screen calibration and system information is also accessed
via the system icon.
Date
Display Time
Battery
Level
Indicator
FM
Enabled/
Disabled
Return to
Previous
Menu
HEMA NAVIGATOR 5” MENUS
16
HN5 Quick_start guide layout_Ver1_2:Layout 1 27/02/10 2:26 PM Page 16

4.2.1 System Menu
The HEMA Navigator System Menu consists of the following elements:
Volume Adjusts the master volume of the Navigator Device.
Power Displays the battery charge level and allows for
adjustment of power saving settings.
Backlight Adjusts the brightness of the backlight and allows for
adjustment of power saving settings.
Date Time Sets the Date, Time and Time Zone.
Language Selects the interface language for the device.
Sys Info Displays System and allows for GPS Reset,
Factory Reset and screen calibration.
Return to
Previous
Menu
17
HEMA NAVIGATOR 5” MENUS
HN5 Quick_start guide layout_Ver1_2:Layout 1 27/02/10 2:26 PM Page 17

4.2.1.1 Volume
Volume for the HEMA Navigator can be adjusted by tapping the left and right
arrows to decrease or increase volume respectively. The tap sound can be
enabled or disabled by toggling the ‘Enable sounds for taps’ option.
Set and Return
to Previous
Menu
Increase
Volume
Decrease
Volume
Toggle Tap
Sounds
Current
volume
Indicator
HEMA NAVIGATOR 5” MENUS
18
HN5 Quick_start guide layout_Ver1_2:Layout 1 27/02/10 2:26 PM Page 18

Set and
Return to
Previous
Menu
Increase
Brightness
Decrease
Brightness
Auto-Off
Backlight
Indicator
4.2.1.3 Backlight
Allows adjustment of the backlight to increase or decrease screen brightness.
Adjustment is also available to turn off the backlight after a set time interval
ranging from Always on to Off after 1 / 2 / 3 / 10 / 30 minutes. This auto-backlight
shut-off will only operate while on battery power.
Set and
Return to
Previous
Menu
Battery
Level
Indicator
Change
Auto Sleep
modes
Sleep mode
indicator
4.2.1.2 Power
Displays the current battery level for the Hema Navigator while not connected to
a USB power source. The option is also available to place the device into sleep
mode automatically after a set time interval ranging from Always on to Off after
1 / 2 / 3 / 10 / 30 minutes.
19
HEMA NAVIGATOR 5” MENUS
HN5 Quick_start guide layout_Ver1_2:Layout 1 27/02/10 2:26 PM Page 19

4.2.1.4 System Date Time
Setting the Date, Time and Time Zone for the HEMA Navigator.
Note: Hours are shown in Military format (24 hour clock)
ie.hour 14 is 14-12 = 2PM
Set Time
Tapping the Clock icon will open the System Time settings screen.
Set and Return
to Previous
Menu
Tap Clock icon
to set Time
Tap Calendar
icon to set Date
Tap Globe icon
to select Time
Zone
Set and Return
to Previous
Menu
Increase
Hours
Decrease
Hours
Decrease
Minutes
Increase
Minutes
HEMA NAVIGATOR 5” MENUS
20
HN5 Quick_start guide layout_Ver1_2:Layout 1 27/02/10 2:26 PM Page 20
Table of contents
Other Hema GPS manuals


