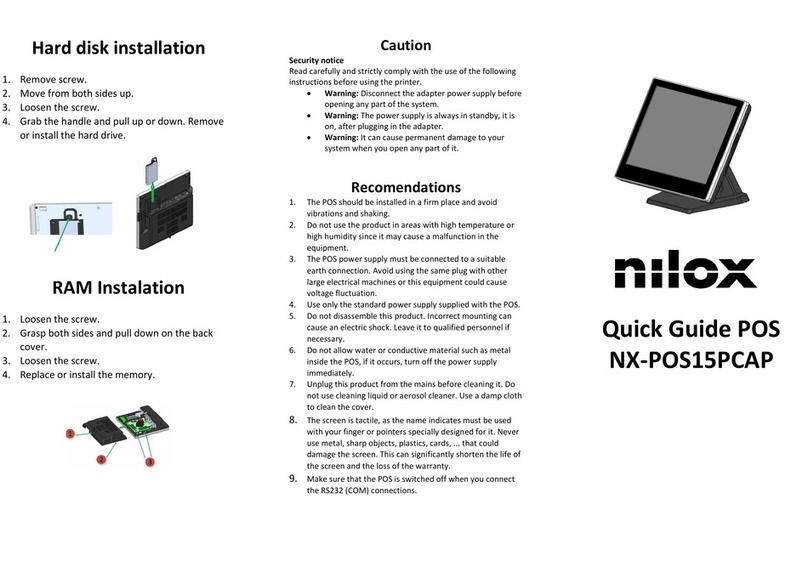
HENNING liftpc HT1 User manual

Hand-Held Terminal HT1
Operating Instructions

Handterminal
Henning GmbH Seite 2
Copyright
© Copyright 2011 by Henning GmbH, Loher Str. 26a –30a, 58332 Schwelm
Warranty
This description has been drawn up by Henning GmbH to the best of their
knowledge. All technical statements have been carefully established and checked.
They correspond to the state of the art. Changes and errors excepted.
Our application engineering advice –spoken and written –shall support your own
work. It is regarded as an indication without obligation –also with regard to possible
third party industrial property rights –and does not release you from your own
obligation to carry out appropriate testing of the products regarding their suitability for
the intended application.
Product descriptions do not contain statements about the liability for possible
damages. However, should a liability be involved, it would be limited for all damages
to the value of the goods supplied and used.
Suggestions and comments are welcomed.
Address
Henning GmbH
Loher Str. 26a –30a
58332 Schwelm
Deutschland
FON: 02336 / 9 29 8 –0
FAX: 02336 / 9 29 8 –10
eMail: info@henning-gmbh.de
URL : http://www.henning-gmbh.de/
Any kind of duplication, in part or in whole, is only permitted with the written approval
of Henning GmbH.
Technical changes excepted.

Handterminal
Henning GmbH Seite 3
TABLE OF CONTENTS
1SCOPE OF DELIVERY ................................................................................... 4
2OPTIONAL ANCILLARIES ............................................................................. 4
3CONTROL ELEMENTS................................................................................... 5
4SHORT DESCRIPTION OF MEASUREMENT................................................ 6
5GENERAL OPERATING INSTRUCTIONS ..................................................... 7
6MAIN MENU.................................................................................................... 8
6.1 Menu item Measurement............................................................................... 9
6.1.1 Submenu data logging....................................................................................................9
6.1.2 Submenu ID change .....................................................................................................10
6.2 Menu item Status......................................................................................... 11
6.3 Menu item Date / Time................................................................................. 12
6.4 Menu item Language................................................................................... 13
7EVALUATION ............................................................................................... 13
8TRANSFER OF MEASUREMENTS TO THE mobile Diagnose
SOFTWARE .................................................................................................. 14
9CHARGING OF THE HAND-HELD TERMINAL ........................................... 14
10 ERROR MESSAGES..................................................................................... 15
11 TECHNICAL DATA....................................................................................... 16

Handterminal
Henning GmbH Seite 4
1SCOPE OF DELIVERY
1x Hand-Held Terminal HT1
1x Power pack
1x Connection cable QS2-Sensor –Hand-Held
Terminal HT1
2OPTIONAL ANCILLARIES
External card reader
For the input of the CompactFlash Cards
and many further memory card formats.
Connection via USB 2.0.
For Windows 98SE / 2000 / ME / XP
Internal card reader
For the input of the CompactFlash Cards
and many further memory card formats.
5,25’ mounting case for PC, USB connection.
For Windows 98SE / 2000 / ME / XP
CompactFlash Type I memory cards
Capacity 128 MB for approx. 120 min measurements
Capacity 256 MB for approx. 250 min measurements
Capacity 512 MB for approx. 500 min measurements
Car charging adapter
Stabilized switch mode power pack
Output 12 V for max. 2 A
With cigar lighter connector
(Illustration similar)
(Illustration similar)
(Illustration similar)
(Illustration similar)

Handterminal
Henning GmbH Seite 5
Resetting key
RJ12 Connecting socket
for QS2 sensor
Sound-input
Jack receptacle for the
connection of the
sound level meter
Display
Enter key
Arrow key down
Arrow key up
Control LED's for the
charging operation
Charging socket
CompactFlash Card
slide-in
3CONTROL ELEMENTS

Handterminal
Henning GmbH Seite 6
4SHORT DESCRIPTION OF MEASUREMENT
Step 1: Connect the 3-D Sensor QS2 to the QS2 socket of the Hand-Held
Terminal using the supplied Western helix cable.
Step 2: Connect the DC OUT output of the sound level meter to the sound
(optional) input of the of the Hand-Held Terminal (the required cable is supplied
together with the sound level meter).
Step 3: Make sure that a CompactFlash Card is inserted in the „CompactFlash
Card“ slide-in of the Hand-Held Terminal.
Step 4: Switch the Hand-Held Terminal on by pressing and holding down the
Enter key until the opening text appears on the display.
Then the status text is automatically indicated.
German English
Opening text
Status text
Step 5: Now the Hand-Held Terminal switches automatically to the menu item
„Measurement“.
German English
Step 6: Select this menu item by pressing the Enter key. In the new display text
you see an ID in the lower line. The next measurement will be filed
under this ID on the CompactFlash Card. To change the ID select it by
the arrow keys, press the Enter key and set another ID.
German English
Step 7: Select the menu item Start using the Enter key. This starts the
measurement and after a short initialisation phase, which is signalled on
the display, the measured acceleration data is continuously stored on
the CompactFlash Card.
Step 8: The measurement will be terminated by pressing the Enter key again.

Handterminal
Henning GmbH Seite 7
5GENERAL OPERATING INSTRUCTIONS
Switching on
The Hand-Held Terminal is switched on by holding the Enter key for approx. 3
seconds.
The sensor QS2 has to be connected before switching on the HT1!
Switching off
The Hand-Held Terminal is switched off by holding the Enter key in the main menu
for approx. 3 seconds.
The sensor QS2 has to be disconnected after switching off the HT1! Permanent
connection can damage the batteries and the device!
Navigation
Arrow keys are used for the navigation in the menu. In the case of some menu items
the arrow keys are also used for the input of values. The selection of a menu item
and the adoption of a value are effected by the Enter key.
Accumulator capacity
At any time the two-line display shows the current residual capacity of the
accumulator in the upper right-hand corner.
German English
Opening and status text
After the switching-on operation two messages appear on the display one after the
other:
German English
Opening text
Status text
Software version
Date / Time
Residual accumu-
lator capacity
Free memory
on the CF Card in
minutes

Handterminal
Henning GmbH Seite 8
6MAIN MENU
German English
Menu item
Measurement
Menu item
Status
Menu item
Date / Time
Menu item
Language

Handterminal
Henning GmbH Seite 9
6.1 Menu item Measurement
Under this menu item an acceleration measurement (optionally with sound level
measurement) can be started and terminated and it is possible to set the
identification number under which the measurement is filed on the CompactFlash
Card.
German English
6.1.1 Submenu data logging
German English
Return to
main menu
Submenu
ID change
Submenu
Data logging
In this phase the Hand-Held Terminal
checks whether a QS2 sensor is
connected and operational.
Subsequently, the measurement is
started.
After pressing the Enter key the measurement is finished.
After the measurement the ID, under
which this measurement is stored on
the CompactFlash Card, is shown
once more
Indication of velocity, refer to chapter
Evaluation

Handterminal
Henning GmbH Seite 10
...
6.1.2 Submenu ID change
This submenu is used to set the identification number under which a measurement is
stored on the CompactFlash Card.
The identification number consists of a 5-digit and a 2-digit number string separated
by an underbar. After a measurement the 2-digit number is automatically increased
by One. This makes it possible to carry out several measurements of an installation
one after the other without having to change the identification number manually prior
to every new measurement. For this purpose the 5-digit numeric string should be
selected in such a way that it identifies the installation unambiguously.
In this submenu the Enter key is used to shift between the places of the identification
number.
By means of the arrow keys the current place (flashing on the display) is increased
(arrow up) by One or decreased (arrow down) by One.
German English
Increases or
decreases the
current place
(flashing) by One.
Increases or
decreases the
current place
(flashing) by One.
Increases or
decreases the
current place
(flashing) by One.
Return to
menu item
Measurement

Handterminal
Henning GmbH Seite 11
1
2
3
4
1
2
3
4
6.2 Menu item Status
Under this menu item you may call the status messages of the Hand-Held Terminal.
Altogether four status messages are displayed. By means of the arrow keys you can
scroll up and down on the display.
Use the Enter key to return to the main menu.
German English
Residual capacity of accumulator in per cent
Free storage space on the CompactFlash Card in minutes, in which you can still
carry out measurements until the memory area of the CompactFlash Card is
fully used.
Current accumulator voltage in volt
Current voltage of the sound input
Return to
main menu
Return to
main menu

Handterminal
Henning GmbH Seite 12
6.3 Menu item Date / Time
Under this menu item you can set the current date and time. The Hand-Held
Terminal is provided with a real-time clock which is, however, not buffered, so that
after a complete accumulator discharge the clock has to be readjusted.
The Enter key in this submenu is used to shift between the places of the date and the
time.
By means of the arrow keys the current place (flashing on the display) is increased
(arrow up) by One or decreased (arrow down) by One.
German English
Return to
main menu
Increases or
decreases the
current place
(flashing) by One.
Increases or
decreases the
current place
(flashing) by One.
.
Increases or
decreases the
current place
(flashing) by One.
Increases or
decreases the
current place
(flashing) by One.
Increases or
decreases the
current place
(flashing) by One.

Handterminal
Henning GmbH Seite 13
6.4 Menu item Language
In this submenu you can change the display language. The languages German and
English are available.
German English
7EVALUATION
During the measurement the display indicates the current velocity of the elevator
installation in m/sec. This online evaluation is enabled by the permanent integration
of the acceleration data of the vertical direction.
German English
Any deviations between the online evaluation and the later evaluation by the
mobile Diagnose software result from the limited computing capacity of the micro-
controller of the Hand-Held Terminal.
The Hand-Held Terminal cannot replace a velocity measuring device.
Choose
English and
return to
main menu
Choose
German and
return to
main menu
Return to
main menu

Handterminal
Henning GmbH Seite 14
8TRANSFER OF MEASUREMENTS TO THE mobile
Diagnose SOFTWARE
Choose the File menu in the software and start the function „ Read data from CF
Card“.
Using this function you can transfer the
measurements which you have recorded with your
Hand-Held Terminal HT 1.
As soon as you select this menu item a dialog box
appears in which you select the file on the Compact
Flash card that you want to transfer. The file name
consists of the identification number which you
have previously set on the Hand-Held Terminal.
Afterwards you still have to choose a project to
which this measurement shall be allocated.
As soon as you have finished this, the file is
imported and added to the "Travels".
9CHARGING OF THE HAND-HELD TERMINAL
The current residual capacity of the accumulator is, as already described,
permanently displayed on the switched-on Hand-Held Terminal.
The Hand-Held Terminal is provided with an internal (rapid) charging device. This
makes it possible to charge the Hand-Held Terminal in a very short time either using
a socket or the cigar lighter connector in the car (see optional ancillaries).
Charging is carried out at 12 V DC and 1 A charging current. Take care that the
power pack can permanently supply 1.5 A.
For charging insert the adapter connector in the Hand-Held Terminal. The current
charging status is visualized by the two LED's:
LED1 LED2
During the charging operation the Hand-Held Terminal has to be switched off
and the senor QS2 has to be disconnected!
(flashing)
Rapid charging operation is initialized,
accumulator is being prepared
Rapid charging operation running
Rapid charging operation finished

Handterminal
Henning GmbH Seite 15
10 ERROR MESSAGES
1. CompactFlash Card defective
Possible causes:
1. No CompactFlash Card inserted
2. CompactFlash Card not formatted
3. No free storage space on the CompactFlash Card
4. CompactFlash Card defective
2. Identification number error
Cause:
-It exists already a file with this ID on the CompactFlash Card. Either delete this
file or choose another ID.
3. LiftPC QS2 sensor not connected
Possible causes
1. No QS2 sensor is connected to the Hand-Held Terminal
2. At least one of the connectors is not locked in the corresponding socket
3. The connection cable is defective

Handterminal
Henning GmbH Seite 16
11 TECHNICAL DATA
Hand-Held Terminal
Dimensions L x W x H: 188 x 138 x 37 mm
Weight: 750 g
Accumulator: 4 x NiCd AA 1.2 V 1100 mAh (rapid-chargeable)
Current consumption:
- during the measurement approx. 200 mA
- without QS2 sensor approx. 40 mA
- stand-by < 1 mA
Charging voltage: 12 V DC
Charging current: 1 A
Charging time: approx. 2 h, if accumulator is completely discharged
QS2 socket: RJ12 data socket
Sound socket: Jack receptacle 3.5 mm
Charging socket: DC-Power Jack with 2.5 mm pin
CF slide-in: For use with CompactFlash media type I
Table of contents
