Heraeus biofuge pico User manual

Biofuge Instructions for Use
!
"""
!
#
$
%
#
&
'
$
(
)
%
&

How to use this manual
Use this manual to get acquainted with your centrifuge
and its accessories.
The manual helps you to avoid inappropriate handling.
Make sure to keep it always close to the centrifuge.
A manual that is not kept handy cannot provide
protection against improper handling and thus a-
gainst damage to persons and objects.
The manual comprises chapters on
• Safety regulations
• Instrument description
• Rotor program and accessories
• Transportation and hook-up
• Use of the centrifuge
• Maintenance and care
• Troubleshooting
• Technical data
• Index
Please fold out
Overleaf you will find a graphic
representation of the control panel
with a survey of the most important
functions
!
"""
!
#
$
%
#
&
'
$
(
)
%
&

rotor turns
speed time quick run
"set" keys
open lid
start
stop
back panel:
socket for mains connection
mains switch
!
"""
!
#
$
%
#
&
'
$
(
)
%
&
The control panel of the
Biofuge pico
Display
Speed
Resting state: preselected speed
During run: current speed; rotating light: rotor turns
End: "End"
Running/resting: error codes (if present)
Time
Resting/end: preselected run time (in minutes; in
"hold" mode, "hd")
During run: remaining run time or (with quick start)
run time passed
Lid open: "OP"
Keys
Start: normal start
Stop: manual stop
Open lid: open lid
(possible only with mains switch ON)
Quick run: short-term acceleration as long as key is
pressed, with indication of run time pas-
sed
"Set" keys: stepwise increase/decrease of preset
values, accelerated change when pres-
sed permanently
Short pressing of any of the "set" keys: switch from
current to preset value
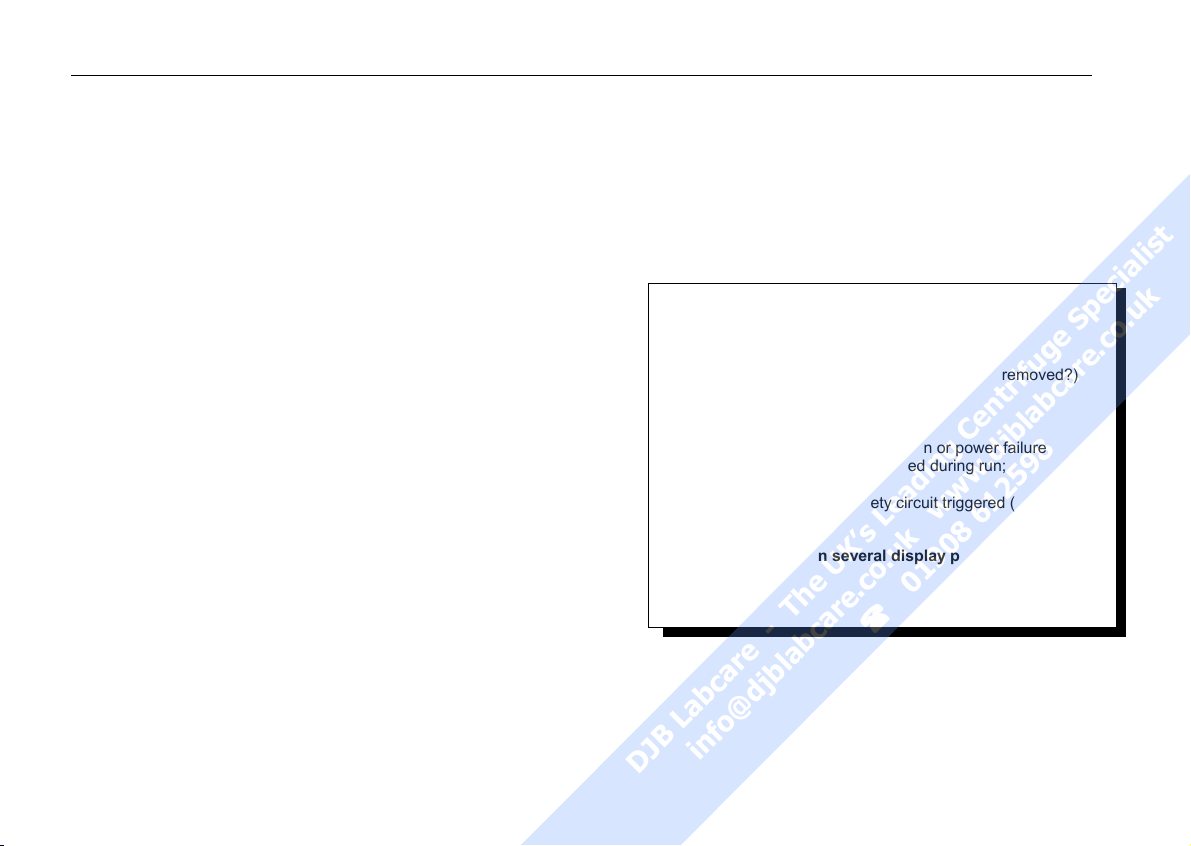
Error codes (troubleshooting see chapter
"Troubleshooting")
E-0: motor blockage (transport protection removed?)
E-8: excess voltage
E-10: internal error
E-11: internal error
br: power turned off during run or power failure
Lid: lid turned loose or opened during run;
drive overheated
OP: with lid closed: safety circuit triggered (drive
overheated)
Warnings can span several display panels
!
"""
!
#
$
%
#
&
'
$
(
)
%
&

Contents
1
Contents
For your safety........................................... 3
Proper use................................................................ 3
Improper use ............................................................ 3
Centrifuging hazardous materials ............................ 3
Handling ................................................................... 4
Conformity to current standards............................... 5
Safety instructions in this manual ............................ 5
The Biofuge pico ........................................ 7
Safety systems......................................................... 7
Properties................................................................. 8
„Quick run“ operation ............................................... 8
Pieces delivered....................................................... 9
Accessories .............................................. 11
Rotor program ........................................................ 12
Adapters for rotor order no. 7500 3328 ................. 13
Before use................................................. 15
Where to install the centrifuge ............................... 15
Mains connection ................................................... 15
Removing the transport protection......................... 15
Operation .................................................. 17
Transport and installation....................................... 17
Mains connection ................................................... 17
Opening the lid ....................................................... 18
Emergency lid release ........................................... 18
Inserting the rotor ................................................... 20
Permissible rotor temperature............................ 21
Lifetime of the rotor ............................................ 21
Removing the rotor................................................. 22
Loading the rotor .................................................... 22
Maximum loading ............................................... 22
Filling the centrifuge tubes ................................. 23
Aerosol-tight application......................................... 24
Checking for aerosol tightness............................... 25
Placing the tubes in the rotor ................................. 26
Selecting the speed................................................ 27
Selecting the run time ............................................ 27
Preselected run time .......................................... 27
Continuous operation ......................................... 28
Starting the centrifuge ............................................ 28
Changing the settings during the run..................... 28
Stopping the centrifuge .......................................... 28
Stopping with preset time ................................... 28
Stopping with continuous operation ................... 28
Short-time centrifugation........................................ 29
RCF value .............................................................. 29
!
"""
!
#
$
%
#
&
'
$
(
)
%
&

Contents
2
Maintenance and care .............................. 31
Maintenance to be performed by the customer ..... 31
Cleaning.............................................................. 31
Disinfection ......................................................... 32
Decontamination................................................. 34
Autoclaving ......................................................... 35
Check whether autoclaving is permitted! ........... 35
The Service of KENDRO........................................ 36
Warranty conditions ............................................... 36
Troubleshooting ....................................... 37
Problems you can handle yourself......................... 37
In case you must call the Service........................... 42
Technical data........................................... 44
Component parts and performance ....................... 44
The "Easycontrol" user interface............................ 47
Electrical connections / fuses................................. 49
Index .......................................................... 51
Autoclaving protocol................................ 57
Speed / RCF diagrams.............................. 58
!
"""
!
#
$
%
#
&
'
$
(
)
%
&

For your safety
3
For your safety
Heraeus centrifuges are manufactured according to
current technical standards and regulations. Nonethe-
less, centrifuges may pose dangers if
• they are not used as designed
• they are operated by untrained personnel
• their design is improperly changed
• the safety instructions are not heeded
Therefore anybody concerned with operation and
maintenance of the centrifuge must read and fol-
low the safety instructions.
In addition, the pertinent regulations for prevention of
accidents must be strictly followed.
This manual is an integral part of the centri-
fuge assembly and must be kept close at
hand at all times.
Proper use
The centrifuge is designed to separate liquid-
suspended materials having different densities and
particle size, respectively. The maximum sample den-
sity is 1.2 g/cm3at maximum speed.
Improper use
During a run, a safety zone of 30 cm around the centri-
fuge must be maintained where neither persons nor
hazardous materials may be stationed.
The centrifuge may cause harm to you or other per-
sons and may damage material goods if you do not re-
spect the following safety measures:
Centrifuging hazardous materials
• The centrifuge is neither made inert, nor is it explo-
sion-proof. Therefore never use the centrifuge in an
explosion-prone environment.
• Explosive or flammable substances must not be
centrifuged. The same holds for substances prone
to react briskly with each other.
!
"""
!
#
$
%
#
&
'
$
(
)
%
&

For your safety
4
• Do not centrifuge toxic or radioactive substances or
pathogenic microorganisms unless you have taken
proper precautions.
Such precautions can e.g. consist of biological
seals.
• Should toxins or pathogenic substances enter the
centrifuge or its parts, you must carry out the proper
procedures for disinfection (see "Maintenance and
care – Disinfection").
• Strongly corrosive substances that may cause dam-
age to materials and impair the mechanical strength
of the rotor may be centrifuged only inside
protective vessels.
Handling
• Never use the centrifuge unless the rotor is properly
mounted.
• Never manually open the lid if the rotor still turns.
• Use only original parts for the centrifuge. The only
exception are common glass or plastic centrifuge
tubes if these are approved for the rotor speed and
RCF values of your rotor, respectively.
• Never use the centrifuge with the lid open.
• Never use the centrifuge if the paneling has been
partially or totally removed.
• Changes in mechanical or electrical components
may be carried out only by persons authorized to
this effect by KENDRO Laboratory Products.
• You may use the centrifuge only with a properly lo-
aded rotor. You must not overload the rotor.
• If the rotor or the lid shows visible traces of corro-
sion or wear, you must stop using it.
• Strictly follow the rules and regulations for cleaning
and disinfection.
!
"""
!
#
$
%
#
&
'
$
(
)
%
&

For your safety
5
Conformity to current standards
Heraeus centrifuges are manufactured and tested
according to the following standards and regulations:
for all voltages:
• IEC 1010-1 / EN 61010-1
• IEC 1010-2 / EN 61010-2-020
− Pollution degree 2
− Overvoltage category II
for 120 V only:
• CAN/CSA-C22.2 No. 1010.1-92
• CAN/CSA-C22.2 No. 1010.2.020-94
Safety instructions in this manual
This symbol denotes potential hazards to
persons.
This symbol denotes potential damage to
the centrifuge or parts in its immediate sur-
roundings.
General hints are marked with this symbol.
In addition, you are asked to adhere to the pertinent
regulations, in Germany
• Regulations for prevention of accidents BGV A2
• Regulations for prevention of accidents VBG 5
• Regulations for prevention of accidents VBG 7z
!
"""
!
#
$
%
#
&
'
$
(
)
%
&

For your safety
6
for your notes
!
"""
!
#
$
%
#
&
'
$
(
)
%
&
The Biofuge pico
7
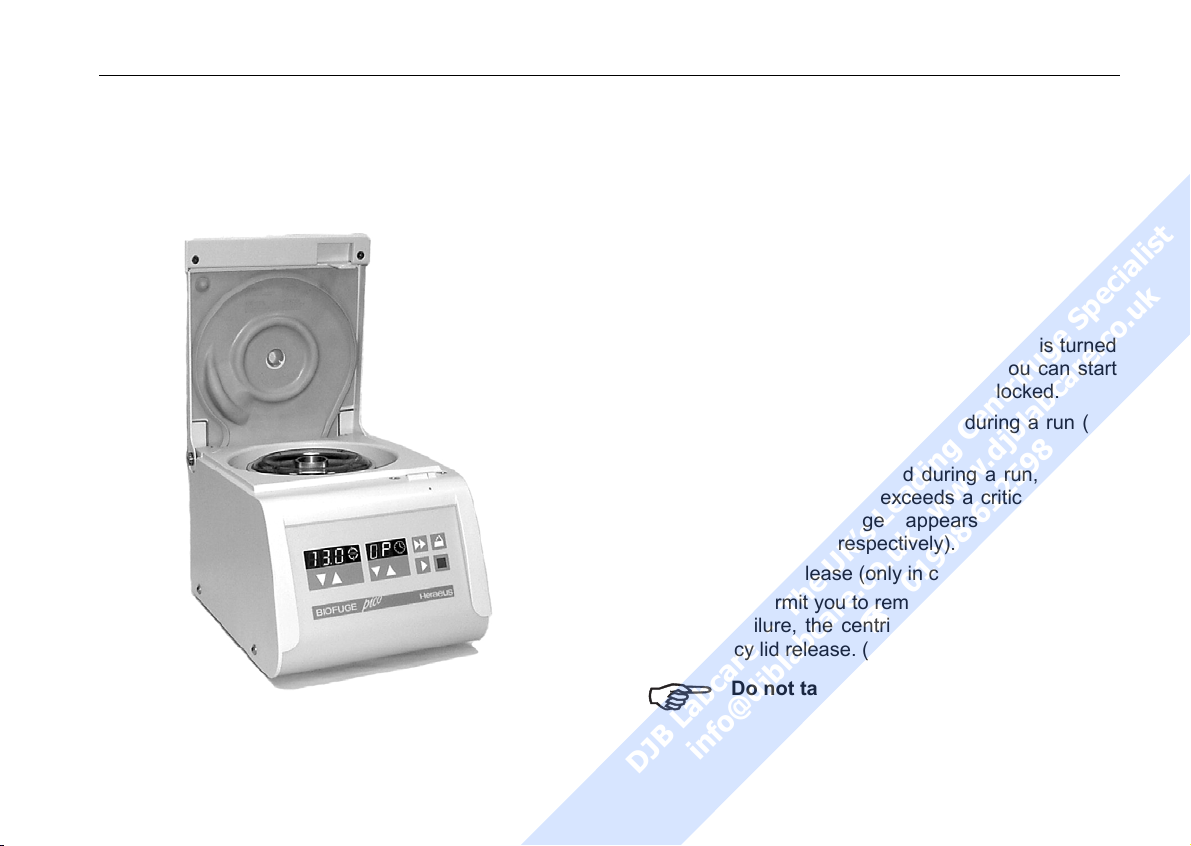
The Biofuge pico
The figure below shows the Biofuge pico with the lid
opened and the rotor put in place.
Safety systems
The Biofuge pico is equipped with a number of safety
systems.
• Connection rotor – motor
• Body and rotor chamber made from impact-
resistant plastic
• Lid with hinge and control window
• Lid lock mechanism
You can open the lid only when the power is turned
on and the rotor has come to a halt. You can start
the centrifuge only if the lid is properly locked.
• Warning if lid is manually opened during a run (sa-
fety circuit actuated)
If the lid is manually opened during a run, or if the
temperature of the drive exceeds a critical value, a
corresponding message appears in the dis-
play("Lid" and "OP", respectively).
• Emergency lid release (only in case of emergency)
In order to permit you to remove samples even after
a power failure, the centrifuge is equipped with an
emergency lid release. (see chapter "Operation").
Do not tamper with the safety systems!
!
"""
!
#
$
%
#
&
'
$
(
)
%
&

The Biofuge pico
8
Properties
The Biofuge pico is a benchtop centrifuge for use in the
biochemical and medical laboratory.
The preset speed is reached in seconds. You can also
spin samples for only a few seconds using the "quick
run" key ( ) if this is required for the task in question.
The extremely long-lived, maintenance-free induction
motor provides quiet and vibration-free operation even
at high speeds.
The user-friendly "Easycontrol" control panel permits
easy operation. With the centrifuge turned on and the
lid closed, the preset speed and run time are displayed
before the run. During operation, the control panel
shows the actual values; upon briefly pressing any one
of the "set" keys or
the preset values for speed
and run time are displayed instead. After the run, the
"speed" panel displays "End".
If you press the or
keys repeatedly, you increase
the corresponding preset value stepwise. If you press
and hold down the chosen key, the respective value
increases continuously, at first slowly and, after a few
seconds, at an accelerated pace.
You can change the preset values during operation.
„Quick run“ operation
As long as the "quick run" key ( ) is pressed, the ro-
tor is accelerated with maximum power, potentially up
to the maximum speed (overriding any preset speed
value).
!
"""
!
#
$
%
#
&
'
$
(
)
%
&

The Biofuge pico
9
Pieces delivered
The Biofuge pico is delivered complete with:
• a special cap nut for fixing the rotor
• 10-mm tubular socket wrench for fastening the
cap nut
• fixed-angle rotor 24 x 1,5 / 2 ml 7500 3328
• cable for mains connection
• this Manual
cap nut
order no.
70056208
tubular socket
wrench
order no.
2036 0072
!
"""
!
#
$
%
#
&
'
$
(
)
%
&

The Biofuge pico
10
for your notes
!
"""
!
#
$
%
#
&
'
$
(
)
%
&

Accessories
11
Accessories
The Biofuge pico is delivered complete with a fixed-
angle rotor with 24 holes for placing microliter tubes
with a volume of 1.5 or 2.0 ml.
In addition you may order three sets of adapters con-
taining 24 reduction sleeves each. With these adapters
you can centrifuge all commercially available microliter
tubes with a volume between 0.2 and 0.6 ml as well as
0.2-ml PCR reaction vessels.
A further option is a PCR-Strip rotor.
Please consult our sales documentation for a complete
collection of accessories including technical data, order
numbers and special low-cost package offers.
!
"""
!
#
$
%
#
&
'
$
(
)
%
&

Accessories
12
Rotor program
Rotor designation Microliter rotor
24 x 2 ml PP
PCR-rotor
order no. 7500 3328 7500 3327
places / volume 24 x 1,5 / 2 ml 4 x PCR-Strip
maximum permissible load [ g ] 24 x 4 4 x 4 ( 32 x 0,5 )
maximum speed nmax [ min-1 ] 13 000 13 000
minimum speed nmin [ min-1 ] 2 000 2 000
maximum RCF value at nmax 16 060 12 846 ( 11 524* )
maximum radius [ cm ] 8,5 6,8 ( 6,1* )
minimum radius [ cm ] 5,9 6,1 ( 4,7* )
angle [ ° ] 40 45
acceleration / deceleration time [ s ] 15 / 12 15 / 12
aerosol-tight yes (reduced filling) yes (reduced filling)
permissible temperature range
autoclavable (number of cycles)
-4 °C to +40 °C
121°C, (10 cycles)
-4 °C to +40 °C
121°C, (10 cycles)
* The values relate to vessel places 4 and 5 in the PCR-Rotor
!
"""
!
#
$
%
#
&
'
$
(
)
%
&

Accessories
13
Adapters for rotor order no. 7500 3328
Adapter Dimensions
(∅x H)
Capacity Number per
Set
Color Order No.
reduction sleeve PCR 6,2 x 20 mm 0,2 ml 24 gray 7600 3750
reduction sleeve 8 x 43,5 mm 0,5/0,6 ml 24 turquoise 7600 3758
reduction sleeve 6 x 46 mm 0,25/0,4 ml 24 red 7600 3759
!
"""
!
#
$
%
#
&
'
$
(
)
%
&

Accessories
14
for your notes
!
"""
!
#
$
%
#
&
'
$
(
)
%
&

Before use
15
Before use
Where to install the centrifuge
The centrifuge must be operated in a place meeting
the following criteria:
• A safety zone of 30 cm around the centrifuge must
be maintained. Hazardous materials must not be
kept within this zone during centrifugation.
• The substructure must be stable and resonance-
free. A good support is provided by a plane labora-
tory bench or a large laboratory carriage with cast-
ers that may be locked.
• To ensure sufficient air circulation, a minimum dis-
tance from the wall of 10 cm at the back and of
15 cm on each side must be kept.
• The centrifuge must be protected from heat and di-
rect sunshine.
• The location should be well ventilated.
Mains connection
Make sure that voltage and frequency correspond to
the specifications on the instrument label.
Turn the mains switch on the back panel off (press
"0"); only then connect the centrifuge with the mains
supply using the power cord supplied with the instru-
ment.
Removing the transport protection
Turn the instrument on. The display panel shows for
about 12 s the routine internal software check se-
quence. Open the lid by pressing the "open lid" key
and remove the transport protection for the rotor.
Check that the rotor moves freely by lightly turning it,
and make sure the rotor is tightly screwed on.
The Biofuge pico is now ready for use.
!
"""
!
#
$
%
#
&
'
$
(
)
%
&

Before use
16
for your notes
!
"""
!
#
$
%
#
&
'
$
(
)
%
&
Table of contents


