Hercules LT0892 User manual

Instruction Manual
Lateral Pallet Tilter (LT0892)
Note: Owner/Operator must read and understand this instruction
manual before using the lateral pallet tilter.

1. Before the first operating the machine, you should
learn:
Please read, understand and follow these safety rules, maintenance,
operating instructions and repair before operating this machine so as
to prolong the lifetime of the machine and avoid death or damage of
material.
·Please read the Instruction Manual carefully.
·The safety rules, maintenance, operating instructions.
·Proper application.
·Risks with improper use.
·Please replace the bolt with hole of Part No.138 before use.
2. General specifications
Model
LT0892
Capacity (kg)
800
Pressure (MPa)
≤25
Max. Fork Height (mm)
920
Min. Fork Height (mm)
88
Width Overall Forks (mm)
540
Fork Length (mm)
1150
Fork Width (mm)
150
Fork Lateral Tilting Angle ( °)
Each 20 of left and right
Load Wheel Diameter (mm)
Ø80×70
Steering Wheel Diameter (mm)
Ø160×50
Total Length (mm)
1630
Total Width (mm)
694
Total Height (mm)
1320
Net Weight (kg)
210
3. Operating features of the machine
3.1 The machine has the same working function as the normal stacker.
3.2 When stacking, we can make the left or right side of the machine
1

nearer to the stacking area, then turn the winch to tilt the fork,
overturn the material to the stacking area or on the stacking goods,
without unloading by man, which is safe and free of labor.
3.3 Because the capacity of load is not big, the height of stacking is not
high, the operating force of winch is not big when tilting.
4 Safety rules
4.1 Optimum safety
4.1.1 Use the correct operation, the operator should stand after the
control level whenever push/pull or ascend/lower.
4.1.2 When using the lateral tilting function, the operator should stand
the reverse side of the stacking area to operate the winch. Pay
attention to the direction of operating the winch, which can not
be wrong, or so may result in death or damage of material.
4.1.3 Avoid overloads
Note: the center distance of load and load is inverse ratio, that is
the load center is nearer to the heel of the fork, the load is bigger,
while the center distance is farther, the load is smaller. (Dia.1)
Please obey this regulation strictly, never exceed the regulation of
this diagram, because the weight and center of the load influence
the intensity of the fork, if it is overloaded there is a risk of
bending. Diagram
Dia.1 2

4.1.4 Avoid offset loads
Except obeying the regulation of diagram, the load must be
distributed evenly on forks or pallets, avoid of left or right offset,
then the load will not overturn when lifting or transporting.
4.1.5 Driving loaded
The machine is designed for use on even and level floor. During
transport the forks shall be raised as little as possible. Transport
with raised forks should be made over the shortest possible
distances and at low speed. Do not transport when tilting goods
on the machine, this is not safe.
4.1.6 Driving the machine on the slope
1) The machine shall be unloaded or a small load.
2) The load shall be in the lowest position.
3) The gradient shall be no more than 2°when dragging the
machine.
4) The operator shall be on the upper position whether upgrade or
downgrade.
4.2 Safety regulations
1) Never stand or walk under a raised load.
2) Before lowering the forks, make certain that no foreign elements
can hinder the free lowering of the forks.
3) The machine is designed for use on even and level floor.
4) During transport the forks shall be raised as little as possible.
5) Transport with raised forks should be made over the shortest
possible distances and at low speed.
6) Brake when lifting or lateral tilting load in stacking area.
7) Do not use a damaged or malfunctioning machine.
8) Do not use a machine with a worn, damaged or more than 3%
elongation chain.
9) Conduct a thorough pre-operation inspection prior to each use.
5 Maintenance and operating instructions
3

5.1 Lifetime of the machine
Regular inspection, repair and the replacement of worn or defective
parts in good time will prolong the life of the machine.
“Prevention is better than repair”, therefore ensure:
5.1.1 Correct usage.
5.1.2 Regular cleaning.
5.1.3 Oil changes at the correct intervals.
5.1.4 Periodic safety inspection.
5.2 Lubrication and oil change
Under normal conditions the machine requires no lubrication (except
bearing of tilting assembly). All ball bearings are sealed or
half-sealed and treated with molybdenum disulphide grease. So it
has self-lubricating function during moving.
Use the hydraulic type oil according to the table below.
Temperature
Oil
-20℃~+40℃
L-HV46 Hydraulic oil
5.3 Oil change
5.3.1 Draining:
1) Lower the forks to bottom position.
2) Loosen the screw (1112) of filling hole in external cylinder.
3) Remove the discharge valve shaft (133) and spring (135), then
drain off the oil in external cylinder. If remove the discharge
valve body (130Q) and steel ball (129), drain off the oil in
external cylinder, pump piston and oil pipe normally.
5.3.2 Filling:
1) Install the lowering valve assembly.
2) Fill the hole with oil. Oil quantity: 1.1 liters.
3) Expel the air from the pump unit, then tighten the screw of filling
hole.
5.4 Seal leakage
Locate the point at which oil leakage appears and then replace
defective seals. 4

5.5 The safety valve does not seal completely
The safety valve (W) will open when the load reaches the 20% of the
capacity, the safety valve must seal completely in capacity, no
leakage. (This has been set in factory, do not regulate it under
general conditions.)
With a certain load on the forks, press the pump rod by the control
lever quickly so that oil quickly flows over the hydraulic valve. If the
forks do not lift or tilt, it is because that the overflow valve does not
close (not seal), regulate the pressure of the spring of the overflow
valve. If this does not solve the problem, the valve insert must be
replaced by new ones or the whole safety assembly.
5.6 Bleeding the hydraulic system
The pump will not operate if there is air in the hydraulic system.
The system can be bled as follows:
1) Loosen the screw (1112) of the filling hole in external cylinder.
2) With a certain load on the forks (about 200kg), pump the control
lever to make the forks up to the top, then open the lowering valve
quickly to make the forks down to the bottom.
3) Open the lowering valve, keep on pumping the control lever many
times, then lift fork again, lower again until expel the air.
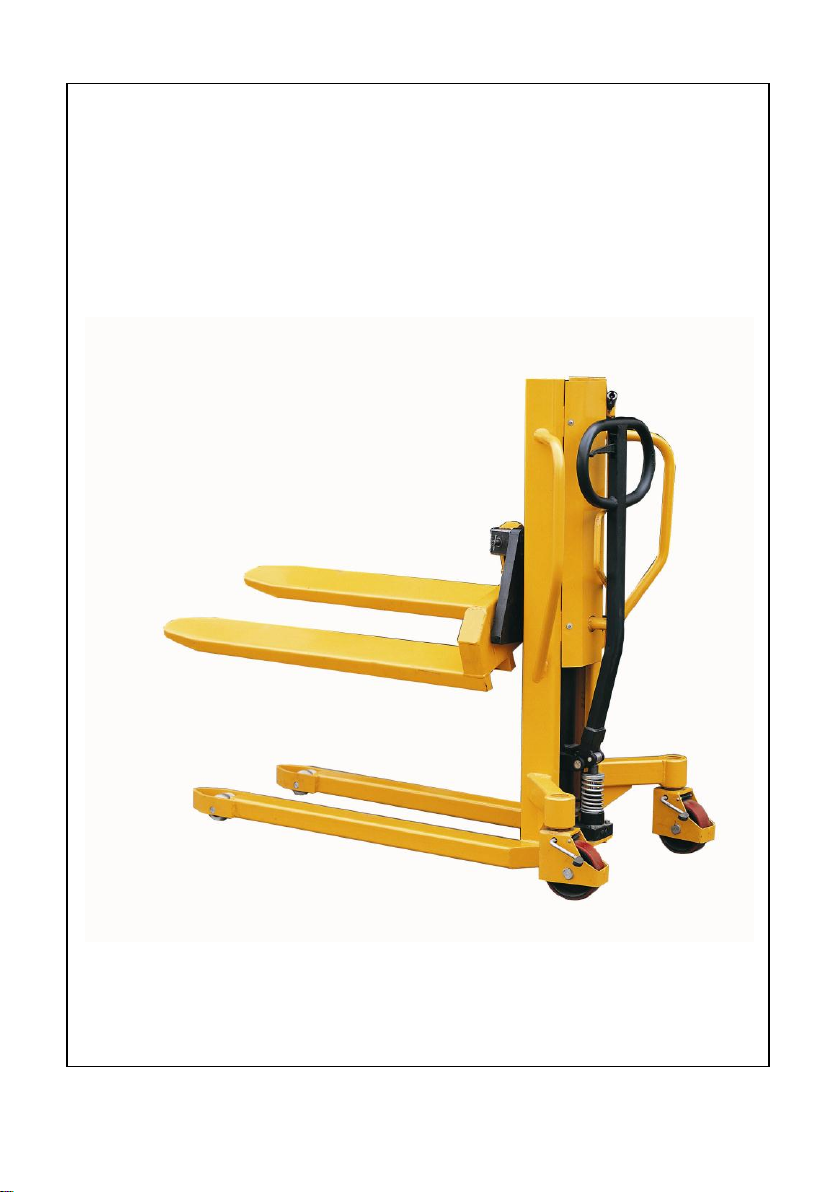
5.7 Adjustments of the three working positions of the handle
5.7.1 Three working positions of the handle
1) Lift position (the position of fork lifting): The handle is in the bottom
position.
2) Normal position (Neither lift nor lower position): The handle is in
the neutral normal position.
3) Lower position (The position of fork lowering): The handle is in
the upper position.
5.7.2 Adjustment of normal position
1) Place the handle bar in normal position.
2) Press the control lever to the lowest position.
3) Regulate the nut (H1104) on the guiding rod (H5906) of control
5

lever and the regulating screw (140M) on the crank link (139M) to
make the crank link be dragged (now the lowering valve is open,
but hydraulic valve is close), while the forks in the state of neither
lower nor lift position.
5.7.3 Adjustment of lifting position
1) Place the handle bar in lifting position.
2) Pump the control lever, the crank link (139M) shall not be dragged
(now the lowering valve and hydraulic valve is close), the forks in
the working state of lifting.
3) If the forks do not lift, regulate the nut (H1104) and the regulating
screw (140M), until satisfy the needs of normal position and lifting
position simultaneously.
5.7.4 Adjustment of lowering position
1) Pull the handle bar in lowering position.
2) The crank link (139M) shall be dragged, and make the lowering
valve and hydraulic valve open completely, the forks in the
lowering state.
3) If the forks do not lower, regulate the nut (H1104) and the
regulating screw (140M), until satisfy the needs of three state
positions simultaneously.
5.8 Forks height adjustment
Two rollers (F1207) in the upper carriage are mounted on eccentric
axle (F5922), turn the eccentric axle, and adjust the tilting angle of
the carriage so that they can be adjusted.
Adjustments:
1) Loosen the setting screw (F5919, each one on the left and right.).
2) Lock the hexagon point of the eccentric axle (F5922) with a wrench,
the eccentric axle can now be turned to give the necessary
adjustment.
3) Turn the eccentric axle back can make the fork tilt to the front (that
is the front is low and the back is high), Turn the eccentric axle front
can make the fork tilt to the back (that is the front is high and the
6

back is low).
4) To ensure the same load on all rollers, the eccentric axle (F5922)
must be adjusted on both sides and to the same position.
5) Tighten setting screw M8 of each side after adjustment.
Note: The eccentric axle can only adjust the front or back of fork, can’t
adjust the tilting clearance of left or right of fork.
5.9 Cleaning
When cleaning the machine, do not direct the jet onto bearings and
seals. Otherwise the grease will be washed out and the life of the
equipment shortened.
6 Troubles shooting
When the machine is used every day, adjustments and the
replacement of worn parts might be necessary. For the frequency of
troubles, causes and actions please refer to the following table.
NO
TROUBLE
CAUSE
ACTION
1
The forks do not
lift up.
-Not enough hydraulic oil.
-Discharge valve is not
sealed or locked.
- Air in the hydraulic oil.
-Overflow valve is not
sealed or out of
adjustment.
-Overload the machine
seriously.
-Pour in more oil.
-Adjust the discharge
valve, eliminate locking.
-Expel the air.
-Adjust the overflow
valve or replace
component.
-Lift according to the
rated capacity.
2
The forks do not
lift to maximum
height.
-Not enough hydraulic oil.
-Add more oil.
3
The forks unable
to lift capacity
load.
-Overflow valve is out of
adjustment or not sealed
completely.
-Adjust or replace the
overflow valve.
7

4
The forks sink
after they have
been raised.
- Pressure valve does not
seal completely.
-Seals leakage.
-Adjust the pressure
valve.
-Replace seals with new
ones.
5
The forks lifting
speed is low
(Quantity of lifting
is small)
- Air in the hydraulic oil.
-Discharge valve is not
sealed.
-Seals leakage.
-Expel the air.
-Adjust the discharge
valve or replace
component.
-Replace seals with new
ones.
6
The forks do not
descend.
-Discharge valve is locked
or out of adjustment.
-Low temperature,
viscosity class is large.
-The rod is deformed
resulting from a seriously
unbalanced load.
-A part has been
damaged or been
deformed resulting from
unbalanced load.
- Adjust or bleed the
trouble.
-Replace the hydraulic oil
applied to the low
temperature.
-Replace the rod.
-Repair or replace
component.
7
The forks do not
descend to the
lowest height.
-The length of lifting chain
is out of adjustment.
-Adjust the lifting chain.
8
The forks do not
tilt or heavy on
handle and noisy
when tilting.
-The screw is damaged.
-The bearing is damaged.
-Turning axle is worn and
locked.
-Replace the screw.
-Replace the bearing.
-Replace the turning axle
and bushing.
If the problem cannot be solved according to the above table, please
contact the manufacturer.
8

Hydraulic Assembly
9

Parts List of Hydraulic Assembly
Parts No.
Description
Q’ty
Parts No.
Description
Q’ty
5900
Hydraulic assembly
1
1154A
Pump cylinder
1
5901
Rod
1
1155A
Seal ring
1
5902
Welded frame
1
110
Screw
1
1101
Dust proof ring
1
111
Red copper washer
1
1102
Cylinder
1
112
Spring
1
1103
O-ring
1
113
Pressure rod
1
1104
O-ring
1
114
Steel ball
1
1105
Seal ring
1
115Q
Pressure valve body
1
1106
Spacing washer
1
116
Split ring
1
1107
O-ring
1
117
O-ring
2
1109
Guide casing
1
118
Red copper washer
2
1110
Washer
1
119
Steel needle
1
1111
Retaining ring
1
121
Spring pin
1
1112
Screw
1
129
Steel ball
1
(138)
Screw
1
130Q
Discharge valve body
1
1114
Pressure cap
1
131
Spring
1
1115
Spring pin
1
132
O-ring
1
1117
Spring
1
133
Discharge valve shaft
1
1134
O-ring
1
134
Valve taper core
1
1135
Red copper washer
1
135
Spring
1
1136
Bushing
2
136
Pressure regulating screw
1
1137
Bolt
4
137
O-ring
1
1139
Spring washer
4
138
Screw
1
1140
Plain washer
4
139M
Crank link
1
1141
O-ring
1
140M
Setting screw
1
1150A
Spring cover
1
141
Nut
1
1151A
Pump rod
1
142
Spring washer
1
1152A
Dust proof ring
1
166
Retainer
3
1153A
O-ring
1
167
Retainer
1
10

Frame Assembly
11

Parts List of Frame Assembly
Parts No.
Description
Q’ty
Parts No.
Description
Q’ty
F5901
Spring pin
2
F1114
Dividing bush
2
F5902
Load roller axle
2
F1115
Steering wheel bracket
2
F5903
Bearing
4
F1116
Locking nut
2
F5904
Dividing bush
4
F1117
Hexagon nut
22
F5905
Frame assembly
1
F1118
Control level of brake
2
F5906
Type U bolt
1
F1119
Steering wheel axle
2
F5907
Plain washer
2
F1120
Axle
2
F5908
Locking nut
2
F1121
Spring leaf
2
F5909
Hex socket screw
4
F1122
Bushing
4
F5910
Small washer
6
F1123
Bearing
4
F5911
Nut
4
F1124
Steering wheel
2
F5912
Spring hoop
2
F1151
Dust proof cover
2
F5913
Contact casing
1
F5317
Bearing
2
F5914
Contact block
1
F5320
Retaining ring
2
F5915
Axle
2
F5337
Axle
4
F5916
Welded crank
1
F5338
Bolt
2
F5917
Slotted nut
2
F5339
Hexagon nut
4
F5918
Split pin
2
F5341
Split ring
4
F5941
Safety net
1
F5342
Bolt
2
F116A
Load roller, Nylon
2
F5343
Chain
2
F1106
Rubber cushion
1
F5344
Dividing bush
2
F1109
Bolt
2
F5345
Retaining ring
2
F1110
Spring washer
2
F5346
Chain pulley
2
F1111
Pressboard
2
F5347
Dividing bush
1
F1113
Bearing
2
F5348
Chain pulley axle
1
F1113A
Bearing
2
F5349
Chain pulley bracket
1
12

Carriage Assembly
13

Parts List of Carriage Assembly
Parts
No.
Description
Q’ty
Parts
No.
Description
Q’ty
F5919
Setting screw
2
F5932
Bearing
2
F5920
Welded carriage
1
F5933
Pin
4
F5921
Sliding pad
4
F5934
Plain washer
4
F5922
Eccentric axle
2
F5935
Bolt
4
F5923
Plastic plate
1
F5936
Fixing block
2
F5924
Screw
4
F5937
Fork assembly
1
F5925
Runner bracket
1
F5938
Screw
2
F5926
Axle
1
F5939
Spacing cover
1
F5927
Retaining ring
2
F5940
Retaining ring
4
F5928
Sliding block
1
F1129
Retaining ring
4
F5929
Parallel pin
2
F1130
Bearing
4
F5930
Screw shaft
1
F1207
Roller
4
F5931
Washer
2
14

Parts List of Handle
Parts No.
Description
Q’ty
Parts No.
Description
Q’ty
H5901
Control level
1
H1109
Retaining ring
2
H5902
Steel wire rod
1
H1110
Bushing
1
H5903
Axle
1
H102
Spring pin
1
H5904
Spring pin
1
H103
Spading plate
1
H5905
Chain
1
H104
Spring pin
2
H5906
Guiding rod
1
H105
Spring pin
1
H1103
Nut
1
H106
Handle
1
H1104
Nut
1
H111
Steel roller
1
H1107
Steel roller axle
1
H112
Spring pin
1
H1108
Steel roller
1
15

Assembly list
Assembly Description
5900 Hydraulic ass’y
B Lowering valve ass’y
D Hydraulic valve ass’y
W Safety valve ass’y
16
Table of contents