HeroCamper ROBOT TROLLEY RT4500 User manual

ROBOT TROLLEY (EN)
Model RT4500, 2500 & 1500
Congratulations on the purchase of your new Robot Trolley, and thank you for choosing a product from
#HeroCamper™.
It is important that you read this manual thoroughly before using your Robot Trolley. Unauthorized use or maintenance
may result in voidance of the guarantee.
WARNING NOTICE FOR BATTERY
Charge the battery completely before first use!
The Lithium battery installed in this machine has only been charged to part of its capacity (as freight
regulations prescribe). It is vital that you charge the battery to its full capacity before operating the machine
to ensure high performance and long life. Charging for the first time may take 6-8 hours (see recharging
instructions).
Always recharge fully after use until the LED light turns green!
Recharge Periodically!
If the Robot Trolley goes unused for more than two months, it is highly recommended to inspect and charge
the battery until the LED on the charger changes from red to green, in order to maintain maximum battery
life and performance.
Do not store the Robot Trolley in direct sunlight or at high temperatures. High temperatures may drain the
battery quickly.
Failure to follow these instructions will damage the battery and void the battery’s warranty!
Batteries: Charging and changing
Battery for Robot Trolley
1. To charge the Robot Trolley battery, connect the charger to the Robot Trolley by placing the charging
plug in the outlet on the back end cover.
2. The battery charger displays a constant red light while charging is in progress. Completion of battery
charging is indicated by a constant green light.

Battery Charger
Charging
Battery Charger
Fully Charged
Changing the remote control battery
1. Loosen the 4 screws on the back of the remote control and remove the panel.
2. Replace the old battery with a new one of the same type.
Remember to protect the environment when disposing of batteries –do not dispose of them with ordinary household
waste.
Technical Data
Moldel RT4500
Model RT2500
Model RT1500
Battery voltage
14.8V
14.8V
14.8V
(some versions use 14.4V)
Battery type
Lithium
Lithium
Lithium
Battery capacity
Approx. 11,000 mAh
Approx. 10,000 mAh
Approx. 5,000 mAh
Battery operating
capacity
Approx. 30 min. operation
Battery charger
100-240 V, 2 A
100-240 V, 2 A
100-240 V, 1 A
Remote control battery
2 x AA 1.5 Volt
2 x AA 1.5 Volt
2 x AA 1.5 Volt
Max. load stress
450 kg
300 kg
300 kg
Speed unloaded
Approx. 9 m/min.
Approx. 9 m/min.
Approx. 9 m/min.
Speed loaded
Approx. 7 m/min.
Approx. 7 m/min.
Approx. 7 m/min.
Motor
4 x DC motors
4 x DC motors
2 x DC motors
Safety function
3 min. Auto shut-off.
Hauling capacity
Trailers up to 4,500 kg
Trailers up to 2,500 kg
Trailers up to 1,500 kg
Caterpillar tracks
2 with rubber profiles
Weight
Approx. 38 kg
Approx. 38 kg
Approx. 22 kg
Contents of carton
When unpacking the Robot Trolley, please check that all parts are in the carton.
If any of the items are missing: Contact your dealer.
Model RT4500
Model RT2500
Model RT1500
Operating Manual
1
1
1
Robot Trolley
1
1
1
Charger
1
1
1
Remote control incl. 2x
AA batteries
1
1
1
Transport bag
1
1
1
+ Suspension fixture consisting of the following parts
1
:
Security ring (cotter)
1
1
1
Outer mounting tube
1
1
1
Inner mounting tube
1
1
1
Extension for inner tube
1
1
1
Mounting bracket for
inner tube
1
1
1
Female for mounting
Bracket
1
1
1
1
Not applicable in Australia and New Zealand.
Charging
Outlet

Support plate for female
mounting bracket
1
1
0
Clamp
1
1
0
+ Screws and nuts for suspension fitting.

EU DECLARATION OF CONFORMITY
No.: 1
The manufacturer, and/or any authorized representative of the manufacturer within the
European Community, hereinafter referred to as
#HeroCamper™
Lammefjordsvej 5, DK-6715 Esbjerg N
declares that the products
Robot Trolley RT1500, Robot Trolley RT2500 and RT4500
have been manufactured in conformity with the provisions of the following EU directives
· 98/37/EC –The Machinery Directive
· 99/5/EC –The R&TTE Directive
· 2004/108/EC –The EMC Directive
· 2002/95/EC –The RoHS Directive
· 2002/96/EC –The WEEE Directive
· 2006/42/EC –The EU machine directive
and that all standards mentioned overleaf have been applied.
The last two digits of the year of the CE approval: 12
Esbjerg, 1 October 2021
………………………………….
Lasse Smidt, CEO

Reference to standards (or parts hereof) applied in connection with this Declaration of
Conformity:
-harmonized standards:
EN 953: 2003 Safety of Machinery - Guards –General requirements for the design and
construction of fixed and movable guards
EN 954-1:2003 Safety of Machinery. Safety-related parts of control systems. Part 1: General
principles for design
EN 1037:1998 Safety of Machinery –prevention of unexpected start-up
EN 12100-1:2005 Safety of Machinery –Basic concepts and general principles for design –
Part 1: Basic terminology, methodology
EN 12100-2:2005 Safety of Machinery –Basic concepts and general principles for design –
Part 2: Technical principles
EN 13850:2006 Safety of Machinery –Emergency stop –Principles for design
EN 13857:2008 Safety distances to prevent hazard zones being reached by upper and lower
limbs
EN 60204-1:2006 Safety of Machinery - Electrical equipment of machines - Part 1: General
requirements
#HeroCamper™
Lammefjordsvej 5, DK-6715 Esbjerg

Before Use: Preparing the Robot Trolley
Checking the status
1. Unpack the Robot Trolley and check that the Robot Trolley is clean and not broken
2. Make sure the Robot Trolley battery is charged according to instructions
Mounting the suspension fitting –standard bracket
REGIONAL VARIANTS
Some countries and makes of caravan may require a special bracket version. Please inquire with your dealer.
If there is a plastic cover over the side member system on the caravan, it can be helpful to remove it while mounting the
suspension fitting.
1. When mounting the suspension fitting from the Robot Trolley onto the caravan, start by gliding the two mounting
tubes, A1 and A2, together, and then placing them up inside the side members.
2. Next, loosely screw on the mounting bracket to the inner mounting tube, and screw the female piece to the
mounting bracket. If there are larger distances between side members, place the extension tube inside the inner
mounting tube.
The illustration below shows the assembled suspension fitting mounted on the side members
2
:
3. Slide the entire suspension fitting as far back on the side members as possible to put maximum weight on the
Robot Trolley. Do not push the suspension fitting so far back that mounting and removing the Robot Trolley
becomes difficult.
The following illustration shows the optimal placement of the suspension fitting on the caravan:
4. Push the Outer and Inner Mounting Tube as far from each other as possible, towards the sides of the side
members. Tighten the left and right brackets so that the bent undersides of these are positioned precisely against
the outer side of the side members. Make sure that the bolts are tightened to the maximum extent.
(If the caravan’s bearers are extremely narrow, and the mounting tubes cannot be pressed far enough together
upon mounting, you can use a hacksaw to shorten mounting tube A2. There must be minimum 10-15 cm inner
overlap of the Outer and Inner mounting tubes.)
5. Once the suspension fitting is adjusted and fastened to the side members, tighten the clamp bolt into the side of
the inner mounting tube.
Mounting of Robot Trolley
1. When mounting the Robot Trolley on the suspension fitting, adjust the height of the suspension fitting using the
nose/jockey wheel.
2
Clamp and support plate for female mounting bracket only come with Model RT2500.
A1: Outer mounting tube
Female for mounting bracket
Mounting bracket for inner
mounting tube
Inner extension tube
A2: Inner mounting tube

2. The suspension fitting mounted on the Robot Trolley fits into a slit on the underside of the mounting fitting on the
left side (seen from the ball catch) and can be pushed into place in this slot.
3. After pushing the Robot Trolley into the slot in the mounting fitting, attach the factory-provided cotter ring, which
locks the Robot Trolley in place.
4. After attaching the cotter ring to the Robot Trolley, raise the support wheel to its highest position, and release the
hand brake. This shifts the weight of the caravan onto the Robot Trolley. You are now ready to tow your caravan.
Illustration of the Robot Trolley mounted on the side
members of the caravan:
VARIANTS
CT2500 is equipped with a tall or low tower with ball joint
CT2500 Tall tower
Height is adjustable
CT2500
Low tower
Using the Robot Trolley
SOME ADVICE ON SAFETY AND OPERATION BEFORE STARTING
1. Familiarize yourself with the operating manual, and practice maneuvering the caravan on a flat surface before
attempting to maneuver it on sloping surfaces. We recommend testing your Robot Trolley at home –also
without a caravan –so you can try out the different maneuvering options.
2. Load: The Robot Trolley is designed for moving caravans weighing up to approx. 4500 kg (RT4500), 2500 kg
(Model RT2500) or 1500 kg (Model RT1500). In order for Robot Trolley to function optimally, the ball weight
must be at least 75-85 kg. This ball weight creates about 120-150 kg of pressure on the Robot Trolley. Too
little weight on the Robot Trolley may result in poor gripping and poor towing results. Greatest pressure is
achieved by mounting the Robot Trolley as far back on the side members as possible.
3. Level surfaces: To ensure optimal transfer of the Robot Trolley’s power to the surface it is to operate on, the
Robot Trolley must move in the direction of the antenna, i.e. forward. (Except on sloping surfaces, see below).
4. Sloping surfaces: Operating the Robot Trolley on sloping surfaces may shift and decrease the pressure on the
Robot Trolley, resulting in poor contact with the terrain.
oWhen using your Camper-Trolley to move your caravan or trailer UP a slope or edge, the CT must PUSH
the caravan up the slope –if necessary, one wheel at a time. Optionally, use a ramp.
oWhen moving your caravan DOWN a slope the CT must LEAD the caravan DOWN the slope.
Special precaution
5. Be aware that if towing down very steep inclines or on wet, oily surfaces, it may be necessary to use the hand
brake on your caravan during operation if the Robot Trolley is unable to hold the caravan or the caterpillar
tracks cannot adequately grip the surface.

Activating and Pairing the Robot Trolley with the remote control
The Robot Trolley comes pre-paired with the remote control.
-Turn on the Robot Trolley by simply pressing the Start/Stop button for maximum 1-2 seconds.
-Turn on the remote control by pushing the forward button () once.
-The Robot Trolley is now ready to use.
IMPORTANT
Re-pairing the Robot Trolley
1. Turn on the Remote Control by pushing the Forward button () once. The green light on the Remote Control will
turn on.
2. Turn on the Robot Trolley by clicking the Start/Stop button. The green light on the Robot Trolley will turn on.
3. Now simultaneously press and hold the Turn Right button (→) on the Remote Control and press and hold the
Start/Stop button on the Robot Trolley, both LED lights start to blink for 8 seconds, after which the LED lights will
light constantly. Now the Robot Trolley and Remote Control have been re-paired and are ready to use. If this
pairing procedure is unsuccessful, the Remote Control will turn off automatically in around 15 seconds, and the
user needs to redo the procedure from step 1.
The start/stop button and operating status
indicator are located on the front of the Robot
Trolley
(The diode lighting can be difficult to see in
strong sunlight):
The maneuvering buttons on the remote control:
Forward: (
);Turn right: (
→
)
Backward: (
);Turn left: (
)
The battery indicator shows the Robot Trolley’s remaining battery
status. If the capacity is too low, the CT may not respond correctly.
If the indicator itself weakens, the remote control battery needs to be
replaced, otherwise the CT may not respond correctly.
Maneuvering the Robot Trolley
The Robot Trolley logo on the remote control must always point toward the trolley.
Use both hands on the remote control, and hold it horizontally during use.
-Forward: To move forward, in the same direction as the antenna, hold down forward button ().
-Backward: To move backward/reverse, hold down the back button ().
-Turn: To turn, hold down the forward () or backward () button while at the same time holding down one of the
turn buttons of the remote control to turn right (→) or left (). The Robot Trolley will only turn if you first hold
the forward or backward button, followed by a turn button.
-Stop: To stop the Robot Trolley from moving, simply release the forward or backward button.
Operating
Status
Start/Stop
Button
Battery Indicator

Deactivating the Robot Trolley
-The Robot Trolley shuts off automatically after 3 minutes if the remote control is not activated within that period.
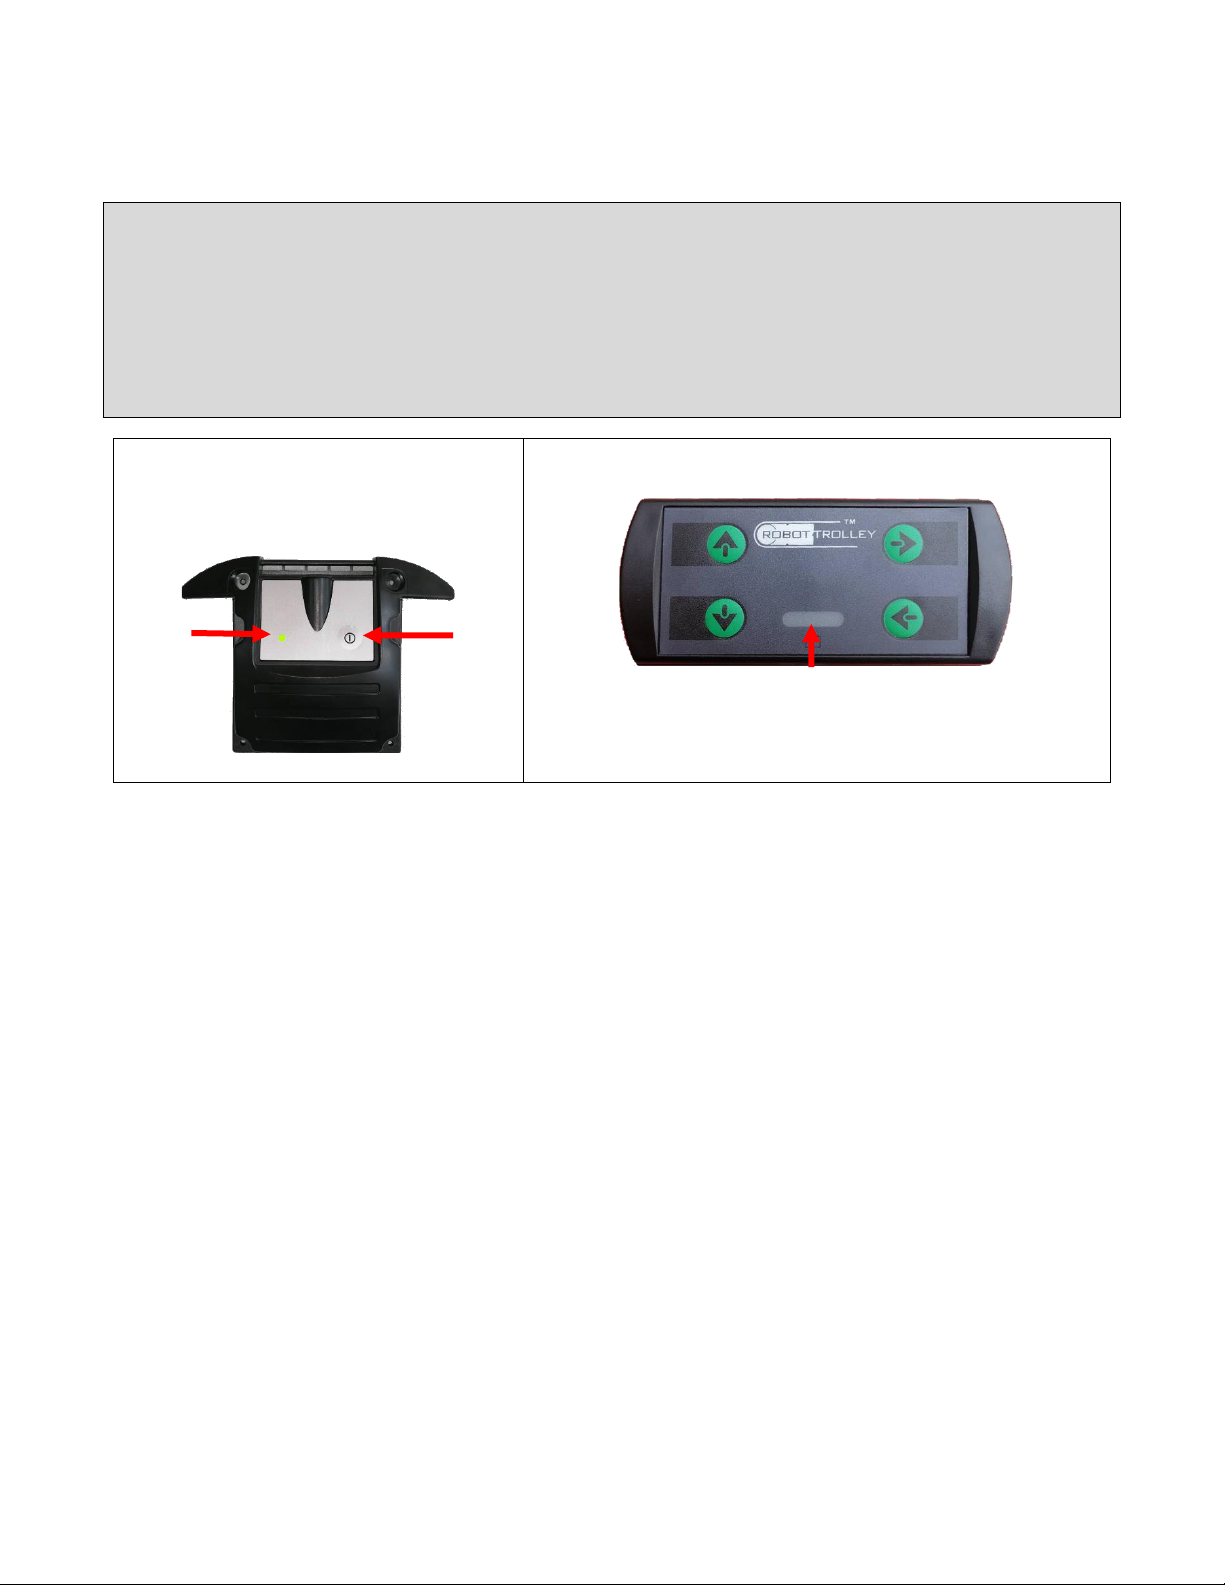
-If you do not want to wait 3 minutes until the Robot Trolley shuts off automatically, press the start/stop button to
disconnect the power manually on the Robot Trolley. Turn off the Remote Control LED light by holding down the
Right Button (→), and then pressing the left button() at the same time
After Use: Detaching, Cleaning, Storing, and Maintenance
Detaching the Robot Trolley
Never leave the Robot Trolley mounted to the caravan while towing the caravan behind a car.
It is important that you always detach the Robot Trolley after use and place it in the storage box/bag together with the
remote control.
When you have finished towing the caravan and you want to disconnect the Robot Trolley, pull the parking brake and adjust
the nose/jockey wheel so that the caravan is slightly elevated. This takes the weight off the Robot Trolley.
Remove the cotter ring and use the remote control to move the Robot Trolley out of the lock fitting (or pull it out manually).
Cleaning
If you have used the Robot Trolley in wet or dirty conditions, you can clean it in the following manner:
Remove pebbles, clay, grass and the like from the belts. Then give it a gentle cleaning using a small amount of clean water
and a brush or cloth. Do not use soap or cleansing agents or a high-pressure cleaner.
Storage
Put the Robot Trolley in the transport box/bag delivered from the factory. If the storage box/bag should become damaged,
discard it. A new plastic storage box/bag may be obtained from your Robot Trolley distributor.
Store the Robot Trolley in dry, frost-free conditions.
Do not store the Robot Trolley in direct sunlight or at high temperatures. High temperatures may drain the battery quickly.
Maintenance
The Robot Trolley should be operated at least every second month in order to keep the battery healthy.
If the Robot Trolley goes unused for more than two months, it is highly recommended that you operate the Robot Trolley
for a short while and then charge the battery until the LED on the charger turns green, in order to maintain maximum battery
life and performance.
Repair
Please contact your local dealer for repair issues.
Complaints
In case of any claim regarding this product, please contact your dealer and provide information about: The cause of the
error or defect and the date of purchase. Present your invoice as proof of purchase.
Children
Note that children under age 3 should not play with any plastic bags or small parts from the Robot Trolley, as there is a risk
of suffocation. Children should not tow the caravan with the remote control.
#HeroCamper™
Lammefjordsvej 5, DK-6715 Esbjerg N
www.herocamper.com
This manual suits for next models
2
Table of contents