4horizont.com 5
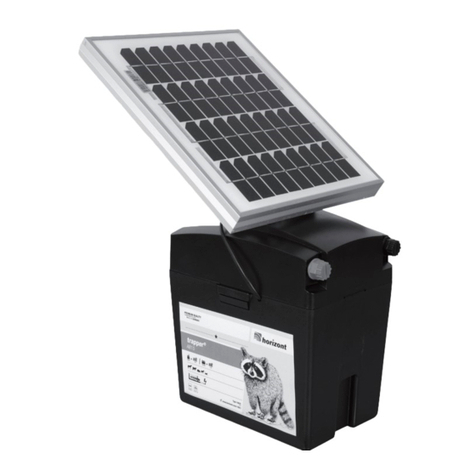
Originalbetriebsanleitung trapper N8
Operating instruction trapper N8
MONTAGE UND ANSCHLUSS:
Die Aufstellung kann in einem Gebäude erfolgen, aber nicht in feuergefährdeten Betriebsstätten. Das Gerät ist senkrecht
anzubringen (Abstand zum Boden). Die Erdleitung*) wird an die Klemme mit dem Erdungszeichen, die Zaunleitung*) an die
Klemme mit dem Blitzzeichen angeschlossen.
*) möglichst Hochspannungskabel verwenden.
INBETRIEBNAHME:
Die Netzversorgung herstellen, nach einigen Sekunden hört man ein gleichmäßiges Ticken, das Gerät ist in Betrieb. Die
Kontrollampe leuchtet im Rhythmus der elektrischen Impulse auf. Das Netzanschlusskabel darf bei Temperaturen unter
5°C nicht berührt werden.
ERDUNG:
Eine gute Erdung des Weidezaungerätes ist äußerst wichtig für den einwandfreien Betrieb und die optimale Leistung des
Gerätes, deshalb soll die Erdung an einer möglichst feuchten und bewachsenen Stelle vorgenommen werden. Einen 1m
langen Erdstab einsetzen. Bei trockenem Boden und langem Zaun sollte ein zusätzlicher Erdleiter mit Zwischenerdern (alle
50m) am Zaun entlang verlegt werden. Die Betriebserde der Elektrozaunanlage muss von der Schutz- und Betriebserde
des Netzes im Hof getrennt sein (Abstand mind. 10m).
SERVICE:
Reparaturen dürfen nur von qualifizierten Personen durchgeführt werden.
Es sind nur die vom Hersteller vorgeschriebenen Ersatzbauteile zu verwenden.
TECHNISCHE ÄNDERUNGEN VORBEHALTEN!
INSTALLATION AND CONNECTION:
The installation should be idially inside a building but not where there is a risk of fire. The fencer must be mounted in the
vertical position (distance to the ground). The earth stake must be driven into the ground at a moist place and connected to
the energizer. Fence and earth leads (preferably use high-voltage cable) must be attached to the marked fence and earth
terminals.
OPERATION:
Plug the mains cable in a 230V supply socket. After a few seconds a slight tick can be heard. The fence indication light
flashes with the pulses. The power supply cable must not be handled when the temperature is below 5°C.
GROUNDING:
For a faultless operation and to obtain best possible output a good grounding is very important. There fore the grounding
must be made at a rather moisty and overgrown place.
An 1 m earth stake ( e.g. 12mm ø ) shall be used. With long fences and on dry soil a ground return wire with intermediate
groundings (every 50 m) is necessary. The distance between the system earth and the protective system earth of the
supply net work shall be at least 10 m.
SERVICE:
Repair is only to be made by qualified service personnel. Only by the manufacturer commanded replacement parts
must be used.
SUBJECT TO TECHNICAL ALTERATIONS !
in Verbindung mit den Errichtungs- und Sicherheitshinweisen für Elektrozaungeräte
SECURA ANIMAL (www.horizont.com)
in connection with SAFETY HINTS SECURA ANIMAL (www.horizont.com)
de
en
Mode d’emploi trapper N8
MONTAGE ET RACCORDEMENT:
L‘appareil peut être monté dans un bâtiment mais pas dans un lieu d’exploitation facilement inflammable. L‘appareil est à
fixer verticalement (distance au sol). Le conduit de prise de terre*) sera raccordée à la borne marquée du symbole de prise
de terre et le conduit de la clôture*) sera raccordée à la borne marquée du symbole éclair. *) l‘utilisation de câbles des
tension souple.
MISE EN SERVICE ET CONTRÔLE:
Raccorder au secteur. Quelques secondes après on entend un tic-tac régulier, l’appareil est en marche. La lampe témoin
clignote à la cadence des impulsions électriques. Ne touchez pas le câble de secteur quand la température tombe au-
dessous de 5°C.
PRISE DE TERRE:
Une bonne prise de terre est particulièrement importante pour le bon fonctionnement et la performance maximum de
l‘électrificateur; c’est pourquoi la prise de terre doit être faite à un endroit le plus humide possible et couvert de végé-
tation. Placer une barre de fer à 1 m de profondeur (par exemple une barre ronde de 12 mm de diamètre). Par sol sec et
clôture longue, on devra poser un conducteur de terre supplémentaire avec des prises de terre intermédiaires (tous les
50 m) le long de la clôture. La distance entre électrificateur/piquet de terre et la prise de terre sur laquelle est branché
l’électrificateur doit être d’au moins 10 m.
SERVICE:
Les réparations ne doivent être faites que par des personnes qualifiées. Utiliser uniquement les pièces détachées
et composants du fabricant.
SOUS RÉSERVE DE CHANGEMENTS TECHNIQUES !
En relation avec les INFORMATIONS DE SECURITE (voir SECURA ANIMAL)
f
