3
Content
1. Safety warnings and general rules
2. Technical data
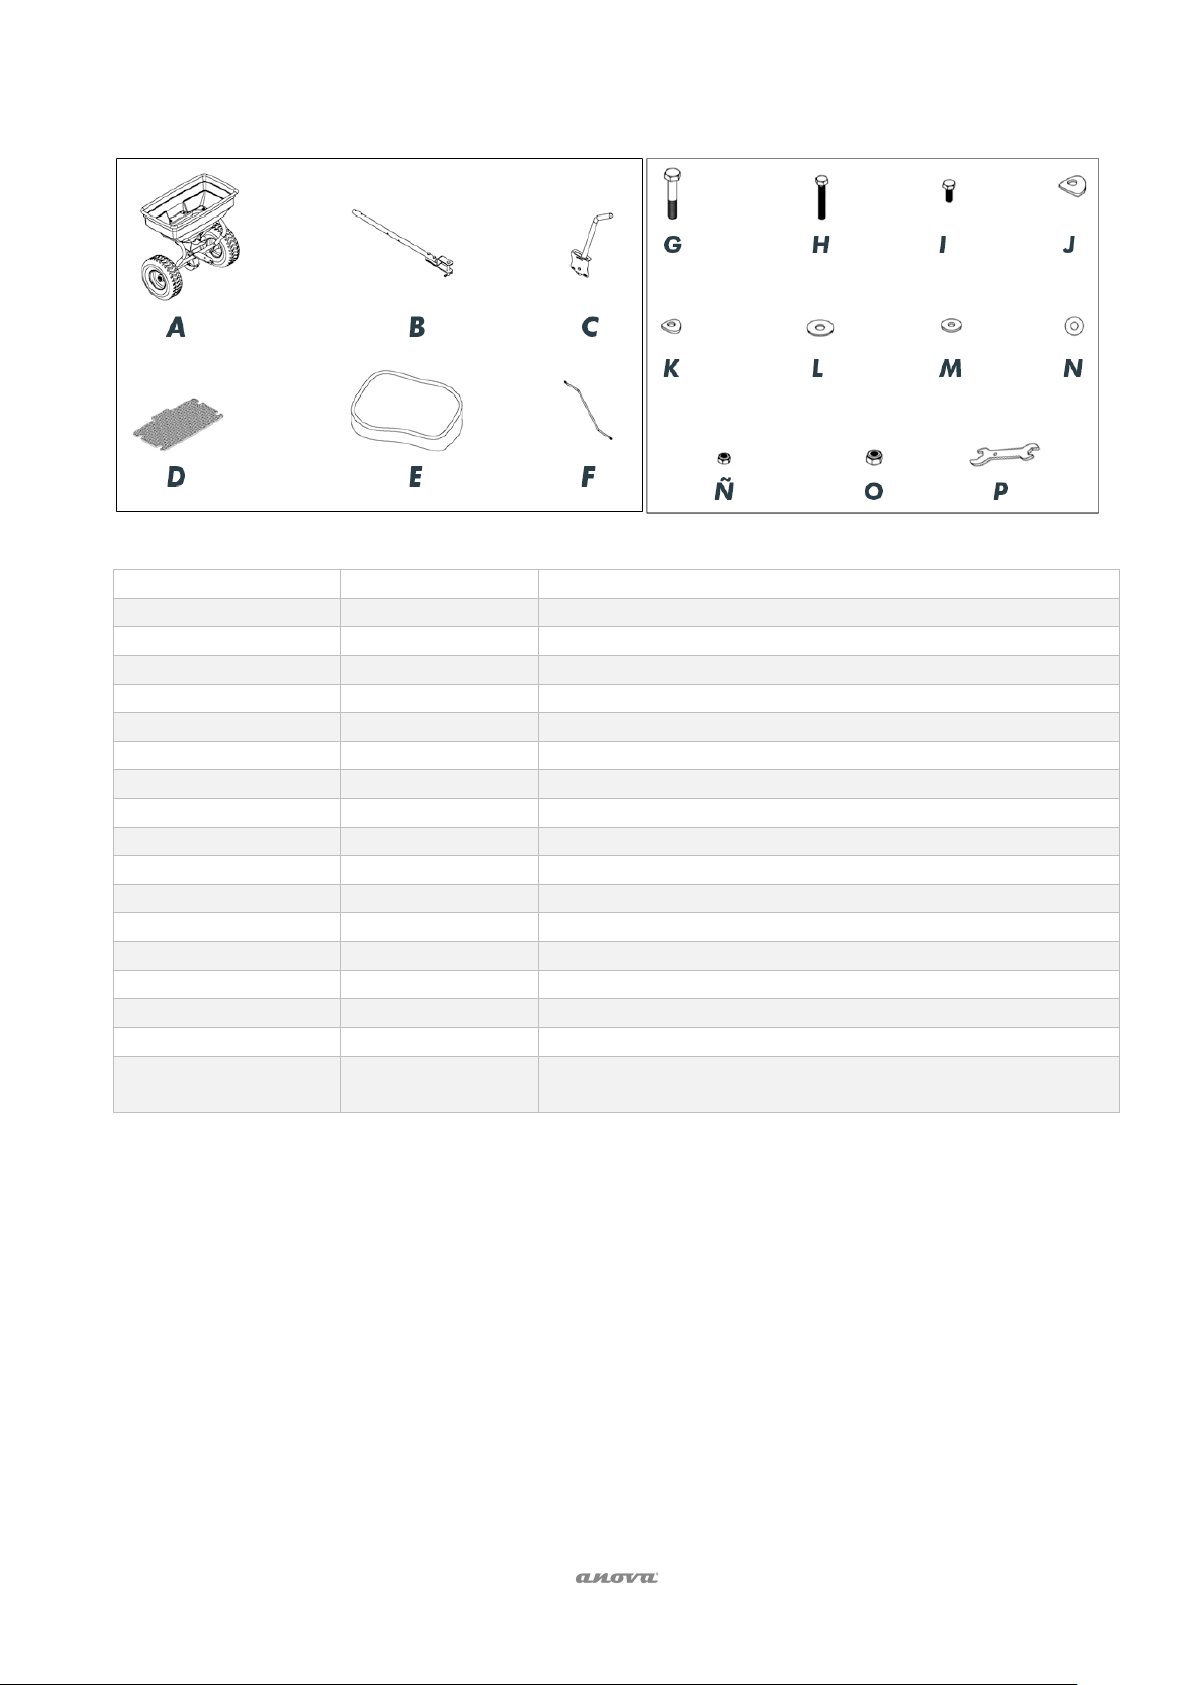
3. Components and parts of the ATS60 accessory
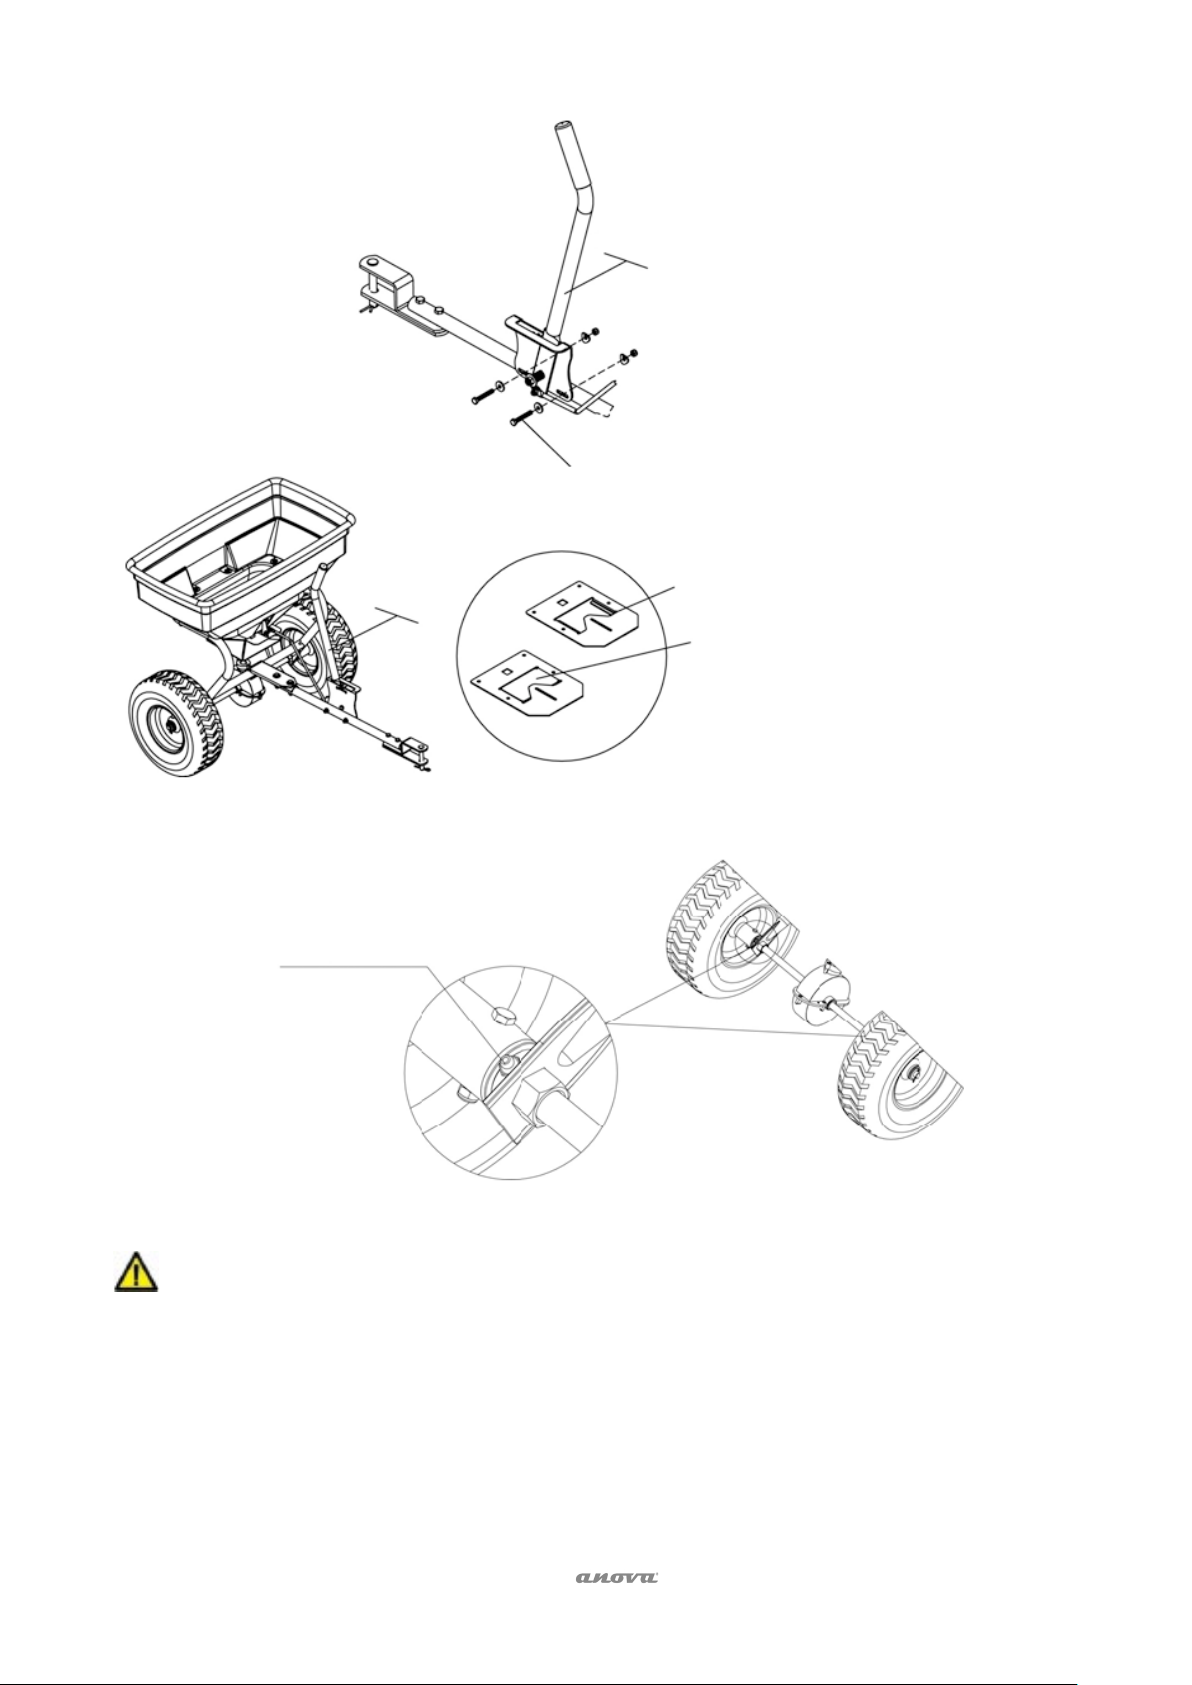
4. Assembly instructions
5. Maintenance and storage
6. Environment
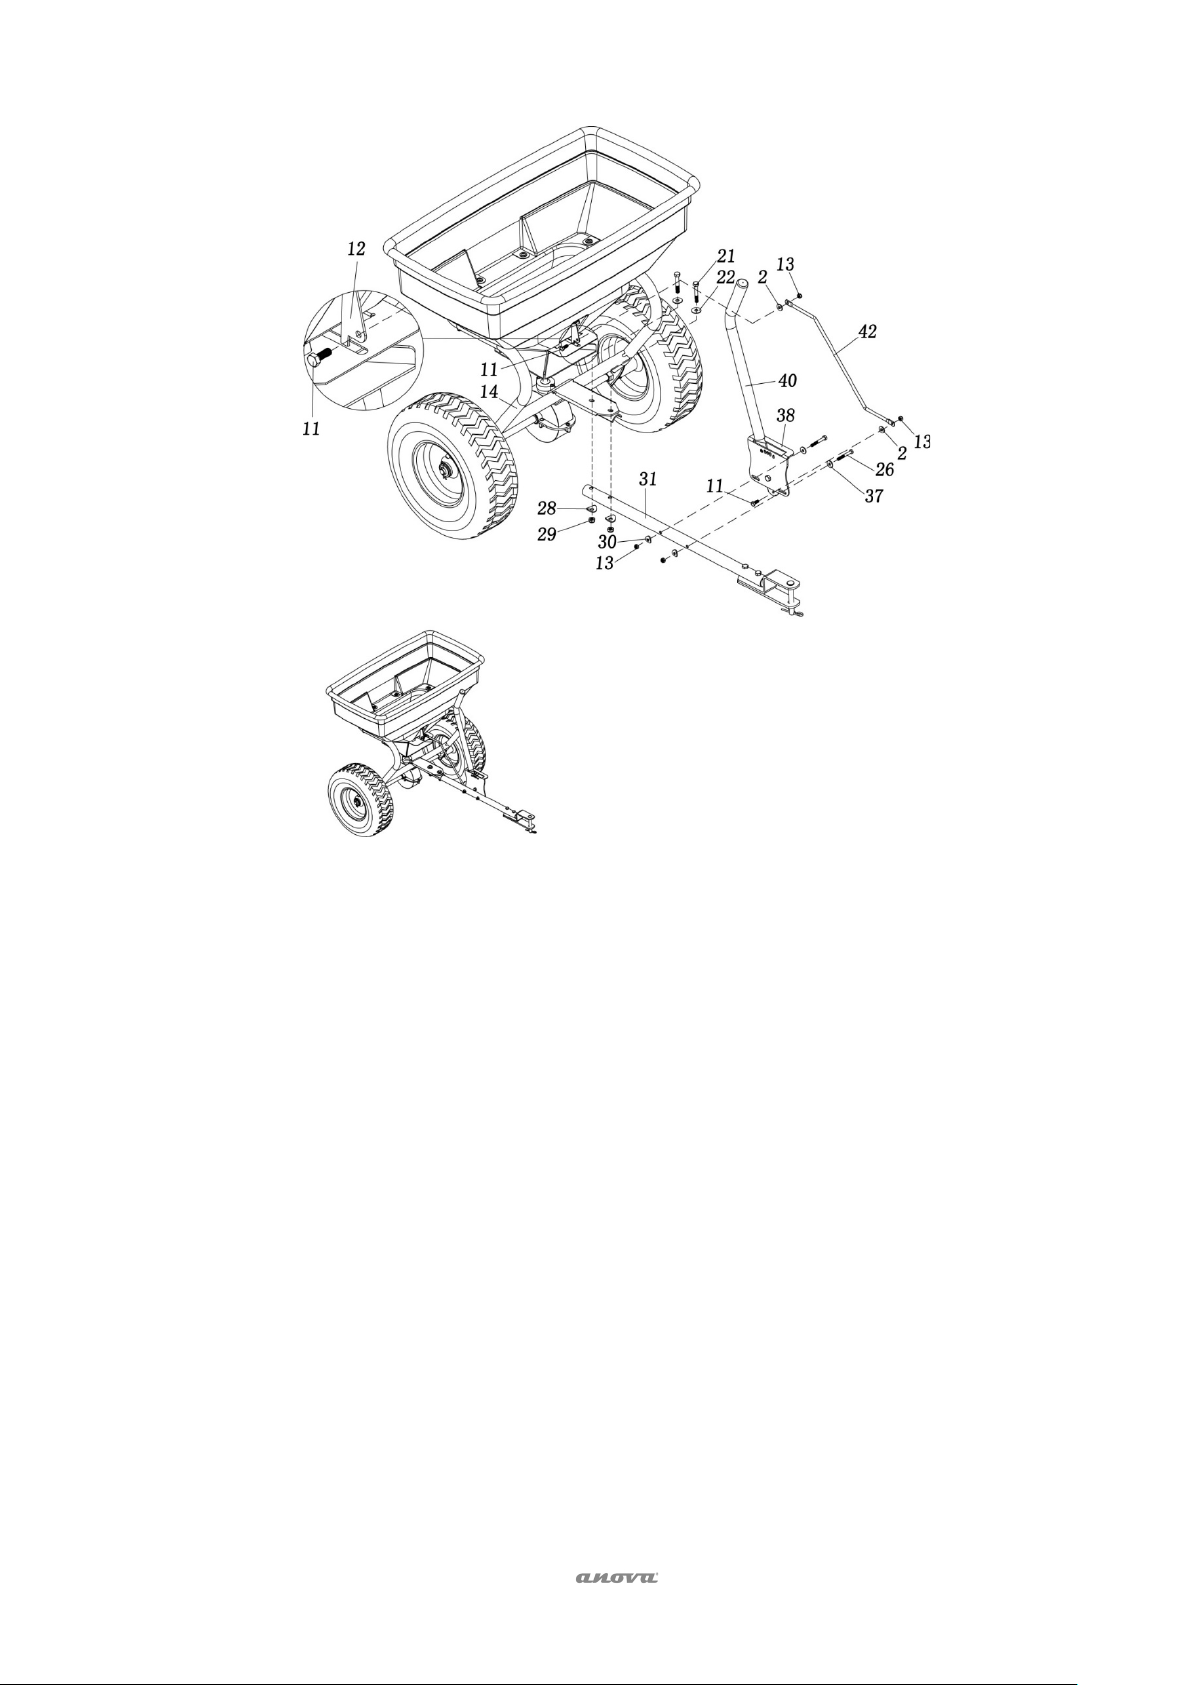
7. Exploded view
8. CE conformity declaration
1. Safety warnings and general rules
Please read this manual carefully before using the seeding trailer for the riding mower.
The operator must read and understand all safety and warning information, start-up instructions,
maintenance and storage instructions before using this equipment. Failure to properly use and
maintain this product could result in serious injury to the operator and bystanders.
Operation warnings
•Read the towing vehicle owner's manual and towing vehicle safety rules. Know how to
operate your tractor before using the towed spreader.
•Read chemical label directions and precautions for handling and applying purchased
chemicals for spreading.
•Wear eye and hand protection when handling and applying lawn or garden chemicals.
•Never operate the tractor and spreader attachment without wearing sturdy footwear, and
do not allow anyone to ride or sit on the spreader attachment frame.
•Never allow children to operate the tractor or spreader attachment, and do not allow
adults to operate it without proper instructions.
•Always start with the transmission in first (low) gear and the engine in low gear, gradually
increasing speed as conditions allow.
•When towing the spreader, do not drive too close to a stream or ditch and be alert to
holes and other hazards that could cause you to lose control of the spreader and tractor.
•Before operating the vehicle on any incline (hill), check the safety rules in the vehicle
owner's manual.
•Tow only with recommended vehicles (lawn / garden tractors and ATV).
•Do not carry passengers sitting or standing on the lawn roller at any time.
•Do not allow children to play, stand or climb on the spreader.
•Do not exceed 125 lb rated capacity
•Replace or repair damaged or worn parts immediately.
•To avoid personal injury and / or equipment damage, do not exceed 5 MPH.
•Inspect the spreader before use to make sure it is in good working order.
•ALWAYS keep hands and feet away from moving parts while operating the equipment.
•Do not use if the spreader is damaged or worn, as this can cause injury to the operator
or bystanders.
•Make sure the spreader is secure and locked in the approved vehicle hitch before
operating.
•Never add material to the spreader unless it is connected to the tractor.