Heska Element DC User manual

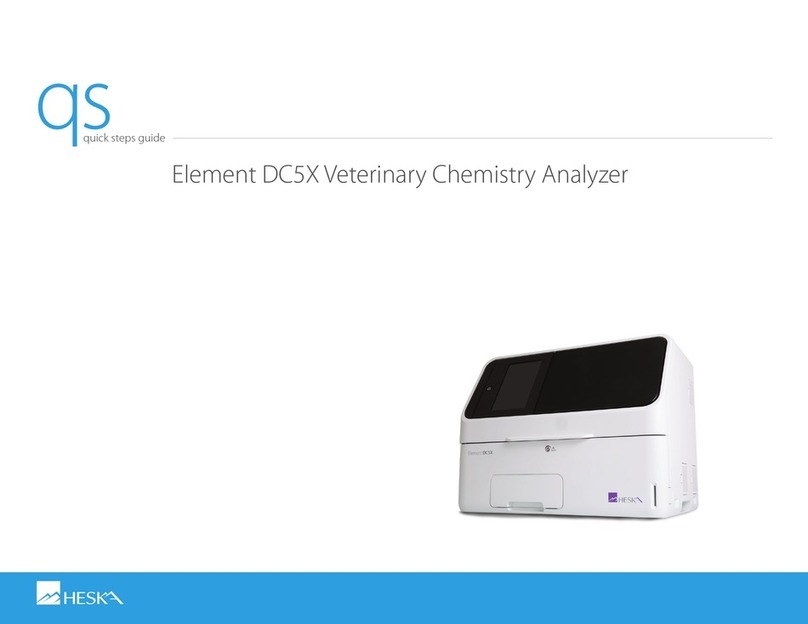
Element DC
Veterinary Chemistry Analyzer
pm
product manual

Introduction
Thank you for purchasing the Element DC® Veterinary Chemistry Analyzer
The Element DC is a diagnostic medical device for veterinary hospital use to analyze blood by colorimetric end-point, rate
and ISE tests, using the DRI-CHEM SLIDES.
Before using this equipment, please read this manual carefully to follow the precautions so that you can operate it
correctly.
Keep the manual near the Element DC, so that you can refer to it whenever necessary.
CAUTIONS
1. No part or all of this manual may be reproduced in any form without prior permission.
2. The information contained in this manual may be subject to change without prior
notice.
3. FUJIFILM shall not be liable for malfunctions and damage resulting from installation,
relocation, remodeling, maintenance, and repair done by other than dealers specified
by FUJIFILM.
4. FUJIFILM shall not be liable for malfunctions and damage of FUJIFILM products due
to the use of products of other manufacturers not supplied by FUJIFILM.
5. FUJIFILM shall not be liable for malfunctions and damage resulting from remodeling,
maintenance, and repair using repair parts other than those specified by FUJIFILM.
6. FUJIFILM shall not be liable for malfunctions and damage resulting from negligence of
precautions and operating methods contained in this manual.
7. FUJIFILM shall not be liable for malfunctions and damage resulting from use under
environment conditions outside the range of conditions required for proper use of this
product, such as power supply, installation environment, etc. contained in this manual.
8. FUJIFILM shall not be liable for malfunctions and damage resulting from natural
disasters such as fires, earthquakes, floods, lightning, etc.
Introduction
ii
Element DC
Veterinary Chemistry Analyzer

SECTION 1: SAFETY USAGE AND HANDLING PRECAUTIONS
1.1 Definition of Specific Safety Precautions....................................................................................................................................................................1
1.2 Precautions Before Operating This Equipment......................................................................................................................................................1
1.3 Biohazards and Disposal.......................................................................................................................................................................................................2
1.4 Explosive Hazards......................................................................................................................................................................................................................2
1.5 Electrical Hazards ......................................................................................................................................................................................................................2
1.6 Electromagnetic Compatibility (EMC)..........................................................................................................................................................................3
1.7 Moving Parts ................................................................................................................................................................................................................................3
1.8 Installation Site Requirements..........................................................................................................................................................................................4
1.9 Test Results for Diagnosis.....................................................................................................................................................................................................4
1.10 DRI-CHEM SLIDES......................................................................................................................................................................................................................5
1.11 QC Card System.........................................................................................................................................................................................................................7
1.12 Handling Samples.....................................................................................................................................................................................................................7
1.13 Sampler Cover.............................................................................................................................................................................................................................7
1.14 Diluents and Reference Fluid.............................................................................................................................................................................................7
1.15 DRI-CHEM AUTO TIPS, Sample Tubes, and DRI-CHEM MIXING CUPS.......................................................................................................8
1.16 Light Source Lamp...................................................................................................................................................................................................................8
1.17 Recording Paper ........................................................................................................................................................................................................................8
1.18 Warning Labels...........................................................................................................................................................................................................................9
SECTION 2: COMPONENT NAMES AND FUNCTIONS
2.1 Component Names..............................................................................................................................................................................................................10
2.2 Names and Functions of Touch Panel Display.....................................................................................................................................................12
2.2.1 TOP Dialogue .....................................................................................................................................................................................................12
2.2.2 Test Preparation Dialogue..........................................................................................................................................................................13
2.2.3 Mode Function Dialogue............................................................................................................................................................................17
2.2.4 Result Search Dialogue................................................................................................................................................................................17
2.2.5 Help Dialogue....................................................................................................................................................................................................19
2.3 Names and Functions of Screen Keyboard............................................................................................................................................................20
2.3.1 Ten-Key Input Dialogue...............................................................................................................................................................................20
2.3.2 Alphanumeric Input Dialogue ................................................................................................................................................................21
Table of Contents
i
Element DC
Veterinary Chemistry Analyzer

SECTION 3: PRINCIPLES OF OPERATION
3.1 Slide Loading............................................................................................................................................................................................................................25
3.2 Sample Loading......................................................................................................................................................................................................................25
3.3 Sampling and Spotting......................................................................................................................................................................................................25
3.4 Incubation ..................................................................................................................................................................................................................................25
3.5 Photometer and Potentiometer Readout...............................................................................................................................................................25
3.6 Disposal of Consumables..................................................................................................................................................................................................26
3.7 Preparations...............................................................................................................................................................................................................................26
3.7.1 List for Daily Maintenance Before Use................................................................................................................................................26
3.7.2 Preparations before Turning the Power On (Daily Maintenance before Use #1).....................................................26
3.7.3 Turning the Power On (Daily Maintenance before Use #2)...................................................................................................27
3.7.4 List for Daily Maintenance after Use....................................................................................................................................................29
3.7.5 Turning the Power Off (Daily Maintenance after Use)..............................................................................................................29
3.7.6 Sample Racks......................................................................................................................................................................................................30
3.7.7 Producing Samples Using Sample Tubes.........................................................................................................................................31
3.7.8 QC Card System................................................................................................................................................................................................32
3.8 Measurement...........................................................................................................................................................................................................................33
3.8.1 Basic Measurements (excluding ISE tests and tests that require dilution)...................................................................33
3.8.2 Usage of the WORK LIST Button.............................................................................................................................................................36
3.8.3 ISE Tests..................................................................................................................................................................................................................38
3.8.4 Tests that Require Dilution.........................................................................................................................................................................39
3.8.5 Setting Slides......................................................................................................................................................................................................42
3.8.6 Rerunning Tests ................................................................................................................................................................................................43
3.9 Sample Barcode Reader.....................................................................................................................................................................................................44
3.9.1 Operating Procedures...................................................................................................................................................................................45
3.10 Editing Sample No. and Sample ID.............................................................................................................................................................................46
SECTION 4: PERIODIC MAINTENANCE
4.1 User Daily/Periodic Maintenance.................................................................................................................................................................................48
4.2 Cleaning the Air Filters........................................................................................................................................................................................................48
4.2.1 Cleaning Procedures .....................................................................................................................................................................................48
4.3 Cleaning the Incubator, Spotting Part and ISE Unit .........................................................................................................................................49
4.4 Cleaning the Slide Reader ................................................................................................................................................................................................54
4.4.1 Cleaning Procedure........................................................................................................................................................................................54
4.5 Replacing the Recording Paper.....................................................................................................................................................................................55
4.5.1 Replacement Procedure..............................................................................................................................................................................55
4.6 Replacing and Cleaning the Light Source Lamp ...............................................................................................................................................56
4.6.1 Replacement and cleaning procedure..............................................................................................................................................56
ii

4.7 Inspecting and Replacing the Sampler O-ring....................................................................................................................................................58
4.7.1 Inspecting the Sampler O-ring...............................................................................................................................................................58
4.7.2 Replacing the Sampler O-ring.................................................................................................................................................................66
SECTION 5: TROUBLESHOOTING
5.1 Error Indications......................................................................................................................................................................................................................61
5.1.1 Error Codes Table.............................................................................................................................................................................................61
5.1.2 Printout Indications Table...........................................................................................................................................................................63
5.2 Troubleshooting.....................................................................................................................................................................................................................65
5.2.1 Startup Errors......................................................................................................................................................................................................65
5.2.2 Display or Printer Trouble ...........................................................................................................................................................................65
5.2.3 Slide Reading Error .........................................................................................................................................................................................65
5.2.4 Sampler Errors....................................................................................................................................................................................................66
5.2.5 Photometer Errors...........................................................................................................................................................................................68
5.2.6 Transfer Errors.....................................................................................................................................................................................................69
5.2.7 Temperature Control Errors.......................................................................................................................................................................69
5.2.8 Circuit Board Malfunction ..........................................................................................................................................................................70
5.2.9 QC Card/DI Card Read Error......................................................................................................................................................................71
5.2.10 Slide Loading Errors........................................................................................................................................................................................71
5.2.11 Errors Related to ISE Tests...........................................................................................................................................................................71
5.2.12 Errors Related to Data Communication or Sample Barcode Reader...............................................................................73
5.2.13 Other Errors.........................................................................................................................................................................................................74
SECTION 6: MODE SETTINGS AND FUNCTIONS
6.1 Mode Setting Procedure and Description .............................................................................................................................................................75
6.1.1 Mode Setting Procedure.............................................................................................................................................................................75
6.1.2 How to Select Each Mode..........................................................................................................................................................................76
6.2 Control Mode <Normal>..................................................................................................................................................................................................77
6.2.1 Execution of the Control Mode..............................................................................................................................................................77
6.3 Date & Time Settings <Normal> ..................................................................................................................................................................................77
6.4 Display Brightness <Normal>........................................................................................................................................................................................77
6.5 Buzzer Volume <Normal> ................................................................................................................................................................................................78
6.5.1 Error Sound..........................................................................................................................................................................................................78
6.5.2 Test End Sound .................................................................................................................................................................................................79
6.6 Lamp Configuration <Normal>....................................................................................................................................................................................80
6.7 Display Information <Normal>.....................................................................................................................................................................................82
6.7.1 Error log.................................................................................................................................................................................................................82
6.7.2 Display Temperature & Humidity...........................................................................................................................................................83
6.7.3 Lot Information.................................................................................................................................................................................................83
6.7.4 DI Card Information........................................................................................................................................................................................84
iii

6.8 Basic/External I/F Settings <Admini.>.......................................................................................................................................................................86
6.8.1 Language Setting............................................................................................................................................................................................86
6.8.2 Date Format Setting.......................................................................................................................................................................................87
6.8.3 Host I/F Settings...............................................................................................................................................................................................88
6.8.4 Barcode Reader.................................................................................................................................................................................................92
6.9 Display Settings <Admini.>.............................................................................................................................................................................................94
6.9.1 Unit Conversion................................................................................................................................................................................................94
6.9.2 Display Method for Outside of Measurement Range...............................................................................................................95
6.9.3 Reference Interval Settings........................................................................................................................................................................97
6.9.4 Result Display Setting................................................................................................................................................................................101
6.9.5 Sample No./ID Settings.............................................................................................................................................................................102
6.9.6 Work List Selection Setting.....................................................................................................................................................................103
6.10 Coefficients/Test Settings <Admini.>.....................................................................................................................................................................103
6.10.1 Correlation Coefficients............................................................................................................................................................................104
6.10.2 Lot Compensation Coefficients...........................................................................................................................................................108
6.10.3 Dilution Factor................................................................................................................................................................................................111
6.10.4 Spotting Count ..............................................................................................................................................................................................112
6.10.5 Print Sheets of Test Results .....................................................................................................................................................................112
SECTION 7: OTHER FUNCTIONS
7.1 Data Communication.......................................................................................................................................................................................................115
SECTION 8: SPECIFICATIONS/CONSUMABLES
8.1 Specifications and Standard Accessories.............................................................................................................................................................117
8.1.1 Specifications..................................................................................................................................................................................................117
8.1.2 Standard Accessories .................................................................................................................................................................................118
8.2 Consumables and Optional Accessories..............................................................................................................................................................118
8.2.1 Consumables ..................................................................................................................................................................................................118
8.2.2 Optional Accessories..................................................................................................................................................................................119
SECTION 9: GLOSSARY.........................................................................................................................................................................................................................121
iv

Safe Usage and Handling Precautions
This section contains safety precautions which must be followed for the safe operation of the Element DC® Veterinary
Chemistry Analyzer.
Before using this equipment, please read this chapter carefully and follow the precautions given, so that you can operate it
correctly.
1.1 Definition of Specific Safety Precautions
Specific safety precautions are noted by the terms WARNING, CAUTION, IMPORTANT, and additional information by NOTE.
The respective meanings are as follows:
WARNING
Indicates hazardous situations that may lead to serious injury, even death or the transmission of infectious agents if
the precaution is not followed.
CAUTION
Indicates hazardous situations that may lead to minor or moderate injury or physical damage if the caution is not
followed.
IMPORTANT
Indicates improper handling that could have an adverse effect on the accuracy of the measurement values if the
precaution is not followed.
Indicates procedures requiring special attention, instructions that must be followed, supplementary explanations, etc.
1.2 Precautions Before Operating This Equipment
CAUTION
Before using this equipment, please read this Instruction Manual carefully so that you can operate the equipment
correctly.
CAUTION
Whenever you operate this equipment, be sure to observe the precautions described in this manual. Failure to do so
may subject you to injuries, cause property damage, or produce incorrect test results.
CAUTION
This equipment is only to be operated by personnel appropriately trained for its intended use and correct operation.
CAUTION
The operators must be appropriately trained for the usage of the key (sampler cover lock) to follow the usage and its
cautionary statements. Refer to Section 1.13, Sampler Cover.
CAUTION
Do not remodel the Element DC. Otherwise, the safety will not be guaranteed.
Section 1: Safe Usage and Handling Precautions
1
Element DC
Veterinary Chemistry Analyzer

CAUTION
In the mode functions described in Section 6, there are 2 kinds of modes: one is the administrator mode, which
can only be operated by administrators; another is the normal mode, which can be operated by normal operators.
The important mode functions, which affect test results such as correlation coefficient settings, can only be
operated in the administrator mode. The administrator modes must be operated only by the administrators who
have the responsibility for the use of the analyzer. Inputting a password in the password input dialogue allows the
administrators to operate the administrator modes.
1.3 Biohazards and Disposal
WARNING
As used (contaminated) consumables (e.g., DRI-CHEM SLIDES, DRI-CHEM AUTO TIPS, DRI-CHEM MIXING CUPS and
sample tubes) and contaminated swabs or cloths used for cleaning the equipment are infectious waste, process
the waste correctly in compliance with any applicable regulations in your country, such as by incineration, melting,
sterilization or disinfection.
WARNING
When discarding the Element DC body that may be contaminated with blood samples, be sure to process it correctly
in compliance with any applicable regulations in your country because it must never be disposed of as a general
waste.
WARNING
When handling samples (blood) and performing maintenance (cleaning the analyzer), always follow biohazard
procedures (e.g., wearing gloves, lab coat, and safety goggles), referring to the sample handling rules of your facility.
If any part of the body comes in contact with samples, immediately rinse the contaminated body part thoroughly
under running water and then use ethyl alcohol as a disinfectant. Seek medical assistance if necessary.
WARNING
Do not touch used slides and tips with bare hands as this may cause contamination. If any part of the body comes in
contact with contaminated consumables, immediately rinse the contaminated body part thoroughly under running
water and then use ethyl alcohol as a disinfectant. Seek medical assistance if necessary.
WARNING
When samples come into contact with the analyzer components, immediately clean and disinfect the components.
1.4 Explosive Hazards
WARNING
As this equipment is not explosion-proof, be sure not to use flammable and explosive gas around the equipment.
1.5 Electrical Hazards
WARNING
The power supply voltage applied to the equipment is AC100–240V.
To avoid electrical shock, observe the following precautions:
Avoid installation sites where water may splash, etc., on the equipment.
Make sure that the equipment is properly grounded to a protective earth lead for indoor wiring.
Make sure that all cables have been properly connected.
2

WARNING
Plug the power cable of the equipment into an outlet with a grounding receptacle. If the equipment is not grounded
to a protective earth lead, this may cause electrical shock.
WARNING
When plugging the power cable in or removing it from an outlet, be sure to hold onto the plug body, not just the
cable, to prevent damage to the cable.
WARNING
Do not remove covers or other parts that are secured with screws to avoid electrical shock that may result from
exposure to hazardous voltage, or injury from moving parts.
1.6 Electromagnetic Compatibility (EMC)
NOTE: This equipment conforms to the following EMC requirements:
FCC Part 15 Subpart B:2006, Class A
ICES–003 Issue No. 4, Class A
This is a class A product. In a domestic environment, this product may cause radio interference in which case the user may
be required to take adequate measures.
This equipment has been tested and found to comply with the limits for a Class A digital device, pursuant to Part 15 of the
FCC Rules. These limits are designed to provide reasonable protection against harmful interference when the equipment
is operated in a commercial environment. This equipment generates and can radiate radio frequency energy and, if not
installed and used in accordance with the instruction manual, may cause harmful interference to radio communications.
Operation of this equipment in a residential area may cause harmful interference in which case the user will be required
to correct the interference at his own expense.
This Class A digital apparatus complies with Canadian ICES–003.
If this equipment does cause harmful interference to other devices, which can be determined by turning the equipment
off and on, the user is encouraged to try to correct the interference by one or more of the following measures:
Reorient or relocate the receiving device.
Increase the separation between the equipment.
Connect the equipment into an outlet on a circuit different from that to which the other device(s) are connected.
Consult the manufacturer or field service technician for help.
CAUTION
Do not use other devices (such as mobile phone) which generate and can radiate radio frequency energy near the
Element DC. Otherwise, physical damage or malfunction on the Element DC may occur.
1.7 Moving Parts
WARNING
Do not place your hands near the moving part (sampler, slide transfer bar, spotting part) whenever operating the
equipment, including maintenance. Also use care not to get your hands, hair, clothing, or accessories caught in
moving part.
WARNING
During sample processing, ensure the LCD under cover and sampler cover are closed and locked with the key to
prevent injuries and biohazard. If fingers touch the tip which has sample inside, the sample will spill out from the tip
to cause biohazard. When the display reads [Ready to test], the sampler cover can be opened.
3

1.8 Installation Site Requirements
WARNING
Plug the power cable of the equipment into an outlet with a grounding receptacle. If the equipment is not grounded
to a protective earth lead, this may cause electrical shock.
CAUTION
Avoid the following installation sites:
Places where spills or water leakage may occur.
Places where the equipment is exposed to direct sunlight.
Places near sources of heat such as heaters.
Places where the temperature may drastically change.
Places where the equipment is subject to vibration or its support table is unstable.
1. Install the equipment in the following environmental conditions:
Location: Indoor use
Illumination: Below 6,000 cd/m² (lux) (Below 3,000 cd/m² (lux) when using the sample barcode reader)
Altitude: Up to 2,000 m
Transient overvoltage category: II
Pollution degree: 2
Operating temperature: 59°F to 89°F (15°C to 32°C)
Operating humidity: 30% to 80% RH (no vapor condensation)
2. Use the equipment under the following electrical requirements:
Voltage limit:100−240 V
Frequency: 50−60 Hz
Supply voltage fluctuations: ± 10%
Rated current: 2.5−1.1 A
Phase: Single
Type of protection against electrical shock: CLASS 1 EQUIPMENT
3. Plug the Element DC into an independent AC outlet separate from other devices.
4. Empty space is necessary at least 4 in (10 cm) on the back and the both sides of the equipment (Empty space on the
back is necessary to unplug the power cable connector from the appliance inlet of the equipment).
5. Unplug the equipment from the AC outlet if it will not be used for an extended period of time.
1.9 Test Results for Diagnosis
WARNING
In case that an analyzer malfunction error(s) is (are) displayed (printed) before/during test processing, or warning
indications are printed out along with test results, the test results may NOT be accurate. Refer to Section 5:
Troubleshooting and rerun the tests.
IMPORTANT
Make a diagnosis in a comprehensive manner, considering other relative test results or clinical situation.
4

1.10 DRI-CHEM SLIDES
(Henceforth, DRI-CHEM SLIDE is shortened into “slide”in this manual.)
WARNING
Do not touch used slides with bare hands as this may cause contamination. If any part of the body comes in contact
with used slides, immediately rinse the contaminated body part thoroughly under running water and then use ethyl
alcohol as a disinfectant. Seek medical assistance if necessary.
WARNING
As used slides are infectious waste, process the waste correctly in compliance with any applicable regulations in your
country, such as by incineration, melting, sterilization or disinfection.
IMPORTANT
The slides should be stored in a refrigerator [35.6°F to 46.4°F (2°C to 8°C)] without unwrapping to avoid humidity, light,
and heat.
Only the required number of slides should be taken out of the refrigerator and warmed up to room temperature
before unwrapping the individual packages.
Complete the measurement within 30 minutes after unwrapping the individual package.
Do not touch either the center part of the surface or the back of the colorimetric test slides.
Do not touch the thread bridge part of the electrolyte slide.
Do not scratch (damage) the printed dot-code on the backside of the slides.
A new slide must be used for each measurement. Do not reuse.
NOTE: Types of slide packages and containers for liquids (e.g., diluent, reference fluid) are subject to change
without notice.
5

TCO
2
Total Carbon Dioxide
emantseTnoitacifissalC
Biochemical
Tests
Enzymes
ALP Alkaline Phosphatase
v-AMY Amylase
CPK Creatine Phosphokinase
GGT Gamma Glutamyltransferase
GOT/ASTAspartate Aminotransferase
GPT/ALT Alanine Aminotransferase
LDH Lactate Dehydrogenase
General
Chemistry
ALB Albumin
BUN Blood Urea Nitrogen
Ca Calcium
CRE Creatinine
GLU Glucose
IP Inorganic Phosphorus
Mg Magnesium
NH
3
Ammonia
TBIL Total Bilirubin
TCHO Total Cholesterol
TG Triglyceride
TP Total Protein
UA Uric Acid
Electrolytes
Na Sodium
K Potassium
Cl Chloride
v-LIP Pancreatic Lipase
List of DRI-CHEM SLIDES for the Element DC.
NOTE: Specifications and capabilities are subject to change without notice.
6

1.11 QC Card System
1. QC cards are packed together with slides in the same box. Before you start using a new lot of slides, read the QC card
using the QC card reader. It is advisable to store the QC card in the box it comes in until the accompanying lot of
slides has been used.
The analyzer can store a maximum of 2 lots of slide information for each test name.
When more than 2 lots of QC information are read, the oldest QC information will be deleted.
2. Read the QC card when no slide is in the process of being analyzed.
1.12 Handling Samples
WARNING
When handling samples (blood), always follow biohazard procedures (e.g., wearing gloves, lab coat, and safety
goggles), referring to the sample handling rules of your facility. If any part of the body comes in contact with samples,
immediately rinse the contaminated body part thoroughly under running water and then use ethyl alcohol as a
disinfectant. Seek medical assistance if necessary.
IMPORTANT
When using plasma or serum, check that the samples have not undergone hemolysis, and that they do not contain
any fibrin deposits.
1.13 Sampler Cover
WARNING
During sample processing, ensure the cover under the screen and the sampler cover are closed and locked with the
key to prevent injuries and biohazard. If fingers touch the tip which has sample inside, the sample will spill out from
the tip to cause biohazard. When the display reads“Ready to test”, the sampler cover can be opened.
1.14 Diluents and Reference Fluid
CAUTION
When handling diluent or reference fluid, always follow chemical procedures (e.g., wearing gloves, lab coat, and safety
goggles), referring to the Instructions for Use for fluids and sample handling rules of your facility.
IMPORTANT
For ISE tests, the reference fluid is necessary. Refer to the Instructions for Use for the slides.
IMPORTANT
Do not use products other than specified products designed for the Element DC, as using non-specified products
could cause inaccurate test results and damage the analyzer.
7

1.15 DRI-CHEM AUTO TIPS, Sample Tubes and DRI-CHEM MIXING CUPS
(Henceforth, DRI-CHEM AUTO TIPS is shortened to “tips”, Sample Tubes to “tubes”, and DRI-CHEM MIXING CUPS to “mixing
cups”in this manual.)
The sampler of the Element DC performs pipetting automatically. However, it is necessary to prepare the DRI-CHEM AUTO
TIPS, Sample Tubes (Heparin Tube or Plain Tube) and DRI-CHEM MIXING CUPS designed for use with the Element DC.
The Sample Tubes include the following:
Heparin Tube 1.5
Heparin Tube 0.5
Plain Tube 1.5
Plain Tube 0.5
WARNING
Do not touch used tips, tubes, and mixing cups with bare hands as this may cause contamination. If any part of the
body comes in contact with contaminated consumables, immediately rinse the contaminated body part thoroughly
under running water and then use ethyl alcohol as a disinfectant. Seek medical assistance if necessary.
WARNING
As used tips, tubes, and mixing cups are infectious waste, process the waste correctly in compliance with any
applicable regulations in your country, such as by incineration, melting, sterilization or disinfection.
IMPORTANT
Use new DRI-CHEM AUTO TIPS, Sample Tubes and DRI-CHEM MIXING CUPS for each sample. Do not reuse old tips and
mixing cups.
IMPORTANT
Do not use products other than specified products designed for the Element DC, as using non-specified products
could cause inaccurate test results and damage the analyzer.
1.16 Light Source Lamp
CAUTION
The light source lamp gets very hot. Before replacing the lamp, turn the power off and wait for at least 5 minutes.
1. The light source lamp is a halogen lamp. Do not touch the glass surface of the lamp with bare hands.
2. The lamp is expendable. A spare lamp should be kept on hand in case the lamp burns out.
1.17 Recording Paper
1. Use specified recording paper for the Element DC.
2. Do not use paper other than the type specified, as this could damage the printer head.
8

1.18 Warning Labels
Warning labels and safety labels on the Element DC are:
High temperature caution label
Lamp caution label
Biohazard label
Key caution label
Chemicals caution label
Finger caution label
Name-plate
Power switch
Power button
Power button
Biohazard label
Biohazard label
Chemicals caution label
Key caution label
Name-plate
High temperature
caution label
Lamp caution label
Power switch
| : Depress to power ON
O : Depress to power OFF
Biohazard label
Finger caution label
9

2.1 Component Names
Section 2: Component Names and Functions
Sampler Cover
Card Reader
Front Under Cover
Disposal Box
LCD Under Cover
LCD Touch Panel
Printer
Sample Rack
Incubator Cover
Spotting Part
Light Source Lamp
ISE Unit (inside)
(inside) Slide Reader (inside)
Sampler
Incubator Cable
10
Element DC
Veterinary Chemistry Analyzer

Air Filter (Louver)
Circuit Protector
Appliance Inlet RS232C Connector
LAN Terminal
Sampler Cover Lock
Power Switch
USB Connector
(Only for the sample
barcode reader)
NOTE: Do not connect any
USB device other than the
sample barcode reader
11

5. Result Search button
The Result Search button is used for displaying the result search dialogue. (Refer to Section 2.2.4)
6. Feed button
The feed button is used for advancing recording paper in the printer. Paper advances each time the button is pressed.
IMPORTANT
The test preparation dialogue displayed after rebooting the analyzer is the same one before the reboot (either the
basic or advanced dialogue).
2.2 Names and Functions of Touch Panel Display
Setting, measuring operation, and confirming test results and messages of the analyzer are performed with the touch
panel display. The analyzer employs a pressure-sensitive panel, and this makes it possible for users to operate wearing
gloves.
Element DC
①
②
③
④
⑥ ⑤
2.2.1 TOP Dialogue
By touching at the upper left of each dialogue, the TOP
dialogue is displayed.
1. Help button
The Help button is used for displaying the help dialogue.
(Refer to Section 2.2.5)
2. Measurement button
The Measurement button is used for displaying the test
preparation dialogue for a new test.
3. Mode Function button
The Mode Function button is used for displaying the
MODE FUNCTION menu dialogue. (Refer to Section 2.2.3
and Section 6.)
4. Power OFF button
The Power OFF button is used for turning off the power of
the analyzer. (Refer to Section 3.7.5)
12

2.2.2 Test Preparation Dialogue
The test preparation dialogue is for preparing and setting a test.
The dialogue is displayed after the power is turned on and the
analyzer starts up.
IMPORTANT
In dialogues (including test preparation dialogue) displayed
when performing tests, there are 2 kinds of dialogue: one is the
basic dialogue, which does not display the sample state display
area; another is the advanced dialogue, which displays the
sample state display area. By using the Display/Hide Sample
State Display button, operators can display/hide the area.
This manual gives operating instructions taking the advanced
dialogue (with the sample state display area) as an example.
1. The TOP Dialogue button
The TOP DIALOGUE is used for returning to the TOP dialogue.
2. Sample Information Setting Area
The sample information setting area displays sample
information (No., ID, Animal, Sample type and Dilution).
Touch each field in the area, input sample information and
change the input contents.
a. [No.]: Sequence No. (In the work list test preparation
dialogue, sample No. is displayed.)
By touching NO. FIELD, the screen keyboard is displayed
and you can change numbers. Up to 9 digits can be entered.
If more than 9 digits are entered or the field is blank, the
content in the field is not confirmed even after touching OK.
IMPORTANT
Change the displayed information with the Sample No./ID
settings of MODE FUNCTION.
[No. display:]: Select YES or NO. When touching NO, the
sample No. field is grayed out and you cannot enter or change
numbers.
[Keep sequence No.]: Select YES or NO. When touching NO, the
sequence No. is reset and starts with “1” when power is cycled.
When touching YES, the sequence No. is incremented (the
latest No. + 1).
b. [ID]: Sample ID or patient name (in the work list test preparation dialogue, patient ID is displayed).
When touching ID field, the screen keyboard dialogue appears. Enter alphanumeric characters (up to
13 characters), and touch OK.
IMPORTANT
Sample ID can be input with the sample barcode reader. (Refer to Section 3.9)
③
④
⑤
①
⑦ ⑥
②
②
Basic
Advanced
⑦
13

c. [Animal]: Reference interval settings
When touching ANIMAL FIELD, the animal dialogue is
displayed. Select the animal. If there is more than one
animal page, touch the or button to switch page.
NOTE: To cancel the reference interval settings, touch X.
d. [Sample type]: Sample type Plasma/Serum (P/S)
When touching SAMPLE TYPE FIELD, the sample type
dialogue is displayed. Select the sample type to be tested.
NOTE: To cancel the sample type setting, touch X.
e. [Dilution]: Dilution factor (None, 1, 2, 3, 4, 5 and 10)
When touching DILUTION FIELD, the dilution factor
selection dialogue is displayed. Select the dilution factor
to be used for the test.
NOTE: To cancel the dilution factor setting, touch X.
3. HELP button
The help button is used for displaying the help dialogue.
(Refer to Section 2.2.5)
4. WORK LIST button
The WORK LIST button is used for obtaining test requests
from a host PC by connecting the analyzer to PMS (Practice
Management Software). (Refer to Section 3.8.2)
5. START button
The START button is used for starting tests.
6. Sample State Display Area
The latest 20 samples’ histories can be displayed. If the
number of sample histories reaches 21, the oldest one
is deleted. When touching New test, the default test
preparation dialogue is displayed.
7. DISPLAY/HIDE SAMPLE STATE DISPLAY button
The display/hide sample state display area button is used
for displaying or hiding the sample state display area.
The dialogue with the sample state display area is called
“advanced” and without the area is called “basic”.
③
④
⑤
①
⑦ ⑥
②
②
Basic
Advanced
⑦
14
Table of contents
Other Heska Measuring Instrument manuals
