HETCH SVC-1406-HC User manual

Vacuum & Steam Mop
Model No. : SVC-1406-HC
Size : 160 x 105mm
HETCH Vacuum & Steam Mop (user manual)
Paper : 230gsm Art Card (cover matt laminate)
. Important Safety Instructions
. Parts Identification
. Operation Instruction
. Care & Maintenance
. Troubleshooting
. Specifications
. Warranty Card
A
B
C
D
E
F
G
Page : 2

A. IMPORTANT SAFETY INSTRUCTIONS
Read all instructions before using
When using an electrical appliance, basic safety precautions should always be followed, including the
following:
Vacuum cleaner is an electric appliance, it must be used in accordance with the conditions of the manual, the
manual must be properly preserved for future reference.
Check and confirm that the vacuum cleaner is using a voltage that is consistent with the power supply
voltage.
Do not vacuum the following objects, or may damage the vacuum cleaner or cause a fire, resulting in personal
injury and other accidents.
A. Heating objects, such as carbon fire, etc.;
B. Sharp object, such as glass, etc.;
C. Harmful objects or water and liquids (solvents, corrosive agents, etc.)
D. Flammable and explosive substances, such as gasoline or alcohol products.
To clean, repair or stop use of vacuum cleaner, the power supply must be cut off. When cutting off the power
supply, pull the plastic part of the plug instead of pulling the power line.
Avoid immersing the vacuum cleaner in water & placing the vacuum near heating equipment.
Refrain children from playing with the vacuum cleaner, to avoid any accidents.
1.
2.
3.
4.
5.
6.
Page : 3

A. IMPORTANT SAFETY INSTRUCTIONS
Please do not use the vacuum cleaner in the following situations :
A. Vacuum appears damaged or cannot run smoothly.
B. Power cord breakage.
Avoid blocking the suction inlet to avoid motor damage and heating deformation.
This product’s power line and motor is using Y type connection, if the power line is damaged, special
equipment is required to replace it, or you can call our professional maintenance department to repair it.
This appliance can be used by persons with reduced physical, sensory or mental capabilities or lack of
experience and knowledge if they have been given supervision or instruction concerning use of the
appliance in a safe way and understand the hazards involved.
Do not leave the product alone after connect to electricity.
If found any damage on cover after fall down or water leaking, please do not continue using it.
7.
8.
9.
10.
11.
12.
Page : 4

B. PARTS IDENTIFICATION
1. Handgrip
2. Steam trigger
3. Control setting panel
4. Power cord hook
5. Main body
6. Steam handle fixing screw
7. Power cord
8. Upper chamber
9. Lower chamber
10. Brush lock
11. Brush
12. Steamboost tray
13. Microfiber mop pad
14. Dust container
15. Cyclonic steel filter
16. HEPA filter
17. Water compartment
18. Carpet glider
Page : 5
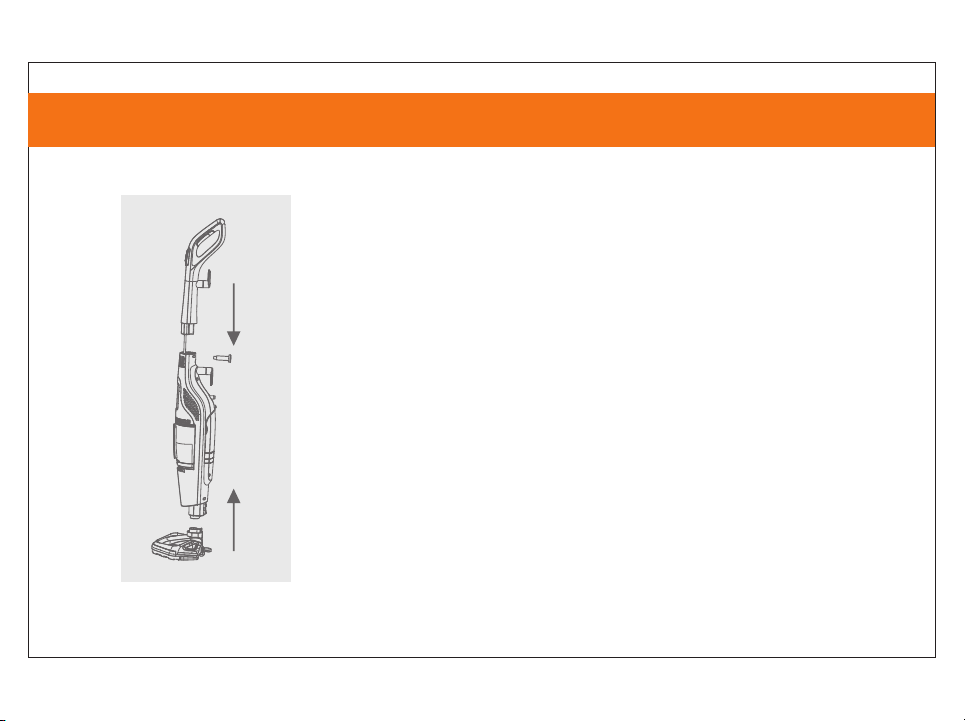
C. OPERATION INSTRUCTION
Install before using :
A. Open the package, take out the machine, insert the handle in to
the machine, and tighten the screw.
B. Insert the brush into the machine till hear sound of “ka”, that
indicates the brush was installed.
A
B
Page : 6
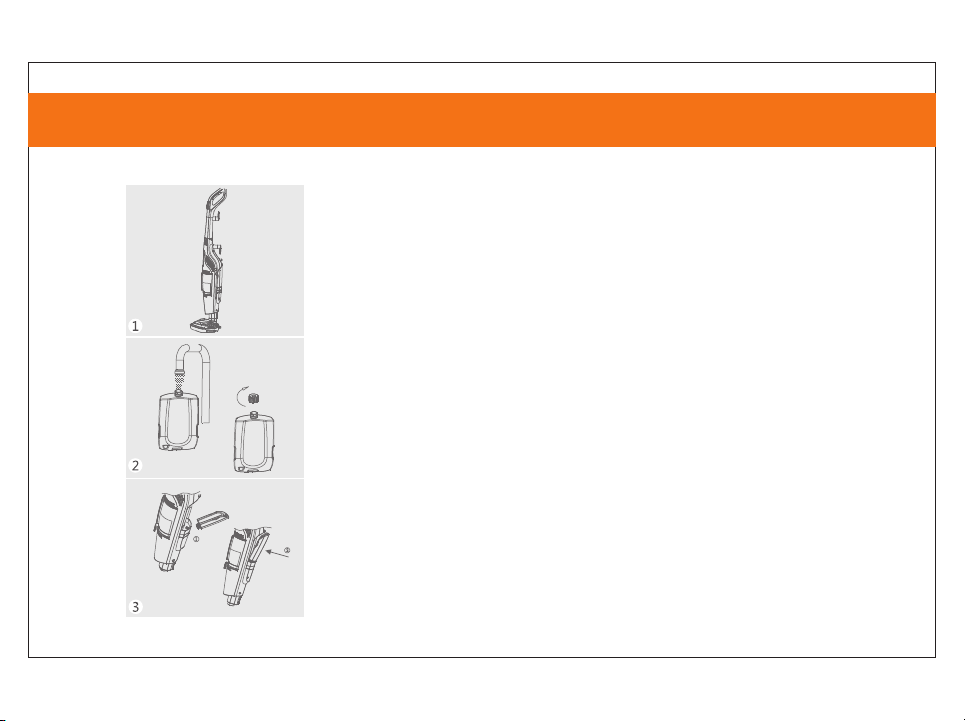
C. OPERATION INSTRUCTION
1. Turn the power cord hook cord on the handle to release power.
2. Take off the water compartment and open the cover, filling with
water, then put the cover back and tighten it!
3. Insert the water compartment aligning the water inlet, push the
water compartment to host slowly, till hear a sound of “ka”, it indicates
the water compartment has been installed in place.
Page : 7
C. OPERATION INSTRUCTION
4. Keep the brush aligning the interface of the machine, insert it slowly
till hear a sound of ”ka”, it indicates that brush was installed well.
5. Align the semicircle concave of the steamboost tray and the semicircle
convex of brush, then gently press the steamboost tray till you hear a
“bang” sound, it means the steamboost tray is fixed well.
6. Connecting the plug to a power socket, and make sure the connection
is secured, select the appropriate function for different needs.
Page : 8

C. OPERATION INSTRUCTION
7.1. Steam (Low) - Low Steam use on delicate floors or for light, everyday cleaning. To turn steam on, press
steam switch once. Press again steam switch to turn off. Can be used simultaneously with the vacuum
function or separately as a steam mop only.
7.2. Steam (High) - High Steam use for durable floors or on sticky messes. To turn steam on, press steam
switch once. Press again steam switch to turn off. Can be used simultaneously with the vacuum function or
separately as a steam mop only.
NOTE : You must select a steam setting first and then press the steam trigger to release steam.
7.3. Vacuum - Vacuum ON/OFF button. Can be used simultaneously with either steam function or
separately as a stick vacuum only.
Vacuum switch
Steam switch (High)
Steam switch (Low)
Indicator light
Steam trigger
Page : 9

C. OPERATION INSTRUCTION
8. Turn off all controls, switch off power supply, remove the plug from
socket.
9. Rewind the power cord to the power cord hook, and make it upright
stand in storage place.
Page : 10
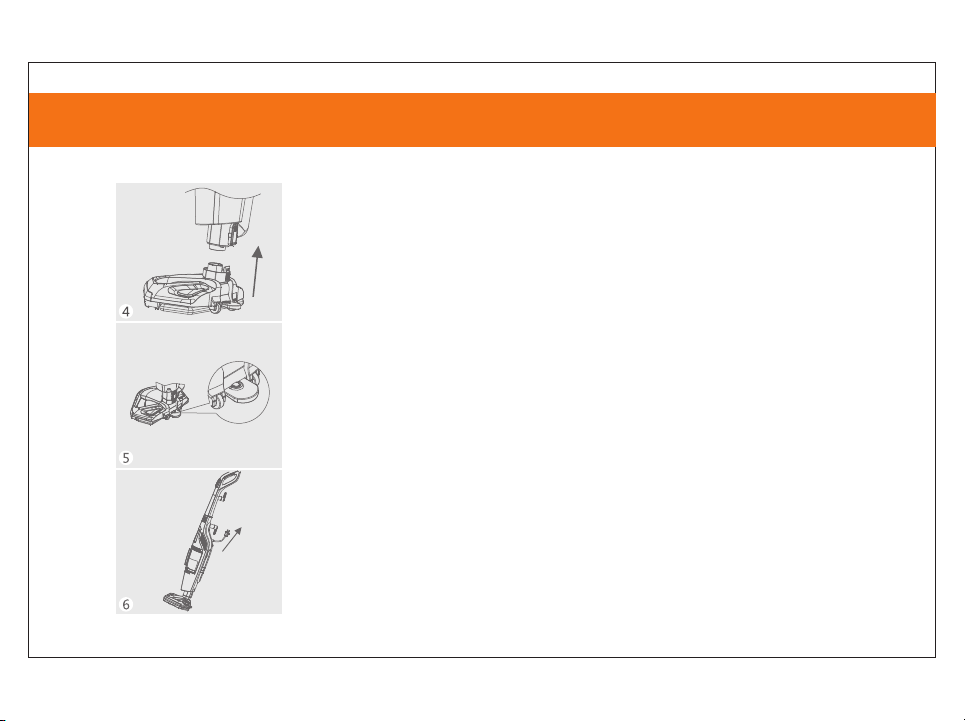
C. OPERATION INSTRUCTION
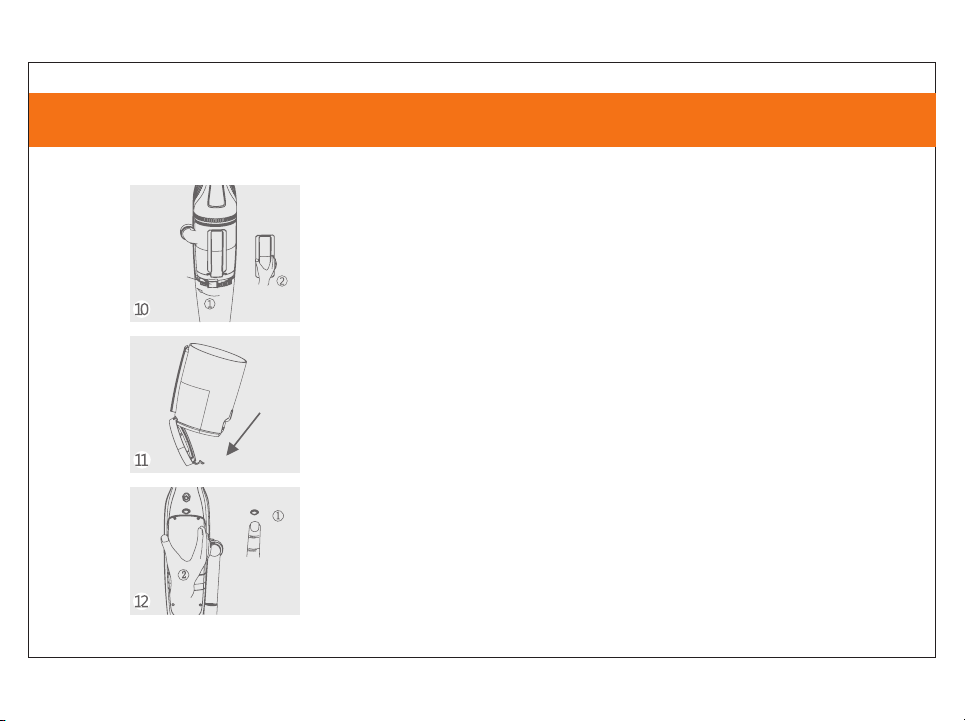
10. Revolve the dust container in a clockwise direction to the end
then remove the dust container.
11. Open the dust container cover to pour out the dust.
The dust
container
switch
12. Press the water compartment release button to release water
compartment. Hold the concave position of the water compartment to
remove the water compartment.
Page : 11

C. OPERATION INSTRUCTION
13. Press the brush lock to remove the brush.
14. Treading softly the prominent semicircle of the steamboost tray,
pull up the machine till hearing a sound of “ka”, the steamboost tray
release.
15. Removed the microfiber mop pad from the steamboost tray.
Page : 12

C. OPERATION INSTRUCTION
16. The carpet glider use : when clean the carpet with carpet glider is
more easier and quicker to clean.
17. When in using, ensure the dust container was fixed well with the
HEPA filter, and that the dust container is installed in place.
Page : 13

D. CARE & MAINTENANCE
Removing microfiber mop pad :
1.Unplug vacuum and steam mop from electrical outlet.
2.Step on foot release for steamboost tray and lift unit off tray.
3.Carefully remove microfiber mop from the steamboost tray using the
semicircle tab. The microfiber mop pad and steamboost tray may be hot.
4.The microfiber mop pad can be machine washed in warm water. Use
only liquid detergents. Do not use fabric softeners or bleach. For best
results, air dry it completely.
Empty dust container :
1.Unplug vacuum and steam mop from electrical outlet.
2.Remove the dust container from the unit by turning the dust container
switch to the left.
3.Hold the dust container over a trash bin to empty dirt.
4.The dirt container may be washed in warm water with a mild detergent.
Make sure it is completely dry before attaching.
5.Mount the dust container back on the vacuum base and turn the dust
container switch to the right until it is centered on the front of the unit.
Microber mop pad
Dust container switch
Page : 14

Cleaning vacuum filter:
1.Turn power off and unplug unit.
2.Remove the dust container from the unit, as directed above.
3.Remove filter and tap firmly against the inside of a trash bin, removing any
visible dirt.
4.Replace filters back into the dust container and attach dust container to the
main unit. Revolve the dust container to lock.
Cleaning dust chamber:
1.Grab bottom end of the lower chamber and pull outward away from the main
body. Then, turn upper chamber and pull outward away from the main body.
2.Separate the dust chamber into two pieces.
3.Wash dust chamber.
4.To reassemble, twist the upper chamber to insert to the lower chamber.
Reattach the upper chamber by turning into place and attach the lower chamber
to the main body.
5.Make sure chamber fits tightly into the unit.
D. CARE & MAINTENANCE
HEPA lter
Cyclonic
steel lter
Dust
container
Pull outward
Upper chamber
Lower chamber
Page : 15

Cleaning brush:
1.To clean the brush, press the brush lock on the back of the pivot joint and
pull the brush to release it from the appliance.
2.Wash bottom of brush with cold water.
3.Look for any clogging in the steam nozzle. To clean, run water over steam
nozzle.
4.Make sure brush is dry completely before attaching the brush to the
appliance.
5.To re-attach the foot to the appliance: place the brush on the floor, push
the appliance down into the brush and then listen for the click that sounds
when properly attached.
D. CARE & MAINTENANCE
Brush lock
Brush
Brush
Steamboost tray
Page : 16

E. TROUBLESHOOTING
Problem
Vacuum cleaner has low suction
Visible dirt escaping from cleaner
Possible Causes Solutions
Empty dust container.Dust container is full
Dust container is not installed
properly
Brush is loose Make sure brush is fully inserted
into body of unit.
Obstacles in the filters
Dust chamber is not installed
properly
Dust container is full of debris Empty dust container.
Reduced steam or no steam Water compartment empty Fill water compartment.
Steam level not selected Select steam level by pressing
steam level button.
Filter is missing or installed
incorrectly
Check filter for correct installation.
Dust container installed
incorrectly
Adjust the chamber until position
correctly.
Follow filter cleaning instructions
on page care & maintenance.
Position dust container correctly and
turn dust container switch to the right
until it is in the center of the unit.
Position dust container correctly and
turn dust container switch to the right
until it is in the center of the unit.
Page : 17

F. SPECIFICATIONS
Model
Rated Voltage
Rated Frequency
Max. Rated Power
Heating Power
Motor Power
Dust Container Capacity
Water Compartment Capacity
Net Weight
SVC-1406-HC
220-240V
50/60Hz
1550W
1000W
550W
1.2L
380ML
4.16KG
Page : 18

Page : 19

Page : 20
Table of contents


