manuals.online logo
Brands
  1. Home
  2. •
  3. Brands
  4. •
  5. Heyl
  6. •
  7. Measuring Instrument
  8. •
  9. Heyl Testomat EVO User manual

Heyl Testomat EVO User manual

WLAN SD-Karte / WLAN SD Card / WLAN SD Card
Testomat
®
EVO
Wichtige
Sicherheitsinformationen
Beachten Sie für den Umgang mit der SD-Karte die
Sicherheitsinformationen von Toshiba, die der Verpackung
beiliegen.
Important Safety Information
When using the SD Card, please follow Toshiba’s safety
information, which is included with the packaging.
Informations importantes de
sécurité
Respectez les informations de sécurité de Toshiba, qui
figurent dans l'emballage, lorsque vous manipulez la carte
SD.
Einleitung
Wir empfehlen für den Aufbau eines WLANs den Einsatz der
„Flash Air Karte“ von Toshiba. Diese Anleitung beschreibt die
Installation für diese SD-Karte. Die Installation für andere SD-
Karten kann abweichen.
Diese Anleitung ergänzt die Anleitung von Toshiba. Aufgrund
der speziellen Anforderungen der Testomat-Geräte führen Sie
die Ersteinrichtung nur so durch, wie sie in dieser Anleitung
beschrieben wird.
Das Verfahren entspricht dem Abschnitt „Wichtiger Hinweis:
Grundeinstellungen“ der Toshiba Anleitung mit Ergänzungen
für den permanenten Einsatz der Karte.
Bestimmungsgemäßer Gebrauch
Die SD-Karte wird eingesetzt, um ein Testomat
®
EVO -Gerät
in einem WLAN (Wireless Local Area Network) ansprechen zu
können. Über das WLAN kann beispielsweise die
Messwertabfrage erfolgen.
Einrichtung
Bevor Sie die Karte verwenden können, muss sie für den
Einsatz in einem Testomat-Gerät vorbereitet werden.
Installieren Sie die Software für die Einstellung der SD-Karte
auf Ihrem Computer wie folgt:
1. Setzen Sie die Karte in einen Computer mit SD-
Kartenleser ein.
2. Installieren Sie die Toshiba FlashAir Software. Sie
befindet sich auf der SD-Karte unter dem Namen
„Flashair.exe“. Alternativ können Sie die Software im
Internet auf der Webseite von Toshiba bekommen (Link
siehe Kapitel Referenz/Unterstützung).
3. Wenn die Installation abgeschlossen ist, starten Sie
„Toshiba FlashAirTool“:
•Geben Sie den Laufwerksbuchstaben ein, unter
dem die SD-Karte eingerichtet wurde.
•Wählen Sie „Netzwerkeinstellungen“, um die
Karte zu konfigurieren.
•FlashAir SSID: Wählen Sie den Namen für
das WLAN-Netz, unter dem die Karte
erreichbar sein soll.
•FlashAir Passwort: Wählen Sie ein
Passwort für die WPA2-AES
Verschlüsselung.
•Klicken Sie oben links auf „←“
•Wählen Sie WLAN-Startmodus
•Wählen Sie „Automatischer Startmodus“.
•Auto Start Timeout Setting: „30 Minuten“.
•Klicken Sie „Anwenden“, um die
Einstellungen zu übernehmen.
•Verlassen Sie das „Toshiba FlashAirTool“.
Richten Sie nun die Karte für den Einsatz im Testomat ein:
4. Starten Sie nun das ebenfalls auf der SD Karte abgelegte
Programm „DisableWlanTimeout.bat“.
5. Geben Sie den Laufwerksbuchstaben ein, unter dem die
SD-Karte eingerichtet wurde (nur den Buchstaben, ohne
Doppelpunkt!)
6. Das Programm beendet sich mit der Anzeige „Success“.
Das „Auto Start Timeout Setting“ ist nun deaktiviert, das
heißt, die WLAN-Verbindung der Karte ist immer aktiv.
Die Karte ist damit fertig eingestellt und kann in das Testomat-
Gerät eingesetzt werden. Bei Konfigurationsänderungen
müssen alle Einstellungen erneut durchgeführt werden ab
Punkt 3.
Introduction
We recommend Toshiba’s “Flash Air Card” for setting up a
WLAN. These instructions describe the installation of this SD
Card. The installation of other SD Cards may differ.
These instructions supplement Toshiba’s instructions. Due to
the special requirements of Testomat appliances, carry out the
initial set up strictly according to these instructions.
This procedure is described in the section, “Important
information: Basic settings” in the Toshiba instructions, with
supplements for the permanent use of the SD Card.
Appropriate use
The SD Card is used to be able to address a Testomat
®
EVO
unit in a WLAN (Wireless Local Area Network). A reading
enquiry, for example, can be sent via WLAN.
Setup
Before you can use the SD Card it must be prepared for use in
a Testomat appliance. Install the software for setting up the
SD Card on your computer as follows:
1. Insert the card in a computer with an SD Card Reader.
2. Install the Toshiba FlashAir software. You will find it on
the SD Card under the name, “Flashair.exe”. Alternatively,
you can download the software from Toshiba’s Internet
website (see the chapter, Reference/Support).
3. Once the installation has been completed, run “Toshiba
FlashAirTool”:
•Enter the drive name (letter) the SD Card was
set up on.
•Select “Network settings” to configure the card.
•FlashAir SSID: Choose the name for the WLAN
network in which the card should be accessible.
•FlashAir password: Choose a password for the
WPA2-AES encryption.
•Click on “Apply” to accept the set up.
•In the upper left corner click on “←”
•Select “WLAN Start mode” to configure the card
for the first time.
•Set up the Start Mode: “Automatic start”.
•Auto Start Timeout Setting: “30 minutes”.
•Click on “Apply” to accept the set up.
•Exit the “Toshiba FlashAirTool”.
Now, set up the card for use in the Testomat:
4. Start the program on the SD card,
“DisableWlanTimeout.bat” on your computer.
5. Enter the name of the drive (letter) on which the SD Card
was set up (only the letter, no colon!)
6. The program ends by displaying the message, “Success”.
The “Auto Start Timeout Setting” is now deactivated, i.e.
the card’s WLAN connection is always active.
The card is now fully set up and can be used in the Testomat
appliance. In case of configuration changes the setup must be
beformed from item 3 on again.
Introduction
Pour la mise en place d'un réseau WLAN, nous vous
recommandons d'employer la carte « FlashAir » de Toshiba.
Ces instructions décrivent l'installation pour cette carte SD.
L'installation pour d'autres cartes SD peut être différente.
Ces instructions complètent les instructions de Toshiba. En
raison des exigences spéciales des appareils Testomat,
procédez à la configuration initiale uniquement de la façon
décrite dans ces instructions.
La procédure correspond à la section « Message important :
paramétrage initial » des instructions de Toshiba avec des
informations complémentaires sur l'utilisation continue de la carte.
Utilisation conforme
La carte SD est employée pour pouvoir communiquer avec un
appareil Testomat
®
EVO sur un réseau WLAN (Wireless Local
Area Network). Par exemple, la demande de valeur de mesure
peut se faire via le réseau WLAN.
Configuration
Avant de pouvoir utiliser la carte, elle doit être préparée pour
être employée dans un appareil Testomat. Installez le logiciel
pour le paramétrage de la carte SD sur votre ordinateur
comme suit :
1. Insérez la carte dans un ordinateur avec lecteur de cartes
SD.
2. Installez le logiciel Toshiba FlashAir. Il se trouve sur la
carte SD sous le nom « Flashair.exe ».
3. Lorsque l'installation est terminée, lancez « Toshiba
FlashAirTool » :
•Indiquez la lettre du lecteur dans lequel se
trouve la carte SD.
•Sélectionnez « Paramètres de réseau » pour
procéder à la configuration de la carte.
•FlashAir SSID : sélectionnez le nom du réseau
WLAN sur lequel la carte doit être accessible.
•FlashAir mot de passe : sélectionnez un mot de
passe pour le cryptage WPA2-AES.
•Cliquez sur « Appliquer » pour valider les
paramètres.
•Cliquez sur « ←»
•Sélectionnez «WLAN démarrer mode
d´operation».
•Paramétrer le mode de lancement : « Lancement
automatique au démarrage ».
•Démarrage automatique temps de repos: « 30
minute »
•Cliquez sur « Appliquer » pour valider les
paramètres.
•Quittez le logiciel « Toshiba FlashAirTool ».
Configurez à présent la carte pour son emploi dans un
appareil Testomat :
4. Lancez le programme « DisableWlanTimeout.bat » sur
votre ordinateur.
5. Indiquez la lettre du lecteur dans lequel se trouve la carte
SD (seulement la lettre, sans les deux-points !)
6. Le programme se ferme avec l'affichage « Success ». Le
paramètre « Auto Start Timeout Setting » est désormais
désactivé, ce qui veut dire que la connexion WLAN de la
carte est toujours active.
Le paramétrage de la carte est ainsi terminé et cette dernière
est prête à l'emploi dans un appareil Testomat.
Gebrüder Heyl Analysentechnik GmbH & Co. KG WLAN-Karte_D-GB-F_150611.doc
Orleansstraße 75b Art.-Nr. 100491
D 31135 Hildesheim
www.heyl.de
Verwendung
Innerhalb von 30s nach Start des Testomat-Geräts öffnet die
SD-Karte ein WLAN mit den eingestellten Daten. Nachdem
die WLAN Verbindung aufgebaut wurde, ist die SD-Karte im
Browser Ihres Computers unter der Adresse http://flashair
erreichbar.
Lesen Sie bitte zuerst die Informationen in readme.htm !
Die Struktur und das Format der abgelegten Daten sind
geräteabhängig. Informieren Sie sich in der
Bedienungsanleitung Ihres Computers, wo und in welchem
Format Dateien einer SD-Karte abgelegt werden.
Hinweis: Die SD-Karte unterstützt nur Dateinamen im „8+3“-
Format mit maximal 8 Zeichen als Dateiname und 3 Zeichen
als Endung. Längere Dateinamen werden abgekürzt.
Problemlösungen
•Welche Netzwerkeinstellungen sind für das WLAN
erforderlich?
Die Einstellungen werden automatisch beim Verbinden mit
dem WLAN gemacht. Unter Internetprotokoll sollte sowohl
„IP-Adresse automatisch beziehen“ als auch „DNS-
Serveradresse automatisch beziehen“ eingestellt sein.
•Das WLAN ist plötzlich verschwunden.
Die SD-Karte schließt von sich aus das WLAN nach maximal
10 Minuten, wenn keine Verbindung aktiv ist. Um das WLAN
permanent eingeschaltet zu lassen, setzen Sie die Karte in
einen Rechner mit SD-Kartenleser ein und verfahren Sie wie
unter „Einrichtung“ Punkt 4 – 6 beschrieben.
•Keine Verbindung zum WLAN möglich, obwohl es
angezeigt wird.
Prüfen Sie, ob die WLAN Netzwerkkarte die WPA2
Verschlüsselung unterstützen. Dies ist insbesondere bei
älteren Rechnern nicht der Fall, wenn Windows XP
verwendet wird und aktuelle ServicePacks nicht installiert
wurden. Ein Update von Microsoft ist unter KB893357
verfügbar. Sehr alte WLAN-Netzwerkkarten (vor 2006, z.B.
Lucent/Proxim Orinoco PCMCIA Karten) unterstützen jedoch
die WPA2 Verschlüsselung nicht.
•Die Karte wurde formatiert. Nun funktioniert das WLAN
nicht mehr, alle Ordner auf der Karte sind
verschwunden.
Mit dem FlashAirTool kann der Karteninhalt wieder
hergestellt werden. Sollte es nicht auf dem Rechner
installiert sein, laden Sie das Programm von Toshiba (Link
siehe unten) herunter und installieren Sie es.
Starten Sie das Toshiba FlashAirTool und wählen Sie
„Initialisieren der Karte“. Damit wird das gesamte
Dateisystem mit Werkseinstellungen auf der Karte wieder
hergestellt. Danach muss eine Neueinrichtung erfolgen!
•Die SD-Karte wird vom Rechner nicht erkannt
Die Toshiba FlashAir ist eine SDHC Karte mit einer
Kapazität von 8GByte. Sie kann nur in einem Kartenleser
verwendet werden, der SDHC Karten dieser Kapazität lesen
kann.
Referenz / Unterstützung
•Webseite von Toshiba mit Anleitungen und Software:
http://www.toshiba-components.com/FlashAir/tools.html
•Webseite von Heyl mit diesem Dokument und
zugehöriger Software:
http://www.heyl.de
Use
Within 30 seconds of starting the Testomat appliance the SD
Card establishes a WLAN with the setup data. After the
WLAN connection has been established, the SD Card in
your computer’s browser can be accessed at http://flashair.
At first please read the information in readme.htm !
The structure and format of the stored data depend the
appliance. Consult the operating instructions of your
computer as to where and in what format SD Card files are
stored.
Note: The SD Card only supports file names in “8+3” format
with a maximum of 8 characters as file names and 3
characters as suffixes. Longer file names will be shortened.
Problem solving
•What network settings are required for the WLAN?
The settings are established automatically upon accessing
the WLAN. Both “Access IP address automatically” and
“Access DNS server address automatically” should be set in
the Internet protocol.
•The WLAN has suddenly disappeared.
If no connection is active, after a maximum of 10 minutes the
SD Card itself closes the WLAN. To leave the WLAN
permanently switched on, insert the card into a computer
with an SD Card Reader and continue as described in “Set
up”, points 4 – 6.
•Although it is being displayed, no connection can be
made with the WLAN.
Check whether the WLAN network card supports the WPA2
encryption. This is not the case particularly in older
computers, if Windows XP is used und current ServicePacks
have not been installed. A Microsoft update is available
under KB893357. However, very old WLAN network cards
(prior to 2006, e.g. Lucent/Proxim Orinoco PCMCIA Cards)
do not support the WPA2 encryption.
•The card has been formatted. The WLAN no longer
works and all of the files on the card have disappeared.
The card’s content can be recovered using the FlashAirTool.
Should it not be installed on your computer, download the
tool from Toshiba (see below for the link) and install it.
Run the Toshiba FlashAirTool and select “Initialising the
card”. This reinstates the entire file system with works
settings on the card. Thereafter a new Set up must be
carried out!
•The computer does not recognise the SD Card
The Toshiba FlashAir Card is an SDHC Card with a capacity
of 8GBytes. It can only be used in a card reader that can
read SHDC Cards of this capacity.
Reference / Support
•Toshiba website with instructions and software:
http://www.toshiba-components.com/FlashAir/tools.html
•Heyl website with this document and associated
software:
http://www.heyl.de
Utilisation
Dans les 30 secondes qui suivent le démarrage de l'appareil
Testomat, la carte SD ouvre un réseau WLAN avec les
données paramétrées. Une fois que la connexion WLAN est
établie, la carte SD est accessible dans le navigateur de
votre ordinateur à l'adresse http://flashair.
Lisez l’information dans le fichier « readme.htm » SVP!
La structure et le format des données stockées dépendent
de l'appareil. Reportez-vous aux instructions d'utilisation de
votre ordinateur pour savoir où et dans quel format les
fichiers d'une carte SD sont stockés.
Remarque : la carte SD prend en charge uniquement les
noms de fichiers au format « 8+3 » avec 8 caractères
maximum pour le nom du fichier et 3 caractères maximum
pour l'extension. Les noms de fichiers plus longs sont
raccourcis.
Résolution des problèmes
•Quels paramètres réseau sont nécessaires pour le
réseau WLAN ?
Les paramètres sont configurés automatiquement lors de la
connexion au réseau WLAN. Dans Protocole Internet,
« Obtenir une adresse IP automatiquement » et « Obtenir
les adresses des serveurs DNS automatiquement » doivent
tous deux être sélectionnés.
•Le réseau WLAN a disparu soudainement.
La carte SD ferme le réseau WLAN au bout de 10 minutes
maximum lorsqu'aucune connexion n'est active. Pour laisser
le réseau WLAN activé en permanence, insérez la carte
dans un ordinateur avec lecteur de cartes SD et procédez
comme indiqué aux points 4 à 6 de la procédure
« Configuration ».
•Impossible de se connecter au réseau WLAN, bien qu'il
soit affiché.
Vérifiez si la carte réseau WLAN prend en charge le
cryptage WPA2. Cela n'est pas le cas en particulier avec les
ordinateurs plus anciens, lorsque Windows XP est utilisé et
que les Service Packs actuels n'ont pas été installés. Une
mise à jour de Microsoft est disponible sous KB893357. Les
cartes réseau WLAN très anciennes (antérieures à 2006, par
exemple les cartes PCMCIA Lucent/Proxim Orinoco) ne
prennent cependant pas en charge le cryptage WPA2.
•La carte a été formatée. Maintenant, le réseau WLAN
ne fonctionne plus, tous les dossiers présents sur la
carte ont disparu.
Le contenu de la carte peut être rétabli à l'aide de l'outil
FlashAirTool. S'il n'est pas installé sur l'ordinateur,
téléchargez le programme sur le site de Toshiba (voir le lien
ci-dessous) et installez-le.
Lancez Toshiba FlashAirTool et sélectionnez « Initialisation
de la carte ». Cela permet de rétablir sur la carte l'ensemble
du système de fichiers avec les paramètres d'usine. Il faut
ensuite procéder à une nouvelle configuration.
•La carte SD n'est pas reconnue par l'ordinateur.
La carte FlashAir de Toshiba est une carte SDHC d'une
capacité de 8 Go. Elle peut être utilisée uniquement dans un
lecteur de cartes capable de lire les cartes SDHC de cette
capacité.
Référence / Support
•Site Web de Toshiba avec les instructions et le logiciel :
http://www.toshiba-components.com/FlashAir/tools.html
•Site Web de Heyl avec ce document et le logiciel
associé :
http://www.heyl.de

Other Heyl Measuring Instrument manuals

Heyl Testomat 808 Series Manual

Heyl

Heyl Testomat 808 Series Manual

Heyl Testomat 2000 PO4 User manual

Heyl

Heyl Testomat 2000 PO4 User manual

Heyl Testomat EVO TH series User manual

Heyl

Heyl Testomat EVO TH series User manual

Heyl Testomat ECO User manual

Heyl

Heyl Testomat ECO User manual

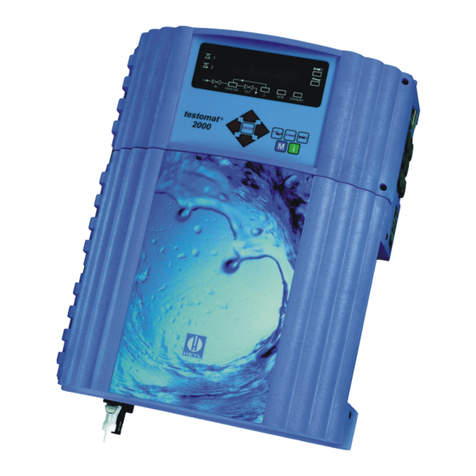
Heyl Testomat 2000 User manual

Heyl

Heyl Testomat 2000 User manual

Heyl Testomat NH2CL-R User manual

Heyl

Heyl Testomat NH2CL-R User manual

Heyl Testomat NH2CL User manual

Heyl

Heyl Testomat NH2CL User manual

Heyl Testomat EVO TH Operating instructions

Heyl

Heyl Testomat EVO TH Operating instructions

Heyl Testomat 2000 Cr VI 0 - 5 ppm User manual

Heyl

Heyl Testomat 2000 Cr VI 0 - 5 ppm User manual

Heyl Testomat 2000 THCL User manual

Heyl

Heyl Testomat 2000 THCL User manual

Heyl Testomat Modul TH Operating instructions

Heyl

Heyl Testomat Modul TH Operating instructions

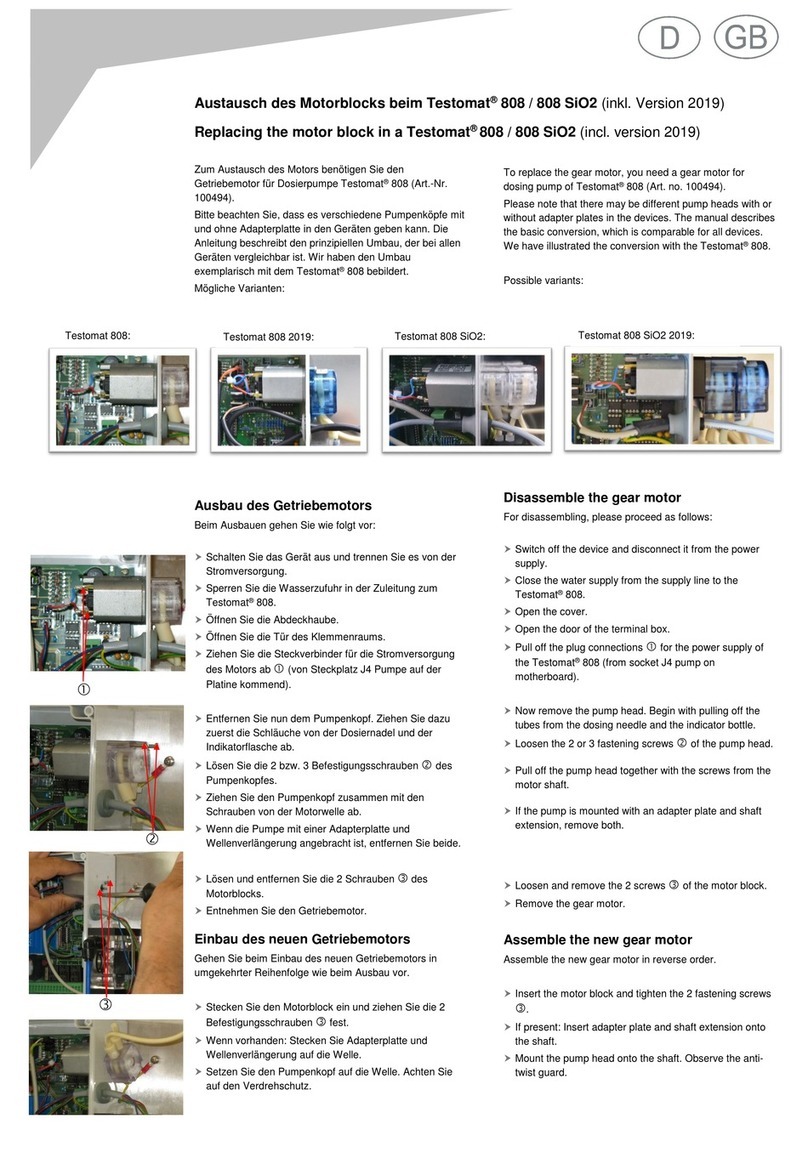
Heyl Testomat 808 User manual

Heyl

Heyl Testomat 808 User manual

Popular Measuring Instrument manuals by other brands

KROHNE OPTIWAVE 7300 C Handbook

KROHNE

KROHNE OPTIWAVE 7300 C Handbook

ADVANTEST R3264 Operation manual

ADVANTEST

ADVANTEST R3264 Operation manual

Nexas NexLink NL102PLUS user manual

Nexas

Nexas NexLink NL102PLUS user manual

METROTEC U15 Series operating manual

METROTEC

METROTEC U15 Series operating manual

Keysight Technologies N9000B Installation note

Keysight Technologies

Keysight Technologies N9000B Installation note

HUATEC HG904 user manual

HUATEC

HUATEC HG904 user manual

Roland RC-20 Service notes

Roland

Roland RC-20 Service notes

Dillon FI-90 user manual

Dillon

Dillon FI-90 user manual

Hayward Sense and Dispense owner's manual

Hayward

Hayward Sense and Dispense owner's manual

TFA 30.3049 instruction manual

TFA

TFA 30.3049 instruction manual

Endress+Hauser Proline Promass E 200 operating instructions

Endress+Hauser

Endress+Hauser Proline Promass E 200 operating instructions

Leuze AMS 384i Original operating instructions

Leuze

Leuze AMS 384i Original operating instructions

Extech Instruments 475055 user manual

Extech Instruments

Extech Instruments 475055 user manual

Sper scientific 840021 instruction manual

Sper scientific

Sper scientific 840021 instruction manual

Hanna Instruments HI 771 manual

Hanna Instruments

Hanna Instruments HI 771 manual

LINSHANG LS190 user manual

LINSHANG

LINSHANG LS190 user manual

Bushnell 202355 instruction manual

Bushnell

Bushnell 202355 instruction manual

Tormach 31101 Technical document

Tormach

Tormach 31101 Technical document

manuals.online logo
manuals.online logoBrands
  • About & Mission
  • Contact us
  • Privacy Policy
  • Terms and Conditions

Copyright 2025 Manuals.Online. All Rights Reserved.