hi Health Innavations hi BTE User manual
hi BTE™hearing aids
Watch a short video on how to use and
maintain the hi BTE products at:
hihealthinnovations.com
User Guide

Table of contents
Getting the most from your
new hearing aids................................................. 1-3
Caring for your hearing aids ............................... 3-4
hi BTE products with ear tube & tip ...................... 5
hi BTE products with ear hook .............................. 6
Turning your hearing aids on and o ................... 7
Wearing your hearing aids ................................. 7-8
Maintaining your hearing aids .......................... 9-12
Battery ............................................................. 13-14
Changing program and volume settings ...... 15-16
Using with telephones and cellular phones;
Telecoils ................................................................ 17
Other uses of a telecoil ........................................ 18
Troubleshooting.................................................... 19
Technical specications ................................. 20-22
FDA statements .............................................. 23-24
Warranty, return and service ............................... 25

1
Getting the most from your new hearing aids
Hearing is a vital part of how you connect with the
world, from laughing at a punch line to sharing a
secret with a loved one. Hearing is also vital to your
overall health. Congratulations on taking control
of your hearinghealth!
While no hearing aid can restore normal hearing and
will not prevent or improve a hearing impairment
resulting from organic conditions, these tips will
help you obtain the most benets from your
hearing aids:
• If you are new to hearing aids, it may take a few
weeks before you are completely comfortable
with them and can fully enjoy the benets. Be
patient as you adjust to hearing sounds that you
may not have heard in a long time. Infrequent
use of hearing aids does not provide full benets,
so your ultimate goal is to wear the hearing aids
all day, every day
• You may nd that a quiet environment is more
comfortable at rst. Gradually introduce new
listening environments
• Whenever possible, directly face the sounds
you are trying to hear and move closer,

2
especially in noisy environments. When
speaking with someone, you can also use facial
cues to help you understand. If you would
like information on speech (lip)-reading or
additional help, consider nding a support
group. A good place to start is the Hearing Loss
Association of America (HLAA) at
hearingloss.org
• Your own voice may initially sound loud, or as
though you are talking “in a barrel.” This is very
common, and most people get used to it over
time
• If you are new to hearing aids, you may hear
background noise (e.g., hum of a fan) that
you may not have heard in a long time. Most
people are able to tune out these noises as they
continue to wear their hearing aids
• When you are in a restaurant, avoid sitting in the
middle of the room or near the kitchen. A booth
to the side or in a corner will be more favorable
• It is not necessary to remove your hearing aids at
security checkpoints (e.g., airports). However, you
should remove your hearing aids for CT and MRI
scans or for other electromagnetic procedures

3
At hi HealthInnovations, we care deeply about
our customers. If you have questions that are not
addressed in this guide or the resources on our
website at hiHealthInnovations.com,please call us
toll-free at 1-855-523-9355, and press 2.
Caring for your hearing aids
Regardless how much you paid for hearing aids,
they are sensitive electronic devices susceptible to
moisture and wax. Do your best to keep your hearing
aids clean and dry at all times. For more information,
visit hiHealthInnovations.com and watch the
hi BTE video.
• When not wearing your hearing aids, open the
battery door to allow any moisture to evaporate.
This also helps extend battery life. Store your
hearing aids in a safe, dry place, away from
direct sunlight and avoid extreme temperatures
• Do not leave your hearing aids in the bathroom
while showering
• When you sweat, be sure to take your hearing
aids o, open the battery door, and allow them
to dry for a minimum of 15 minutes before
putting them back on

4
• Ear wax is natural and common, but it can cause
your hearing aids to whistle or malfunction. It is
important to follow the cleaning instructions on
pages 10-12
• Do not use water, alcohol or other liquids to
clean hearing aids as they may damage them.
If the hearing aids become wet, do not attempt
to dry them in an oven or microwave. Open the
battery door, remove the battery and let the
hearing aids dry naturally for 24-48 hours
• If you live in a humid climate or are around
persistent moisture, consider purchasing a low
cost hearing aid dehumidier or dryer. We have
hearing aid dryers available for purchase
• Ask your doctor to remove excessive wax from
your ears, or ask if you can use an over-the-
counter kit to remove wax
• Remove your hearing aids before using hair
spray, spray perfume or shaving lotions, as these
items can clog or damage your hearing aids
• Do not drop your hearing aids or knock them
against hard surfaces.

5
1. Microphone
and speaker – sound
enters the hearing aid
through the microphone.
The speaker delivers
amplied sound toyou.
2. Program button –
switches between
listening programs.
3. Volume button – changes volume levels.
4. Battery door / on and o – close the door to turn
on the hearing aids. Open the door to turn o
thehearing aids.
Left/Right – Inside the battery door is a red dot
indicating the hearing aid is for the right ear. There
is no dot on the hearing aid for the left ear.
5. Serial number – Each hearing aid has a unique
serialnumber.
6. Ear tube & ear tip – each hearing aid comes with
an ear tube & tip that connects to the hearing aid
speaker. Sound travels through the ear tube & tipto
your ear.
7. Retention loop– helps keep the eartube & tip
inplace.
hi BTE products with ear tube & tip
6
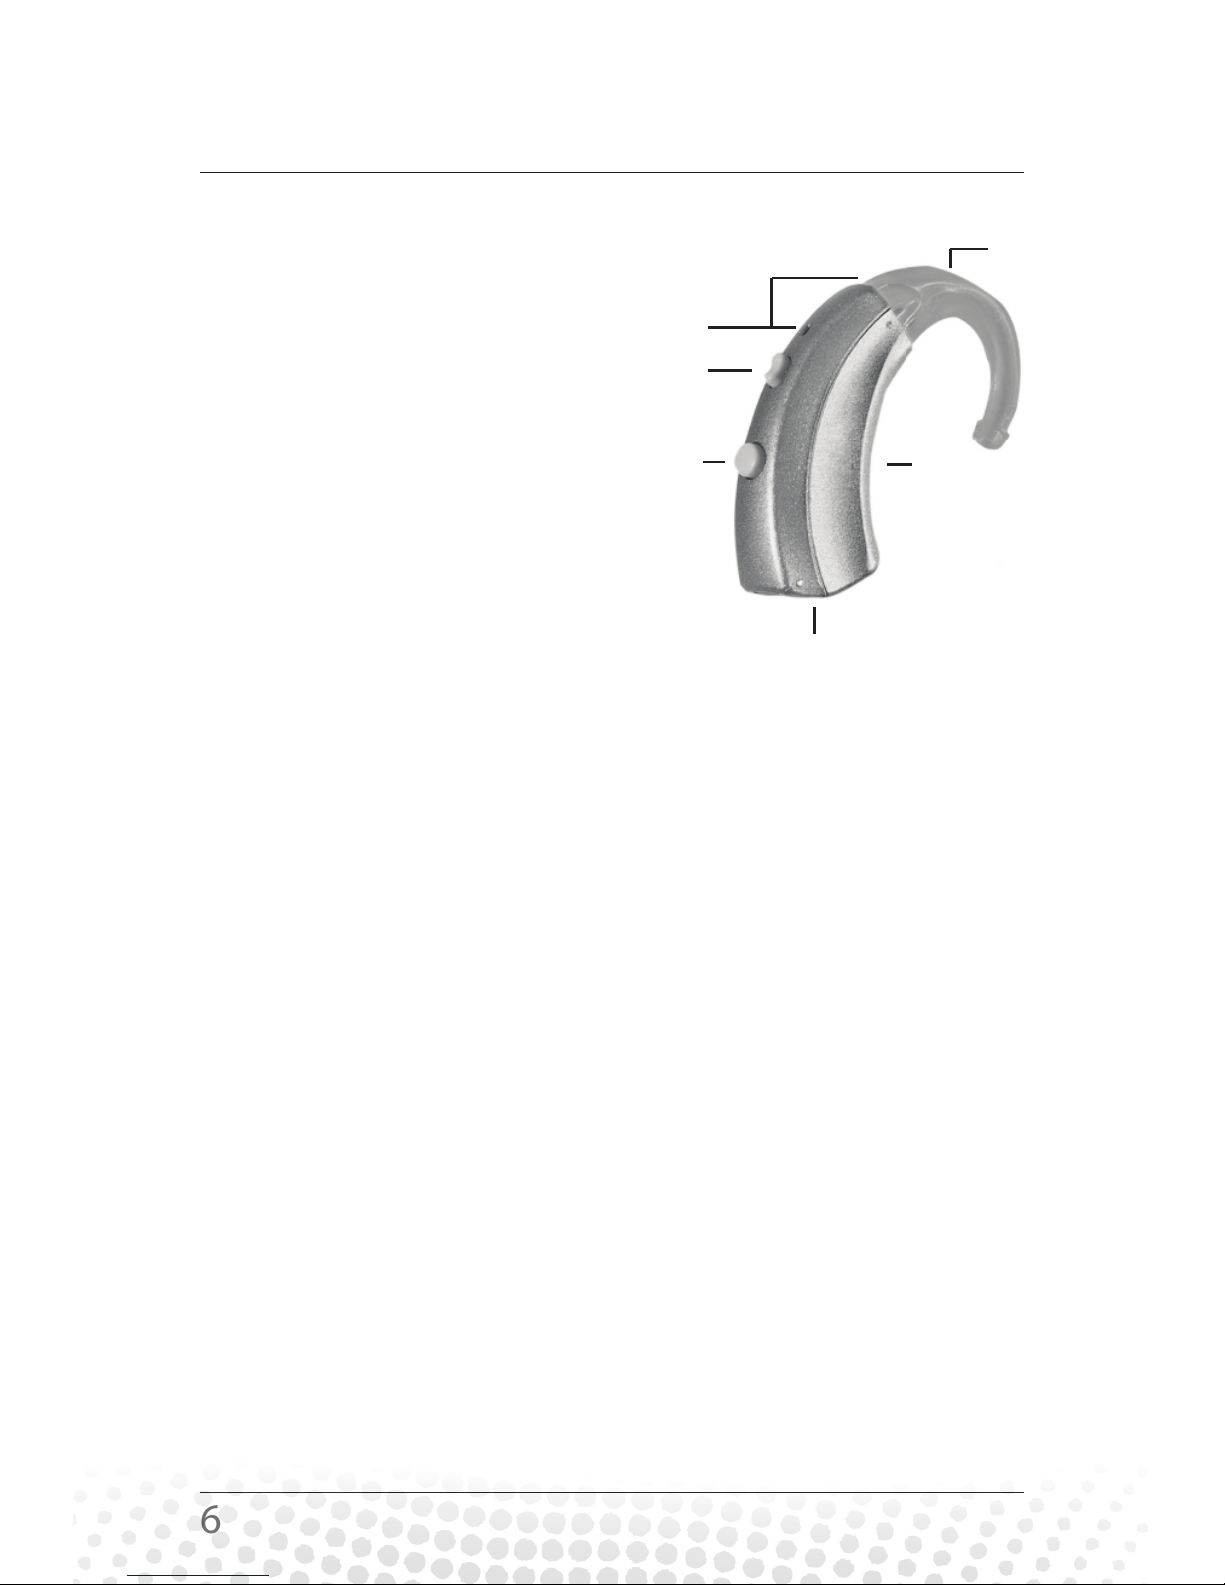
1. Microphone
and speaker – sound
enters the hearing aid
through the microphone.
The speaker delivers
amplied sound toyou.
2. Program button –
switches between
listening programs.
3. Volume button –
changes volume levels.
4. Battery door / on and o – close the door to turn
on the hearing aids. Open the door to turn o
thehearing aids.
Left/Right – Inside the battery door is a red dot
indicating the hearing aid is for the right ear.
There is no dot on the hearing aid for the left ear.
5. Serial number – Each hearing aid has a unique
serialnumber.
6. Ear hook – Each hearing aid comes with an ear
hook that attaches to an ear mold.
hi BTE products with ear hook
1
2
3
4
5
6
7
Your hearing aid has a battery door that acts as an
on/o switch and allows access to thebattery. When
the door is closed, the hearing aid is on. When the
door is open, the hearing aid is o.
1. ON: Simply close the battery door with a battery
in it.
2. OFF: When you’re not wearing your hearing aids,
keep the battery door open to extend battery life.
You do not need to remove the battery. If you are
not planning to wear your hearing aids in the next
12 hours, please remove the battery to allow any
moisture to evaporate.
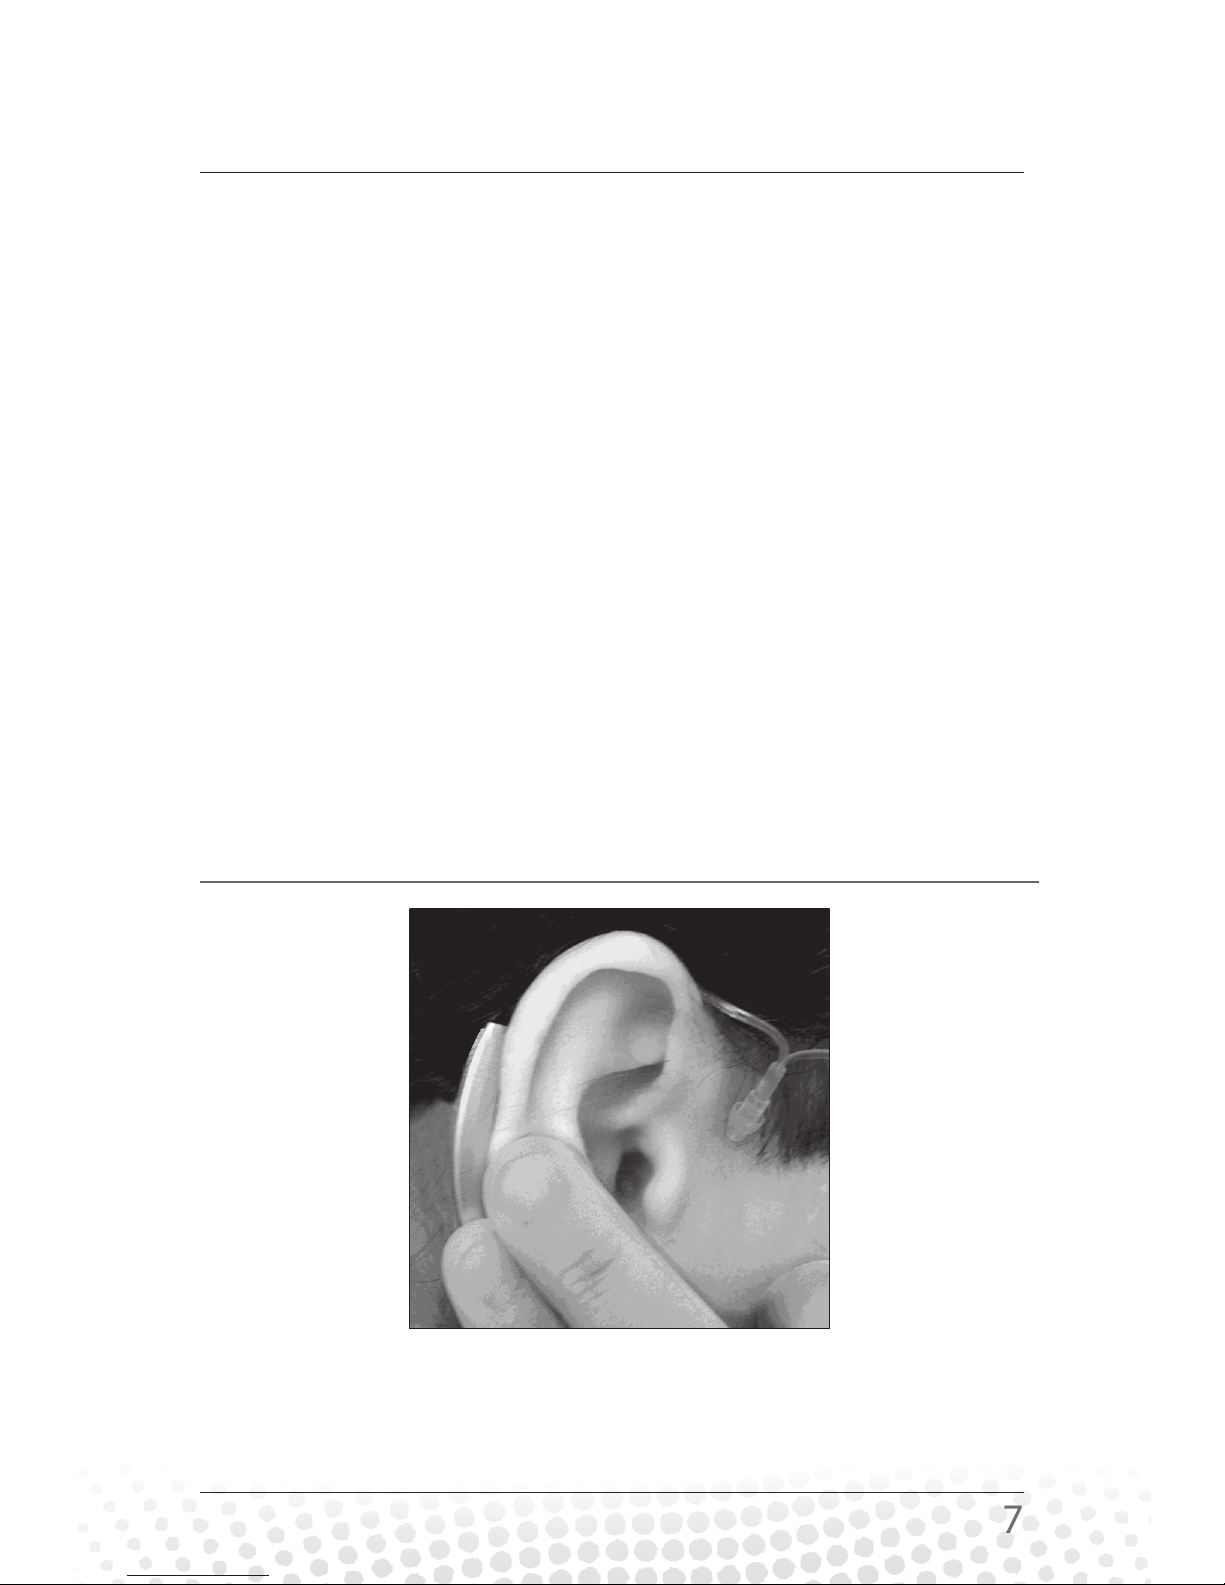
Wearing your hearing aids
Place your hearing aid over the top of your ear until
it rests securely behind your ear.
Turning your hearing aids on and o
8
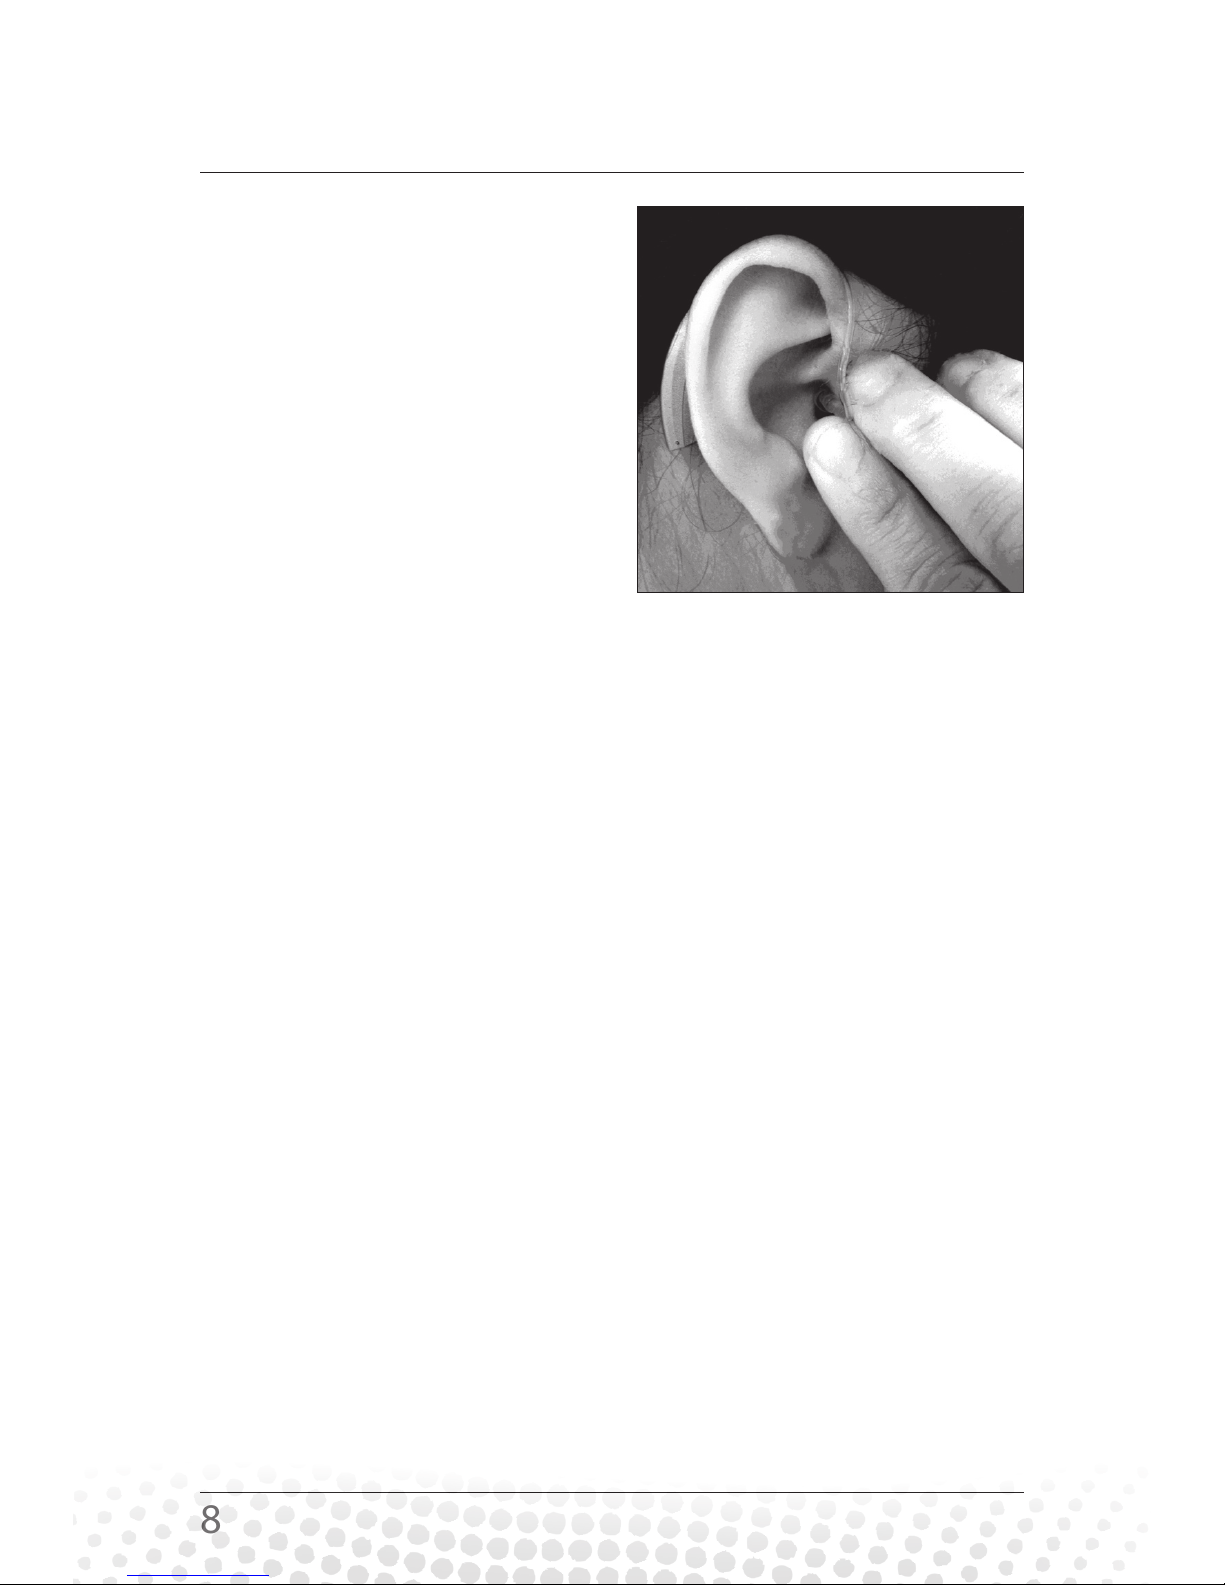
While holding the
hearing aid in place,
insert the ear tip into
your ear canal, and curl/
tuck the retention loop
along the body of your
ear. This retention loop
will eventually tuck in
easily, as body heat helps
it conform to the shape of your ear.
The ear tip should be completely or almost
completely in the ear canal. Use your ngernail to
push the tube (rather than the ear tip) into the ear
canal. This will help the ear tip to go deeper. Your
goal is to go as deep as possible without touching
your ear drum. Proper insertion of the ear tip is key
to getting enough loudness and avoid whistling.
For hearing aids with ear molds, please consult with
your hearing health professional about putting it on.
If you wear eyeglasses, put your glasses on rst and
then put your hearing aids on.
Allergic reactions to hearing aids are unlikely.
However, if you experience skin irritation, redness,
or soreness in or around your ears, please contact
your physician.

9
Maintaining your hearing aids
Depending on your hearing loss, your hearing aids
may be attached to an (a) ear tube & open tip,
(b) ear tube & occluded tip, or (c) ear mold.
Replacing ear tube & tip
Your ear tube & tip will come connected upon
shipment. For optimal performance, replace ear
tube & tip every threemonths.
Removing ear
tube & tip from
hearing aid:Grasp
the “hearing aid
end” of the ear
tube; gently twist
1/4 turn and pull
to remove the
ear tube from the
hearing aid.
Note: Do not bend
the ear tube and tip back and forth to remove it.
Attaching ear tube & tip to hearing aid: Gently
push the “hearing aid end” of the ear tube onto the
hearing aid until it snaps into position.
1) Twist 1/4
turn
2) Pull the
“hearing aid
end” of ear
tube

10
Cleaning ear tube & tip
Between replacements, you’ll need to clean the ear
tube & tip with a cleaning wire, at least once aweek.
Remove the ear tube & tip from the hearing aid by
twisting the “hearing aid end” of the tubing about
1/4 turn, and pulling it straight out.
Thread the cleaning wire through the ear tube,
starting at the “hearing aid end,” until it comes out
at the “ear tip end.” Pull the cleaning wire all the
way through. Be sure to wipe o the wire before
the next cleaning.
Clean the ear tip with a dry cloth.

11
“ear tip end”
“hearing aid
end”
Open t
Note: Ensure the wire goes through the ear tube in
only one direction, from “hearing aid end” to “ear
tip end.” Do not reverse the wire back through the
eartube.

12
Detaching and cleaning ear molds*
*Ask your ear mold provider to see if this applies
to you.
The hearing aid connects to an ear hook, which is
attached to the ear tubing and ear mold.
• Remove the ear mold, tubing and hook in one
piece from the hearing aid by twisting the ear
hook about 1/4 turn, and pulling it straight out
• Washthe ear hook, tubing and ear molds with
warm soapy water and let dry overnight
• After the ear hook, tubing and mold are dry,
reconnect to the hearing aid
Please make sure to
leave the ear hook,
tubing and ear mold
in one piece when
removing from the
hearing aid.
hearing
aid
ear
hook
ear
mold
tubing

13
Battery
NOTE: See page 14 for full battery activation
instructions.
The batteries are air activated. To activate the
battery, remove the tab from the battery and allow
the battery to be exposed to the air for one full
minute before closing the battery door.
The hearing aids use a size 312 battery. The battery
life varies, depending on the amount of hearing aid
use, but is typically about 7-10 days. Please insert
batteries when you receive the hearing aids.
Low battery indicator
A voice warning of “low battery” indicates that the
battery needs to be replaced. If you do not change
your battery, you will hear another warning, at which
time your hearing aid will automatically turn o.
Battery warning information
Dispose of used batteries in an environmentally
friendly way. Do not place batteries in your mouth.
Ifswallowed, contact your physician immediately or
call the National Battery Hotline at 1-202-625-3333.
14
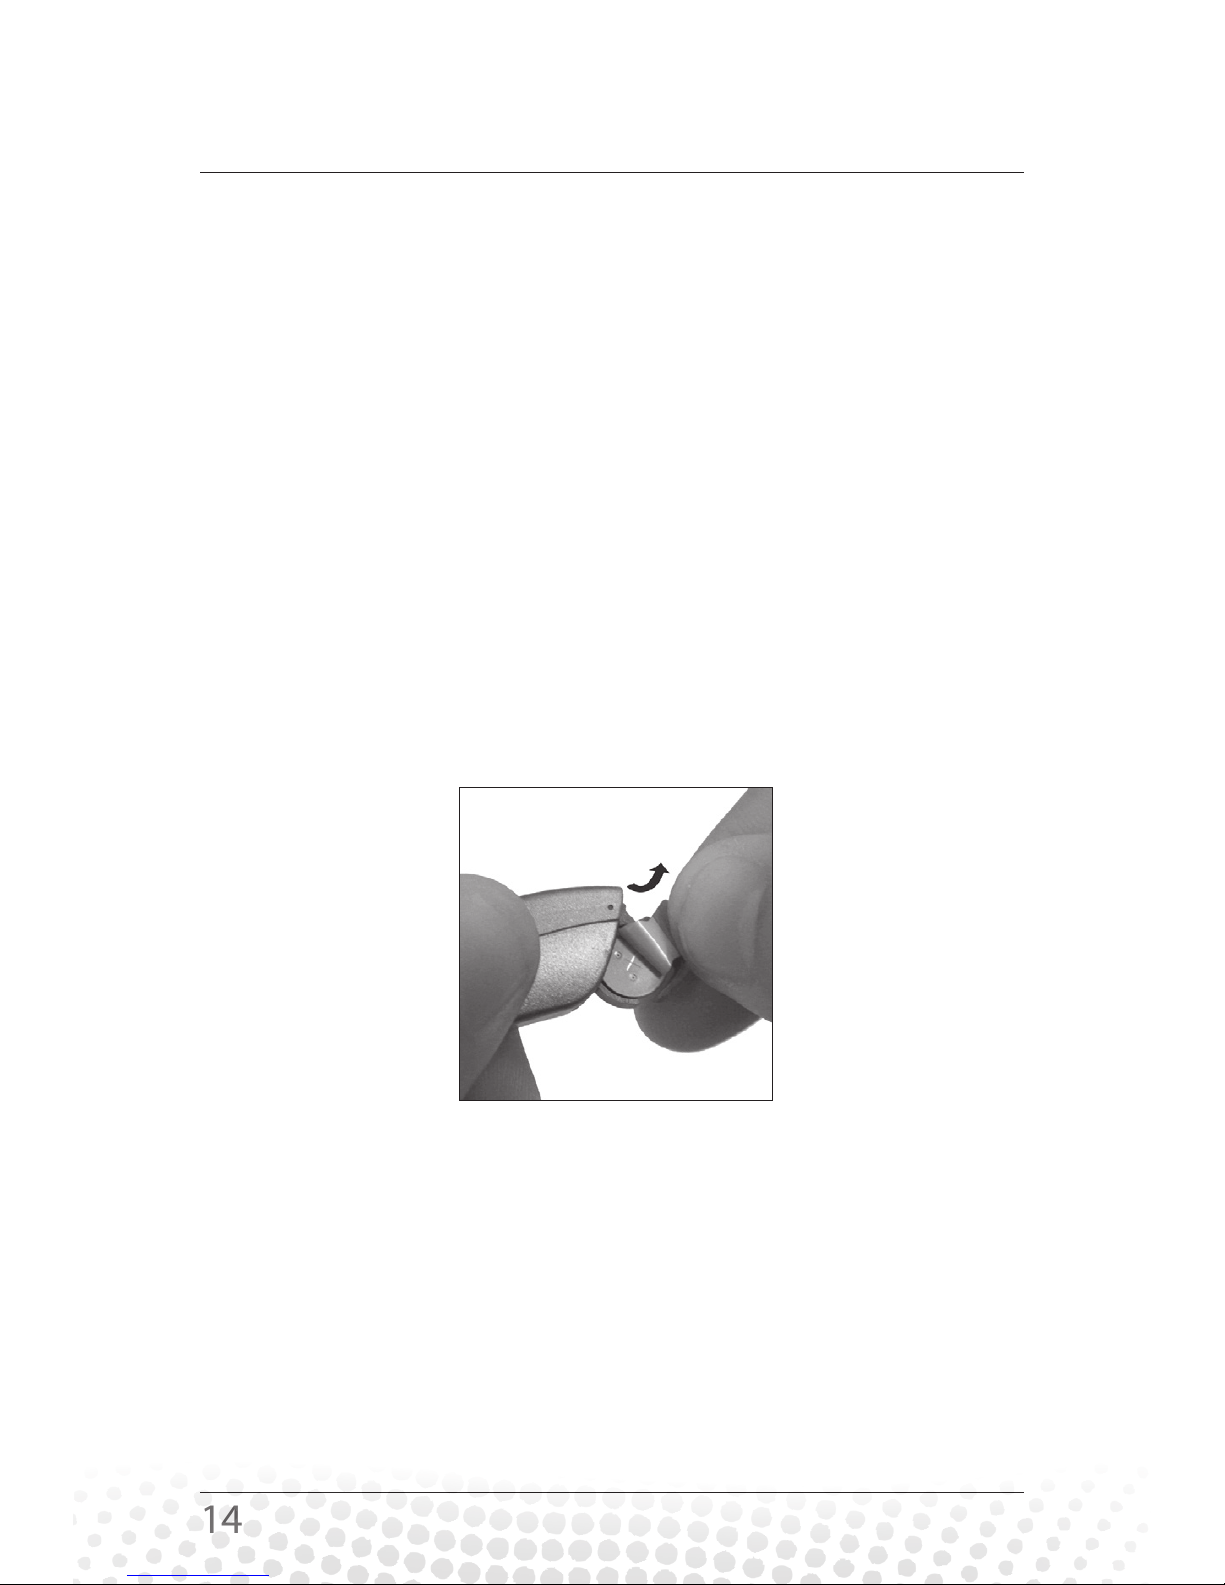
Inserting/replacing the battery
1. Gently pull open the battery door with your
ngernail and remove the used battery. Do not
hold down or press the program or volume
button while opening or closing the battery
door, as this may damage the
hearing aid.
2. Using the plastic tab of a fresh battery, place the
battery into the battery door with the tab facing
up. While holding the battery in place, peel o
the plastictab.
3. To fully activate the battery, wait for one full
minute before gently closing the battery door. If
the door does not close easily, check to see if the
battery was inserted properly.
Note: When the battery is taken out and put back in, the
hearing aid will tell you the current program and volume
settings.

15
If you have worn hearing aids before, you may have
used dierent programs for dierent environments.
Our hearing aids automatically adjust to dierent
environments. Thus, once you determine your
preferred program, you can leave it in that setting.
Program control
The program button allows you to choose between
three program settings*. Spend time using program
1 or 2 to determine which one you like best. Use the
program that sounds best the majority of the time.
Within each program, you can also use the volume
control to make sounds louder or softer if you wish.
Simply press and release the program button
to
change the program setting. The hearing aid will tell
you which program has beenselected. Please keep the
ear tip or ear mold in your ear to hear the notication.
It is important to wait at least 10 seconds after
changing programs before you open the battery
door.
Program 1 “Program 1”
Program 2 (usually the loudest) “Program 2”
Program 3 (telephone or telecoil) “Program 3”
* Hearing aids dispensed by a hi HealthInnovations
professional at your appointment may have less than three
programs.
Changing program and volume settings

16
Volume control
The volume button allows you to choose between
six volume levels. Press and quickly release
the volume button to increase the volume. To
decrease the volume, continue to press the
button until it cycles through the maximum
volume and back to volume 1. Then proceed to
your desired volume level.
The hearing aid will tell
you which volume level has beenselected.
It is normal to have whistling when you hold the
hearing aid in your hand, or when you place your
hand over your ear. However, once the ear tip or ear
mold is all the way in the ear canal (please see
page 8), you should be able to wear your hearing
aids at a comfortable volume without whistling. If
your hearing aid whistles, change to program 1
and/or turn the volume down.

17
Traditional corded phones, cordless phones and
cell phones:
First, try to use the phone as you normally would
hold it. If you cannot hear well, move the handset
up slightly to nd the position that sounds best
to you. If you encounter whistling, tilt the phone
handset at an angle until the whistling stops. It
may help to turn the volume up on your phone.
Practice using the telephone with someone
familiar to you, and move the phone around a bit
to get the best sound.
If your phone is labeled “Hearing Aid Compatible,”
it works with a telecoil (see below).
Telecoils
Your hi BTE may contain a telecoil (labeled on
the hearing aid) which receives electromagnetic
signals directly from the telephone and converts
it to sound. The telecoil setting, which is usually
program 3, turns o the regular microphone, so
you can hear more clearly on the telephone. After
nishing your phone call, change back to your
preferred program, usually program 1 or 2, to
turn on the hearing aid microphone again.
Using with telephones and cellular phones

18
Many people use the telecoil with assistive listening
devices called FM or audio loops. If you go to any
events or religious services and the room is“looped”
that means you can use your telecoil. Set your
hearing aids to the telecoil program. When the
speaker talks into the microphone, the sound will
be picked up by the“loop.” The sound then goes
right into your hearing aid(s). It will turn o the
background noise and allow you to hear the speaker
more clearly. After the event, change back to your
preferred program, usually program 1 or 2, to turn
on the hearing aid microphone again.
Note: You may hear interference while in the
telecoil setting. There may be a “buzzing sound”
from the hearing aids. Fluorescent lighting,
televisions, and computer screens may make this
buzzing louder. Try to move away from these
devices when using the telecoil.
Other uses of a telecoil
Table of contents
Other hi Health Innavations Hearing Aid manuals


