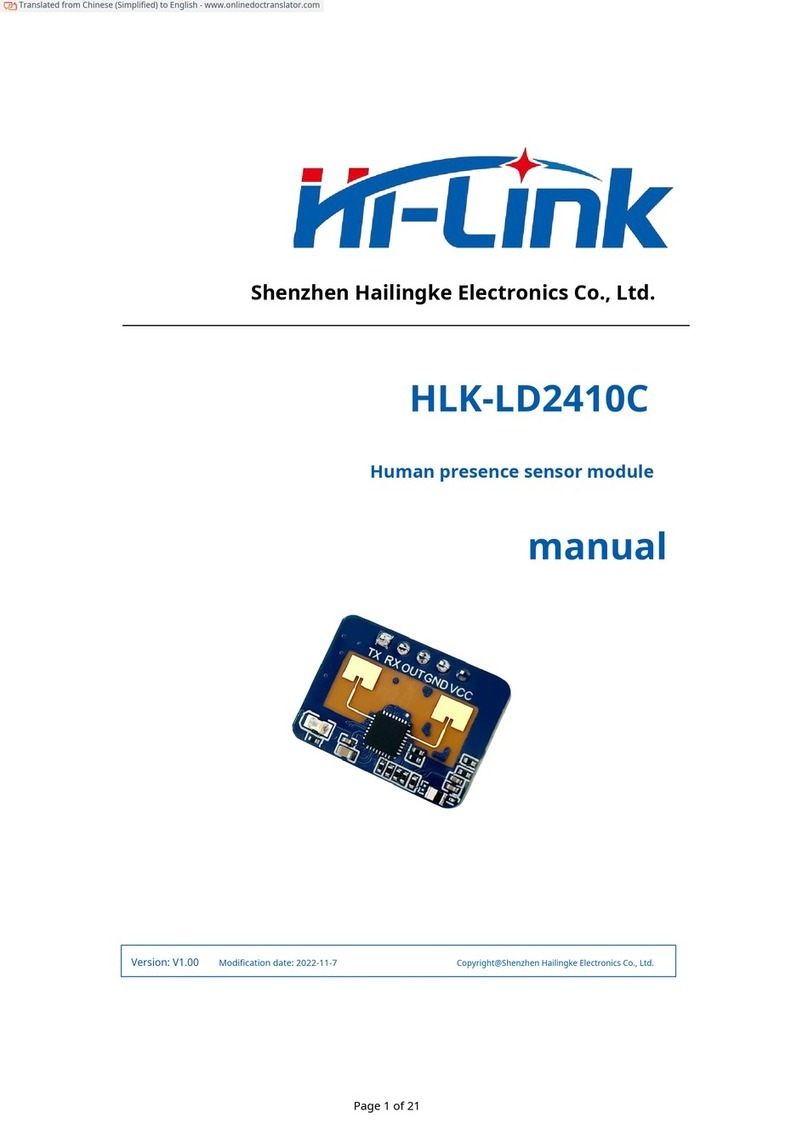
Hi-Link HLK-LD1125H-24G Instructions for use

Human Presence Detection Radar HLK-LD1125H-24G
Application Manual
V1.2
2021-9-16
Due to product upgrades or other reasons, the content of this
document will be updated from time to time. This document is
intended as a guide only, and neither the information nor the
recommendations stated shall constitute any express or implied
warranty.

1
Content
1. Overview............................................................................................................2
2. Module appearance and interface...................................................................... 3
3. Module performance.......................................................................................... 4
4. Debug wiring......................................................................................................4
5. Debug configuration...........................................................................................5
6. Radar installation and testing............................................................................ 12
7. Precautions........................................................................................................ 14
8. Appendix........................................................................................................... 15

2
1. Module Appearance and Interface
HLK-LD1125H-24G is a high sensitivity 24GHz millimeter wave human presence detection
radar module. Different from the traditional radar, which judges the existence of the human
body by detecting the large-scale movements of the human body or the small-scale body
movements, the main feature of this module is to judge the existence of the human body by
detecting the accumulated human breathing and other small-scale movements. Therefore, the
detection of human presence is more accurate than traditional mobile detection radars. Not easy
to miss.
Indoor human presence detection Human body slight moving induction
Modules can penetrate non-metallic enclosures without openings. Common materials
include plastic, glass, acrylic, ceramic, etc.
Embedded ceiling buckle shell (recommended)
Colourful acrylic Glass
86 boxes of plastic panels (recommended)

3
1 2 3 4
2. Module Appearance and Interface
Pin interface definition: (2mm pitch pin header connector isrecommended for the interface)
Pin
Name
Remark
1
VCC
Power supply
5V power
supply
2
GND
Touchdown
3
URX
TTL serial
port receive
4
UTX
TTL serial
transmission

4
23.5G-24.5GHz
Frequency
Typical value
valueTypical
value值
Parameter
\
JNJJJJJK
ameter
Antenna half power
angle
+/-22° (horizontal/vertical)
Data Format
Modulation
FMCW
Detection distance
4m meditate, 8m exercise
Serial ASCII
output
3. Module Performance
Scope Hanging height 3m, static human detection coverage radius>2m
Power
supply电
3.3-5V
Current
80mA
Output serial
3.3V
Detection cycle
4. Debug wiring
HLK-LD1125H-24G uses the serial port to output the test results in string format, so in the
testing, you can do a quick test evaluation on the serial port assistant firstly.
adaptive

5
The module and serial board can be connected as shown as above:
Module 1 pin is connected to serial board 5V
Module 2 pin is connected to serial board GND
Module 3 pin is connected to serial board TX module
Module 4 pin is connected to serial board RX
5.Debug configuration
The HLK-LD1125H-24G can be debugged and tested on the computer through the serial port
assistant.
Use any serial debugging tool. The baud rate is 115200, 8 data bits, 1 stop bit, check bit and
flow control are None, select ASCII for receive settings, and select ASCII for send settings.
Product supports UART text protocol
1
baud rate
115200
2
word width
8bit
3
stop bit
1
4
even-odd
check
None

6
Radar output
When the radar detects a larger motion, it outputs mov, dis=***.
When the radar detects the static state of the human body or the movement of a small amplitude,
it will output occ, dis=***. dis represents the target distance, in meters.
When the radar cannot detect the target, it stops outputting. The user can make a certain delay in
the upper layer to avoid frequent unmanned state when the signal is weak.
Configuration directives
rmax=**,Set the maximum detection distance. The distance value with one decimal place
can be set, and the unit is meters. For example: Set the module to only detect targets within a
distance of 6 meters. Then send rmax=6, at this time the module will only output the target
within 6 meters. Targets 6 meters away will not output. The module defaults to rmax=6.
mth1=**,Set the segmentation sensitivity threshold of 1. mth1 corresponds to the signal
threshold within 2.8 meters. The default value is 60.
mth2=**,Set the segmentation sensitivity threshold of 2. mth2 corresponds to the signal
threshold within 2.8-8 meters. The default value is 30.
mth3=**,Set the segmentation sensitivity threshold of 3. mth3 corresponds to the signal
threshold beyond 8 meters. The default value is 20.
The larger the sensitivity value, the less sensitive the module is. The main reason for segment
sensitivity is that the reflected signal of the short-range target will be relatively stronger, so the
same sensitivity as the long-distance target is not required at short distances. At the same time,
according to different environments, you can also make targeted settings. The segment
sensitivity can be debugged with the test mode. Generally, it is recommended that customers test according to
the default parameters. If you encounter problems, please consult our technical staff.

7
test_mode=*,The setup module goes into the test module. When test_mode=1, the
module enters the test module. In the test mode, the module will output the signal strength
str value in addition to the mov and dis information. The module defaults to test_mode=0.
save,Save Settings. Otherwise,
power down and restore the default
value.
get_all,Get the current parameter
settings.
Note: The command needs to be sent with carriage return and line feed to take effect.
Configuration instruction demonstration
Take the serial port assistant window as an example to demonstrate the function
and output of each command:
Send rmax=8, the module will feedback“received message: rmax=8
rmax is 8.00”Indicates that the command configuration is successful. If you do not
receive this feedback, please check whether the sending command has a carriage
return and line feed, and resend the command.
Send mth1=100, the module will feedback “received message:mth1=80 mth1 is 80”
Indicates that the command configuration is successful. If you do not receive this feedback,
please check whether the sending command has a carriage return and line feed, and resend
the command.

8
Both mth2 and mth3 are the same operation, so won't repeat them.
Send save, the module will feedback “received message: save all vars have been
saved”, indicating that the command configuration is successful and the
parameters are saved. If you do not receive this feedback, please check whether the
sending command has a carriage return and line feed, and resend the command.
Send get_all, the module will feedback“received message: get_all” And return all
parameter settings of the current module. If you do not receive this feedback, please
check whether the sending command has a carriage return and line feed, and resend
the command. You can use this command to check whether the parameter settings
of the module are normal: after setting the parameters and sending save, power off

9
and restart the module, and then send get_all to check whether the parameters are
configured normally.
Send test_mode=1, the module enters the test mode, and the output information of the module
will have signal strength.
The default setting of the module is set according to the highest sensitivity, and the
test site is an open large room (see the test site diagram in the appendix).
When the application environment changes, such as entering a small closed room, the
noise floor may be raised beyond the default sensitivity threshold due to multiple
reflections and refractions of the signal due to the small room, or other surrounding
electromagnetic factors. At this time, you need to set the corresponding mth value by
entering test_mode and observing the size of dis and str when no one is present.
For example: if after entering test_mode, there are no people in the room, but the
module keeps outputting mov or occ, dis is within 2 meters, and str is within 80. According
to the default mth1=60, the str at this time exceeds mth1. Therefore, in such an
environment, mth1 needs to be set to >80. Users can observe the output distance and str
according to the range corresponding to mth to determine whether each mth value is
suitable. For this setting, it is recommended that customers consult our technical staff
during actual debugging. Our technical staff will provide professional guidance.

10
Using the host computer
We provide a matching host computer for users to use for evaluation. Different
from the direct observation of the module output through the serial port, the host
computer can do some upper-layer delay processing after receiving the serial port
signal output by the module.
1. After connecting the module, click serial port detection -serial port selection -open
serial port,the display interface will display the distance value and status.
Someone's here status corresponds to the module serial port mov output. The
displayed distance is the output value of the module serial port dis=**.

11
2. Application layer settings: It is mainly used to set the switching between people, static
and unmanned states. Enter an integer greater than 2 in the Static State window and click
Set. When the host computer continuously receives occ times greater than or equal to the
set value, the host computer displays that someone is still. For example, if it is set to 6, it
means that when the host computer needs to receive occ 6 times continuously, it will
display that someone is still.
3. Enter an integer > 1 in the switch unmanned window, and the host computer will enter the
system when it does not receive any data within the set time. into an unmanned state. The
window value unit is seconds. For example, if it is set to 30, it means that the radar output
will not be received within 30 seconds.
enter the unmanned state.

12
4. Click the setting interface to enter the parameter setting interface. Sensitivity drop-down
menu selects 1-9, 1 is the default sensitivity setting, and each increase of 1 increases the
sensitivity threshold mth1/mth2/mth3 by 10%. The maximum distance window sets the distance
threshold, corresponding to the rmax parameter. Click save after setting, otherwise it will fail
when power off, corresponding to the save command.
6.Radar installation and testing
Test application scenario 1: Horizontal installation straight line test
The installation height is 1 meter, and the human body is facing the radar when measuring.
Test coverage in both sitting and walking states.
Reference coverage
The figure below shows the radar coverage when it
detects sitting and walking. for reference.
The blue area is the mobile sensing area
The orange area is the static presence sensing area

13
radar
Test application scenario 2: hanging height vertical test
This module can also be hung up for human presence detection. Our test scenario is a hanging height
of 3 meters to measure the FOV of the human body standing still and walking.
The blue area is the mobile sensing area
The orange area is the static presence sensing area

14
Precautions
When the radar is working, there should be no metal or other medium that hinders the
transmission of electromagnetic waves in front of the antenna;
Different housing materials and the distance between the module and the inner surface of
the housing will result in different spectral energy returned and parameter settings, which
need to be fine-tuned according to actual conditions. It is generally recommended that the
module be 5-6mm away from the housing, which can be adjusted according to the actual
measurement.。
We recommend users to test according to the default settings of the module. If the effect
is not as expected, you can send the shell structure to the original factory, and the original
factory will test and adjust a reference setting.
The module is for human movement and presence detection, so the distance value given
is not accurate distance measurement, but only indicates the approximate distance of the
target.
If the person under test sits quietly with his back to the radar, the sensing effect will
decrease. The rise and fall of the chest or abdomen caused by breathing cannot be
detected when the back is facing the radar.
It is recommended to use plastic as the casing, because the radar is a very sensitive
module in the presence of the human body. If the casing is made of a material with large
attenuation, it may affect the detection.
Install to avoid the air outlet of the air conditioner, fans and other objects.
Sensitivity is adjustable according to user scenarios. This manual gives the highest
sensitivity case. To adjust sensitivity, contact technical support
If you need more technical support, you can contact sales.

15
Appendix
Module test environment display: an empty room with a length of 18 meters and a width
of 10 meters.
Hanging height installation

15
Table of contents
Other Hi-Link Security Sensor manuals
