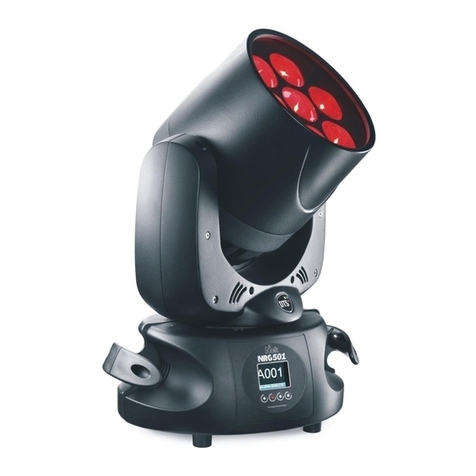
Hi-ltte HL-150BSW LED User manual

HL-150BSW LED
USER MANUAL
The LED BSW 3-in-1 is a powerful LED Moving Head to date. It uses a specially designed
150W LED engine that offers massive output for most large venues and event productions.
It is a great hybrid utility fixture as it acts as a beam, spot and wash all in one fixture.
What’s more, is it comes in a smaller footprint than most other movers in its class.
The LED BSW 3-in-1 offers motorized focus, motorized zoom, circular rotating prism,
1 color wheel, 2 GOBO wheels (1 wheel fixed metal & one wheel rotating/replaceable
GOBOs). There is a LCD function display on the front panel, with the rear panel offering
powerCON In/Out and 3-pin DMX connections.
Protect the LED BSW 3-in-1 during storage and transport with the road case..

Contents
1: Safety Instructions --------------------------------------------------3
2: Technical Parameters ---------------------------------------------4
3: Schematic Lighting Components ------------------------------5
4: Packing And Shipping --------------------------------------------6-7
5: Installation -----------------------------------------------------------7-8
6: AC Power-------------------------------------------------------------9
7:Dynamic Effects -----------------------------------------------------9-10
8: LCD Control --------------------------------------------------------11-12
9: DMX Channels -----------------------------------------------------13-14
10. Trouble Shooting--------------------------------------------------- 15
11. Cleaning--------------------------------------------------------------15
12. Photometric Chart -------------------------------------------------16

1. Safety Instructions
•Before using this product, please observe carefully the product is not unwrap or damage during
transportation.
•As a result of damage during transporting , please do not use the lights, and contact with the
dealer or manufacturer. If you have questions about how to operate the fixture safely, please
contact us by calling the 24-hour service hot line on +86 -02036633371.
•Before running products, to ensure that the voltage and Hertz in accordance with the
requirements of lights.
•It’s very important, connecting ground wire to avoid the electric shock.
•This product is for dry indoor environment.
•This product must be installed on the sufficient space, adjacent to interface the shortest distance of
50 cm, to ensure that the lights will not crash each other.
•Before moving or repairing the product, please unplug the power.
•When it working, ensure that no inflammable and explosive near objects.
•When handling this product, lift the armrest base, rather than the lamp body.
•This product is suitable for a maximum temperature of 40 degrees Celsius, when the surrounding
environment is higher than 40 degrees Celsius, please do not use this product.
•Do not touch when working, the product runs very fast. Prevent hand injury.
•Problems happens when operating performances, should immediately stop using the lights.
•Do not carry out maintenance, repair damage caused or likely to cause other problems.
•Please contact the company’s maintenance repair. During the repair process, use the same
type of accessories.
•Please read the instructions carefully, especially regarding the installation, using, maintenance parts.
•Always transport the lighting in a packed anti-shock protection carton or flight case

2. Technical Parameters
Optical
•Light Source: 150W White LED
•Beam Angle: 8°to 30°
•Spot Angle: 30°
•Wash Angle: 10°to 37°
Specifications
•Pan / Tilt Range: 540°/ 270°
•Color Wheel 1: 8 + Open
•GOBO Wheel 1: 6 Fixed + 4 Open
•GOBO Wheel 2: 6 Rotating/Replaceable + Open
•Shutter: Electronic
•Focus: Motorized
•Frost: 37°(Wash)
•Prism: Rotating Circular Prism(Inner circular 8 facet prism+ outer circular 16 facet prism)
•Dimensions (LxWxH): 9.15” x 6.75” x 14.1” / 305 x 225 x 470mm
•Weight: 22.7 lbs. / 10.3 kg.
Connections
•Power Input: powerCON
•Power Pass through: powerCON @ 220V
Control
•Control Channels: 17
•DMX Modes: 3
•Control: 3-pin DMX
•Pan / Tilt Correction: Automatic
Electrical
•Input Voltage: 100-220V 50Hz/60Hz (Auto Sensing)
•Power draw 120V 60Hz: 205W, 1.72 Amps, PF 0.99
•Power draw 220V 50Hz: 205W, 0.93 Amps, PF 0.99
Certifications
•CE, ROHS
•IP 20: Dry area, No liquids
What's Included
•Power Cable- 1.2M/3.6’ PowerCON
•Qty: 2 Clamps
•Powercon In & Out
•Manual
Optional Accessories
•Road Case (Fits 2)

3. Schematic Lighting Components
Dimensions
Parts

4. Packing And Shipping
4.1 Packing
Moving Head LED light is packaged by carton or standard 2in1flight case.(selectable 1in1 or 4in1),
Random accessories items shown below
Name
Quantity
Unit
User Manual
1
piece
Signal Line
1
piece
Powercon In & Out
1
set
Hanging lamp
hook and fastener
2
piece
Power line
1
piece
4.2 Transport protection locks
In order to transport it easy to protect the lamp body has two locks (XY axes each a lock), X-axis has
four lock position, Y-axis triple lock, lock locked in the center position in the transportation and light a
vertical position with the arm member
Pan protection lock Tilt protection lock Lock position sketch map
4.3 Packing
1. Disconnect the power supply so that the lamp to cool completely before packaging equipment, at
least 15 minutes or more.
2. Close the light protect lock, when cleaning the surface of the light dust
3. Cover the light, seize the equipment both aluminum handles on to make it upside down and gently
placed in the box.
4. Add lighting accessories after placing the light in box.
5. Up to two crates stacked prohibited upside down.
4.4 Unpacking
1. Open the box and bag
2. Seizing the equipment handles, lifting and carrying away the light from the box .Or opening the
flight case cover placing lift boom close to the light base, then equiping light hook on light base
bottom tightening Quick Install locks. At last rising away boom to the top of the lamp from flight
case, put the flight case away.
3. Before turing on the light,should open the light protecting lock

Note:
Upon receipt of lamps, please check if there is damage to the fold closure caused by
transport, where there is transportation damage, please do not use this fixture, and contact
us as soon as possible
Users should ensure that light and installation materials are checked for regular safety checks,
Unprofessional incorrect installation can lead to dangerous, if the lack of working conditions and professional
standards, please operate the light by professionals. Do not use the light if the working temperature isn’t
-15°-40°.When the lighting installation, dismantling, moving, or servicing, do not stand directly beneath the
lamp. The operator must ensure that the fixtures are securely connected, installing the light after
professionals approving electrical parameters make sure that these installation must be checked at least
once per year by experts.
5. Installation
5.1 Installating rigging
150W LED 3 In 1 moving head lights can be placed on the stage or on a stand in any direction.
Quick lock system can quickly and easily remove or install a light hook.
Note:
Must use two clamps fixed equipment, and are 1/4 buckle fastening jig, only fully rotated
90 degrees clockwise to lock fastener.
5.2 Fixed equipment
1. Before installing fixtures must verified rigging equipments
are not damaged, and can bear at least 10 times of light’s
weight. Check the building can be beared at least 10
times of total weights of light, fixture, and cable
accessories
2. Insert the locked hook fastener into base mounting holes
horizontally, grab the handle clockwise 90 degrees
fasteners, in the same way to install a second fastener,
make sure the fastener is fastened under the light base.
3. If truss can be lifted the equipment can be directly
clamped from flight case and locked fixture base. Then
hung on the light and fixed it. Before rising the light to right
height, connect the power cord and signal cable.

Lights must be placed vertically upward. The shortest distance between working lights must be
more than or equal to 900mm. Layout the lighting installation as shown above..
5.3 Data cable
Data cable is DMX512 signal
Signal line connections is X-type connector, X-type connector-----If the external flexible cable or cord of
this light is damaged, please replace professional cable or cord from the manufacture or its agent.Lights’
DMX input and output connects to a three-pin XLR, first pin is grounded, then negative signal is second
pin, third pin connects to the positive polarity signal.
In order to prevent reception reflection and interference control signal, a terminal plug must be installed
on the first branch of the connected device last 3-pin output jack.
3XLR plug
Terminal plug connect with XLR plug second or
1.Grounding
third by a 0.25w 120ohm resistor, then connect
2.Signal-
the resistor into last light’s DMX output jack
3.Signal+
The controller connects to the nearest input XLR 3-pin, then from the output of the device connects to
the input of the next device, continuous connection one by one, the final output data cable terminal
equipment plug one end into the terminal.
If the signal transmission is long-distance , 512 signal amplifier must be
added. DMX512 signal controller connect to the input of the amplifier first,
then connect to the fixture from its output, couple with the terminal plug last.

Do not use two separate output connections. To connect the
branch, a separating consecutive DMX512 signal amplifier must
be used to separate.
Please use the shielded twisted-pair cable. Standard
microphone cables can not be reliably controlled
long-distance data.
6. AC Power
6.1 Fuse Size
Power: 100-240v~
Fuse: 4A 5 * 20 main fuse
6.2 Power Connection
If the external flexible cable or cord of this light is damaged, the line is up to the manufacturer or its
service agent or a similar qualified person to replace, in order to avoid danger. Connect the power
supply personnel must have the appropriate qualifications before proceeding, you must make sure you
are using the power supply voltage matches the voltage identified and have overload or leakage
protection. Directly connect the device to the power supply, do not connect to the silicon box dimming
system, otherwise damage to the equipment.
7.Dynamic Effects
7.1 Gobo wheel
A 6 rotating gobo +1 open composed of glass gobo wheel, customers could change them according to the
needs of their own custom a variety of simple gobos. A static gobo wheel made of 6 fixed gobo +4 open
7.2 Color Wheel
One color wheel is with 8 colors.
The color can be customized.

7.3 Optical Lens focus/zoom
Adjust the optical lens, using mute sound motor + zoom system to make the gobo clearly.
7.4 Prism
The circular prism can be clockwise & counter-clockwise direction rotating and the speed can be adjustable.
Perfect match color & gobo, adding rotating effect, can creat a variety of gorgeous dynamic lighting effects.
7.5 Dimmer & Shutter
0-100% Mechanical Dimmer.
The dimmer can be operated immediately. The shutter speed can be adjusted and the highest speed can be
up to 25times/seconds. Shutter: Pulse effect; random strobe slow to fast (0.5-9F.P.S)
7.6 Frost
Compose of a piece of frost, can achieve spot zoom to complete the soft effect according to the actual
control.
7.7 PAN & TILT MOVEMENT
PAN:540 Tilt:270 16 Bit
PAN&TILT movement speed can be adjusted

8. LCD Control

Manual Control –you can adjust beam spot wash
Beam - Setting adjustment
1. Press the ENTER button, then screen touch MAUNAL CONTROL and select Channel
2. Use the UP and DOWN buttons or screen touch to make your adjustments, make FIXATION GOBO
value 013, FOCUS value 243, ZOOM value 007, then will show beam effect.
Spot- Setting adjustment
1. Press the ENTER button, then screen touch MAUNAL CONTROL and select Channel
2. Use the UP and DOWN buttons or screen touch to make your adjustments, make FOCUS value
097, ZOOM value 253, ROTATING GOBO value 036, then will show gobo effect.
Wash- Setting adjustment
1. Press the ENTER button, then screen touch MAUNAL CONTROL and select Channel
2. Use the UP a nd DOWN buttons or screen touch to make your adjustments, make FOCUS value
168, ZOOM value 253, ROTATING GOBO value 255, then will reach the maximum wash area.

9. DMX Channels
Channel
Value
Description
1
PAN MOVEMENT
2
PAN FINE
3
TILT MOVEMENT
4
TILT FINE
55
0-255
PAN & TILT FAST TO SLOW
6 Dimmer
0-255
Linear Dimming
7
Shutter
0-4
Shutter off
5-64
Random shutter
65-128
Regular shutter
129-160
From dark to bright shutter
161-192
From bright to dark shutter
193-224
Shutter effect1
225-249
Shutter effect2
250-255
Shutter on
8 8
Color
0-8
White
9-16
Color1+white
17-24
Color1
25-32
Color1+color2
33-40
Color2
41-48
Color2+color3
49-56
Color3
57-64
Color3+color4
65-72
Color4
73-80
Color4+ color 5
81-88
Color 5
89-96
Color 5+ color 6
97-104
Color 6
105-112
Color 6+ color7
113-120
Color 7
121-128
Color 7+ color 8
129-136
Color 8
137-144
Color 8+white
145-200
Clockwise flow
201-255
Counter-clockwise flow
99
Fixed gobo
0-6
White
7-13
Gobo1
14-20
Gobo 2
21-27
Gobo 3
28-34
Gobo 4
35-41
Gobo 5
42-48
Gobo 6
49-55
Gobo 7
56-62
Gobo 8
63-69
Gobo 9
70-76
Gobo 9 shake
77-83
Gobo 8 shake

84-90
Gobo 7 shake
91-97
Gobo 6 shake
98-104
Gobo 5 shake
105-111
Gobo 4 shake
112-118
Gobo 3 shake
119-125
Gobo 2 shake
126-132
Gobo 1 shake
133-192
Gobo Clockwise flow
193-255
Gobo Counter-clockwise flow
10
Rotating gobo
0-8
White
9-17
Gobo1
18-26
Gobo2
27-35
Gobo3
36-44
Gobo4
45-53
Gobo5
54-62
Gobo6
63-72
Gobo6 shake
73-82
Gobo5 shake
83-92
Gobo4 shake
93-102
Gobo3 shake
103-112
Gobo2 shake
113-122
Gobo1 shake
123-132
white shake
133-193
Clockwise gobo flow
194-255
Counter-clockwise gobo flow
11
Gobo rotation
0-9
Off
10-91
Gobo clockwise rotating
92-173
Gobo Counter-clockwise rotating
174-255
Gobo rotating back and forth
12
Prism
0-7
No prism
8-36
Prism
37-73
Prism1 macro
74-110
Prism 2 macro
111-147
Prism 3 macro
148-184
Prism 4 macro
185-221
Prism 5 macro
222-255
Prism 6 macro
13
Prism Rotating
0-9
Prism shut
10-91
Prism clockwise rotating
92-173
Prism counter-clockwise rotating
174-255
Prism rotating back and forth
14 Frost
0-255
Linear frost
15 Focus
0-255
Focus
16 Zoom
0-255
Linear Zooming
17
Reset
0-79
No function
80-100
Auto
101-255
Reset

10. Trouble Shooting
Listed below are a few common problems that you may encounter, with solutions.
Unit does not work, No light output and the fan does not work;
1. Check the power connection and main fuse.
2. Be sure the fuse holder is completely and properly seated.
Not responding to DMX Control;
1. Check the DMX connectors/cables to see if they are linked prop- erly.
2. If the DMX LED is on and no response to the channel, check the address settings and the DMX
controller polarity.
3. Try using another DMX controller.
4. Check to see if the DMX cables run near or run alongside to high voltage cable. It may cause damage
or interference to DMX interface circuit.
One of the channels is not working well;
1. The stepper motor might be damaged or the cable connected to the PCB is broken.
2. The motor’s drive IC on the PCB might be out of condition.
11. Cleaning
Regularly clean the outside of the optical lens focusing on the dust. Based on the number of lamps use a
clean environment to determine: Are they moist, smoked or is the surrounding environment
particular-ly dirty, which can cause dust deposition lamps.
Please use a glass cleaning solution and a soft cloth to wipe the focusing optical lens. Carefully dry each
part. At least 20 days to clean the dust outside a lens, the lens inside 30-60 days to clean up the dust once.
Regular inspection lamp fan and bottom case fan, a fan of at least 20\days to clean up dust deposition.
Cleaning must be executed in case of power failure.

12. Photometric Chart
Table of contents
Popular Dj Equipment manuals by other brands
Guangzhou Amin Electronics
Guangzhou Amin Electronics DMX 2401 user manual
Contest
Contest IPFLOOD5X15QC user guide
Chauvet Professional
Chauvet Professional onAir IP panel min Quick reference guide

Brighter
Brighter Eye 1200 Pro user manual
Velleman
Velleman HQ POWER VDL10MB user manual
Ecler
Ecler HAK360 Service manual
