High Energy Sports Quantum Series User manual
High Energy Sports Inc 714-632-3323
1
Quantum Series
Hang glider Parachute Manual
High Energy Sports Inc.
1081 Shepard Unit A
Anaheim, CA 92806
Phone: (714) 632-3323
FAX: (714) 632-6622
www.highenergysports.com
rev. 8-04
Warrantees Disclaimer
It is expressly understood and agreed that by the use hereof by the buyer or any subsequent user that the
manufacturer and/or seller shall in no way be held liable or accountable, upon or under any guaranties or
warranties, express or implies, statutory, by operation of law or otherwise beyond that expressed herein.
The merchandise is SOLD WITH ALL FAULTS AND WITHOUT ANY WARRANTY INCLUDING THE
WARRENTY OF MERCHANTABILITY OR FITNESS FOR ANY PARTICULAR PURPOSE. Manufacturer also
disclaims any liability in torts for damages, general or consequential, including personal injuries, resulting from a
malfunction or from a defect in design, material, workmanship or manufacture whether caused by negligence on
the part of the manufacturer consumer or seller.
There are no tests, standards, or certifications for hang gliding parachutes manufactured in the United States.
“Limited warrenty” High Energy Sports Inc. will warrant all goods against defects in materials or workmanship for 6
months, provided that the consumer follows all inspection, maintenance, registration and use procedures. Any
deviation from manufacturer's specifications concerning maintenance, repair, and alteration or modifications
constitutes willful negligence and will be done at the operator's own risk and result in waiving the above limited
warrenty.
The period of limited warrenty is limited to 180 days because beyond that period of time normal use by purchaser without
inspection by certified rigger or manufacturer may have deleterious effects on it. Damages of buyer and/or user shall be
deemed liquidated in the costs of replacement as above. Manufacturer and/or seller shall in no event be held liable for
personal injuries or for other damages, whether general or consequential to any person, caused by any use of this
merchandise, or by lack of use, or by misuse, and shall have no other liability in connection with this device. Manufacturer
and seller hereby DISCLAIMS and purchaser and user hereby WAIVES ny such liability.

High Energy Sports Inc 714-632-3323
2
INTRODUCTION
Thank you for selecting a High Energy Sports Inc parachute system. This manual will provide
you with information on the installation, operation, and maintenance of your High Energy
Sports Quantum Series parachute. It must be remembered that this is an emergency reserve
canopy designed to slow your rate of descent and reduce your chance of death.
When you contemplate the use of this system, you will probably be in a life threatening
situation, therefore to reduce your risk of serious bodily injury or death it is critical that you
follow the installation and maintenance instructions outlined in this manual.
The information contained in this manual is not intended to replace qualified instruction in the
care and use of emergency hang gliding parachutes, nor is it intended to replace the packing
and inspection duties of a qualified rigger.
We encourage you to attend as many parachute clinics as possible and practice simulated
deployments on the ground prior to each repack. If you have any questions or concerns
please do not hesitate to contact us.
OWNER'S RESPONSIBILITIES
To read and understand this manual before installing and/or using this parachute system.
To read all warning labels.
To fill out and return owner's registration & installation page.
Not to deviate from manufacturer's instructions or from standard practices in the installation
maintenance of the system.
Never allow abuse or misuse of the parachute in any manner.
Never exceed the operational limits of your hang glider or of yourself.
Contact High Energy Sports immediately upon emergency use of this system.
Operational Limitations
QS 330: Maximum total suspended weight= 330 lbs
QS 440 Maximum total suspened weight= 440 lbs
QS 550: Maximum total suspended weight= 550 lbs
Maximum speed=100 mph
Placing your QS parachute in your Harness
The following instructions are for conventional parachute containers using Velcro closures. Consult your
harness manual for other parachute container style routing. No matter what, be sure your parachute
bridle is connected to the carabiner and can easily break free from the harness routing.
1. Completely open the 3-sided Velcro closure on the parachute container located on your
harness.
2. Fold the hook side of the Velcro on your parachute container away from the inside of the
parachute container so it cannot snag any part of your deployment bag.
3. Place your parachute into your harness parachute container with the handle facing up.
The handle will extend out of the container and lay over the Velcro with the grommets. If

High Energy Sports Inc 714-632-3323
3
your parachute container does not have grommets pre-installed in your harness please
contact the harness manufacturer or give us a call.
4. S-fold the parachute bridle into the bottom 1/3 of your parachute container. Leave enough
bridle extending out of the parachute container side (just above the bar tack) to have the
covered loop reach your carabiner. Make sure there are no twists or knots in the bridle.
5. Push the parachute into the container and secure the safety lock system.
To secure the safety lock system line up corresponding grommets located on the
Velcro flap.
With the parachute deployment handle on the outside of each grommet thread the
bungee loop through both grommets.
Insert the curved pin located on your parachute deployment bag handle through the
bungee loop peaking through the grommets on the outside of your parachute
container.
Repeat this process to secure the second safety lock.
If you have any question as to whether your system is secured properly, try to open
the Velcro closure without pulling on the parachute deployment bag handle. If
the parachute container opens freely, your safety lock system is not properly
installed. Next try to open the Velcro by pealing the parachute deployment bag
handle away from the deployment bag. The curved pins should slide out of the
bungee loop and allow the Velcro to open.
If your curved pins slide out of the bungee loops before you exert pressure on the
handle you may need to shorten the bungee loop. To do this simply slide the
knot in the bungee towards the looped end.
6. Secure the top and sides of the Velcro on your parachute container. The more force you
apply to the Velcro the better it will close.
7. Attach the looped end of your bridle to your carabiner. Make sure that your bridle is
opposite the carabiner gate. Secure the bridle to your harness as prescribed by your harness
maker. Make sure you do not have excess bridle that may get caught on anything.
8. If desired attach a safety from your harness main strap directly to your parachute bridle
bypassing the carabiner. This safety should be able to withstand 4000 pound load. It is your
backup in the event of a carabiner failure during deployment.
After you place your parachute into your harness:
1. Be sure the handle releases the safety pins before it pulls on the deployment bag.
2. Practice hanging in your harness and pulling your parachute out of the container.
Note: If your parachute is too small for your parachute container, the handle may not
want to release properly. You can add foam to the bottom of your parachute container to help the
parachute ride higher in your harness container.
3. Do the “knee test” to assure that your parachute is secure.

High Energy Sports Inc 714-632-3323
4
Knee Test:
A. Place your knees on the back of the parachute container (inside the harness
where your body would normally lie)
B. Hold the harness where the sides of your body would normally fit.
C. Pull the sides of the harness towards you while you push against the
parachute with your knees in a manner that simulates your body weight.
D. If you hear Velcro opening sounds, reattach the Velcro and sit on your
parachute container. Try to squeeze the air out of your parachute by rocking
back and forth.
4. Check your bridle routing to make sure it can release when required.
5. Make sure the bridle is attached to the carabiner on the opposite side of the gate
Before Every Flight:
Preflight your parachute:
Check your safety pins
Be sure your handle loop is accessible.
Look at your bridle routing making sure “extra bridle” has not slipped out of your
parachute container.
Be sure the bridle is on the carabiner opposite the gate.
Double check your parachute container Velcro. Be sure it is closed appropriately.
Repeat the Knee Test
IN-FLIGHT SAFETY
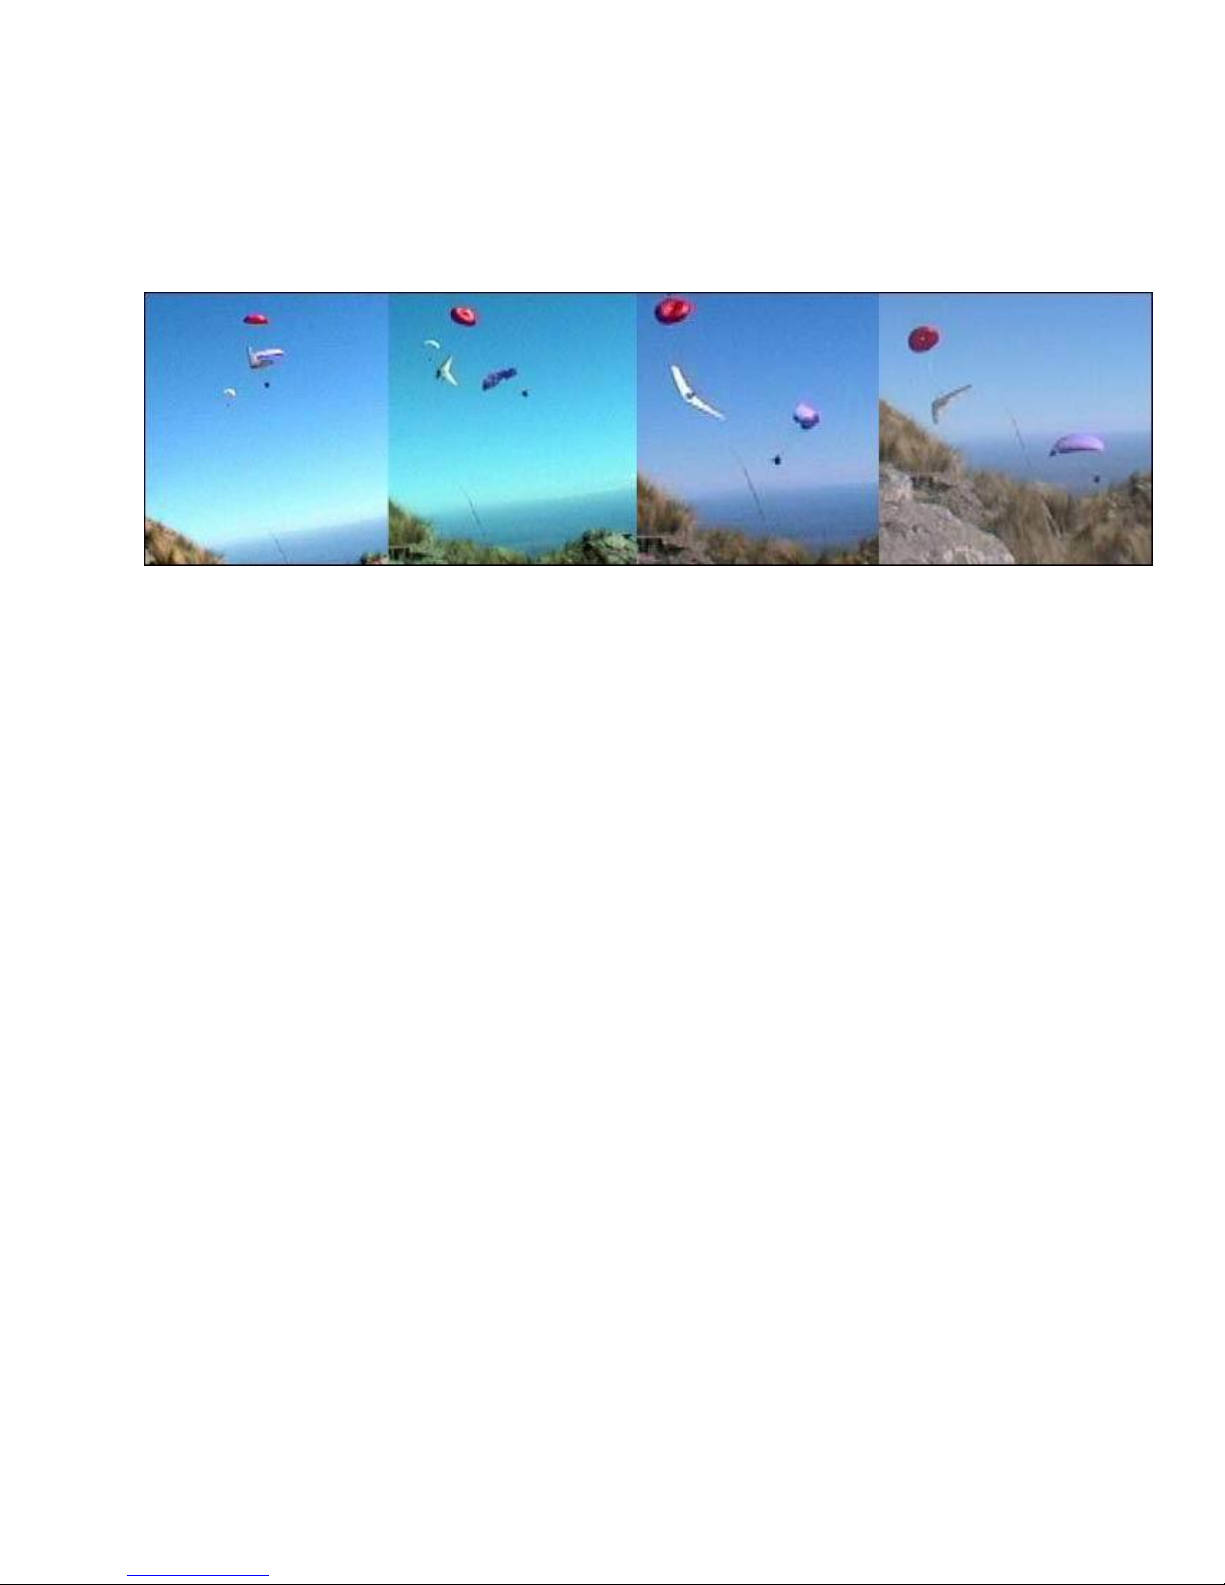
You can help to reduce the time it takes to deploy your parachute by looking for your
parachute handle and reaching for the handle during each flight. Under no circumstances
should you ever practice full in-flight deployments. Even if everything was done perfectly,
sometimes parachutes do not work. You can reduce your altitude loss for full inflation by
throwing the parachute
DEPLOYMENT PROCEDURE: Memorize these steps!
If you need to deploy your parachute do not waste time...deploy fast.
1. Look for the deployment bag handle.
2. Reach and grasp the handle securely.
3. Look for clear air. Avoid throwing your parachute into cables or broken glider parts.
4. Peel the handle down and away from you. You should now be holding the deployment bag
containing your parachute.
5. Throw the deployment bag towards the clear air. Throw the bag hard, as if your life
depended on it, because it very well could. Your bridle should come to full extension
followed by your lines and canopy.
6. Yank vigorously on the bridle. This will help to spread the suspension lines and open the
wind channel if your canopy has not yet inflated.
7. If necessary pull your parachute back in with yanking movements and repeat steps #5 &
#6.

High Energy Sports Inc 714-632-3323
5
8. If you are falling into your canopy do not pull it all the way in. Instead continue to yank on
the bridle until it inflates away from the wreckage.
LANDING SUGGESTIONS
Once your parachute has opened:
If you have a POD style harness open the doors to let your feet out. (There may be some
situations where you choose to remain in the harness.) If you have a cocoon, get your feet out of
the harness and go to a feet down position.
If possible climb into the control bar and stand with your feet spread on the base
tube.
Try to stabilize the glider. You may be able to steer your glider with control inputs
from your feet. If possible try to face the glider into the wind for landing.
Once you are standing in your control bar, keep your head up and arms in. If
possible evaluate the condition of your equipment, pull in any instruments that
have become dislodged and secure them for impact. At this time be sure your hook
knife is readily available.
Depending on your particular situation, you should attempt to let the glider take most
of the impact of landing rather than your body. If you have good control and your
glider is still flying, you may consider dropping into your harness for a good flair
before impact.
If you are not able to climb into the control bar try to get into a feet-to-earth
position. Prepare for a PLF (Parachute Landing Fall) by keeping your eyes
focused on the horizon, bringing your legs together with knees slightly bent, and
your arms in. Try to allow your legs to take the landing impact as you roll from the
side of your legs to the side of your hip, to the side of your shoulder. If you are
drifting while you are under canopy, prepare to roll in the same direction you are
drifting.
Immediately upon landing, unhook from your glider and parachute to prevent the
possibility of being dragged.
How to stop deployment problems before they begin
Repack at least once a year and practice parachute extraction before each repack!
If there is any question about whether your parachute is properly placed in the deployment
bag, hook the handle on a solid object and pull on the bridle. The bridle, lines then canopy
should snake out of the deployment bag in a smooth orderly sequence. (DO NOT ATTEMPT
TO REPACK YOUR OWN PARACHUTE WITHOUT APPROPRIATE GUIDANCE OR
TRAINING.)
Note: When you have your ballistically deployed parachute repacked ask the packer to disconnect the
rocket and pull the lanyard to simulate the rocket pulling the parachute out of the container. It should pull
out smoothly. This process should be repeated after repacking if there is any question about how the
parachute is packed.

High Energy Sports Inc 714-632-3323
6
Preflight your Parachute
Follow procedures outlined above.
Inspect Bridle
Check the bridle for signs of damage that may have been caused by dirt, abrasion, or friction.
Pay special attention to the carabiner loop since damage caused by friction from the harness
is common. The point of bridle entry into the parachute container (about 5’ from the carabiner
loop) may show signs of fraying due to Velcro damage.
Inspect Safety Pins
If they are rusty, clean them or replace.
Check Line Stowage
All lines should be enclosed in the deployment bag.
Inspect Safety Pin holders
Be sure the bungee (or rubber safety pin holder) is tight enough to hold the safety pin without
slipping. The bungee should be secured around the safety pin shaft only. If the bungee slips
above the shaft to the safety pin attachment on the handle it will not deploy. If your bungee is
too loose just slide the knot towards the loop of the bungee and thus tighten it up.
Inspect Rubber bands
Be sure your rubber bands are strong. Replace rubber bands often. Do not double stow (wrap
then around the lines more than once). Use only the appropriate size rubber bands (#61).
Recommended Tools and Preparation for Packing
Rope or cord to secure both ends of the parachute to fixed points.
Weights to hold down folded canopy. (Telephone books work great!)
New rubber bands.
A clean dry area long enough to stretch out the canopy and lines.
1. AIR CANOPY. Practice throwing your parachute in a simulated deployment.
2. LINE CHECK. Check to see that radial seams (long seams with tape reinforcement) are
on the outside of the canopy. Thread an independent packing assist line through all the
packing tabs in an orderly sequence. Packing tabs are located at the junction of the radial
seam and the lateral band. Secure the rope to a fixed object. Stretch out canopy and lines
by pulling on the bridle with mild tension. Check the lines for twists by following two
adjacent lines from the skirt of the canopy to the bridle. Clear any twists. Secure the bridle
to a fixed object so there is mild tension on the parachute.
3. INSPECTION. Inspect the canopy and lines as outlined in Chapter 9 of THE
PARACHUTE MANUAL by Daniel Poynter. Check for tears, burns, broken stitches,
abrasion, or other malformations. Pay special attention to the bridle. Look for snags at the
point where the bridle goes into the parachute container, and for wear at the carabiner
loop. Replace the at the first sign of wear.
High Energy Sports Inc 714-632-3323
7
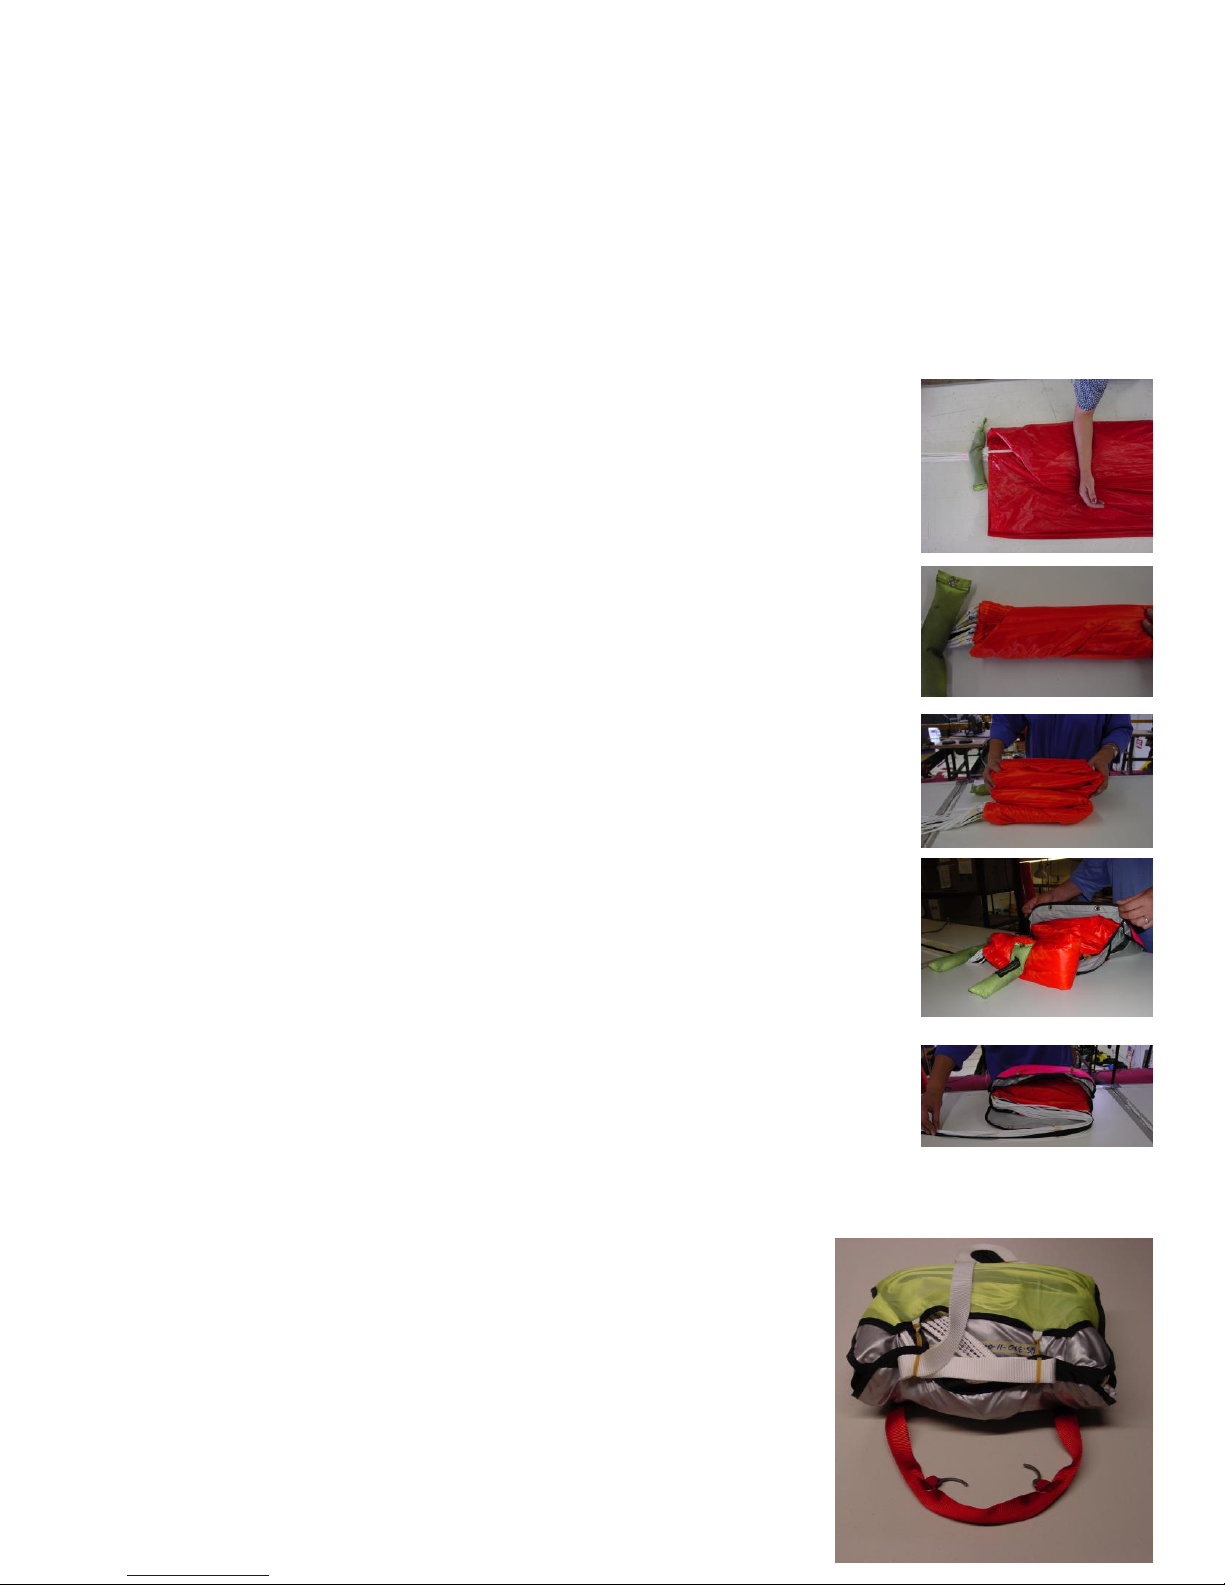
Deployment Bag PACKING INSTRUCTIONS
1. Stretch out the canopy, lines and bridle. Secure packing assist line to a fixed object.
Secure the bridle end using mild tension.
2. Flake the canopy in the usual manner. (Grasp one line at the skirt
of the canopy. With your other hand, lift the center of the gore at
the skirt until the next line can be easily placed on top of the first
line. Repeat this process until the entire canopy is pleated.) Go to
the packing tabs and fold each gore neatly by pulling the center of
the gore to the outside making sure the material is not inverted into
the air channel.
3. Sight down the "air channel" to insure all gores are properly flaked.
4. Lay the canopy with half the gore to each side of the lines. Count
the folded gores on each side of the lines. Count the gores on
each side of the packing tabs. Make sure you have an equal
number of folds on each side.
5. On one side fold the skirt up 45 degrees adjacent to the radial
seams leaving 4 inches for the air channel.
6. Long fold that side of the canopy in thirds.
7. Flip the parachute with the folded half on the table and the unfolded
half on top.
8. Repeat steps 5 and 6 on the top gores. Long fold the canopy into
thirds again and hold in place with weights. At this point you may
want to squeeze air from the folded canopy.
9. Long fold the parachute in half to form a neat “tube”.
10.Remove the rope from the packing tabs and place the packing tab
end of the canopy into one corner of the large pocket in the
deployment bag. Please note: Your parachute will not work with
the packing tab rope in place. Always remove rope immediately after folding the canopy.
11.Close the short deployment bag flap. Thread the appropriate rubber band loops through
the grommets on the short flap and lock by looping the
lines through each of the rubber bands. The stow form a 1”
to 1.5” loop.
12.Starting at the top corner of the line pocket, "S" fold the
remainder of the line into the line pocket.
13. Cover the first 2 locking stows with the long flap and thread
the outside rubber bands through the appropriate
grommets.

High Energy Sports Inc 714-632-3323
8
12.Lock the deployment bag closed by looping the bridle appropriately through each rubber
band
Storage Recommendations
Always remember that this system is a potential life saving device and should be treated
accordingly.
Protect it from exposure to direct sunlight. Ultraviolet exposure can rapidly degrade your
canopy fabric.
Exposure to salt water, acids, gasoline and extreme heat can cause damage. If any of
these things happen, clean the canopy in the prescribed manner according to Poynter's
PARACHUTE MANUAL.
After cleaning and drying inspect the canopy again.
Always store your harness and parachute in a cool dry place. Do not leave your harness
or parachute in the trunk of the car.
Qualified personnel should repack your High Energy Sports parachute every year. In
addition you should have your parachute inspected and repacked any time you suspect
damage.
Closing Comments
Your emergency parachute can be your last chance to get out of a bad situation so be sure to treat it with care.
When you hear about pilots throwing their parachutes, learn as much as possible about the situation, the
conditions and the options available to that pilot. Put yourself in that persons position and try to figure out what
you would do.
In an emergency real time might be only a few seconds but when the adrenaline hits in your brain, you may feel
like you have lots of time to decide what to do and how to do it.
Practice deployments in a simulator before each repack, visualizing deploying your parachute in your mind’s eye,
and reaching for your handle with each hand every time you fly will reduce the amount of time it takes for you to
get your parachute deployed.
If you do use your parachute in a real life emergency and call with an
accident report, we will provide you with a free deployment bag!
Your parachute is only part of your safety system. Be sure to learn all
you can about your harness, hang strap, carabiner, and deployment
system.
Most of all....fly safely!

High Energy Sports Inc 714-632-3323
9
REGISTRATION INFORMATION
(Return within 14 days of date of purchase)
1. OWNERS NAME _______________________________
2. ADDRESS_____________________________________
3. CITY, STATE, ZIP_______________________________
4. COUNTRY_____________________________________
5. TELEPHONE (home)_____________________
6. (work)______________________
7. CANOPY MODEL__________________
8. DATE OF PURCHASE_______________
9. SERIAL NUMBER__________________
10.DEALERS NAME_______________________________
11.DEALERS ADDRESS____________________________
12.CITY, STATE, ZIP_______________________________
I have received, read, and understand all aspects of this product and the technical information
provided. By using the system or allowing its use by others, I agree to assume all risk and
liability associated with its use. I also agree to hold harmless High Energy Sports and any
officers, agents and assigns thereof from any liabilities for injuries or damages arising from
such use.
The parachute was installed and packed by a qualified and competent rigger or technician.
Any deviation from the manufacturers instructions concerning the installation, maintenance,
and use of the system, or any modifications or alterations, shall constitute willful negligence by
myself and shall be done at my own risk.
Date________________________
Owner's Signature________________________________
Return to:
High Energy Sports Inc.
Parachute Registration
1081 Shepard Street Unit A
Anaheim, CA 92806
Other manuals for Quantum Series
1
Table of contents
Other High Energy Sports Aircraft manuals


