HIKE CREW HCSSCRNG4 User manual
™Screen Gazebo
USER GUIDE
HCSSCRNG4
HCSSCRNG6

Thank you for purchasing the Hike Crew Screen Gazebo. This User Guide is intended to provide
you with guidelines to ensure that operation of this product is safe and does not pose risk to the user. Any
use that does not conform to the guidelines described in this User Guide may void the limited warranty.
Please read all directions before using the product and retain this guide for reference.
This product is intended for domestic use only. It is not intended for commercial use.
This product is covered by a limited one-year warranty. Coverage is subject to limits and exclusions.
See warranty for details.
SAFETY PRECAUTIONS
WARNING! Please read and understand all safety precautions and instructions before
setting up this tent. Keep this manual for future reference.
• DISCLAIMER: This tent is flame-resistant, but is NOT fireproof. The fabric will
burn if left in contact with an open flame or heat source. Contact with any
foreign substances to the tent fabric may render the flame-resistant
properties ineffective.
• Keep heat sources (candles, matches, and etc.) away from this tent.
• Don’t build campfires near the tent. Always extinguish campfires before leaving campsite or
retiring into the tent.
• Do not cook inside of gazebo.
• Never use open flame devices in or near this tent.
• Do not refuel lamps, heaters, or stoves inside of tent.
• Always take extreme caution and monitor lanterns and heaters inside of the tent.
• Do not smoke in the gazebo.
• Do not store flammable liquids inside the tent.
• Take down the gazebo when not in use to avoid unnecessary damage from outdoor elements.
• Never store tent when wet. Always allow gazebo to dry in order to prevent mildew and mold.
• Do not leave gazebo outdoors when not in use.
• Never allow children to enter and play in gazebo unattended.
PACKAGE CONTENTS
• Screen gazebo
• Carry bag
• User guide
2
ASSEMBLY INSTRUCTIONS
Gazebo Setup
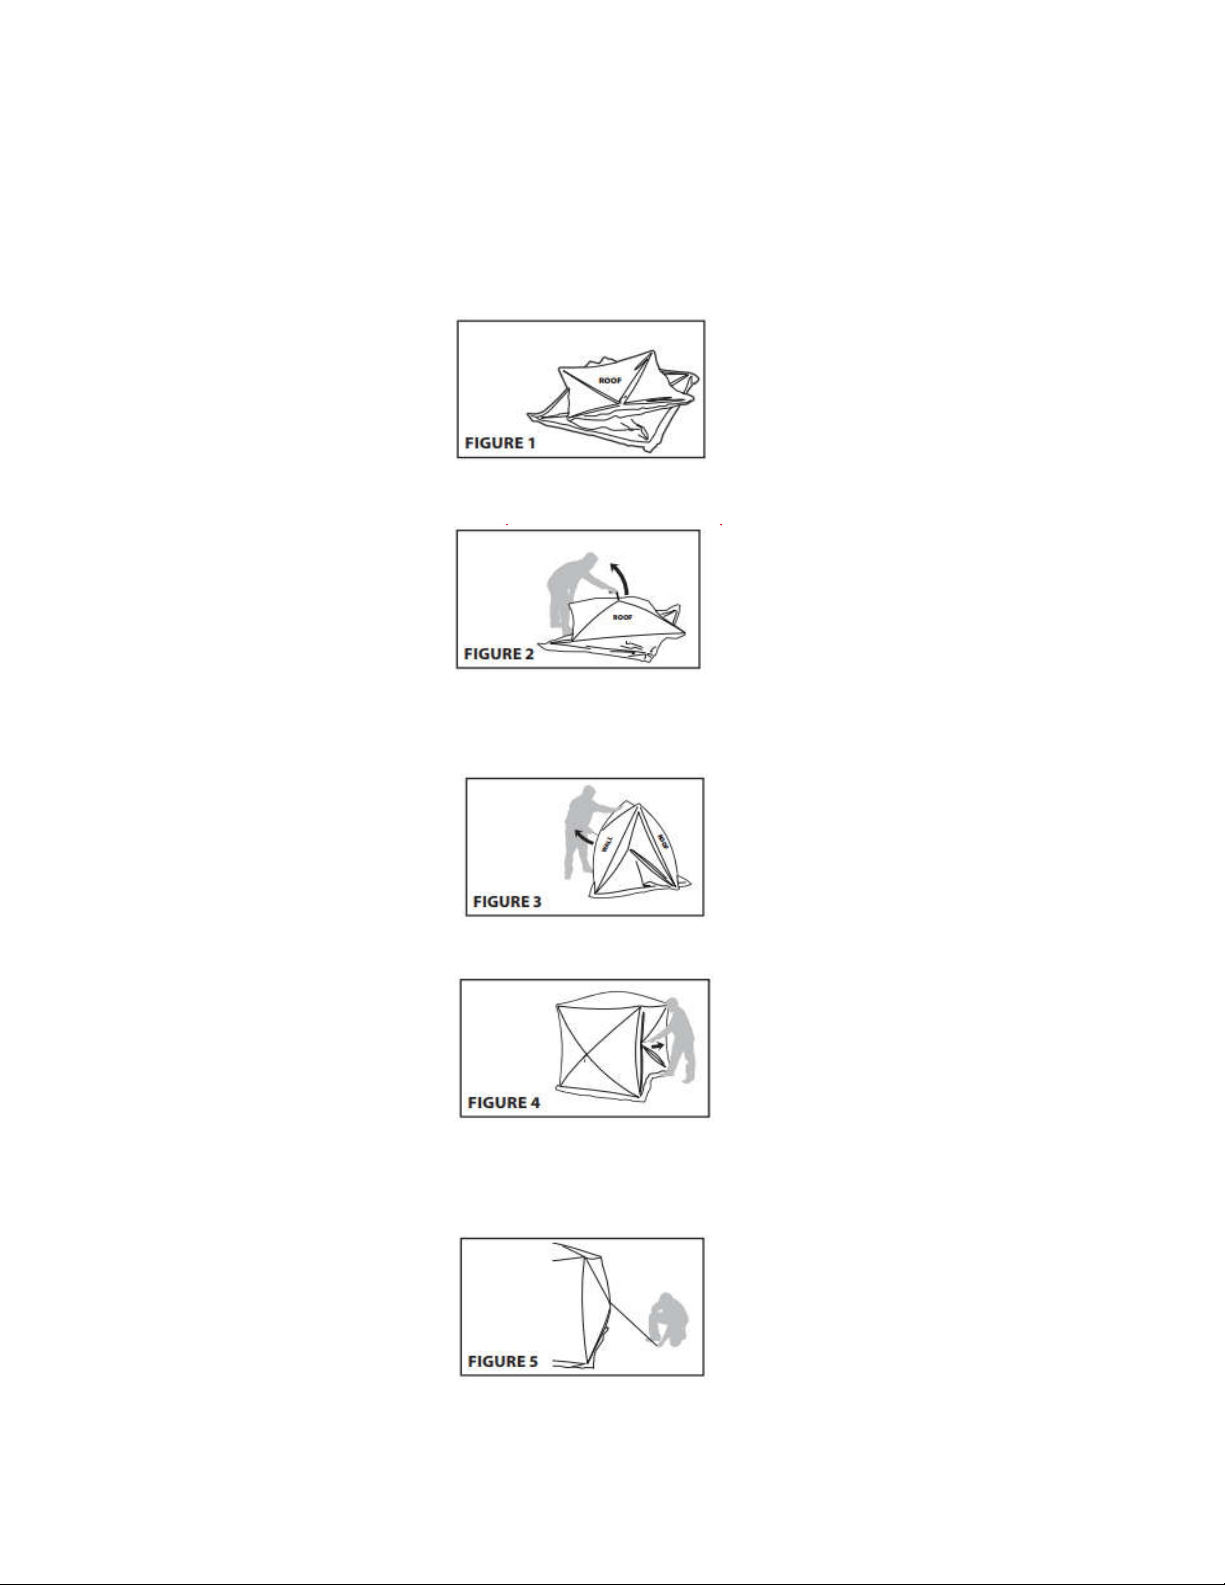
1. Locate a level, flat surface that is clear of debris to prevent rips or cuts while setting up your tent.
2. Lay the tent flat on the cleared-out area. Then, check that there is no material twisting or overlapping.
3. Grasp the webbing loop sewn into the center of the top panel and pull the loop outward.
4. Continue around the tent pulling the loops on the side wall panels outward. Pull until side wall
panels are popped out. (The fiberglass poles should pop out into place holding up the gazebo.)
5. With the gazebo now freestanding, locate the zippered door, and walk into the tent.
6. Once inside the gazebo, place a hand on the top panel and push up until roof pops into place.
7. Move outside and anchor your gazebo down at each corner by tying the ropes down to the pegs
(or stakes) provided.
8. Place pegs firmly into the ground and hammer down the peg to keep gazebo stable.
3
PLEASE READ THE INSTRUCTIONS CAREFULLY
SET-UP STEPS
1.Spread the flysheet out on the ground, as flat as possible
2. Fold up each of the poles, then lift the top panel up, whilst pulling each side panel out by the
corresponding metal pulling loop on either side, then the integral fibreglass poles will simply pop
into place.
These pictures can be instead by the physical photo if need
3.Peg down the four corners of the flysheet to make it stable
TAKE-DOWN STEPS
Push the side metal pulling loop into make the flysheet down ,then push the top panel in, at last
fold it along with the pole
CHECK FOR PARTS ONLINE AT W WW………
OR CALL 000-000-0000
4
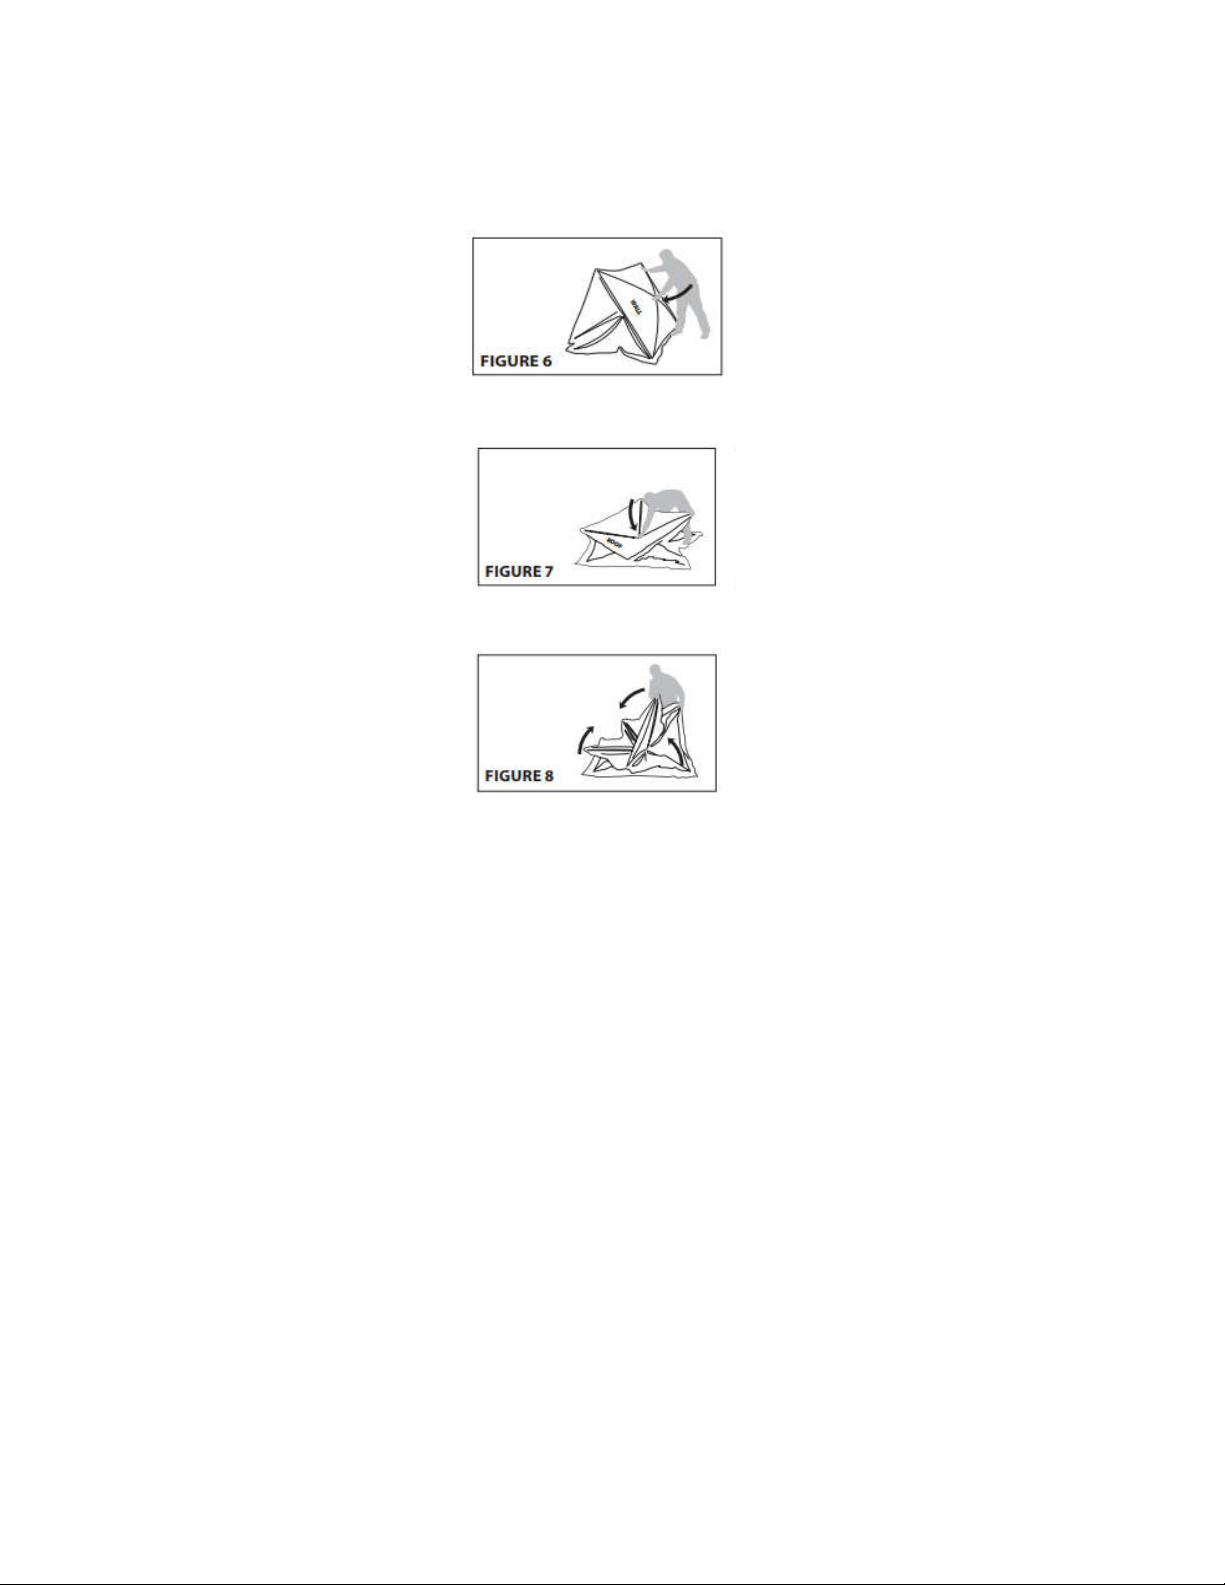
Gazebo Takedown
1. Remove pegs and untie ropes on the pegs.
2. Move around the tent and push side wall panels inward so that the gazebo collapses.
3. Push the top panel inward. The tent should now be back on the ground in its flattened state.
4. Gather the corners of the tent and fold the corners together.
5. Take the folded tent and insert it into carry bag. Place the pegs and ropes in bag as well.
NOTE: Do not force the tent when folding. If tent is hard to fold, check for overlaps and entanglements in
the tent.
MAINTENANCE/STORAGE INSTRUCTIONS
• Take down the tent when not in use. Do not leave tent unattended.
• Never store the tent when it is wet. Always let the tent dry before storing it.
• Use extra tie-downs during excessive winds.
• Clean and wipe down the tent before storing it for long periods of time.
• Store the tent in a cool, dry area.
PLEASE READ THE INSTRUCTIONS CAREFULLY
SET-UP STEPS
1.Spread the flysheet out on the ground, as flat as possible
2. Fold up each of the poles, then lift the top panel up, whilst pulling each side panel out by the
corresponding metal pulling loop on either side, then the integral fibreglass poles will simply pop
into place.
These pictures can be instead by the physical photo if need
3.Peg down the four corners of the flysheet to make it stable
TAKE-DOWN STEPS
Push the side metal pulling loop into make the flysheet down ,then push the top panel in, at last
fold it along with the pole
CHECK FOR PARTS ONLINE AT W WW………
OR CALL 000-000-0000
4
SPECIFICATIONS
• Dimensions (4-sided): 70"x 70"x 80"(177.8 x 177.8 x 203.2 cm)
• Weight (4-sided): 18.5 lbs. (8.4 kg)
• Dimensions (6-sided): 140"x 140"x 85"(355.6 x 355.6 x 215.9 cm)
• Weight (6-sided): 30.2 lbs. (13.7 kg)
• Fabric Material: Polyester and Black Mesh
• Pole Material: Fiberglass
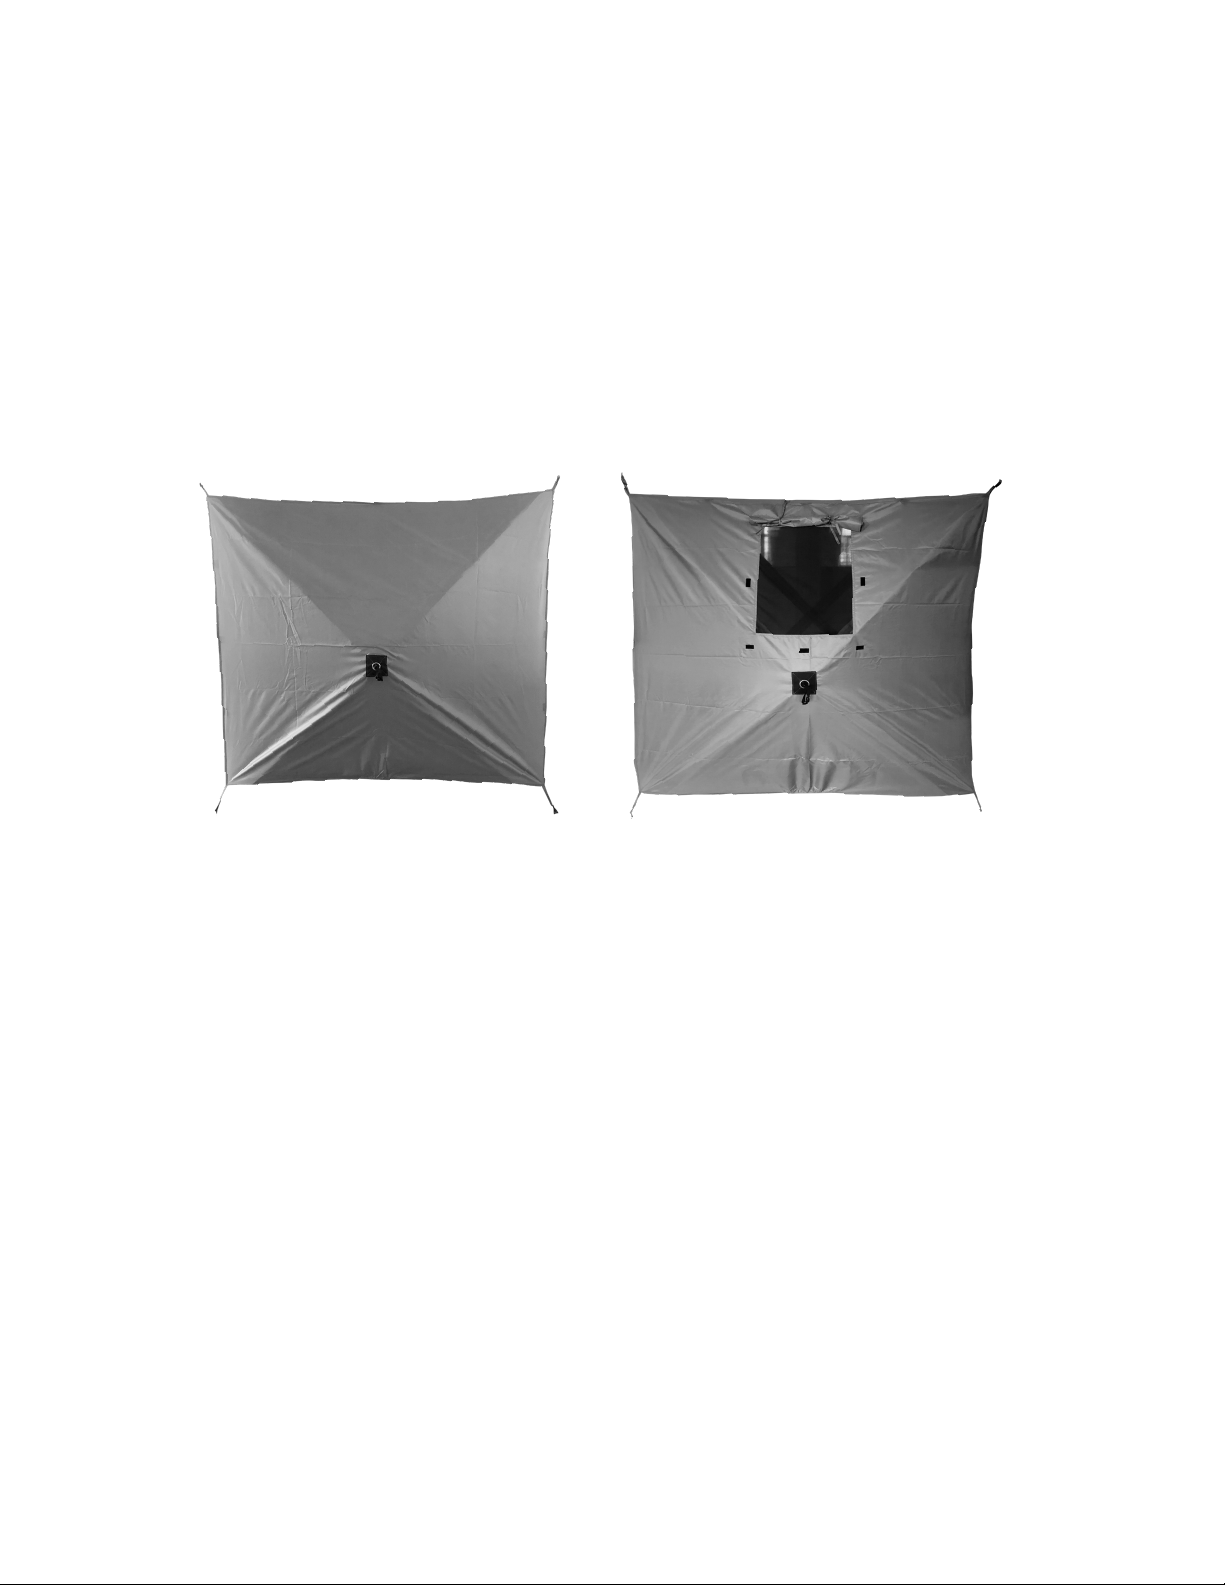
*Hike Crew wind panels and wind panels with window are sold separately.

11
WARRANTY INFORMATION
LIMITED WARRANTY ON HIKE CREW SCREEN GAZEBO
THIS LIMITED WARRANTY GIVES YOU SPECIFIC LEGAL RIGHTS AND YOU MAY
ALSO HAVE OTHER RIGHTS, WHICH VARY FROM STATE TO STATE.
WE WARRANT THAT DURING THE WARRANTY PERIOD, THE PRODUCT WILL BE
FREE FROM DEFECTS IN MATERIALS AND WORKMANSHIP.
LIMITATION OF LIABILITY
TO THE EXTENT NOT PROHIBITED BY LAW, THIS WARRANTY IS EXCLUSIVE AND IN LIEU
OF ALL OTHER WARRANTIES, ORAL, WRITTEN, STATUTORY, EXPRESS OR IMPLIED. EXCEPT
FOR THE EXPRESS WARRANTIES CONTAINED IN THIS LIMITED WARRANTY STATEMENT
AND TO THE EXTENT NOT PROHIBITED BY LAW, WE DISCLAIM ALL OTHER WARRANTIES,
EXPRESSED OR IMPLIED, STATUTORY OR OTHERWISE, INCLUDING WITHOUT LIMITATION,
THE WARRANTIES OF MERCHANTABILITY AND FITNESS FOR A PARTICULAR PURPOSE. SOME
STATES DO NOT ALLOW DISCLAIMERS OF IMPLIED WARRANTIES, SO THIS DISCLAIMER
MAY NOT APPLY TO YOU. TO THE EXTENT SUCH WARRANTIES CANNOT BE DISCLAIMED
UNDER THE LAWS OF YOUR JURISDICTION, WE LIMIT THE DURATION AND REMEDIES OF
SUCH WARRANTIES TO THE DURATION OF THIS EXPRESS LIMITED WARRANTY.
OUR RESPONSIBILITY FOR DEFECTIVE GOODS IS LIMITED TO REPAIR, REPLACEMENT OR
REFUND AS DESCRIBED BELOW IN THIS WARRANTY STATEMENT.
WHO MAY USE THIS WARRANTY? C&A Marketing, Inc. located at 114 Tived Lane East, Edison, NJ
(“we”) extend this limited warranty only to the consumer who originally purchased the product (“you”).
It does not extend to any subsequent owner or other transferee of the product.
WHAT DOES THIS WARRANTY COVER? This limited warranty covers defects in materials and
workmanship of the Hike Crew Screen Gazebo (the “product”) for the Warranty Period as defined
below.
WHAT DOES THIS WARRANTY NOT COVER? This limited warranty does not cover any damage
due to: (a) transportation; (b) storage; (c) improper use; (d) failure to follow the product instructions or
to perform any preventive maintenance; (e) modifications; (f) unauthorized repair; (g) normal wear and
tear; or (h) external causes such as accidents, abuse, or other actions or events beyond our reasonable
control.
WHAT IS THE PERIOD OF COVERAGE? This limited warranty starts on the date of your purchase
and lasts for one year (the “Warranty Period”). The Warranty Period is not extended if we repair or
replace the product. We may change the availability of this limited warranty at our discretion, but any
changes will not be retroactive.
WHAT ARE YOUR REMEDIES UNDER THIS WARRANTY? With respect to any defective product
during the Warranty Period, we will, at our sole discretion, either: (a) repair or replace such product (or
the defective part) free of charge or (b) refund the purchase price of such product if an exchange unit
cannot be provided.

12
HOW DO YOU OBTAIN WARRANTY SERVICE? To obtain warranty service, you must contact us at
Merchandise Authorization (“DMA”) number. No warranty service will be provided without a DMA
number and return shipping costs to our facilities shall be assumed by you, the purchaser. Shipping
costs of the replacement unit to you shall be assumed by us.
GET IN TOUCH!
1-833-855-1816
HIKE CREW is a trademark of C&A IP Holdings LLC in the US, Canada, China, and the EU.
All other products, brand names, company names, and logos are trademarks of their respective
owners, used merely to identify their respective products, and are not meant to connote any
sponsorship, endorsement, or approval.
Distributed by C&A Marketing, Inc., 114 Tived Lane East, Edison, NJ 08837. Made in China.
© 2021. C&A IP Holdings LLC. All Rights Reserved.
This manual suits for next models
1
Table of contents
Popular Outdoor Furnishing manuals by other brands


Sunjoy
Sunjoy Catalina L-GZ660PST-D-MN Assembly instruction

toolport
toolport GG-L1-Q1 Assembly instructions

ROLLAC
ROLLAC ZipShade 100 Warranty & Owner’s Manual

Crivit Outdoor
Crivit Outdoor 93762 instructions

Hanover
Hanover MCLRDN5PCSQSW4-SU-T owner's manual

LuxCraft
LuxCraft 4' Adirondack Glider Assembly instructions


