manuals.online logo
Brands
  1. Home
  2. •
  3. Brands
  4. •
  5. E-Z UP
  6. •
  7. Outdoor Furnishing
  8. •
  9. E-Z UP SPEED SHELTER User manual

E-Z UP SPEED SHELTER User manual

INTERNATIONAL E-Z UP, INC., manufacturer of the
E-Z UP®Instant Shelter®, warrants to the original pur-
chaser who provides a dated sales receipt, from an
Authorized Dealer, each part of the E-Z UP®Instant
Shelter®to be free from defects in material or work-
manship for a period of FIVE YEARS after the date
of original purchase. This warranty applies only for
normal and expected uses, as determined by the
manufacturer. INTERNATIONAL E-Z UP, INC.’s obli-
gation and liability under this warranty is limited to
the repair or replacement (at its option) of the product
or its parts, after its own review and examination.
RETURN ADVISORY - Before returning any part or
product to INTERNATIONAL E-Z UP, INC. or its desig-
nated representative, please phone or write to obtain
specific return shipping instructions. All shipping costs
must be prepaid, and INTERNATIONAL E-Z UP, INC.
is not responsible for products damaged in transit.
CONDITIONS - This warranty shall be void as to
any product which has been altered or modified
in any manner. This warranty does not apply to
damages caused by wind, rain, or other forces of
nature, not to accidental or deliberate damage
of the product, nor to use of the product that
does not conform with the product instructions.
This warranty is provided in lieu of all
other warranties, expressed or implied.
8’ x 12’
© Copyright 2010 International E-Z UP, Inc. USA. All rights reserved. OM.SS2.812.0720 12777 B
With proper care, this shelter will deliver
years of trouble free service. Please take a
few minutes to read the following use and
care instructions. If you have any questions
or require assistance, please call.
We Make Life E-Z!™
INTERNATIONAL E-Z UP, INC.
1601 Iowa Avenue, Riverside, California 92507
(951) 781-0843 • Fax (951) 781-0586
ezup.com
Customer Service Hot Line
800-45 SHADE
800-457-4233
Customer Service Hot Line
800-45 SHADE
800-457-4233
ezup.com
“Sets Up in Seconds!”™
E-Z UP
®
INSTANT SHELTER
®
OWNER’S MANUAL
Care and MaintenanCe
IMPORTANT! Read this information before proceeding.
It is the user’s responsibility to take the following
precautions at all times.
• Always stake or weigh down your shelter. Do not use in any
potentially windy or rainy weather.
Wind and rain can damage the E-Z UP®Instant Shelter® product
and may also result in injury to you or others. Therefore, do not
rely on shelter for protection in heavy or prolonged rain storms.
• The E-Z UP®Instant Shelter®product is designed as a temporary
shelter. Do not leave up for extended periods.
• Use caution when handling the E-Z UP®folding frame.
Avoid pinching hands or fingers as frame opens or closes.
• Do not use shelter in a lightning storm.
• Do not leave your E-Z UP®Instant Shelter®product unattended.
• Do not build fires within shelter enclosure.
For long lasting durability and the best possible protection
for your E-Z UP®Instant Shelter® products, follow these
E-Z care and maintenance instructions:
• Use a mild soap (not detergent) and plenty of water for top
cleaning.
• Let the E-Z UP®top and frame dry completely before closing
or storing to avoid mildew.
• Frame will operate and look better if occasionally wiped with
silicone spray, especially before and after use in damp conditions.
Remove excess silicone residue before applying top.
• Use a seam sealer if top leaks or drips water. Available at most
sporting goods and hardware stores.
• Slightly tighten bolts if frame becomes loose.
iMportant inforMation
WARNING: Keep all flame and heat sources away from all
shelter fabrics. These fabrics meet the flammability requirements
of CPAI-84. The fabric may burn if left in continuous contact with
any flame source. The application of any foreign substance to
the fabric may render the flame-resistant properties ineffective.
PRODUCT WARRANTY
*3.
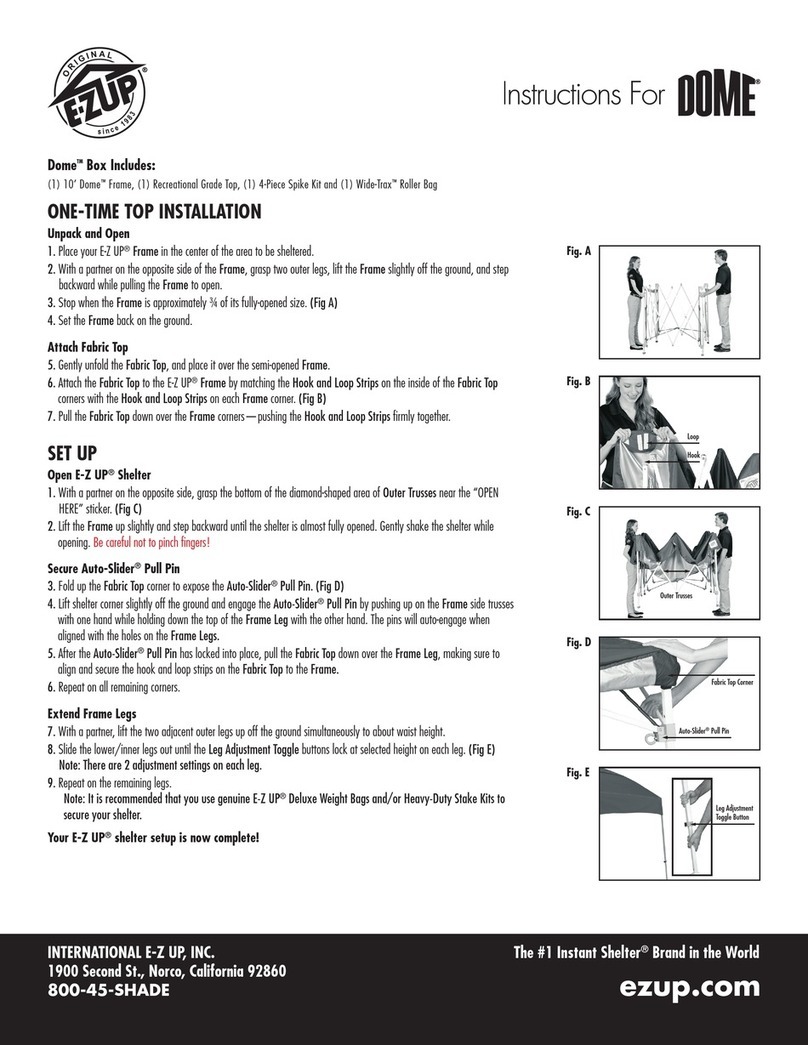
Attach the top to the
frame by matching the quick
attachment strips on the top
with the strips on the frame.
Push the strips firmly togeth-
er at each corner.
7.
To engage the slider at
each corner, first lift the fabric
off of the corner, then with
one hand hold the top of the
leg while pushing up on the
slider with the other hand.
The pull pin will engage
the hole. Pull down the fab-
ric valance over the slider.
Repeat on all four corners.
4.
Store shelter in cover
bag.
3.
Grasp the top and bot-
tom of diamond on 8’ sides.
Lift the shelter up slightly
and shake it while stepping
towards your partner until the
unit is 3/4 closed. With each
partner grasping two outer
legs, push frame together to
fully close it.
Be careful not to pinch fingers.
1.
With partner, slightly lift
up two adjacent outer legs,
depress toggle and telescope
inner legs into outer legs.
Repeat on the opposite legs
- making sure to do two legs
at a time.
2.
Release pull pin at each
corner. With one hand push
up on truss near the pull pin,
pull the pin out to release.
Note: It is much easier to
release pull pin when the
shelter weight has been
removed from the pull pin.
6.
With partner on 8’
sides, opposite side of shel-
ter, stand facing one another.
Grasp the bottom of the dia-
mond shaped area of trusses
on opposite sides. Lift up and
step backward until shelter is
3/4 opened, being careful
not to pinch fingers.
*4.
To secure the top to
frame, line up grommet holes
on fabric valance with bolts
on frame.
*1.
Place your E-Z UP
®
frame in the center of area to be
shaded. With partner on opposite side, grasp two outer
legs, slightly lift off ground and step backwards, stopping
at full arms’ length.
*2.
Gently unfold the fabric top and place it over the
open frame.
Fabric Top
Trusses
Top Attachment Nut
Coin
Spacers
*5.
Unscrew top attach-
ment nut from bolt. Place
grommeted fabric top over
the bolt, screw on top attach-
ment nut and tighten until
snug. Top should rotate
easily - do not overtighten.
Repeat this procedure on the
remaining grommets.
8.
Lift two adjacent outer
legs up and slide out the
inner legs until the toggle
locks. Repeat on the oppo-
site legs - making sure to do
two legs at a time.
Top Attachment Nut
Angle Bracket
Pull Pin
Note: Once top is permanently attached, only perform
steps 1 and 6 - 8 to set up.
How totake down
wHat’sintHe Box
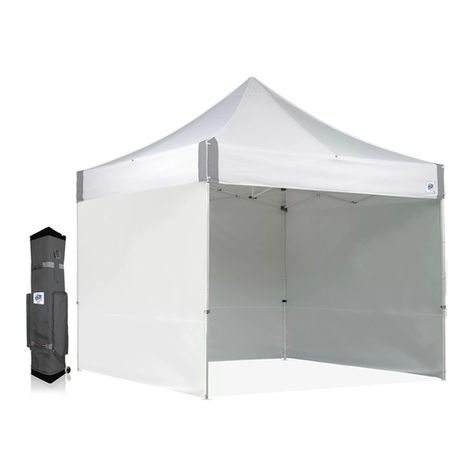
• 1 8’ x 12’ Frame Fully Assembled
• 1 Wrench Kit
*Note: First Time Attachment Is Required.
Top and frame are shipped separately to avoid damage.
A first time set up requires that top be bolted on to the frame.
This first time set up takes longer than future set ups. Once
top is permanently attached to frame, set up and take down
are easily accomplished within seconds.
first tiMe top attaCHMent

Other E-Z UP Outdoor Furnishing manuals

E-Z UP Dome User manual

E-Z UP

E-Z UP Dome User manual

E-Z UP Instant Shelter User manual

E-Z UP

E-Z UP Instant Shelter User manual

E-Z UP Deco User manual

E-Z UP

E-Z UP Deco User manual

Popular Outdoor Furnishing manuals by other brands

siena GARDEN P11694 Assembly instruction

siena GARDEN

siena GARDEN P11694 Assembly instruction

Trigano Mistral Double manual

Trigano

Trigano Mistral Double manual

Costway HW65874 user manual

Costway

Costway HW65874 user manual

Sunjoy A102005814 Assembly and safety instructions

Sunjoy

Sunjoy A102005814 Assembly and safety instructions

YitaHome YSS-V 2 Assembly instructions

YitaHome

YitaHome YSS-V 2 Assembly instructions

sweeek. EMILIA BS60C2 manual

sweeek.

sweeek. EMILIA BS60C2 manual

Hanover MANDN5PCSWRD4 Assembly instructions

Hanover

Hanover MANDN5PCSWRD4 Assembly instructions

Backyard Discovery 2106536D manual

Backyard Discovery

Backyard Discovery 2106536D manual

for Living Essex 088-1872-0 Assembly instructions

for Living

for Living Essex 088-1872-0 Assembly instructions

Costco Iris 2127023 Assembly manual

Costco

Costco Iris 2127023 Assembly manual

Sunjoy L-GZ1022PST-E1 instruction manual

Sunjoy

Sunjoy L-GZ1022PST-E1 instruction manual

Jula Hard Head 000-934 operating instructions

Jula

Jula Hard Head 000-934 operating instructions

Outsunny 84B-503 Assembly instruction

Outsunny

Outsunny 84B-503 Assembly instruction

Palram Arizona 5000 - Breeze instruction manual

Palram

Palram Arizona 5000 - Breeze instruction manual

Forest garden MTGSH86 manual

Forest garden

Forest garden MTGSH86 manual

PHI VILLA THD-PV-096-B Use and care guide

PHI VILLA

PHI VILLA THD-PV-096-B Use and care guide

Living & Co Verona Bench instruction manual

Living & Co

Living & Co Verona Bench instruction manual

PREMIER POLYSTEEL 950-501 quick start guide

PREMIER POLYSTEEL

PREMIER POLYSTEEL 950-501 quick start guide

manuals.online logo
manuals.online logoBrands
  • About & Mission
  • Contact us
  • Privacy Policy
  • Terms and Conditions

Copyright 2025 Manuals.Online. All Rights Reserved.