hillvert HT-COSTIGAN-3600 User manual

expondo.com
HT-COSTIGAN-3600
BEDIENUNGSANLEITUNG
USER MANUAL
INSTRUKCJA OBSŁUGI
NÁVOD K POUŽITÍ
MANUEL D´UTILISATION
ISTRUZIONI PER L‘USO
MANUAL DE INSTRUCCIONES
SOLAR IRRIGATION

3
07.06.202207.06.2022
2
PRODUKTNAME BEWÄSSERUNGSSYSTEM
PRODUCT NAME SOLAR IRRIGATION
NAZWA PRODUKTU SYSTEM DO NAWADNIANIA
NÁZEV VÝROBKU ZAVLAŽOVACÍ SYSTÉM
NOM DU PRODUIT SYSTÈME D'IRRIGATION
NOME DEL PRODOTTO SISTEMA DI IRRIGAZIONE
NOMBRE DEL PRODUCTO SISTEMA DE RIEGO
MODELL
HT-COSTIGAN-3600
PRODUCT MODEL
MODEL PRODUKTU
MODEL VÝROBKU
MODÈLE
MODELLO
MODELO
NAME DES HERSTELLERS
EXPONDO POLSKA SP. Z O.O. SP. K.
MANUFACTURER NAME
NAZWA PRODUCENTA
NÁZEV VÝROBCE
NOM DU FABRICANT
NOME DEL PRODUTTORE
NOMBRE DEL FABRICANTE
ANSCHRIFT DES HERSTELLERS
UL. NOWY KISIELIN-INNOWACYJNA 7, 66-002 ZIELONA GÓRA | POLAND, EU
MANUFACTURER ADDRESS
ADRES PRODUCENTA
ADRESA VÝROBCE
ADRESSE DU FABRICANT
INDIRIZZO DEL FORNITORE
DIRECCIÓN DEL FABRICANTE
3
7
11
15
18
22
26
DEUTSCH
ENGLISH
POLSKI
ČESKY
FRANÇAIS
ITALIANO
ESPAÑOL
INHALT | CONTENT | TREŚĆ | OBSAH | CONTENU | CONTENUTO | CONTENIDO DEBEDIENUNGSANLEITUNG
Das Produkt erfüllt die geltenden
Sicherheitsnormen.
Gebrauchsanweisung beachten.
Recycling-Produkt.
ACHTUNG! oder WARNUNG! oder HINWEIS! um
auf bestimmte Umstände aufmerksam zu machen
(Allgemeines Warnzeichen).
Parameter - Beschreibung Parameter - Wert
Produktname Bewässerungssystem
Modell HT-COSTIGAN-3600
Betriebsart Solarmodul, Batterie
3,6 V 1.200 mAh Ni-MH
Nennleistung [W]/
Nennspannung des
Solarmoduls [V]
0,7 / 6
Pumpenversorgung [VDC] 3,5
Nennleistung der Pumpe [W] 0,45
Ladezeit des Geräts bei
direktem Sonnenlicht [h] 6 ÷ 8
Regelbereich der Betriebszeit
innerhalb von 12 Stunden [min] 0,5 ÷ 12
Maximaler Wasserdurchuss
[ml/min] 600
Maximale Wassertemperatur
[°C] 40
Saughöhe [m] 2,4
Förderhöhe [m] 3
Größe des Solarmodulrahmens
[mm] 178 × 236 × 132
Größe des Solarmoduls [mm] 105 × 145
Größe der Steuereinheit [mm] 162 × 140 × 56
Gewicht [kg] 1,1
Der Begri „Gerät“ oder „Produkt“ in den Warnungen
und Beschreibung des Handbuchs bezieht sich auf
das Bewässerungssystem. Legen Sie keine Hände oder
Gegenstände in das laufende Gerät!
2.1. SICHERHEIT AM ARBEITSPLATZ
a) Im Falle eines Schadens oder einer Störung sollte
das Gerät sofort ausgeschaltet und dies einer
autorisierten Person gemeldet werden.
b) Wenn Sie nicht sicher sind, ob das Gerät
ordnungsgemäß funktioniert, wenden Sie sich an
den Service des Herstellers.
c) Reparaturen dürfen nur vom Service des Herstellers
durchgeführt werden. Führen Sie keine Reparaturen
auf eigene Faust durch!
d) Bewahren Sie die Gebrauchsanleitung für den
weiteren Gebrauch auf. Sollte dieses Gerät
an Dritte weitergegeben werden, muss die
Gebrauchsanleitung mit ausgehändigt werden.
e) Elektrische Leitungen und Bewässerungsschläuche
sollten so angeordnet werden, dass die Sicherheit
der Menschen nicht gefährdet und Stolpern
ausgeschlossen wird.
f) Überprüfen Sie regelmäßig den Zustand der
Schläuche auf Beschädigungen oder Lecks.
g) Biegen Sie die Leitungen nicht, um sie nicht zu
beschädigen.
h) Verwenden Sie das Gerät nicht in der Nähe von
elektrischen Installationen, um zu vermeiden, dass
diese nass werden. Dies kann zu einer Gefährdung
von Leben oder Gesundheit führen.
i) Denken Sie daran, regelmäßig Wasser in den Tank zu
füllen, damit nicht zu viel Luft hineingerät.
j) Schließen Sie das Gerät nicht direkt an ein
vorhandenes Wasserversorgungsnetz an.
k) Das Gerät darf nicht an andere Stromquellen als ein
kompatibles Solarmodul angeschlossen werden.
Für einen langen und zuverlässigen Betrieb des Geräts
muss auf die richtige Handhabung und Wartung
entsprechend den in dieser Anleitung angeführten
Vorgaben geachtet werden. Die in dieser Anleitung
angegebenen technischen Daten und die Spezikation sind
aktuell. Der Hersteller behält sich das Recht vor, im Rahmen
der Verbesserung der Qualität Änderungen vorzunehmen.
Unter Berücksichtigung des technischen Fortschritts und
der Geräuschreduzierung wurde das Gerät so entworfen
und produziert, dass das infolge der Geräuschemission
entstehende Risiko auf dem niedrigsten Niveau gehalten
wird.
ERLÄUTERUNG DER SYMBOLE
1. ALLGEMEINE BESCHREIBUNG
Diese Anleitung ist als Hilfe für eine sichere und zuverlässige
Nutzung gedacht. Das Produkt wurde strikt nach den
technischen Vorgaben und unter Verwendung modernster
Technologien und Komponenten sowie unter Wahrung der
höchsten Qualitätsstandards entworfen und angefertigt.
Die originale Anweisung ist die deutschsprachige Fassung.
Sonstige Sprachfassungen sind Übersetzungen aus der
deutschen Sprache.
2. NUTZUNGSSICHERHEIT
VOR INBETRIEBNAHME MUSS DIE ANLEITUNG
GENAU DURCHGELESEN UND VERSTANDEN
WERDEN
TECHNISCHE DATEN
HINWEIS!In der vorliegenden Anleitung sind
Beispielbilder vorhanden, die von dem tatsächlichen
Aussehen des Produkts abweichen können.
ACHTUNG!Lesen Sie alle Sicherheitshinweise und
alle Anweisungen durch. Die Nichtbeachtung der
Warnungen und Anweisungen kann zu schweren
Verletzungen bis hin zum Tod führen.
HINWEIS!Kinder und Unbeteiligte müssen bei der
Arbeit mit diesem Gerät gesichert werden.
2.2. PERSÖNLICHE SICHERHEIT
a) Es ist nicht gestattet, das Gerät im Zustand der
Ermüdung, Krankheit, unter Einuss von Alkohol,
Drogen oder Medikamenten zu betreiben,
wenn diese die Fähigkeit das Gerät zu bedienen,
einschränken.
b) Das Gerät ist nicht dazu bestimmt, durch Personen
(darunter Kinder) mit eingeschränkten physischen,
sensorischen und geistigen Fähigkeiten bzw. durch

4 5
07.06.2022 07.06.2022
DEDE
C
D
AB
H
IK
F
E
J
G
L
L2L1 B2
J
I
II
III IV
Verzeichnis der Bestandteile:
A1. Saugschlauch
A2. Versorgungsschlauch
B1. Verteilerschlauch
B2. Anti-Siphon-Ventilschlauch
B3. Kondensatorschlauch
C. Steuereinheit/Irrigator
C1. Saugschlauch-Buchse
C2. Versorgungsschlauch-Buchse
C3. Wasserstandsensor-Buchse
C4. Solarmodul-Buchse
D. Solarmodul
E. Wasserstandsensor
F. Filter
G. Spritzdüse
H. Leitungshalter
I. T2-Verbindungsstück
J. T1-Verbindungsstück
K. Stöpsel
L. Anti-Siphon-Ventil
M. Netzkabel
N. Leitung des Wasserstandsensors
a) Packen Sie alle Komponenten des Geräts vorsichtig
aus.
b) Installieren Sie das Gerät in Arbeitsstellung an der
Wand.
c) Verbinden Sie die Leitung (N) des
Wasserstandsensors mit der entsprechenden Buchse
(C3) der Steuereinheit.
d) Schneiden Sie etwa 20 Zentimeter vom Schlauch (A)
ab, wodurch Schlauch (A1) und (A2) entsteht.
e) Schneiden Sie den Schlauch (A1) auf die richtige
Länge zu (unter Berücksichtigung des Abstandes der
Steuereinheit vom Wassertank). Schließen Sie den
Wasserlter (F) an den Schlauch (A1) an.
f) Verbinden Sie das andere Ende der Leitung (A1) mit
der entsprechenden Buchse an der Steuereinheit
(C1).
g) Stellen Sie den Filter (F) und den Wasserstandsensor
(E) in den Wassertank.
h) Verbinden Sie den Schlauch (A2) mit der Buchse (C2)
der Steuereinheit.
i) Befestigen Sie die Buchse (I) am freien Ende des
Schlauchs (A2).
j) Schneiden Sie etwa 10 Zentimeter vom Schlauch (B)
ab, so dass Schlauch (B1) und (B2) entsteht.
k) Verbinden Sie den Schlauch (B2) mit der Buchse (J),
sodass der Schlauch (B2) nach oben zeigt.
l) Befestigen Sie das Anti-Siphon-Ventil (L) am freien
Ende des Schlauchs (B2).
ACHTUNG! Die Position des Anti-Siphon-Ventils (L) muss
sich oberhalb der Wasserauslässe benden und in Richtung
des Schlauchs (B2) zeigen, wie in der folgenden Abbildung
dargestellt!
I. Zeitschaltknopf
• T - Test
• 0 - Ausschalter
• 1 - 30 sek/12 h
• 2 – 1 min/12 h
• 3 – 2 min/12 h
• 4 – 4 min/12 h
• 5 – 8 min/12 h
• 6 – 12 min/12 h
II. Diode
III. Wasserstandsensor-Buchse
IV. Solarmodul-Buchse
3.3.2. EINSTELLUNG DER
BETRIEBS-/BEWÄSSERUNGSZEIT
Die Bewässerungszeit wird mit dem Zeitschaltknopf (1)
eingestellt. Die Auswahl des geeigneten Modus startet den
Betrieb des Geräts unter Berücksichtigung der folgenden
Zeitintervalle.
• T – Testmodus. Die grüne Diode (2) leuchtet auf. Das
Gerät funktioniert solange, bis der Akku entladen ist.
• 0 – Ausschalter. Das Gerät stoppt, die Diode (2)
erlischt.
• 1-6 – Bewässerungszeit. Die Auswahl des
entsprechenden Werts gibt die Betriebszeit des
Geräts an, für die es nach Ende jedes 12-Stunden-
Zyklus in Betrieb ist: 30 Sekunden, 1 Minute, 2
Minuten, 4 Minuten, 8 Minuten, 12 Minuten. Die
grüne Diode (2) leuchtet.
Beispiel: Wenn Sie den Zeitschaltknopf (1) auf „3“
einstellen, bedeutet das, dass das Gerät automatisch
alle 12 Stunden für 2 Minuten bewässert.
o) Verbinden Sie die Buchse (I) mit dem Schlauchende
(B1).
p) Platzieren Sie das Stützelement (H) neben der
Panze und stützen Sie die Leitung (B1), die Wasser
für die Bewässerung liefert, darauf.
r) Schließen Sie die auf die entsprechende Länge vom
übrigen Schlauch zugeschnittene Leitung (B3) an die
nach unten gerichtete Buchse (I) an. Passen Sie die
Länge je nach Bedarf und Höhe der Stütze (H) an.
Schließen Sie die Spritzdüse (G) an das freie Ende des
Schlauches (B3) an.
s) Wiederholen Sie den in m - p beschriebenen
Vorgang für nachfolgende Panzen
t) Am Ende der Leitung (B2) einen Stöpsel (K)
anbringen.
u Verbinden Sie die Leitung (M) des Solarmoduls mit
der Buchse (C4) der Steuereinheit.
3.3. ARBEIT MIT DEM GERÄT
Lassen Sie das Solarmodul nach ordnungsgemäßer
Geräteinstallation mindestens 6 Stunden an einem
sonnigen Ort, um den Akku vollständig aufzuladen.
3.3.1. STEUEREINHEIT
m) Schließen Sie den Schlauch (B1) an das freie Ende der
Buchse (J) an.
n) Schneiden Sie den Schlauch so (B1) zu, dass Wasser
zu den Panzen geführt werden kann.
Personen ohne entsprechende Erfahrung und/oder
entsprechendes Wissen bedient zu werden, es sei
denn es gibt eine für ihre Aufsicht und Sicherheit
zuständige Person bzw. sie haben von dieser Person
entsprechende Hinweise in Bezug auf die Bedienung
das Gerät erhalten.
c) Um eine versehentliche Inbetriebnahme zu
vermeiden, vergewissern Sie sich, dass der
Schalter vor dem Anschließen an eine Stromquelle
ausgeschaltet ist.
d) Das Gerät ist kein Spielzeug. Kinder sollten unter
Aufsicht stehen, damit sie nicht mit dem Gerät
spielen.
2.3. SICHERE ANWENDUNG DES GERÄTS
a) Überhitzen Sie das Gerät nicht. Verwenden Sie
geeignete Werkzeuge für die entsprechende
Anwendung. Richtig ausgewählte Geräte und der
sorgsame Umgang mit ihnen führt zu besseren
Arbeitsergebnissen.
b) Benutzen Sie das Gerät nicht, wenn der EIN-/AUS-
Schalter nicht ordnungsgemäß funktioniert. Geräte,
die per Schalter nicht gesteuert werden können sind
gefährlich und müssen repariert werden.
c) Trennen Sie das Gerät vom Solarmodul, bevor Sie
Einstellungen vornehmen, das Zubehör austauschen
oder das Gerät beiseitelegen. Eine solche
vorbeugende Maßnahme verringert das Risiko einer
versehentlichen Inbetriebnahme.
d) Nicht verwendete Werkzeuge sind außerhalb
der Reichweite von Kindern sowie von Personen
aufzubewahren, welche weder das Gerät selbst, noch
die entsprechende Anleitung kennen. In den Händen
unerfahrener Personen können derlei Geräte eine
Gefahr darstellen.
e) Halten Sie das Gerät im einwandfreien Zustand.
Überprüfen Sie vor jeder Arbeit, ob allgemeine
Schäden vorliegen oder Schäden an beweglichen
Teilen (Bruch von Teilen und Komponenten oder
andere Bedingungen, die den sicheren Betrieb der
Maschine beeinträchtigen könnten). Im Falle eines
Schadens muss das Gerät vor Gebrauch in Reparatur
gegeben werden.
f) Halten Sie das Gerät außerhalb der Reichweite von
Kindern.
g) Reparatur und Wartung von Geräten dürfen nur
von qualiziertem Fachpersonal und mit Original-
Ersatzteilen durchgeführt werden. Dadurch wird die
Sicherheit bei der Nutzung gewährleistet.
h) Um die vorgesehene Betriebsintegrität des Gerätes
zu gewährleisten, dürfen die werksmäßig montierten
Abdeckungen oder Schrauben nicht entfernt werden.
i) Es ist verboten, das Gerät während der Arbeit zu
schieben, umzustellen oder umzudrehen.
j) Das Gerät regelmäßig reinigen, damit sich kein
Schmutz auf Dauer festsetzen kann.
k) Das Gerät ist kein Spielzeug. Reinigung und Wartung
dürfen nicht von Kindern ausgeführt werden, wenn
diese nicht unter der Aufsicht von Erwachsenen
stehen.
l) Halten bzw. hängen Sie das Gerät nicht an Leitungen
oder Schläuchen auf.
m) Das Gerät darf nicht zum Pumpen von verunreinigtem
Wasser (z.B. durch Öl, Partikel, abrasive Feststoe
usw.) verwendet werden.
n) Das Gerät darf nicht zum Pumpen von Salzwasser,
ätzenden Substanzen, brennbaren Flüssigkeiten usw.
verwendet werden.
o) Das Gerät darf nicht bei negativen
Umgebungstemperaturen verwendet werden.
Gefrorenes Wasser beschädigt das Gerät.
p) Nehmen Sie das Gerät nicht ohne Wasser in Betrieb.
q) Montieren Sie das Solarmodul so, dass es vor
versehentlicher Beschädigung (z.B. infolge eines
Sturzes oder Aufpralls) geschützt ist.
ACHTUNG!Obwohl das Gerät mit dem Gedanken an
die Sicherheit entworfen wurde, besitzt es bestimmte
Schutzmechanismen. Trotz der Verwendung
zusätzlicher Sicherheitselemente besteht bei der
Bedienung immer noch ein Verletzungsrisiko. Es wird
empfohlen, bei der Nutzung Vorsicht und Vernunft
walten zu lassen.
ACHTUNG!Die Zeichnungen von diesem Produkt
benden sich am Ende der Bedienungsanleitung
(S. 30).
3. NUTZUNGSBEDINGUNGEN
Das Gerät ist für die automatische Bewässerung von
Panzen mittels Solarenergie ausgelegt. Für alle Schäden
bei nicht sachgemäßer Verwendung haftet allein der
Betreiber.
3.1. GERÄTEBESCHREIBUNG
A. Schlauch mit größerem Querschnitt
B. Schlauch mit kleinerem Querschnitt
C. Steuereinheit
D. Solarmodul mit Stützelement
E. Wasserstandsensor
F. Filter
G. Spritzdüse
H. Leitungshalter
I. T2-Verbindungsstück
J. T1-Verbindungsstück
K. Stöpsel
L. Anti-Siphon-Ventil
ACHTUNG! Im Punkt „Gerätemontage“ wird beschrieben,
wie die Schläuche (A) und (B) zugeschnitten werden!
3.2. MONTAGE DES GERÄTS L1. Einlass des Anti-Siphon-Ventils (L)
L2. Auslass des Anti-Siphon-Ventils (L)

6 7
07.06.2022 07.06.2022
DE ENUSER MANUAL
Das Entladen des Akkus
Wenn der Akku entladen ist, schalten Sie die
Bewässerungsfunktion aus, indem Sie den Zeitschaltknopf
(1) auf „0“ stellen, und lassen Sie das Solarmodul
mindestens 6 Stunden an einem sonnigen Ort, um den
Akku aufzuladen.
Kein Wasser im Tank
Wenn die Diode (2) an der Steuereinheit (C) rot zu blinken
beginnt und die Bewässerung stoppt, bedeutet dies, dass
nicht genügend Wasser im Tank vorhanden ist. Um die
einwandfreie Funktion des Geräts wiederherzustellen, muss
der Wasservorrat nachgefüllt werden.
ACHTUNG! Wenn die Diode (2) abwechselnd grün und rot
blinkt, sind beide Probleme gleichzeitig aufgetreten!
3.4. REINIGUNG UND WARTUNG
a) Verwenden Sie zum Reinigen der Oberäche
ausschließlich Mittel ohne ätzende Inhaltsstoe.
b) Es ist untersagt die Maschine mit Wasserstrahlen zu
besprühen.
c) Hinsichtlich der technischen Ezienz und eventueller
Schäden sollte eine regelmäßige Überprüfung des
Gerätes durchgeführt werden.
d) Verwenden Sie ein weiches Tuch, um das Solarmodul
zu reinigen.
e) Reinigen Sie das Solarmodul regelmäßig, um das
Laden der Zellen zu optimieren.
SICHERE ENTSORGUNG VON AKKUMULATOREN UND
BATTERIEN
Die Geräte sind mit einem 3,6 V / 1200 mAH Akku
ausgestattet. Abgenutzte Akkus sollten aus dem Gerät
entfernt werden. Der Akku sollte der für die Entsorgung
dieser Materialien zuständigen Einheit übergeben werden.
Der im Gerät verwendete Akku sollte mindestens alle 2
Jahre ausgetauscht werden.
ENTSORGUNG GEBRAUCHTER GERÄTE
Dieses Produkt darf am Ende seiner Nutzungsdauer
nicht über den normalen Hausmüll entsorgt werden,
sondern muss an die Sammel – und Recyclinganlage für
Elektround Elektronikgeräte zurückgegeben werden.
Darüber informiert Sie das Symbol auf dem Produkt, auf
der Bedienungsanleitung oder der Verpackung. Die im
Gerät verwendeten Materialien sind entsprechend ihrer
Bezeichnung recyclebar. Mit der Wiederverwendung,
erneuten Nutzung von Materialien oder anderen
Formen des Gebrauchs von Gebrauchtgeräten leisten
Sie einen wichtigen Beitrag zum Schutz unserer
Umwelt. Informationen über die entsprechenden
Entsorgungspunkte erteilen Ihnen die lokalen Behörden.
The product satises the relevant safety standards.
Read instructions before use.
The product must be recycled.
WARNING! or CAUTION! or REMEMBER! Applicable
to the given situation (general warning sign).
Parameter description Parameter value
Product name Solar irrigation
Model HT-COSTIGAN-3600
Powering type Solar panel,
Battery 3.6 V
1,200 mAh Ni-MH
Rated power [W] / rated voltage
of the solar panel [V] 0.7 / 6
Pump power supply [VDC] 3.5
Rated power of the pump [W] 0.45
Charging time of the device
exposed to direct sunlight [h] 6 ÷ 8
Range of adjustment of the
operating time within 12 hours
[min]
0.5 ÷ 12
Maximum water ow [ml/min] 600
Maximum water temperature [°C] 40
Suction height [m] 2,4
Pumping height [m] 3
Solar panel mounting frame
dimensions [mm] 178 × 236 × 132
Solar panel dimensions [mm] 105 × 145
Control unit dimensions [mm] 162 × 140 × 56
Weight [kg] 1.1
To increase the product life of the device and to ensure
trouble-free operation, use it in accordance with this user
manual and regularly perform maintenance tasks. The
technical data and specications in this user manual are
up to date. The manufacturer reserves the right to make
changes associated with quality improvement. The device
is designed to reduce noise emission risks to a minimum,
taking into account technological progress and noise
reduction opportunities.
LEGEND
1. GENERAL DESCRIPTION
The user manual is designed to assist in the safe and
trouble-free use of the device. The product is designed and
manufactured in accordance with strict technical guidelines,
using state-of-the-art technologies and components.
Additionally, it is produced in compliance with the most
stringent quality standards.
DO NOT USE THE DEVICE UNLESS YOU HAVE
THOROUGHLY READ AND UNDERSTOOD THIS
USER MANUAL
TECHNICAL DATA
The terms „device“ or „product“ are used in the warnings
and instructions to refer to Solar irrigation. Do not put your
hands or other items inside the device while it is in use!
2.1. SAFETY IN THE WORKPLACE
a) If you discover damage or irregular operation,
immediately switch the device o and report it to a
supervisor without delay.
b) If there are any doubts as to the correct operation
of the device, contact the manufacturer‘s support
service.
c) Only the manufacturer‘s service point may repair the
device. Do not attempt any repairs independently!
d) Please keep this manual available for future
reference. If this device is passed on to a third party,
the manual must be passed on with it.
e) Electric cables and irrigation hoses should be
arranged so they do not pose any risk to people,
eliminating the possibility of tripping.
f) Regularly check the condition of the hoses for
damage or leaks.
g) Do not bend the cables to avoid damage.
h) Do not use the device in the vicinity of electrical
installations to avoid penetration of water. It may
cause a threat to life or health.
i) Remember to regularly ll up the water in the tank to
prevent system airlock.
j) Do not connect the device directly to an existing
water supply network.
k) It is forbidden to connect the device to power
sources other than a compatible solar panel.
The original operation manual is written in German. Other
language versions are translations from the German.
2. USAGE SAFETY
PLEASE NOTE!Drawings in this manual are for
illustration purposes only and in some details may
dier from the actual product.
ATTENTION!Read all safety warnings and all
instructions. Failure to follow the warnings and
instructions may result in serious injury or even
death.
REMEMBER!When using the device, protect
children and other bystanders.
2.2. PERSONAL SAFETY
a) Do not use the device when tired, ill or under the
inuence of alcohol, narcotics or medication which
can signicantly impair the ability to operate the
device.
b) The device is not designed to be handled by persons
(including children) with limited mental and sensory
functions or persons lacking relevant experience
and/or knowledge unless they are supervised by
a person responsible for their safety or they have
received instruction on how to operate the device.
c) To prevent the device from accidentally switching on,
make sure the switch is on the OFF position before
connecting to a power source.
d) The device is not a toy. Children must be supervised
to ensure that they do not play with the device.
2.3. SAFE DEVICE USE
a) Do not overload the device. Use the appropriate
tools for the given task. A correctly-selected device
will perform the task for which it was designed better
and in a safer manner.
b) Do not use the device if the ON/OFF switch does not

8 9
07.06.2022 07.06.2022
EN EN
C
D
AB
H
IK
F
E
J
G
L
function properly (does not switch the device on and
o). Devices which cannot be switched on and o
using the ON/OFF switch are hazardous, should not
be operated and must be repaired.
c) Disconnect the device from the solar panel before
making adjustments, changing attachments or
putting the device away. This preventive measure
reduces the risk of accidental activation.
d) When not in use, store in a safe place, away from
children and people not familiar with the device who
have not read the user manual. The device may pose
a hazard in the hands of inexperienced users.
e) Keep the device in perfect technical condition.
Before each use check for general damage and
especially check for cracked parts or elements and
for any other conditions which may impact the safe
operation of the device. If damage is discovered,
hand over the device for repair before use.
f) Keep the device out of the reach of children.
g) Device repair or maintenance should be carried out
by qualied persons, only using original spare parts.
This will ensure safe use.
h) To ensure the operational integrity of the device, do
not remove factory-tted guards and do not loosen
any screws.
i) Do not move, adjust or rotate the device in the
course of work.
j) Clean the device regularly to prevent stubborn grime
from accumulating.
k) The device is not a toy. Cleaning and maintenance
may not be carried out by children without
supervision by an adult person.
l) Do not handle or hang the device holding it by the
cables or hoses.
m) It is forbidden to use the device for pumping
contaminated water (e.g. with oil, small particles,
abrasive solids, etc.)
n) Do not use the device for pumping salty water,
caustic substances, ammable liquids, etc.
o) Do not use the device at temperatures below zero
degrees Celsius. Frozen water will damage the
device.
p) Do not start the device if it is not lled with water.
q) Mount the solar panel so as to protect it against
accidental damage (e.g., as a result of a fall or
impact).
ATTENTION!Despite the safe design of the device
and its protective features, and despite the use of
additional elements protecting the operator, there
is still a slight risk of accident or injury when using
the device. Stay alert and use common sense when
using the device.
ATTENTION!This product’s assembly drawings can
be found at the end of the manual (p. 30).
3. USE GUIDELINES
The device is designed for automatic irrigation of plants
using solar energy. The user is liable for any damage
resulting from unintended use of the device.
3.1. DEVICE DESCRIPTION
A. Larger cross-section hose
B. Smaller cross-section hose
C. Control unit
D. Solar panel with support
E. Water level sensor
F. Filter
G. Spraying nozzle
H. Cable support
I. T2 connector
J. T1 connector
K. Stopper
L. Anti-siphon valve
PLEASE NOTE! In the „Assembly“ section there is a
description of how to trim hoses (A) and (B)!
3.2. ASSEMBLY
L2L1 B2
J
I
II
III IV
a) Carefully unpack all the device components.
b) Install the device in working position on the wall.
c) Connect the water level sensor cable (N) to the
corresponding socket (C3) on the control unit.
d) Cut o about 20 centimetres from hose (A). The
trimmed section will be used to make hoses (A1) and
(A2).
e) Cut the hose (A1) to the correct length (taking into
account the distance between the control unit and
the water tank). Connect the water lter (F) to the
hose (A1).
f) Connect the other end of the hose (A1) to the
appropriate connector on the control unit (C1).
g) Place the lter (F) and the water level sensor (E) in the
water tank.
h) Connect the hose (A2) to the connector (C2) on the
control unit.
i) Attach the connector (I) to the free end of the hose
(A2).
j) Trim about 10 centimetres of the hose (B), thus
creating hoses (B1) and (B2).
k) Connect the hose (B2) to the connector (J) so that the
hose (B2) points upwards.
l) Attach the anti-siphon valve (L) to the free end of the
hose (B2).
IMPORTANT! The anti-siphon valve (L) must be raised
above the level of water outlets. The anti-siphon valve
(L) must be positioned with respect to the hose (B2) as
illustrated in the gure below!
List of elements:
A1. Suction hose
A2. Supply hose
B1. Distribution hose
B2. Anti-siphon valve hose
B3. Condenser hose
C. Control unit/irrigator
C1. Suction hose connection socket
C2. Supply hose connection socket
C3. Water level sensor socket
C4. Solar panel socket
D. Solar panel
E. Water level sensor
F. Filter
G. Spraying nozzle
H. Cable support
I. T2 connector
J. T1 connector
K. Stopper
L. Anti-siphon valve
M. Power cord
N. Water level sensor cable
I. Timer knob
• T - Test
• 0 - Switch
• 1 - 30 sec/12 h
• 2 - 1 min/12 h
• 3 - 2 min/12 h
• 4 - 4 min/12 h
• 5 - 8 min/12 h
• 6 - 12 min/12
II. Diode
III. Water level sensor socket
IV. Solar panel socket
3.3.2. OPERATION/SPRAYING TIME SETTINGS
Plant spraying time is adjusted by means of the timer knob
(1). Selection of the appropriate mode starts the operation
of the device, accounting for the following time intervals.
• T – Test mode. The green LED (2) will light up. The
device will work until the battery is discharged.
• 0 – Switch. The device stops, the diode (2) goes out.
• 1-6 – Spraying time. Choosing an appropriate value
indicates the device operating time for which it will
start again after each 12-hour cycle, respectively: 30
seconds, 1 minute, 2 minutes, 4 minutes, 8 minutes,
and 12 minutes. The green LED (2) is on.
Example: Setting the timer knob (1) to „3“ means
that the device will automatically start spraying for 2
minutes every 12 hours.
Discharged battery
If the battery is discharged, turn the spraying function o
by setting the timer knob (1) to „0“ and leave the solar
panel in a sunny place for at least 6 hours to recharge the
battery.
No water in the tank
If the diode (2) on the control unit (C) starts ashing red
and the watering is switched o, it means that there is not
enough water in the supply tank. In order to restore the
proper operation of the device, rell the water tank.
PLEASE NOTE! When the LED (2) blinks alternately, i.e.,
green and red, it means that both problems described
above have occurred at the same time!
3.4. CLEANING AND MAINTENANCE
a) Use only non-corrosive cleaners to clean the surface.
b) Never spray the device with water.
c) The device must be regularly inspected to check its
technical eciency and spot any damage.
d) Use a soft cloth to clean the solar panel.
e) Regularly clean the solar panel to optimize the cell
charging.
3.3.1. CONTROL PANEL
L1. Anti-siphon valve (L) inlet
L2. Anti-siphon valve (L) outlet
m) Connect a hose (B1) to the free end of the connector
(J).
n) Cut the length of the hose (B1) to make supply of
water to the plant possible.
o) Attach the connector (I) to the end of the hose (B1).
p) Place the support (H) next to the plant and place the
water supply hose (B1) on the support (H) to make
irrigation possible.
r) Attach the hose (B3) cut to the appropriate length
from the remaining length of hose (B2) to the end
of the connector (I) pointing down. Adjust the length
according to needs and to the height of the support
(H). Connect the spray nozzle (G) to the free end of
the hose (B3).
s) Repeat the process described in paragraphs m - p for
subsequent plants.
t) Insert the stopper (K) at the end of the hose (B2).
u) Connect the solar panel cable (M) to the socket (C4)
on the control unit.
3.3. DEVICE USE
After correct installation of the device, place the solar panel
in a sunny place for at least 6 hours to fully charge the
battery.

10 11
07.06.2022 07.06.2022
EN PLINSTRUKCJA OBSŁUGI
SAFE REMOVAL OF BATTERIES AND RECHARGEABLE
BATTERIES
The devices are equipped with a 3.6 V/1200 mAh battery.
Dead battery should be removed from the device. The
battery should be handed over to the unit responsible for
the disposal of such materials. The device battery should be
replaced at least every 2 years.
DISPOSING OF USED DEVICES
Do not dispose of this device in municipal waste systems.
Hand it over to an electric and electrical device recycling
and collection point. Check the symbol on the product,
instruction manual and packaging. The plastics used
to construct the device can be recycled in accordance
with their markings. By choosing to recycle you are
making a signicant contribution to the protection of our
environment. Contact local authorities for information on
your local recycling facility.
Produkt spełnia wymagania odpowiednich norm
bezpieczeństwa.
Przed użyciem należy zapoznać się z instrukcją.
Produkt podlegający recyklingowi.
UWAGA! lub OSTRZEŻENIE! lub PAMIĘTAJ!
opisująca daną sytuację (ogólny znak ostrzegawczy).
Opis parametru Wartość parametru
Nazwa produktu System do nawadniania
Model HT-COSTIGAN-3600
Typ zasilania Panel słoneczny,
Bateria 3,6 V 1 200 mAh
Ni-MH
Moc znamionowa [W]
/ napięcie znamionowe
panelu słonecznego[V]
0,7 / 6
Napięcie zasilania pompy
[VDC] 3,5
Moc znamionowa pompy [W] 0,45
Czas ładowania urządzenia
wystawionego na
bezpośrednie działanie
promieni słonecznych [h]
6 ÷ 8
Zakres regulacji czasu
działania w ciągu 12h [min] 0,5 ÷ 12
Maksymalny przepływ wody
[ml/min] 600
Maksymalna temperatura
wody [°C] 40
Wysokość zasysania [m] 2,4
Wysokość pompowania [m] 3
Wymiary ramy montażowej
panelu słonecznego [mm] 178 × 236 × 132
Wymiary panelu słonecznego
[mm] 105 × 145
Wymiary jednostki sterującej
[mm] 162 × 140 × 56
Ciężar [kg] 1,1
Termin „urządzenie” lub „produkt” w ostrzeżeniach
i w opisie instrukcji odnosi się do systemu do nawadniania.
Nie wkładać rąk, przedmiotów do wnętrza pracującego
urządzenia!
2.1. BEZPIECZEŃSTWO W MIEJSCU PRACY
a) W razie stwierdzenia uszkodzenia lub
nieprawidłowości w pracy urządzenia należy je
bezzwłocznie wyłączyć i zgłosić to do osoby
uprawnionej.
b) W razie wątpliwości czy urządzenia działa poprawnie,
należy skontaktować się z serwisem producenta.
c) Naprawy urządzenia może wykonać wyłącznie
serwis producenta. Nie wolno dokonywać napraw
samodzielnie!
d) Zachować instrukcję użytkowania w celu jej
późniejszego użycia. W razie, gdyby urządzenie miało
zostać przekazane osobom trzecim, to wraz z nim
należy przekazać również instrukcję użytkowania.
e) Przewody elektryczne oraz węże nawadniające należy
ułożyć w sposób niezagrażający bezpieczeństwu
ludzi, wykluczający możliwość potknięcia się.
f) Należy regularnie sprawdzać stan węży pod kątem
uszkodzeń lub nieszczelności.
g) Nie zginać przewodów aby uniknąć ich uszkodzenia.
h) Nie wolno używać urządzenia w pobliżu instalacji
elektrycznych aby uniknąć ich zamoczenia. Może to
spowodować zagrożenie życia lub zdrowia.
i) Należy pamiętać o regularnym uzupełnianiu wody
w zbiorniku, aby zapobiec zapowietrzaniu się
instalacji.
j) Nie wolno podłączać urządzenia bezpośrednio do
istniejącej sieci wodociągowej.
k) Zabrania się podłączania urządzenia pod źródła
zasilania inne niż kompatybilny panel słoneczny.
Dla zapewnienia długiej i niezawodnej pracy urządzenia
należy dbać o jego prawidłową obsługę oraz konserwację
zgodnie ze wskazówkami zawartymi w tej instrukcji. Dane
techniczne i specykacje zawarte w tej instrukcji obsługi są
aktualne. Producent zastrzega sobie prawo dokonywania
zmian związanych z podwyższeniem jakości. Uwzględniając
postęp techniczny i możliwość ograniczenia hałasu,
urządzenie zaprojektowano i zbudowano tak, aby ryzyko
jakie wynika z emisji hałasu ograniczyć do najniższego
poziomu.
OBJAŚNIENIE SYMBOLI
1. OGÓLNY OPIS
Instrukcja przeznaczona jest do pomocy w bezpiecznym
i niezawodnym użytkowaniu. Produkt jest zaprojektowany
i wykonany ściśle według wskazań technicznych przy
użyciu najnowszych technologii i komponentów oraz przy
zachowaniu najwyższych standardów jakości.
Instrukcją oryginalną jest niemiecka wersja instrukcji.
Pozostałe wersje językowe są tłumaczeniami z języka
niemieckiego.
2. BEZPIECZEŃSTWO UŻYTKOWANIA
PRZED PRZYSTĄPIENIEM DO PRACY NALEŻY
DOKŁADNIE PRZECZYTAĆ I ZROZUMIEĆ NINIEJSZĄ
INSTRUKCJĘ
DANE TECHNICZNE
UWAGA! Ilustracje w niniejszej instrukcji obsługi
mają charakter poglądowy i w niektórych szczegółach
mogą różnić się od rzeczywistego wyglądu produktu.
UWAGA! Przeczytać wszystkie ostrzeżenia
dotyczące bezpieczeństwa oraz wszystkie instrukcje.
Niezastosowanie się do ostrzeżeń i instrukcji może
spowodować porażenie prądem, pożar i/lub ciężkie
obrażenia ciała lub śmierć.
PAMIĘTAJ! Należy chronić dzieci i inne osoby
postronne podczas pracy urządzeniem.
2.2. BEZPIECZEŃSTWO OSOBISTE
a) Niedozwolone jest obsługiwanie urządzenia
w stanie zmęczenia, choroby, pod wpływem
alkoholu, narkotyków lub leków, które ograniczają
w istotnym stopniu zdolności obsługi urządzenia.

12 13
07.06.2022 07.06.2022
PLPL
L2L1 B2
J
I
II
III IV
B1. Wąż rozprowadzający
B2. Wąż zaworu antysyfonowego
B3. Wąż skraplacza
C. Jednostka sterująca / irygator
C1. Gniazdo przewodu ssącego
C2. Gniazdo przewodu doprowadzającego
C3. Gniazdo czujnika poziomu wody
C4. Gniazdo panelu słonecznego
D. Panel słoneczny
E. Czujnik poziomu wody
F. Filtr
G. Dysza zraszająca
H. Podpórka przewodu
I. Złącze T2
J. Złącze T1
K. Zatyczka
L. Zawór antysyfonowy
M. Przewód zasilający
N. Przewód czujnika poziomu wody
a) Ostrożnie rozpakować wszystkie elementy
urządzenia.
b) Zainstalować urządzenie w pozycji roboczej na
ścianie.
c) Podłączyć przewód (N) czujnika poziomu wody do
odpowiedniego gniazda (C3) jednostki sterującej.
d) Odciąć ok. 20 centymetrów od węża (A), powstanie
dzięki temu wąż (A1) oraz (A2).
e) Przeciąć wąż (A1) na odpowiednią długość (biorąc
pod uwagę odległość jednostki sterującej od
zbiornika wody). Podłączyć do węża (A1) ltr wody
(F).
f) Podłączyć drugi koniec przewodu (A1) do
odpowiedniego złącza jednostki sterującej (C1).
g) Umieścić ltr (F) oraz czujnik poziomu wody (E)
w zbiorniku z wodą
h) Podłączyć wąż (A2) do przyłącza (C2) jednostki
sterującej.
i) Do wolnego końca węża (A2) dołączyć złącze (I).
j) Odciąć ok. 10 centymetrów od węża (B), powstanie
dzięki temu wąż (B1) oraz (B2).
k) Podłączyć wąż (B2) do złącza (J), tak by wąż (B2)
skierowany był do góry.
l) Dołączyć do wolnego końca węża (B2) zawór
antysyfonowy (L).
UWAGA! Położenie zaworu antysyfonowego (L) musi
znajdować się powyżej wylotów wody oraz powinien on
być skierowany względem węża (B2), tak jak na poniższym
rysunku!
I. Pokrętło minutnika
• T – Test
• 0 – Wyłącznik
• 1 – 30 sek/12 h
• 2 – 1 min/12 h
• 3 – 2 min/12 h
• 4 – 4 min/12 h
• 5 – 8 min/12 h
• 6 – 12 min/12 h
II. Dioda
III. Gniazdo czujnika poziomu wody
IV. Gniazdo panelu słonecznego
3.3.2. USTAWIENIA CZASU PRACY / ZRASZANIA
Czas zraszania roślin regulowany jest przy pomocy pokrętła
minutnika (1). Wybór odpowiedniego trybu rozpoczyna
pracę urządzenia, uwzględniając poniższe przedziały
czasowe.
• T – tryb testu. Zaświeci się zielona dioda (2).
Urządzenie będzie działać do czasu rozładowania się
akumulatora.
• 0 – Wyłącznik. Urządzenie kończy pracę, dioda (2)
zgaśnie.
• 1-6 – Czas zraszania. Wybór odpowiedniej wartości
wskazuje czas pracy urządzenia na jaki uruchomi
się ono po upływie każdego 12-godzinnego cyklu,
odpowiednio: 30 sekund, 1 minuta, 2 minuty, 4
minuty, 8 minut, 12 minut. Zielona dioda (2) świeci
się.
Przykład: Ustawienie pokrętła minutnika (1) na wartość „3”
oznacza, że urządzenie uruchomi automatycznie zraszanie
na 2 min, co 12 godzin.
Rozładowanie akumulatora
W przypadku rozładowania akumulatora należy wyłączyć
funkcję zraszania ustawiając pokrętło minutnika
(1) w pozycji „0” oraz pozostawić panel słoneczny
w nasłonecznionym miejscu na przynajmniej 6 godzin,
celem naładowania akumulatora.
od reszty węża (B2). Długość dopasować według
potrzeb i wysokości podpórki (H). Podłączyć dyszę
zraszającą (G) do wolnej końcówki węża (B3).
s) Powtórzyć proces opisany w punktach m - p dla
kolejnych roślin
t) Na końcu przewodu (B2) zamontować zatyczkę (K).
u) Podłączyć przewód (M) panelu słonecznego do
gniazda (C4) jednostki sterującej.
3.3. PRACA Z URZĄDZENIEM
Po prawidłowym montażu urządzenia należy pozostawić
panel słoneczny w nasłonecznionym miejscu na co najmniej
6 godzin, celem pełnego naładowania akumulatora.
3.3.1. PANEL STERUJĄCY
L1. Wlot zaworu antysyfonowego (L)
L2. Wylot zaworu antysyfonowego (L)
m) Do wolnej końcówki złącza (J) podłączyć wąż (B1).
n) Przyciąć wąż (B1) na długość umożliwiającą
doprowadzenie wody do rośliny.
o) Podłączyć złącze (I) do końca węża (B1).
p) Umieścić podpórkę (H) obok rośliny i ułożyć na
niej przewód (B1) doprowadzający wodę, tak by
umożliwiał podlewanie.
r) Do końcówki złącza (I) skierowanej w dół podłączyć
przewód (B3) odcięty na odpowiednią długość
C
D
AB
H
IK
F
E
J
G
L
b) Urządzenie nie jest przeznaczone do tego, by
było użytkowane przez osoby (w tym dzieci)
o ograniczonych funkcjach psychicznych,
sensorycznych i umysłowych lub nieposiadające
odpowiedniego doświadczenia i/lub wiedzy, chyba
że są one nadzorowane przez osobę odpowiedzialną
za ich bezpieczeństwo lub otrzymały od niej
wskazówki dotyczące tego, jak należy obsługiwać
urządzenie.
c) Aby zapobiegać przypadkowemu uruchomieniu
upewnij się, że przełącznik jest w pozycji wyłączonej
przed podłączeniem do źródła zasilania.
d) Urządzenie nie jest zabawką. Dzieci powinny być
pilnowane, aby nie bawiły się urządzeniem.
2.3. BEZPIECZNE STOSOWANIE URZĄDZENIA
a) Nie należy przeciążać urządzenia. Używać narzędzi
odpowiednich do danego zastosowania. Prawidłowo
dobrane urządzenie wykona lepiej i bezpieczniej
pracę dla którego zostało zaprojektowane.
b) Nie należy używać urządzenia, jeśli przełącznik ON/
OFF nie działa sprawnie (nie załącza i nie wyłącza
się). Urządzenia, które nie mogą być kontrolowane
za pomocą przełącznika są niebezpieczne, nie mogą
pracować i muszą zostać naprawione.
c) Przed przystąpieniem do regulacji, wymiany osprzętu
lub odłożeniem urządzenia należy odłączyć je od
panelu słonecznego. Taki środek zapobiegawczy
zmniejsza ryzyko przypadkowego uruchomienia.
d) Nieużywane urządzenia należy przechowywać
w miejscu niedostępnym dla dzieci oraz osób
nieznających urządzenia lub tej instrukcji
obsługi. Urządzenia są niebezpieczne w rękach
niedoświadczonych użytkowników.
e) Utrzymywać urządzenie w dobrym stanie
technicznym. Sprawdzać przed każdą pracą czy
nie posiada uszkodzeń ogólnych lub związanych
z elementami ruchomymi (pęknięcia części
i elementów lub wszelkie inne warunki, które mogą
mieć wpływ na bezpieczne działanie urządzenia).
W przypadku uszkodzenia, oddać urządzenie do
naprawy przed użyciem.
f) Urządzenie należy chronić przed dziećmi.
g) Naprawa oraz konserwacja urządzeń powinna być
wykonywana przez wykwalikowane osoby przy
użyciu wyłącznie oryginalnych części zamiennych.
Zapewni to bezpieczeństwo użytkowania.
h) Aby zapewnić zaprojektowaną integralność
operacyjną urządzenia, nie należy usuwać
zainstalowanych fabrycznie osłon lub odkręcać śrub.
i) Zabrania się przesuwania, przestawiania i obracania
urządzenia będącego w trakcie pracy.
j) Należy regularnie czyścić urządzenie, aby nie
dopuścić do trwałego osadzenia się zanieczyszczeń.
k) Urządzenie nie jest zabawką. Czyszczenie
i konserwacja nie mogą być wykonywane przez
dzieci bez nadzoru osoby dorosłej.
l) Nie wolno przenosić lub wieszać urządzenia za
przewody lub węże.
m) Zabrania się używania urządzenia do pompowania
zanieczyszczonej wody (np. olejem, drobinami,
częściami stałymi o charakterze ściernym itp.)
n) Zabrania się używania urządzenia do pompowania
słonej wody, substancji żrących, łatwopalnych
płynów itp.
o) Zabrania się używania urządzenia przy ujemnych
temperaturach otoczenia. Zamarznięta woda
spowoduje uszkodzenie urządzenia.
p) Nie uruchamiać urządzenia bez wody.
q) Należy zamontować panel słoneczny
w sposób zabezpieczający go przed przypadkowym
uszkodzeniem (np. w wyniku upadku lub uderzenia).
UWAGA! Pomimo iż urządzenie zostało
zaprojektowane tak aby było bezpieczne, posiadało
odpowiednie środki ochrony oraz pomimo użycia
dodatkowych elementów zabezpieczających
użytkownika, nadal istnieje niewielkie ryzyko
wypadku lub odniesienia obrażeń w trakcie pracy
z urządzeniem. Zaleca się zachowanie ostrożności i
rozsądku podczas jego użytkowania.
UWAGA! Rysunki złożeniowe produktu znajdują się
na końcu instrukcji (str. 30).
3. ZASADY UŻYTKOWANIA
Urządzenie przeznaczone jest do automatycznego
nawadniania roślin przy wykorzystaniu zasilania z energii
słonecznej. Odpowiedzialność za wszelkie szkody
powstałe w wyniku użytkowania niezgodnego
z przeznaczeniem ponosi użytkownik.
3.1. OPIS URZĄDZENIA
A. Wąż o większym przekroju
B. Wąż o mniejszym przekroju
C. Jednostka sterująca
D. Panel słoneczny z podporą
E. Czujnik poziomu wody
F. Filtr
G. Dysza zraszająca
H. Podpórka przewodu
I. Złącze T2
J. Złącze T1
K. Zatyczka
L. Zawór antysyfonowy
UWAGA! W punkcie „Montaż urządzenia” znajduje się opis
przycięcia węży (A) i (B)!
3.2. MONTAŻ URZĄDZENIA
Lista elementów:
A1. Wąż ssący
A2. Wąż doprowadzający

14 15
07.06.2022 07.06.2022
PL CZNÁVOD K POUŽITÍ
Brak wody w zbiorniku
W przypadku, gdy znajdująca się na jednostce sterującej
(C) dioda (2) zacznie migać na czerwono, a zraszanie
wyłączy się oznacza to, że w zbiorniku zasilającym nie ma
wystarczającej ilości wody. Aby przywrócić prawidłowe
funkcjonowanie urządzenia należy uzupełnić zapas wody.
UWAGA! W przypadku, gdy dioda (2) mruga naprzemiennie
w kolorach zielonym i czerwonym oznacza to, że obydwa
powyższe problemy wystąpiły jednocześnie!
3.4. CZYSZCZENIE I KONSERWACJA
a) Do czyszczenia powierzchni należy stosować
wyłącznie środki niezawierające substancji żrących.
b) Zabrania się spryskiwania urządzenia strumieniem
wody.
c) Należy wykonywać regularne przeglądy urządzenia
pod kątem jego sprawności technicznej oraz
wszelkich uszkodzeń.
d) Do czyszczenia panelu słonecznego należy używać
miękkiej ściereczki.
e) Należy regularnie czyścić panel słoneczny w celu
optymalizacji ładowania ogniwa.
INSTRUKCJA BEZPIECZNEGO USUNIĘCIA
AKUMULATORÓW I BATERII
W urządzeniach zamontowany jest akumulator 3,6 V
/ 1200 mAh. Zużyty akumulator należy zdemontować
z urządzenia. Akumulator przekazać komórce
odpowiedzialnej za utylizację tych materiałów. Akumulator
wykorzystywany w urządzeniu powinien być wymieniany
nie rzadziej niż co 2 lata.
USUWANIE ZUŻYTYCH URZĄDZEŃ
Po zakończeniu okresu użytkowania nie wolno usuwać
niniejszegoproduktupoprzeznormalneodpadykomunalne,
lecz należy go oddać do punktu zbiórki i recyklingu
urządzeń elektrycznych i elektronicznych. Informuje o tym
symbol, umieszczony na produkcie, instrukcji obsługi lub
opakowaniu. Zastosowane w urządzeniu tworzywa nadają
się do powtórnego użycia zgodnie z ich oznaczeniem.
Dzięki powtórnemu użyciu, wykorzystaniu materiałów lub
innym formom wykorzystania zużytych urządzeń wnoszą
Państwo istotny wkład w ochronę naszego środowiska.
Informacji o właściwym punkcie usuwania zużytych
urządzeń udzieli Państwu lokalna administracja.
Výrobek splňuje požadavky příslušných
bezpečnostních norem.
Před použitím výrobku se seznamte s návodem.
Recyklovatelný výrobek.
UPOZORNĚNÍ! nebo VAROVÁNÍ! nebo
PAMATUJTE! popisující danou situaci (všeobecná
výstražná značka).
Popis parametru Hodnota parametru
Název výrobku Zavlažovací systém
Model HT-COSTIGAN-3600
Druh napájení Solární panel, Baterie
3,6 V 1 200 mAh Ni-MH
Jmenovitý výkon [W] / jmenovité
napětí solárního panelu [V] 0,7 / 6
Napětí napájení čerpadla [VDC] 3,5
Jmenovitý výkon čerpadla [W] 0,45
Doba nabíjení zařízení
vystaveného přímému
slunečnímu záření [h]
6 ÷ 8
Rozsah nastavení provozní doby
v průběhu 12 h [min] 0,5 ÷ 12
Maximální průtok vody [ml/min] 600
Maximální teplota vody [°C] 40
Výška sání [m] 2,4
Výška čerpání [m] 3
Rozměry montážního rámu
solárního panelu [mm] 178 × 236 × 132
Rozměry solárního panelu [mm] 105 × 145
Rozměry řídicí jednotky [mm] 162 × 140 × 56
Hmotnost [kg] 1,1
Pro zajištění dlouhého a spolehlivého fungování zařízení
pravidelně provádějte revize a údržbu v souladu s pokyny
uvedenými v tomto návodu. Technické údaje a specikace
uvedené v návodu jsou aktuální. Výrobce si vyhrazuje
právo provádět změny za účelem zvýšení kvality. Vzhledem
k technickému pokroku a možnosti omezení hluku bylo
zařízení navrženo a vyrobeno tak, aby nebezpečí vyplývající
z emise hluku bylo omezeno na nejnižší úroveň.
VYSVĚTLENÍ SYMBOLŮ
1. VŠEOBECNÝ POPIS
Návod slouží jako nápověda pro bezpečné a spolehlivé
používání výrobku. Výrobek je navržen a vyroben přesně
podle technických údajů za použití nejnovějších technologií
a komponentů a za dodržení nejvyšších jakostních norem.
PŘED ZAHÁJENÍM PRÁCE SI DŮKLADNĚ PŘEČTĚTE
TENTO NÁVOD A UJISTĚTE SE, ŽE JSTE POCHOPILI
VŠECHNY POKYNY
TECHNICKÉ ÚDAJE
Pojem „zařízení“ nebo „výrobek“ v bezpečnostních
pokynech a návodu se vztahuje na Zavlažovací systém.
Pokud je zařízení v provozu, nevkládejte do něj ruce ani
žádné předměty!
2.1. BEZPEČNOST NA PRACOVIŠTI
a) Pokud zjistíte, že zařízení nepracuje správně, nebo
je poškozeno, ihned jej vypněte a poruchu nahlaste
autorizované osobě.
b) Pokud máte pochybnosti o tom, zda zařízení funguje
správně, kontaktujte servis výrobce.
c) Opravy zařízení může provádět pouze servis výrobce.
Opravy neprovádějte sami!
d) Návod k obsluze uschovejte za účelem jeho
pozdějšího použití. V případě předánání zařízení
třetím osobám musí být spolu se zařízením předán
rovněž návod k obsluze.
e) Elektrické kabely a zavlažovací hadice uspořádejte
způsobem, který neohrožuje bezpečnost osob a
vylučuje možnost klopýtnutí.
f) Pravidelně kontrolujte stav hadic s ohledem na
možnost jejich poškození nebo netěsnosti.
g) Neohýbejte kabely, aby nedošlo k jejich poškození.
h) Nepoužívejte zařízení v blízkosti elektrických
instalací, abyste zabránili jejich styku s vodou. Může
to způsobit poškození zdraví nebo ohrožení života.
i) Nezapomeňte pravidelně doplňovat vodu v nádrži,
aby nedošlo k zavzdušnění zařízení.
j) Nepřipojujte zařízení přímo k existující vodovodní
síti.
k) Je zakázáno připojovat zařízení k jiným zdrojům
napájení než ke kompatibilním solárním panelům.
Originálním návodem je německá verze návodu. Ostatní
jazykové verze jsou překladem z německého jazyka.
2. BEZPEČNOST POUŽÍVÁNÍ
POZOR! Obrázky v tomto návodu jsou ilustrační.
V některých detailech se od skutečného vzhledu
zařízení mohou lišit.
POZNÁMKA! Přečtěte si tento návod včetně všech
bezpečnostních pokynů. Nedodržování návodu a
výstrah může způsobit těžký úraz nebo smrt.
PAMATUJTE! Při práci se zařízením chraňte děti a
jiné nepovolané osoby.
2.2. OSOBNÍ BEZPEČNOST
a) Zařízení nepoužívejte, jste-li unaveni nebo pod
vlivem drog, alkoholu nebo léků, které významně
snižují schopnost zařízení ovládat.
b) Zařízení není určen k tomu, aby jej používaly osoby
(včetně dětí) s omezenými psychickými, smyslovými
nebo duševními schopnostmi nebo osoby bez
příslušných zkušeností a/nebo znalostí, ledaže
jsou pod dohledem osoby zodpovědné za jejich
bezpečnost nebo od ní obdržely pokyny, jak zařízení
obsluhovat.
c) Zabraňte náhodnému spuštění. Ujistěte se, že je
spínač ve vypnuté poloze před připojením zařízení k
napájecímu zdroji.
d) Zařízení není hračka. Dohlížejte na děti, aby si nehrály
se zařízením.
2.3. BEZPEČNÉ POUŽÍVÁNÍ ZAŘÍZENÍ
a) Zařízení nepřetěžujte. Pro daný úkol používejte vždy
správný typ nářadí. Správně zvolené nářadí lépe a
bezpečněji provede práci, pro kterou bylo navrženo.
b) Zařízení nepoužívejte, pokud spínač pro zapnutí a
vypnutí zařízení nefunguje správně. Zařízení, které

16 17
07.06.2022 07.06.2022
CZCZ
L2L1 B2
J
I
II
III IV
g) Umístěte ltr (F) a snímač hladiny vody (E) do nádrže
na vodu.
h) Připojte hadici (A2) k přípojce (C2) na řídicí jednotce.
i) K volnému konci hadice (A2) připojte konektor (J).
j) Z kabelu (B) odřízněte přibližně 10 centimetrů, čímž
získáte hadice (B1) a (B2).
k) Připojte hadici (B2) ke konektoru (J) tak, aby hadice
(B2) směrovala nahoru.
l) K volnému konci hadice (B2) připojte anti-sifonový
ventil (L).
POZOR! Anti-sifonový ventil (L) musí být umístěný nad
vývody vody a musí směrovat k hadici (B2) tak, jak je to
na obrázku níže!
II. Dioda
III. Zásuvka snímače hladiny vody
IV. Zásuvka solárního panelu
3.3.2. NASTAVENÍ DÉLKY ZALÉVÁNÍ ČASOVAČEM
Délka časového úseku, v průběhu kterého jsou rostliny
zalévány, se nastavuje pomocí ovládacího knoíku
časovače (1). Po volbě vhodného režimu se spustí provoz
zařízení. Zvolit si lze z následujících možností:
• T – Testovací režim. Rozsvítí se zelená dioda (2).
Zařízení bude v provozu nepřetržitě až do vybití
baterie.
• 0 – Vypnutí. Zařízení ukončí provoz, dioda (2) zhasne.
• 1-6 – Délka zalévání. Volba jednotlivých hodnot
udává délku zalévání. Zalévání se aktivuje každých 12
hodin a může trvat 30 sekund, 1 minutu, 2 minuty, 4
minuty, 8 minut a 12 minut. Zelená dioda (2) svítí.
Příklad: Nastavení ovládacího knoíku časovače (1)
na hodnotu „3” znamená, že zařízení automaticky
aktivuje zalévání každých 12 hodin a zalévání bude
trvat 2 minuty.
Vybití baterie
V případe vybití baterie vypněte funkci zalévání nastavením
ovládacího knoíku časovače (1) na hodnotu „0” a ponechte
solární panel na slunečném místě nejméně 6 hodin, aby se
baterie zcela nabila.
V nádrži není voda
V případě, že dioda (2) na ovládací jednotce (C) začne
červeně blikat a zavlažování se vypne, znamená to, že v
zásobníku nádrži není dostatek vody. Aby se obnovilo
správné fungování zařízení, musí být voda v nádrži
doplněna.
POZOR! V případě, že dioda (2) střídavě bliká zeleně a
červeně, znamená to, že se oba výšeuvedené problémy
vyskytly současně!
3.4. ČIŠTĚNÍ A ÚDRŽBA
a) K čištění povrchu zařízení používejte výhradně
prostředky neobsahující žíravé látky.
b) V žádném případě přístroj nelze mýt vodou.
c) Pravidelně provádějte revize zařízení a kontrolujte,
zda je technicky způsobilé a není poškozeno.
d) Na čistění solárního panelu používejte měkký hadřík.
e) Solární panel čistěte pravidelně, abyste optimalizovali
nabíjení baterie.
NÁVOD K BEZPEČNÉMU ODSTRANĚNÍ AKUMULÁTORŮ A
BATERIÍ.
Zařízení jsou vybavena baterií 3,6 V / 1 200 mAh.
Opotřebovanou baterii ze zařízení vyjměte. Baterii předejte
organizaci odpovědné k likvidaci těchto materiálů. Baterie
používaná v zařízení by měla být vyměněna nejméně
jednou za 2 roky.
LIKVIDACE OPOTŘEBENÝCH ZAŘÍZENÍ
Po ukončení doby používání nevyhazujte tento výrobek
společně s komunálním odpadem, ale odevzdejte jej k
recyklaci do sběrny elektrických a elektronických zařízení.
O tom informuje symbol umístěný na zařízení, v návodě
k obsluze nebo na obalu. Komponenty použité v zařízení
jsou vhodné pro zužitkování v souladu s jejich označením.
Díky zužitkování, recyklaci nebo jiným způsobům využití
opotřebených zařízení významně přispíváte k ochraně
životního prostředí. Informace o příslušné sběrně
opotřebených zařízení poskytne místní obecný nebo
městský úřad.
L1. Vstup anti-sifonového ventilu (L)
L2. Výstup anti-sifonového ventilu (L)
m) K volnému konci konektoru (J) připojte hadici (B1).
n) Řezáním upravte hadici (B1) na délku, která umožní
přívod vody k rostlinám.
o) Připojte konektor (I) ke konci hadice (B1).
p) Umístěte podpěru (H) vedle rostliny a umístěte na
ni hadici dodávající vodu (B1) tak, aby umožnila
zalévání.
r) Na konec konektoru (I), který je nasměrovaný dolů,
připojte hadici (B3), kterou získáte odříznutím ze
zbytků hadice (B1). Délku hadice přizpůsobte podle
potřeb a výšky podpěry (H). Připojte kropící trysku
(G) na volný konec hadice (B3).
s) Pro přívod zavlažování k dalším rostlinám opakujte
postup popsaný v bodech m) až p).
t) Na konci hadice (B1) namontujte zátku (K).
u) Zapojte kabel solárního panelu (M) do zásuvky (C4)
na řídicí jednotce.
3.3. PRÁCE SE ZAŘÍZENÍM
Po správné instalaci zařízení ponechte solární panel na
slunečném místě nejméně 6 hodin, aby se baterie zcela
nabila.
3.3.1. OVLÁDACÍ PANEL
C
D
AB
H
IK
F
E
J
G
L
nelze ovládat spínačem, je nebezpečné a musí být
opraveno.
c) Před seřizováním, výměnou příslušenství nebo
demontáží zařízení odpojte toto zařízení od
solárního panelu. Takové preventivní opatření snižuje
riziko náhodného uvedení zařízení do provozu.
d) Nepoužívaná zařízení uchovávejte mimo dosah dětí
a osob, které nejsou seznámeny se zařízením nebo
návodem k obsluze. Zařízení jsou nebezpečná v
rukou nezkušených uživatelů.
e) Zařízení udržujte v dobrém technickém stavu.
Kontrolujte před každou prací jeho celkový stav i
jednotlivé díly a ujistěte se, že je vše v dobrém stavu,
a uživateli tak při práci se zařízením nehrozí žádné
nebezpečí. V případě, že zjistíte poškození, nechte
zařízení opravit.
f) Udržujte zařízení mimo dosah dětí.
g) Opravu a údržbu zařízení by měly provádět
pouze kvalikované osoby za výhradního použití
originálních náhradních dílů. Zajistí to bezpečné
používání zařízení.
h) Pro zachování navržené mechanické integrity
zařízení neodstraňujte předem namontované kryty
nebo neuvolňujte šrouby.
i) Nepřesouvejte, nepřenášejte a neotáčejte zařízení v
provozu.
j) Pravidelně čistěte zařízení, aby nedošlo k trvalému
usazovaní nečistot.
k) Zařízení není hračka. Čištění a údržbu nesmí provádět
děti bez dohledu dospělé osoby.
l) Zařízením nepohybujte za jeho kabely a hadice, ani
ho za ně nezavěšujte.
m) Zařízení je zakázáno používat pro čerpání znečištěné
vody (např. olejem, pevnými částicemi, abrazivními
tuhými látkami apod.)
n) Zařízení je zakázáno používat pro čerpání slané vody,
žíravých látek, hořlavých kapalin apod.
o) Zařízení je zakázáno používat, pokud je okolní
teplota nižší než 0 °C. Zamrzlá voda způsobí
poškození zařízení.
p) Neuvádějte zařízení do provozu bez vody.
q) Solární panel namontujte způsobem, který jej chrání
před náhodným poškozením (např. v důsledku pádu
nebo nárazu).
POZNÁMKA! I když zařízení bylo navrženo tak, aby
bylo bezpečné, tedy má vhodné bezpečnostní prvky,
tak i přes použití dodatečné ochrany uživatelem při
práci se zařízením nadále existuje malé riziko úrazu
nebo poranění. Doporučuje se zachovat opatrnost a
zdravý rozum při jeho používání.
POZNÁMKA! Výkresy sestavení naleznete na konci
tohoto návodu (str. 30).
3. ZÁSADY POUŽÍVÁNÍ
Zařízení je určeno pro automatické zavlažování rostlin
pomocí solární energie. Odpovědnost za veškeré škody
vzniklé v důsledku použití zařízení v rozporu s určením
nese uživatel.
3.1. POPIS ZAŘÍZENÍ
A. Hadice s větším průřezem
B. Hadice s menším průřezem
C. Ovládací jednotka
D. Solární panel s podpěrou
E. Snímač hladiny vody
F. Filtr
G. Postřikovací tryska
H. Podpěra hadice
I. Konektor T2
J. Konektor T1
K. Zátka
L. Anti-sifonový ventil
POZOR! V bodě „Montáž zařízení“ naleznete popis
přiřezávání hadic (A) a (B)!
3.2. MONTÁŽ ZAŘÍZENÍ
Seznam dílů:
A1. Sací hadice
A2. Napájecí hadice
B1. Rozvodná hadice
B2. Anti-sifonová hadice
B3. Hadice kondenzátoru
C. Ovládací jednotka / zavlažovač
C1. Připojení sací hadice
C2. Připojení napájecí hadice
C3. Zásuvka snímače hladiny vody
C4. Zásuvka solárního panelu
D. Solární panel
E. Snímač hladiny vody
F. Filtr
G. Kropící tryska
H. Podpěra hadice
I. Konektor T2
J. Konektor T1
K. Zátka
L. Anti-sifonový ventil
M. Napájecí kabel
N. Kabel snímače hladiny vody
a) Opatrně rozbalte všechny součásti zařízení.
b) Nainstalujte zařízení do pracovní polohy na stěnu.
c) Zapojte kabel (N) snímače hladiny vody do
odpovídající zásuvky (C3) na řídicí jednotce.
d) Odřízněte přibližně 20 cm hadice (A), čímž získáte
hadice (A1) a (A2).
e) Řezáním upravte hadici (A1) na požadovanou délku
(s ohledem na vzdálenost řídicí jednotky od nádrže
na vodu). K jednomu konci hadice (A1) připojte ltr
vody (F).
f) Druhý konec hadice (A1) připojte k příslušnému
konektoru na řídicí jednotce (C1).
I. Ovládací knoík časovače
• T – Test
• 0 – Vypnutí
• 1 – 30 sek/12 h
• 2 – 1 min/12 h
• 3 – 2 min/12 h
• 4 – 4 min/12 h
• 5 – 8 min/12 h
• 6 – 12 min/12 h

18 19
07.06.2022 07.06.2022
FR MANUEL D´UTILISATION FR
Le produit est conforme aux normes de sécurité en
vigueur.
Respectez les consignes du manuel.
Collecte séparée.
ATTENTION ! , AVERTISSEMENT ! et REMARQUE
attirent l'attention sur des circonstances
spéciques (symboles d'avertissement généaraux).
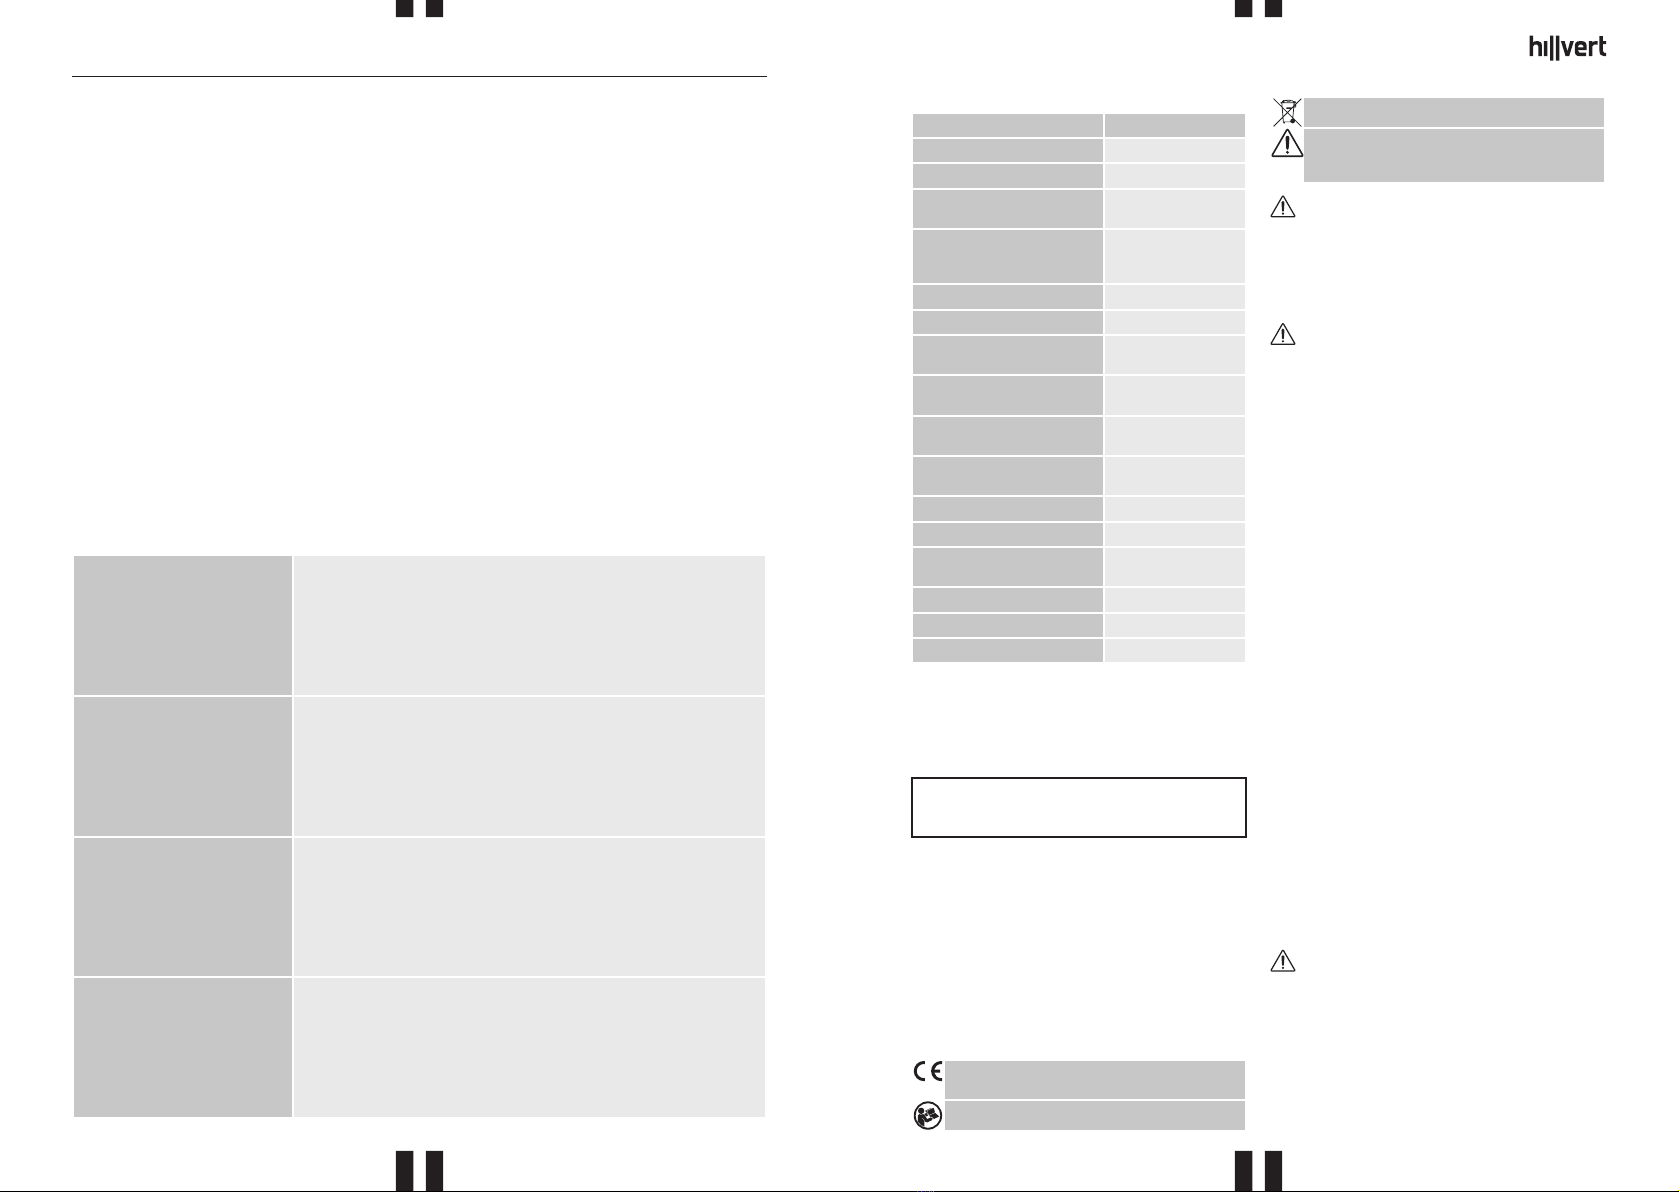
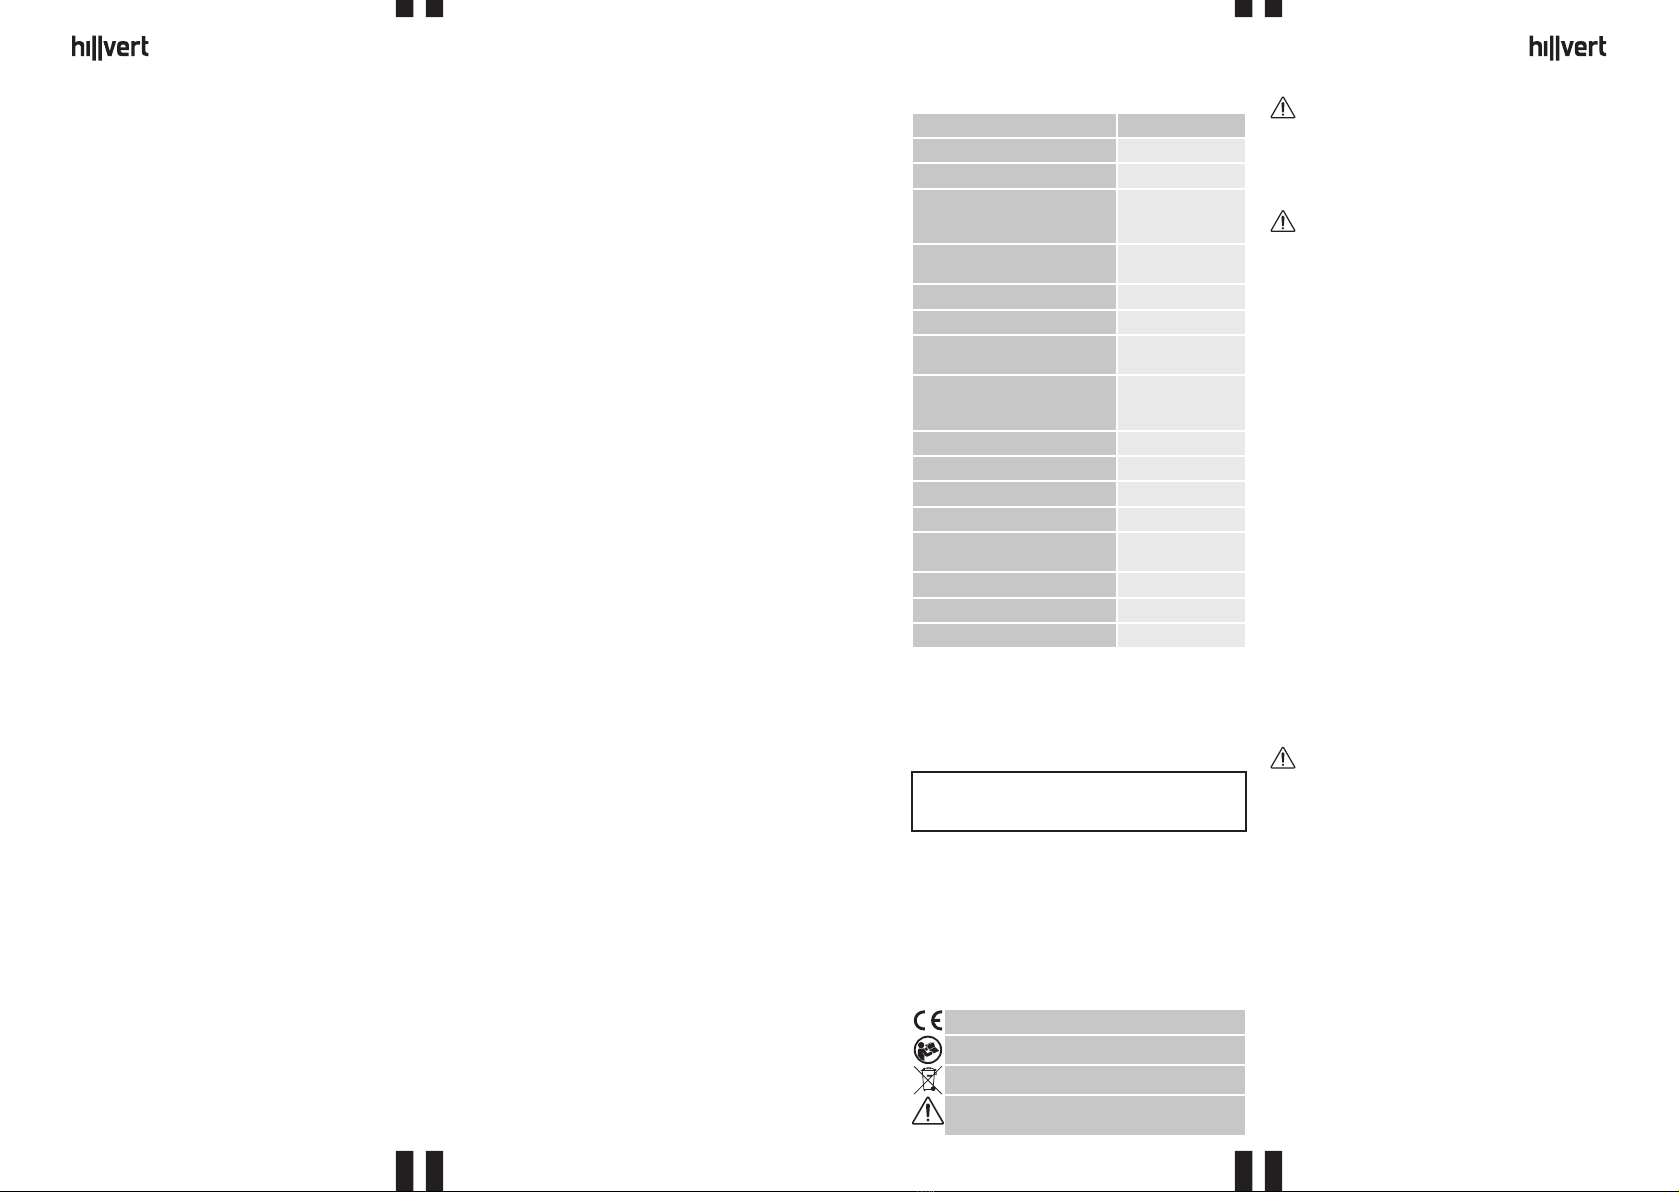
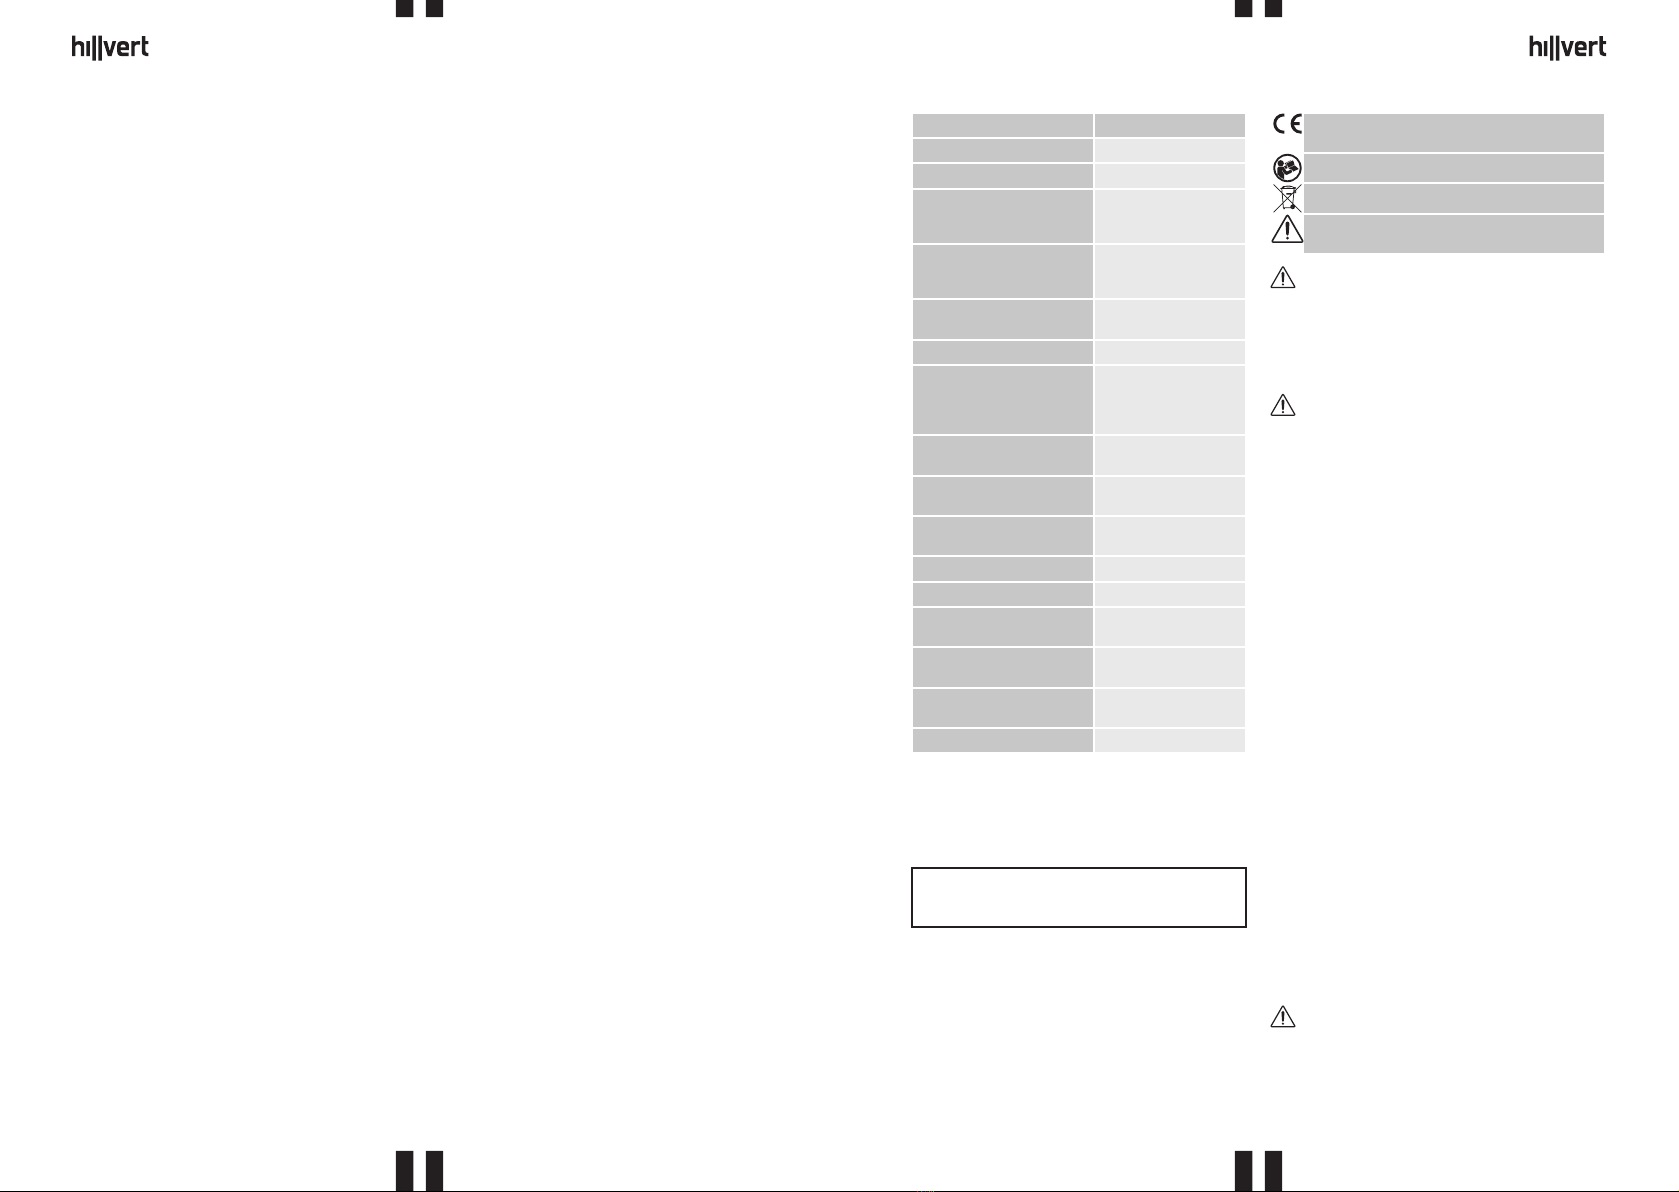
Description des paramètres Valeur des
paramètres
Nom du produit Système
d'irrigation
Modèle HT-
COSTIGAN-3600
Type d'alimentation Panneau solaire,
Pile 3,6 V
1 200 mAh Ni-MH
Puissance nominale [W] / Tension
nominale du panneau solaire[V] 0,7 / 6
Tension de la pompe [VDC] 3,5
Puissance nominale de la pompe [W] 0,45
Temps de charge de l'appareil
exposé directement au soleil [h] 6 ÷ 8
Plage de réglage de la durée de
fonctionnement pendant 12 h [min] 0,5 ÷ 12
Débit d'eau maximal [ml/min] 600
Température maximale de l'eau [°C] 40
Hauteur d'aspiration [m] 2,4
Hauteur de refoulement [m] 3
Dimensions du cadre de montage
du panneau solaire [mm] 178 × 236 × 132
Dimensions du panneau solaire [mm] 105 × 145
Dimensions de l'unité de
commande [mm] 162 × 140 × 56
Poids [kg] 1,1
An de garantir le fonctionnement able et durable de
l‘appareil, il est nécessaire d‘utiliser et d‘entretenir ce
dernier conformément aux consignes gurant dans le
présent manuel. Les caractéristiques et les spécications
contenues dans ce document sont à jour. Le fabricant se
réserve le droit de procéder à des modications à des ns
d’amélioration du produit. L‘appareil a été mis au point et
fabriqué en tenant compte des progrès techniques et de la
réduction de bruit an de réduire au maximum les risques
liés aux émissions sonores.
SYMBOLES
1. DESCRIPTION GÉNÉRALE
L‘objectif du présent manuel est de favoriser une utilisation
sécuritaire et able de l‘appareil. Le produit a été conçu
et fabriqué en respectant étroitement les directives
techniques applicables et en utilisant les technologies et
composants les plus modernes. Il est conforme aux normes
de qualité les plus élevées.
LISEZ ATTENTIVEMENT LE PRÉSENT MANUEL ET
ASSUREZ-VOUS DE BIEN LE COMPRENDRE AVANT
LA PREMIÈRE UTILISATION
DÉTAILS TECHNIQUES
Les notions d‘« appareil », de « machine » et de « produit »
gurant dans les descriptions et les consignes du manuel se
rapportent à/au Système d‘irrigation. N‘insérez ni les mains,
ni tout autre objet dans l‘appareil lorsqu‘il fonctionne !
2.1. SÉCURITÉ AU POSTE DE TRAVAIL
a) En cas de dommages ou de mauvais fonctionnement,
l’appareil doit être mis hors tension immédiatement
et la situation doit être rapportée à une personne
compétente.
b) En cas d’incertitude quant au fonctionnement correct
de l’appareil, contactez le service client du fabricant.
c) Seul le service du fabricant peut eectuer des
réparations. Ne tentez aucune réparation par vous-
même !
d) Conservez le manuel d’utilisation an de pouvoir
le consulter ultérieurement. En cas de cession de
l’appareil à un tiers, l’appareil doit impérativement
être accompagné du manuel d’utilisation.
e) Les câbles électriques et les tuyaux d‘irrigation
doivent être disposés de manière à ne pas menacer
la sécurité des personnes et à éviter les risques de
trébuchement.
f) Vériez régulièrement l’absence de dommages et de
fuites sur les tuyaux.
g) Ne pliez pas les câbles pour éviter de les
endommager.
h) N‘utilisez pas l‘appareil à proximité d‘installations
électriques pour éviter de les mouiller. Cela peut
constituer une menace pour la vie et la santé.
i) Pensez à remplir régulièrement l’eau du réservoir
pour empêcher la pénétration d‘air dans le système.
j) Ne branchez pas l‘appareil directement au réseau
d‘alimentation en eau existant.
k) Ne branchez jamais l‘appareil à une source
d‘alimentation autre qu‘un panneau solaire
compatible.
La version originale de ce manuel a été rédigée en
allemand. Toutes les autres versions sont des traductions
de l‘allemand.
2. CONSIGNES DE SÉCURITÉ
REMARQUE !Les illustrations contenues dans le
présent manuel sont fournies à titre explicatif. Votre
appareil peut ne pas être identique.
ATTENTION !Veuillez lire attentivement toutes
les consignes de sécurité et toutes les instructions.
Le non-respect des avertissements et des consignes
de sécurité peut entraîner des blessures graves ou
la mort.
REMARQUE !Veillez à ce que les enfants et les
personnes qui n‘utilisent pas l‘appareil soient en
sécurité durant le travail.
2.2. SÉCURITÉ DES PERSONNES
a) N‘utilisez pas l‘appareil lorsque vous êtes fatigué,
malade, sous l‘eet de drogues ou de médicaments
et que cela pourrait altérer votre capacité à utiliser
l‘appareil.
b) Cet appareil n‘est pas conçu pour être utilisé
par les personnes dont les facultés physiques,
C
D
AB
H
IK
F
E
J
G
L
sensorielles ou mentales sont limitées (enfants y
compris), ni par des personnes sans expérience
ou connaissances adéquates, à moins qu‘elles se
trouvent sous la supervision et la protection d‘une
personne responsable ou qu‘une telle personne leur
ait transmis des consignes appropriées en lien avec
l‘utilisation de l’appareil.
c) An de prévenir la mise en marche accidentelle de
l‘appareil, assurez-vous que celui-ci est éteint et que
l‘interrupteur se trouve sur arrêt avant de procéder
au branchement.
d) Cet appareil n‘est pas un jouet. Les enfants doivent
demeurer sous la supervision d’un adulte an qu’ils
ne jouent pas avec l’appareil.
2.3. UTILISATION SÉCURITAIRE DE L‘APPAREIL
a) Ne faites pas surchauer l‘appareil. Utilisez les outils
appropriés pour l‘usage que vous en faites. Le choix
d‘appareils appropriés et l‘utilisation soigneuse de
ceux-ci produisent de meilleurs résultats.
b) N’utilisez pas l’appareil si l’interrupteur MARCHE/
ARRÊT ne fonctionne pas correctement. Les appareils
qui ne peuvent pas être contrôlés à l‘aide d‘un
interrupteur sont dangereux et doivent être réparés.
c) Avant de procéder à tout réglage, changement
d‘accessoire ou dépose, débranchez l’appareil du
panneau solaire. Une telle mesure préventive réduit
le risque d‘activation accidentelle.
d) Les outils qui ne sont pas en cours d‘utilisation
doivent être mis hors de portée des enfants et des
personnes qui ne connaissent ni l‘appareil, ni le
manuel d‘utilisation s‘y rapportant. Entre les mains
de personnes inexpérimentées, ce genre d‘appareils
peut représenter un danger.
e) Maintenez l‘appareil en parfait état de marche. Avant
chaque utilisation, vériez l’absence de dommages
en général et au niveau des pièces mobiles (assurez-
vous qu’aucune pièce ni composant n’est cassé et
vériez que rien ne compromet le fonctionnement
sécuritaire de l’appareil). En cas de dommages,
l’appareil doit impérativement être envoyé en
réparation avant d’être utilisé de nouveau.
f) Tenez l‘appareil hors de portée des enfants.
g) La réparation et l‘entretien des appareils doivent être
eectués uniquement par un personnel qualié, à
l‘aide de pièces de rechange d‘origine. Cela garantit
la sécurité d’utilisation.
h) Pour garantir l‘intégrité opérationnelle de l‘appareil,
les couvercles et les vis posés à l‘usine ne doivent pas
être retirés.
i) Il est défendu de pousser, de déplacer ou de tourner
l’appareil pendant son fonctionnement.
j) Nettoyez régulièrement l‘appareil pour en prévenir
l’encrassement.
k) Cet appareil n‘est pas un jouet. Le nettoyage et
l’entretien ne doivent pas être eectués par des
enfants, à moins qu’ils se trouvent sous la supervision
d’un adulte responsable.
l) Ne déplacez pas l‘appareil en le tenant par les ls ou
les tuyaux et ne le suspendez pas non plus de cette
façon.
m) Il est interdit d‘utiliser l‘appareil pour pomper de
l‘eau contaminée (par exemple par de l‘huile, des
particules, des solides abrasifs, etc.).
n) Il est interdit d‘utiliser l‘appareil pour le pompage
d‘eau salée, de substances corrosives, de liquides
inammables, etc.
o) Il est interdit d‘utiliser l‘appareil à des températures
sous zéro. L‘eau gelée endommagera l‘appareil.
p) Ne démarrez pas l‘appareil à sec.
q) Montez le panneau solaire de manière à le protéger
contre les dommages accidentels (résultant par
exemple d‘une chute ou d‘un choc).
ATTENTION ! Bien que l‘appareil ait été conçu en
accordant une attention spéciale à la sécurité et qu‘il
comporte des dispositifs de protection, ainsi que des
caractéristiques de sécurité supplémentaires, il n’est
pas possible d’exclure entièrement tout risque de
blessure lors de son utilisation. Nous recommandons
de faire preuve de prudence et de bon sens lorsque
vous utilisez l’appareil.
ATTENTION ! Les schémas du produit se trouvent à
la dernière page du manuel d’utilisation (p. 30).
3. CONDITIONS D’UTILISATION
L‘appareil est conçu pour irriguer automatiquement les
plantes en utilisant l‘énergie solaire. L’utilisateur porte
l’entière responsabilité pour l’ensemble des dommages
attribuables à un usage inapproprié.
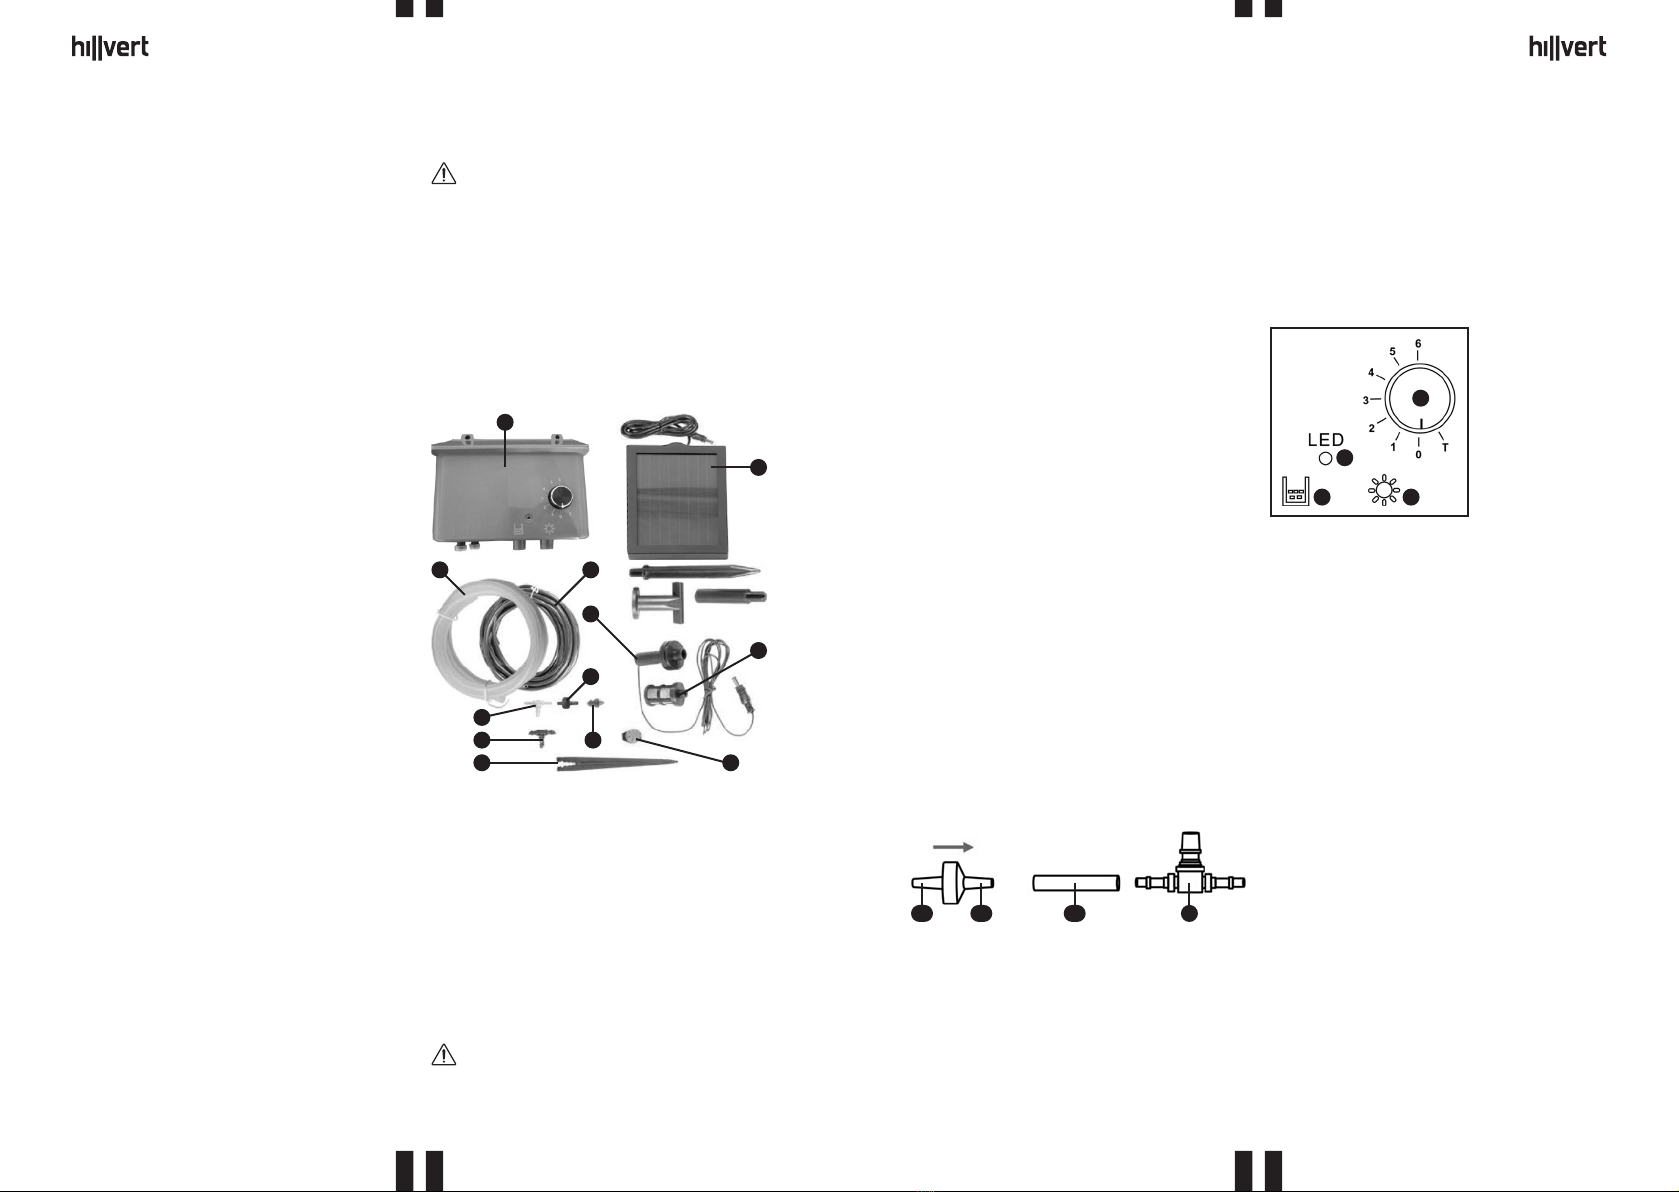
3.1. DESCRIPTION DE L‘APPAREIL
A. Tuyau à grande section
B. Tuyau à petite section
C. Unité de commande
D. Panneau solaire avec piquet
E. Capteur de niveau d‘eau
F. Filtre
G. Buse d‘arrosage
H. Support de tuyau
I. Connecteur T2
J. Connecteur T1
K. Bouchon
L. Valve anti-siphon
ATTENTION ! Au point « Montage de l‘appareil », vous
trouverez une description de la façon appropriée de couper
les tuyaux (A) et (B) !
3.2 MONTAGE DE L‘APPAREIL
Nomenclatur :
A1. Tuyau d‘aspiration
A2. Tuyau d‘alimentation
B1. Tuyau de distribution

20 21
07.06.2022 07.06.2022
FR FR
L2L1 B2
J
I
II
III IV
I. Bouton de la minuterie
• T – Test
• 0 – Interrupteur
• 1 – 30 s/12 h
• 2 – 1 min/12 h
• 3 – 2 min/12 h
• 4 – 4 min/12 h
• 5 – 8 min/12 h
• 6 – 12 min/12 h
II. Diode
III. Raccord du capteur de niveau d‘eau
IV. Raccord panneau solaire
3.3.2 RÉGLAGE DU TEMPS DE TRAVAIL / D‘ARROSAGE
Le temps d‘arrosage des plantes se règle à l‘aide du
bouton de la minuterie (1). La sélection du mode approprié
entraine le démarrage de l‘appareil selon les intervalles de
temps ci-dessous.
• T – mode de test. La diode verte s‘allume (2).
L‘appareil fonctionne jusqu‘au déchargement de la
batterie.
• 0 – Interrupteur. L‘appareil s‘arrête, la diode (2)
s‘éteint.
• 1-6 – Temps d‘arrosage. La sélection de la valeur
appropriée indique la durée de fonctionnement
pendant laquelle il démarrera après chaque cycle de
12 heures, respectivement : 30 secondes, 1 minute, 2
minutes, 4 minutes, 8 minutes, 12 minutes. La diode
verte (2) s’allume.
Exemple : Le réglage du bouton de la minuterie (1)
sur la valeur « 3 » signie que l’appareil commence
automatiquement à arroser pendant 2 minutes
toutes les 12 heures.
Décharge de la batterie
Si la batterie est déchargée, désactivez la fonction
d‘arrosage en plaçant le bouton de la minuterie (1) sur « 0 »
et laissez le panneau solaire au soleil pendant au moins 6
heures pour recharger la batterie.
Manque d‘eau dans le réservoir
Si la diode (2) de l‘unité de commande (C) commence à
clignoter en rouge et que l‘arrosage est désactivé, cela
L1. Entrée de la valve anti-siphon (L)
L2. Sortie de la valve anti-siphon (L)
m) Fixez le tuyau (B1) à l‘extrémité libre du connecteur
(J).
n) Coupez le tuyau (B1) à une longueur permettant à
l‘eau d’atteindre la plante.
o) Branchez le connecteur (I) à l‘extrémité du tuyau (B1).
p) Placez le support (H) à côté de la plante et posez-y le
tuyau d’alimentation (B1) pour permettre l’arrosage.
r) Raccordez le tuyau (B3) coupé à la longueur
appropriée (B2) à l‘extrémité inférieure du
connecteur (I). Adaptez la longueur en fonction des
besoins et de la hauteur du support (H). Raccordez la
buse (G) à l‘extrémité libre du tuyau (B3).
s) Répétez le processus décrit aux points m - p pour les
plantes suivantes.
t) Au bout du tuyau (B2), installez un bouchon (K).
u) Connectez le câble du panneau solaire (M) au
raccord (C4) de l’unité de commande.
3.3. UTILISATION DE L‘APPAREIL
Après avoir correctement installé l‘appareil, laissez le
panneau solaire au soleil durant au moins 6 heures pour
charger complètement la batterie.
3.3.1. PANNEAU DE COMMANDE
B2. Tuyau de la valve anti-siphon
B3. Tuyau du condensateur
C. Unité de commande / irrigateur
C1. Raccord du tuyau d‘aspiration
C2. Raccord du tuyau d‘alimentation
C3. Raccord du capteur de niveau d‘eau
C4. Raccord du panneau solaire
D. Panneau solaire
E. Capteur de niveau d‘eau
F. Filtre
G. Buse d‘arrosage
H. Support de tuyau
I. Connecteur T2
J. Connecteur T1
K. Bouchon
L. Valve anti-siphon
M. Câble d‘alimentation
N. Câble du capteur de niveau d‘eau
a) Déballez soigneusement tous les composants de
l‘appareil.
b) Installez l‘appareil en position de travail sur le mur.
c) Branchez le capteur de niveau d‘eau (N) dans la prise
appropriée (C3) de l‘unité de commande.
d) Coupez environ 20 centimètres de tuyau (A) pour
créer les tuyaux (A1) et (A2).
e) Coupez le tuyau (A1) à la bonne longueur (en tenant
compte de la distance entre l‘unité de commande
et le réservoir d‘eau). Branchez le ltre à eau (F) au
tuyau (A1).
f) Branchez l‘autre extrémité du tuyau (A1) dans le
raccord approprié de l‘unité de commande (C1).
g) Placez le ltre (F) et le capteur de niveau d‘eau (E)
dans le réservoir d‘eau.
h) Raccordez le tuyau (A2) au raccord (C2) de l’unité de
commande.
i) Fixez le connecteur (I) à l‘extrémité libre du tuyau
(A2).
j) Coupez environ 10 centimètres de tuyau (B) pour
créer les tuyaux (B1) et (B2).
k) Raccordez le tuyau (B2) au connecteur (J) de sorte
que le tuyau (B2) soit dirigé vers le haut.
l) Fixez la valve anti-siphon (L) à l‘extrémité libre du
tuyau (B2).
ATTENTION ! La valve anti-siphon (L) doit se trouver au-
dessus des sorties d’eau et doit occuper la position illustrée
ci-dessous par rapport au tuyau (B2) !
signie qu‘il n‘y a pas assez d‘eau dans le réservoir. An de
rétablir le bon fonctionnement de l‘appareil, l‘alimentation
en eau doit être renouvelée.
ATTENTION ! Si la diode (2) clignote en vert et en rouge à
tour de rôle, cela signie que les deux problèmes se sont
produits simultanément !
3.4. NETTOYAGE ET ENTRETIEN
a) Pour nettoyer les diérentes surfaces, n‘utilisez que
des produits sans agents corrosifs.
b) Il est défendu d‘asperger l‘appareil à l‘aide d‘un jet
d‘eau.
c) Contrôlez régulièrement l‘appareil pour vous assurer
qu‘il fonctionne correctement et ne présente aucun
dommage.
d) Utilisez un chion doux pour nettoyer le panneau
solaire.
e) Nettoyez régulièrement le panneau solaire pour
optimiser la recharge des piles.
RECYCLAGE SÉCURITAIRE DES ACCUMULATEURS ET
DES PILES
Les appareils sont équipés d’une batterie 3,6 V / 1 200
mAh. Les piles usagées doivent être retirées de l‘appareil.
Remettez les piles usagées dans un centre de recyclage
compétent. La pile de l‘appareil doit être remplacée au
moins tous les 2 ans.
MISE AU REBUT DES APPAREILS USAGÉS
À la n de sa vie, ce produit ne doit pas être jeté dans les
ordures ménagères ; il doit impérativement être remis
dans un point de collecte et de recyclage pour appareils
électroniques et électroménagers. Un symbole à cet
eet gure sur le produit, l‘emballage ou dans le manuel
d‘utilisation. Les matériaux utilisés lors de la fabrication
de l‘appareil sont recyclables conformément à leur
désignation. En recyclant ces matériaux, en les réutilisant ou
en utilisant les appareils usagés d’une autre manière, vous
contribuez grandement à protéger notre environnement.
Pour obtenir de plus amples informations sur les points de
collecte appropriés, adressez-vous à vos autorités locales.

22 23
07.06.2022 07.06.2022
IT ISTRUZIONI PER L‘USO IT
Il prodotto soddisfa le attuali norme di sicurezza.
Leggere attentamente le istruzioni.
Prodotto riciclabile.
ATTENZIONE o AVVERTENZA! o NOTA! per
richiamare l'attenzione su determinate circostanze
(indicazioni generali di avvertenza).
Parametri - Descrizione Parametri - Valore
Nome del prodotto Sistema di irrigazione
Modello HT-COSTIGAN-3600
Tipo di alimentazione Pannello solare,
Batteria 3,6 V
1.200 mAh Ni-MH
Potenza nominale [W] / tensione
nominale del pannello solare [V] 0,7 / 6
Tensione di alimentazione della
pompa [VCC] 3,5
Potenza nominale della pompa
[W] 0,45
Tempo di ricarica del dispositivo
esposto alla luce diretta del
sole [h]
6 ÷ 8
Intervallo di regolazione del
tempo di funzionamento su 12
ore [min]
0,5 ÷ 12
Massimo usso dell’acqua
[ml/min] 600
Massima temperatura
dell’acqua [°C] 40
Altezza di aspirazione [m] 2,4
Altezza di pompaggio [m] 3
Dimensioni della cornice del
pannello solare [mm] 178 × 236 × 132
Dimensioni del pannello solare
[mm] 105 × 145
Dimensioni dell’unità di
comando [mm] 162 × 140 × 56
Peso [kg] 1,1
Per un funzionamento duraturo e adabile del dispositivo
assicurarsi di maneggiarlo e curarne la manutenzione
secondo le disposizioni presentate in questo manuale.
I dati e le speciche tecniche indicati in questo manuale
sono attuali. Il fornitore si riserva il diritto di apportare
delle migliorie nel contesto del miglioramento dei
propri prodotti. L‘apparecchiatura è stata progettata e
realizzata tenendo in considerazione il progresso tecnico
e la riduzione di rumore, in maniera tale da mantenere al
minimo i possibili rischi derivanti dalle emissioni di rumore.
SPIEGAZIONE DEI SIMBOLI
1. DESCRIZIONE GENERALE
Queste istruzioni sono intese come ausilio per un uso sicuro
e adabile. Il prodotto è stato rigorosamente progettato
e realizzato secondo le direttive tecniche e l‘utilizzo delle
tecnologie e componenti più moderne e seguendo gli
standard di qualità più elevati.
PRIMA DELLA MESSA IN FUNZIONE È NECESSARIO
AVER LETTO E COMPRESO LE ISTRUZIONI D‘USO
DATI TECNICI
Il termine „apparecchio“ o „prodotto“ nelle avvertenze
e descrizioni contenute nel manuale si riferisce alla/al
Sistema di irrigazione. Non mettere mani o oggetti nel
dispositivo in movimento!
2.1. SICUREZZA SUL LAVORO
a) In presenza di un danno o un difetto, il dispositivo
deve subito essere spento e bisogna avvisare una
persona autorizzata.
b) Se non si è sicuri del corretto funzionamento del
dispositivo, rivolgersi al servizio assistenza del
fornitore.
c) Le riparazioni devono essere eseguite esclusivamente
dal servizio assistenza del produttore. Non eseguire
le riparazioni da soli!
d) Conservare le istruzioni d‘uso per uso futuro. Nel
caso in cui il dispositivo venisse adato a terzi,
consegnare anche queste istruzioni.
e) I cavi elettrici e i tubi di irrigazione devono essere
posizionati in modo da non compromettere la
sicurezza delle persone e impedire eventuali
inciampi.
f) Controllare periodicamente le tubazioni per
escludere eventuali danni o perdite.
g) Non piegare i cavi onde evitare di danneggiarli.
h) Non utilizzare l‘apparecchio in prossimità di impianti
elettrici onde evitare di bagnarli. Ciò può mettere in
pericolo la vita o la salute.
i) Ricordarsi di riempire regolarmente il serbatoio
dell‘acqua per evitare che non vi entri troppa aria.
j) Non collegare l‘apparecchio direttamente alla rete di
approvvigionamento idrico esistente.
k) Non è consentito collegare il dispositivo a fonti
di alimentazione diverse da un pannello solare
compatibile.
Il manuale originale è stato scritto in tedesco. Le versioni in
altre lingue sono traduzioni dalla lingua tedesca.
2. SICUREZZA NELL‘IMPIEGO
AVVERTENZA!Le immagini in questo manuale sono
puramente dimostrative per cui i singoli dettagli
possono dierire dall‘aspetto reale dell‘apparecchio.
ATTENZIONE!Leggere le istruzioni d‘uso e di
sicurezza. Non prestare attenzione alle avvertenze
e alle istruzioni può condurre a gravi lesioni o
addirittura al decesso.
AVVERTENZA!Quando si lavora con questo
dispositivo, i bambini e le persone non coinvolte
devono essere protetti.
2.2. SICUREZZA PERSONALE
a) Non è consentito l‘uso del dispositivo in uno stato
di aaticamento, malattia, sotto l‘inuenza di alcol,
droghe o farmaci, se questi limitano la capacità di
utilizzare il dispositivo.
b) Questo dispositivo non è adatto per essere utilizzato
da persone, bambini compresi, con ridotte capacità
C
D
AB
H
IK
F
E
J
G
L
siche, sensoriali o mentali, così come da privi di
adeguata esperienza e/o conoscenze. Si fa eccezione
per coloro i quali siano sorvegliati da un responsabile
qualicato che si prenda carico della loro sicurezza e
abbia ricevuto istruzioni dettagliate al riguardo.
c) Per evitare avviamenti accidentali, prima di collegare
il dispositivo a una fonte di alimentazione assicurarsi
che questo sia spento.
d) Questo dispositivo non è un giocattolo. I bambini
devono essere sorvegliati anché non giochino con
il prodotto.
2.3. USO SICURO DEL DISPOSITIVO
a) Non far surriscaldare il dispositivo. Utilizzare
strumenti appropriati. Dispositivi scelti correttamente
e un attento utilizzo degli stessi portano a risultati
migliori.
b) Non utilizzare il dispositivo se l‘interruttore ON/
OFF non funziona correttamente (non accendere o
spegnere il dispositivo). I dispositivi con interruttore
difettoso sono pericolosi quindi devono essere
riparati.
c) Scollegare l‘apparecchio dal pannello solare
prima di eettuare la regolazione, la sostituzione
degli accessori o il posizionamento. Tali misure
precauzionali riducono il rischio di avviamento
accidentale.
d) Gli strumenti inutilizzati devono essere tenuti fuori
dalla portata dei bambini e delle persone che non
hanno familiarità con il dispositivo e le istruzioni
d’uso. Nelle mani di persone inesperte, questo
dispositivo può rappresentare un pericolo.
e) Mantenere il dispositivo in perfette condizioni.
Prima di ogni utilizzo, vericare che non vi siano
danni generali o danni alle parti mobili (frattura
di parti e componenti o altre condizioni che
potrebbero compromettere il funzionamento sicuro
del prodotto). In caso di danni, l‘unità deve essere
riparata prima dell‘uso.
f) Tenere il dispositivo fuori dalla portata dei bambini.
g) La riparazione e la manutenzione dell‘attrezzatura
devono essere eseguite esclusivamente da personale
specializzato qualicato e con pezzi di ricambio
originali. Ciò garantisce la sicurezza durante l‘uso.
h) Per garantire l‘integrità di funzionamento
dell‘apparecchio, i coperchi o le viti installati in
fabbrica non devono essere rimossi.
i) È vietato spostare o ruotare il dispositivo durante il
funzionamento.
j) Pulire regolarmente l‘apparecchio in modo da
evitare l‘accumulo di sporcizia.
k) Questo apparecchio non è un giocattolo! La pulizia
e la manutenzione non devono essere eseguite da
bambini a meno che non siano sotto la supervisione
di un adulto.
l) Non trasportare o appendere l‘apparecchio dai li o
tubi.
m) Non è consentito l‘uso dell‘apparecchio per il
pompaggio di acqua contaminata (ad es. olio,
particelle, solidi abrasivi, ecc.).
n) Non è consentito usare il dispositivo per il
pompaggio di acqua salata, sostanze corrosive,
liquidi inammabili, ecc.
o) È vietato l‘uso dell‘apparecchio a temperature
sotto lo zero. L‘acqua ghiacciata può danneggiare
l‘apparecchio.
p) Non avviare l‘apparecchio senza acqua.
q) Installare il pannello solare in modo da proteggerlo
da danni accidentali (ad es. per caduta o impatto).
ATTENZIONE!Anche se l‘apparecchiatura è
stata progettata per essere sicura, sono presenti
degli ulteriori meccanismi di sicurezza. Malgrado
l‘applicazione di queste misure supplementari di
sicurezza sussiste comunque il rischio di ferirsi. Si
raccomanda inoltre di usare cautela e buon senso.
ATTENZIONE!Le illustrazioni di questo prodotto
lo trovi nelle ultime pagine del manuale d´uso, vedi
pag. 30.
3. CONDIZIONI D‘USO
L‘apparecchio è stato progettato per l‘irrigazione
automatica delle piante con l‘utilizzo di energia solare.
L‘operatore è responsabile di tutti i danni derivanti da
un uso improprio.
3.1. DESCRIZIONE DEL DISPOSITIVO
A. Tubo di diametro maggiore
B. Tubo di diametro minore
C. Unità di controllo
D. Pannello solare con supporto
E. Sensore di livello dell’acqua
F. Filtro
G. Ugello spruzzatore
H. Supporto per cavi
I. Connettore T2
J. Connettore T1
K. Tappo
L. Valvola anti-sifone
NOTA! Nella sezione „Installazione dell‘‘apparecchio“ si
trova una descrizione di come tagliare i tubi (A) e (B)!
3.2. INSTALLAZIONE DELL’APPARECCHIO
Indice delle parti:
A1. Tubo di aspirazione
A2. Tubo di alimentazione
B1. Tubo di distribuzione
B2. Tubo della valvola anti-sifone
B3. Tubo del condensatore
C. Unità di comando / irrigatore
C1. Presa del tubo di aspirazione
C2. Presa del tubo di alimentazione
C3. Presa del sensore di livello dell‘acqua

24 25
07.06.2022 07.06.2022
IT IT
L2L1 B2
J
I
II
III IV
C4. Presa del pannello solare
D. Pennello solare
E. Sensore del livello dell’acqua
F. Filtro
G. Ugello spruzzatore
H. Supporto per cavi
I. Connettore T2
J. Connettore T1
K. Tappo
L. Valvola anti-sifone
M. Cavo di alimentazione
N. Cavo del sensore di livello dell‘acqua
a) Disimballare con cura tutti gli elementi dell‘
apparecchio.
b) Collocare l‘apparecchio in posizione di lavoro sulla
parete
c) Collegare il cavo (N) del sensore di livello dell‘acqua
alla presa corrispondente (C3) dell‘unità di comando.
d) Tagliare circa 20 cm dal tubo (A) per formare un tubo
(A1) e (A2).
e) Tagliare il tubo (A1) ad una lunghezza adeguata
(tenendo conto della distanza dell‘unità di comando
dal serbatoio dell‘acqua). Collegare il ltro dell‘acqua
(F) al tubo (A1).
f) Collegare l‘altra estremità del cavo (A1) al connettore
corrispondente dell‘unità di comando (C1).
g) Posizionare il ltro (F) e il sensore di livello dell‘acqua
(E) nel serbatoio dell‘acqua.
h) Collegare il tubo (A2) alla presa (C2) dell‘unità di
comando.
i) Collegare il connettore (I) all‘estremità libera del
tubo (A2).
j) Tagliare circa 10 cm dal tubo (B) per formare un tubo
(B1) e (B2).
k) Collegare il tubo (B2) al connettore (J) in modo che il
tubo (B2) sia rivolto verso l‘alto.
l) Collegare la valvola anti-sifone (L) all‘estremità libera
del tubo (B2).
NOTA! la posizione della valvola anti-sifone (L) deve essere
sopra le uscite dell‘acqua e deve essere orientata verso il
tubo (B2) come nella gura seguente!
I. Manopola del timer
• T - Test
• 0 - Interruttore
• 1 – 30 sec/12 h
• 2 – 1 min/12 h
• 3 – 2 min/12 h
• 4 – 4 min/12 h
• 5 – 8 min/12 h
• 6 – 12 min/12 h
II. Spia
III. Presa del sensore di livello dell’acqua
IV. Presa del pannello solare
3.3.2. IMPOSTAZIONI DELL‘ORARIO DI LAVORO /
IRRIGAZIONE
Il tempo di irrigazione delle piante viene regolato dalla
manopola del timer (1). La selezione della modalità
desiderata avvia il funzionamento dell‘apparecchio,
tenendo conto dei seguenti periodi di tempo.
• T – Modalità test. Si accende il LED verde (2). Il
dispositivo rimarrà in funzione no a quando la
batteria non sarà scarica.
• 0 – Interruttore. L’apparecchio si arresta, la spia (2)
si spegne.
• 1-6 – Tempo di irrigazione. La selezione del valore
adeguato indica il tempo di funzionamento per il
quale l‘apparecchio si avvia dopo ogni ciclo di 12 ore,
a seconda dei casi: 30 secondi, 1 minuto, 2 minuti, 4
minuti, 8 minuti, 8 minuti, 12 minuti. La spia verde
(2) è accesa.
Per esempio: Impostando la manopola del timer (1) su
„3“ signica che il dispositivo inizia automaticamente
a spruzzare per 2 minuti ogni 12 ore.
Batteria scarica
Se la batteria è scarica, disattivare la funzione di irrigazione
ruotando la manopola del timer (1) in posizione „0“ e
lasciare il pannello solare in un luogo soleggiato per
almeno 6 ore per caricare la batteria.
Il serbatoio dell’acqua è vuoto
Se il diodo (2) sull‘unità di comando (C) lampeggia di rosso
e l‘irrigatore si spegne, signica che non c‘è abbastanza
acqua nel serbatoio di alimentazione. Al ne di ripristinare
il corretto funzionamento del dispositivo, è necessario
ripristinare l‘approvvigionamento idrico.
NOTA! Nel caso in cui la spia (2) lampeggi alternativamente
di verde e rosso, signica che entrambi i problemi sopra
indicati si sono vericati contemporaneamente!
L1. Ingresso valvola antisifone (L)
L2. Uscita valvola antisifone (L)
m) Collegare il tubo (B1) all‘estremità libera del
connettore (J).
n) Tagliare il tubo (B1) a una lunghezza tale da
consentire il passaggio dell‘acqua alla pianta.
o) Collegare il connettore (I) all‘estremità del tubo (B1).
p) Collocare il supporto (H) in prossimità della pianta e
posizionare il tubo (B1) su di essa in modo che possa
essere irrigata.
r) Collegare il cavo (B3) tagliato dal resto del tubo
(B2) all‘estremità del connettore (I) rivolta verso il
basso. Regolare la lunghezza in base alle esigenze e
all‘altezza del supporto (H). Collegare l‘ugello (G) alla
terminazione libera del tubo (B3).
s) Ripetere il processo descritto ai punti m - p per le
piante successive
t) Montare un tappo (K) all‘estremità del tubo (B2).
u) Collegare il cavo (M) del pannello solare alla presa
(C4) dell‘unità di comando.
3.3. LAVORARE CON IL DISPOSITIVO
Al termine della corretta installazione dell‘apparecchio,
lasciare il pannello solare in un luogo soleggiato per
almeno 6 ore per caricare completamente la batteria.
3.3.1. PANNELLO DI COMANDO
3.4. PULIZIA E MANUTENZIONEA
a) Per pulire la supercie utilizzare solo detergenti
senza ingredienti corrosivi.
b) È vietato versare o spruzzare acqua sulla macchina.
c) Eettuare controlli regolari del dispositivo per
mantenerlo eciente e privo di danni.
d) Pulire il pannello solare con un panno morbido.
e) Il pannello solare dovrebbe essere pulito
regolarmente per ottimizzare la ricarica delle celle
solari.
SMALTIMENTO SICURO DELLE BATTERIE E DELLE PILE
Gli apparecchi sono dotati di una batteria da 3,6 V /
1200 mAH. Si prega di rimuovere la batteria usata dal
dispositivo. Consegnare la batteria all’organo responsabile
dello smaltimento di tali materiali. La batteria utilizzata
nell‘apparecchio deve essere sostituita almeno ogni 2 anni.
SMALTIMENTO DELLE ATTREZZATURE USATE
Questo prodotto, se non più funzionante, non deve
essere smaltito insieme ai normali riuti, ma deve essere
consegnato ad un’organizzazione competente per lo
smaltimento dei dispositivi elettrici e elettronici. Maggiori
informazioni sono reperibili sull‘etichetta sul prodotto, sul
manuale di istruzioni o sull‘imballaggio. I materiali utilizzati
nel dispositivo possono essere riciclati secondo indicazioni.
Riutilizzando i materiali o i dispositivi, si contribuisce
a tutelare l‘ambiente circostante. Le informazioni sui
rispettivi punti di smaltimento sono reperibili presso le
autorità locali.

26 27
07.06.2022 07.06.2022
ES MANUAL DE INSTRUCCIONES ES
El producto cumple con las normas de seguridad
vigentes.
Respetar las instrucciones de uso.
Producto reciclable.
¡ATENCIÓN!, ¡ADVERTENCIA! o ¡NOTA! para llamar
la atención sobre ciertas circunstancias (señal
general de advertencia).
Parámetro - Descripción Parámetro - Valor
Nombre del producto Sistema de riego
Modelo HT-
COSTIGAN-3600
Tipo de fuente de energía Panel solar,
Batería 3,6 V
1.200 mAh Ni-MH
Potencia nominal [W]/tensión
nominal del panel solar [V] 0,7 / 6
Tensión de alimentación de la
bomba [VDC] 3,5
Potencia nominal de la bomba [W] 0,45
Tiempo de carga del dispositivo
expuesto directamente a la luz
solar [h]
6 ÷ 8
Rango de ajuste del tiempo de
funcionamiento en 12 horas [min] 0,5 ÷ 12
Caudal máximo de agua [ml/min] 600
Temperatura máxima del agua [°C] 40
Altura de succión [m] 2,4
Altura de bombeo [m] 3
Dimensiones del marco de montaje
del panel solar [mm] 178 × 236 × 132
Dimensiones del panel solar [mm] 105 × 145
Dimensiones de la unidad de
control [mm] 162 × 140 × 56
Peso [kg] 1,1
Para garantizar un funcionamiento duradero y able del
aparato, el manejo y mantenimiento deben llevarse a
cabo de acuerdo con las instrucciones de este manual. Los
datos técnicos y las especicaciones de este manual están
actualizados. El fabricante se reserva el derecho de realizar
modicaciones para mejorar la calidad. Teniendo en cuenta
los avances técnicos en materia de reducción del ruido,
el equipo ha sido diseñado y fabricado para mantener el
riesgo de emisiones sonoras al nivel más bajo posible.
EXPLICACIÓN DE LOS SÍMBOLOS
1. DESCRIPCIÓN GENERAL
Este manual ha sido elaborado para favorecer un empleo
seguro y able. El producto ha sido estrictamente diseñado
y fabricado conforme a las especicaciones técnicas y para
ello se han utilizado las últimas tecnologías y componentes,
manteniendo los más altos estándares de calidad.
ANTES DE LA PUESTA EN FUNCIONAMIENTO,
LEA LAS INSTRUCCIONES MINUCIOSAMENTE Y
ASEGÚRESE DE COMPRENDERLAS
DATOS TÉCNICOS
Conceptos como „aparato“ o „producto“ en las advertencias
y descripciones de este manual se reeren a Sistema de
riego. ¡No coloque las manos ni otros objetos sobre el
aparato en funcionamiento!
2.1. SEGURIDAD EN EL PUESTO DE TRABAJO
a) En caso de avería o mal funcionamiento, apague el
aparato y contacte con el servicio técnico autorizado.
b) Si no está seguro de que la unidad funcione
correctamente, póngase en contacto con el servicio
técnico del fabricante.
c) Las reparaciones solo pueden ser realizadas por
el servicio técnico del fabricante. ¡No realice
reparaciones por su cuenta!
d) Conserve el manual de instrucciones para futuras
consultas. Este manual debe ser entregado a toda
persona que vaya a hacer uso del dispositivo.
e) Los cables eléctricos y las mangueras de riego se
deben colocar de forma que no pongan en riesgo la
seguridad de las personas, eliminando la posibilidad
de tropezar.
f) Compruebe regularmente el estado de las
mangueras para detectar daños o fugas.
g) No doble los cables para evitar dañarlos.
h) No utilice el dispositivo cerca de instalaciones
eléctricas para evitar que se mojen. Esto puede
poner en peligro la vida o la salud.
i) Recuerde llenar regularmente el agua del tanque
para evitar la aireación de la instalación.
j) No conecte el dispositivo directamente a una red de
suministro de agua corriente.
k) Está prohibido conectar el dispositivo a una
fuente de alimentación que no sea un panel solar
compatible.
El texto en alemán corresponde a la versión original. Los
textos en otras lenguas son traducciones del original en
alemán.
2. SEGURIDAD
¡ADVERTENCIA!En este manual se incluyen fotos
ilustrativas que podrían no coincidir exactamente con
la apariencia real del dispositivo.
¡ATENCIÓN!Lea todas las instrucciones e
indicaciones de seguridad. La inobservancia de
las advertencias e instrucciones al respecto puede
provocar lesiones graves o incluso la muerte.
¡ADVERTENCIA! Los niños y las personas no
autorizadas deben estar asegurados cuando trabajen
con esta unidad
2.2. SEGURIDAD PERSONAL
a) No está permitido utilizar el aparato en estado de
fatiga, enfermedad, bajo la inuencia del alcohol,
drogas o medicamentos, ya que estos limitan la
capacidad de manejo del aparato.
b) Este aparato no debe ser utilizado por personas
(entre ellas niños) con capacidades físicas, sensoriales
o mentales reducidas, o con falta de la experiencia
y/o los conocimientos necesarios, a menos que
sean supervisadas por una persona responsable de
su seguridad o que hayan recibido de esta persona
responsable las indicaciones pertinentes en relación
al manejo del aparato.
C
D
AB
H
IK
F
E
J
G
L
c) Para evitar una puesta en marcha accidental,
asegúrese de que el interruptor esté apagado antes
de conectar la clavija a una fuente de alimentación.
d) Este aparato no es un juguete. Debe controlar que
los niños no jueguen con él.
2.3. MANEJO SEGURO DEL APARATO
a) No permita que el aparato se sobrecaliente. Utilice
las herramientas apropiadas para cada trabajo.
Debe seleccionarse el aparato adecuado para cada
aplicación y utilizarse conforme al n para el que
ha sido diseñado, para conseguir así los mejores
resultados.
b) No utilice la unidad si el interruptor ON/OFF no
funcionara correctamente (no enciende o apaga).
Los aparatos que no pueden ser controlados por
interruptores son peligrosos. Estos pueden y deben
ser reparados.
c) Antes de realizar ajustes, cambiar los accesorios o
guardar el dispositivo, se debe desconectar del panel
solar. Tal medida preventiva reduce el riesgo de una
accidental puesta en marcha.
d) Mantenga las herramientas fuera del alcance de los
niños y de las personas que no estén familiarizadas
con el equipo en sí o no hayan recibido las
instrucciones pertinentes al respecto. En manos de
personas inexpertas este equipo puede representar
un peligro.
e) Mantenga el aparato en perfecto estado
de funcionamiento. Antes de cada trabajo,
compruébelo en busca de daños generales o de
piezas móviles (fractura de piezas y componentes
u otras condiciones que puedan perjudicar el
funcionamiento seguro de la máquina). En caso de
daños, el aparato debe ser reparado antes de volver
a ponerse en funcionamiento.
f) Mantenga la unidad fuera del alcance de los niños.
g) La reparación y el mantenimiento de los equipos
solo pueden ser realizados por personal cualicado
y siempre empleando piezas de repuesto originales.
Esto garantiza la seguridad durante el uso.
h) A n de asegurar la integridad operativa del
dispositivo, no se deben retirar las cubiertas o los
tornillos instalados de fábrica.
i) Está prohibido mover, cambiar o girar el aparato
durante su funcionamiento.
j) Limpie regularmente el dispositivo para evitar que la
suciedad se incruste permanentemente.
k) Este aparato no es un juguete. La limpieza y el
mantenimiento no deben ser llevados a cabo por
niños que no estén bajo la supervisión de adultos.
l) No mover el aparato tirando de los cables o las
mangueras ni colgarlo de estos.
m) Está prohibido usar el dispositivo para bombear agua
contaminada (por ejemplo, con aceite, partículas,
sólidos abrasivos, etc.).
n) Está prohibido usar el dispositivo para bombear agua
salada, sustancias corrosivas, líquidos inamables,
etc.
o) Está prohibido usar el dispositivo a temperaturas
bajo cero. El agua congelada dañará el dispositivo.
p) No encienda el dispositivo sin agua.
q) Instale el panel solar de manera que esté protegido
contra daños accidentales (por ejemplo, una caída o
impacto).
¡ATENCIÓN! Aunque en la fabricación de este
aparato se ha prestado gran importancia a la
seguridad, dispone de ciertos mecanismos de
protección extras. A pesar del uso de elementos de
seguridad adicionales, existe el riesgo de lesiones
durante el funcionamiento, por lo que se recomienda
proceder con precaución y sentido común.
¡ATENCIÓN!Las ilustraciones de este producto se
encuentra en las últimas páginas de las instrucciones
(p. 30).
3. INSTRUCCIONES DE USO
El dispositivo está diseñado para el riego automático de
plantas utilizando energía solar. El usuario es responsable
de los daños derivados de un uso inadecuado del
aparato.
3.1. DESCRIPCIÓN DEL APARATO
A. Manguera con diámetro mayor
B. Manguera con diámetro menor
C. Unidad de control
D. Panel solar con soporte
E. Sensor de nivel de agua
F. Filtro
G. Boquilla de aspersión
H. Soporte del cable
I. Conector T2
J. Conector T1
K. Tapón
L. Válvula antisifón
¡ATENCIÓN! En el apartado „Instalación del dispositivo“ se
encuentra la descripción de cómo cortar las mangueras (A)
y (B).
3.2. INSTALACIÓN DEL DISPOSITIVO
Listado de componentes:
A1. Manguera de aspiración
A2. Manguera de alimentación
B1. Manguera de distribución
B2. Manguera de la válvula antisifón
B3. Manguera del condensador
C. Unidad de control / aspersor

28 29
07.06.2022 07.06.2022
ES ES
L2L1 B2
J
I
II
III IV
C1. Toma del cable de aspiración
C2. Toma del cable de alimentación
C3. Toma del sensor de nivel de agua
C4. Toma del panel solar
D. Panel solar
E. Sensor de nivel de agua
F. Filtro
G. Boquilla de aspersión
H. Soporte del cable
I. Conector T2
J. Conector T1
K. Tapón
L. Válvula antisifón
M. Conducto de alimentación
N. Cable del sensor de nivel de agua
a) Disimballare con cura tutti gli elementi dell‘ a)
Desembalar con cuidado todos los componentes del
dispositivo.
b) Instalar el dispositivo en la pared, en la posición de
funcionamiento.
c) Conectar el cable (N) del sensor de nivel de agua a la
toma correspondiente (C3) de la unidad de control.
d) Cortar unos 20 centímetros de la manguera (A) para
obtener una manguera (A1) y (A2).
e) Cortar la manguera (A1) a la longitud correcta
(teniendo en cuenta la distancia de la unidad de
control desde el tanque de agua). Conectar un ltro
de agua (F) a la manguera (A1).
f) Conectar el otro extremo del conducto (A1) al
conector adecuado de la unidad de control (C1).
g) Colocar en el tanque de agua el ltro (F) y el sensor
de nivel de agua (E).
h) Conectar la manguera (A2) a la toma (C2) de la
unidad de control.
i) Conectar el conector (I) al extremo libre de la
manguera (A2).
j) Cortar unos 10 centímetros de la manguera (B), para
obtener la manguera (B1) y (B2).
k) Conectar la manguera (B2) al conector (J) de modo
que la manguera (B2) apunte hacia arriba.
l) Conectar la válvula antisifón (L) al extremo libre de la
manguera (B2).
¡ATENCIÓN! La válvula antisifón (L) debe estar por encima
de las salidas de agua y debe estar orientada hacia la
manguera (B2), como se muestra en el siguiente dibujo.
I. Perilla del temporizador
• T - Test
• 0 - Interruptor
• 1 – 30 seg/12 h
• 2 – 1 min/12 h
• 3 – 2 min/12 h
• 4 – 4 min/12 h
• 5 – 8 min/12 h
• 6 – 12 min/12 h
II. Diodo
III. Toma del sensor de nivel de agua
IV. Toma del panel solar
3.3.2. AJUSTES DEL TIEMPO DE TRABAJO / RIEGO
El tiempo de riego de las plantas se ajusta mediante
la perilla del temporizador (1). La selección del modo
apropiado inicia el funcionamiento del dispositivo, según
los siguientes intervalos de tiempo.
• T – Modo de prueba. El diodo verde (2) se encenderá.
El dispositivo funcionará hasta que el acumulador se
descargue.
• 0 – Interruptor. El dispositivo se detiene, el diodo (2)
se apaga.
• 1-6 – Tiempo de riego. El valor correcto indica
el tiempo de funcionamiento durante el cual el
dispositivo se pondrá en marcha después de cada
ciclo de 12 horas, respectivamente: 30 segundos, 1
minuto, 2 minutos, 4 minutos, 8 minutos, 12 minutos.
El diodo verde (2) está encendido.
Ejemplo: Ajustar la perilla del temporizador (1) a
„3“ signica que el dispositivo activará el riego
automático durante 2 minutos, cada 12 horas.
Acumulador descargado
Si el acumulador está descargado, apague la función de
riego ajustando la perilla del temporizador (1) a la posición
„0“ y deje el panel solar en un lugar soleado durante al
menos 6 horas para recargar el acumulador.
No hay agua en el tanque
Si el diodo (2) ubicado en la unidad de control (C) comienza
L1. Entrada de la válvula antisifón (L)
L2. Salida de la válvula antisifón (L)
m) Conectar la manguera (B1) al extremo libre del
conector (J).
n) Cortar la manguera (B1) a una longitud que posibilite
suministrar el agua a la planta.
o) Conectar al extremo de la manguera (B1) el conector
(I).
p) Colocar el soporte (H) al lado de la planta y colocar
sobré él el conducto (B1) de suministro de agua para
posibilitar el riego.
r) Al extremo del conector (I) que apunta hacia abajo,
conectar el conducto (B3) cortado a la longitud
adecuada del resto de la manguera (B2). Ajustar
la longitud según las necesidades y la altura del
soporte (H). Conecte la boquilla pulverizadora (G) al
extremo libre de la manguera (B3).
s) Repetir el proceso descrito en los puntos m - p para
las siguientes plantas.
t) Instalar el tapón (K) en el extremo del conducto (B2).
u) Conectar el conducto (M) del panel solar a la toma
(C4) de la unidad de control.
3.3. MANEJO DEL APARATO
Después de la instalación correcta del dispositivo, deje el
panel solar en un lugar soleado durante al menos 6 horas,
para cargar completamente el acumulador.
3.3.1. PANEL DE CONTROL
a parpadear en rojo y el riego se detiene, signica que
no hay suciente agua en el tanque de suministro. Para
restablecer el correcto funcionamiento del dispositivo, se
debe reponer el suministro de agua.
¡ATENCIÓN! Si el diodo (2) parpadea en verde y rojo
alternativamente, signica que ambos errores se han
producido simultáneamente.
3.4. LIMPIEZA Y MANTENIMIENTO
a) Para limpiar la supercie, utilice solo productos que
no contengan sustancias corrosivas.
b) Se prohíbe rociar la máquina con agua u otros
líquidos.
c) En lo que respecta a la eciencia técnica y posibles
daños, el dispositivo debe ser revisado regularmente.
d) Utilice un paño suave para limpiar el panel solar.
e) Limpie regularmente el panel solar para optimizar la
carga del acumulador.
ELIMINACIÓN SEGURA DE ACUMULADORES Y BATERÍAS
En los dispositivos se utiliza un acumulador 3,6 V / 1200
mAH. El acumulador gastado se debe retirar del dispositivo.
Entregue el acumulador a una empresa acreditada para
el reciclaje. El acumulador usado en el dispositivo debe
reemplazarse al menos cada 2 años.
ELIMINACIÓN DE DISPOSITIVOS USADOS
Tras su vida útil, este producto no debe tirarse al contenedor
de basura doméstico, sino que ha de entregarse en el
punto limpio correspondiente para recolección y reciclaje
de aparatos eléctricos. Al respecto informa el símbolo
situado sobre el producto, las instrucciones de uso o el
embalaje. Los materiales utilizados en este aparato son
reciclables, conforme a su designación. Con la reutilización,
aprovechamiento de materiales u otras formas de uso de
los aparatos utilizados, contribuirás a proteger el medio
ambiente. Para obtener información sobre los puntos de
recogida y reciclaje contacte con las autoridades locales
competentes.

07.06.2022 07.06.2022
30 31
PRODUKTZEICHNUNGEN | PRODUCT‘S VIEWS | RYSUNKI PRODUKTU | NÁKRESY VÝROBKU |
SCHÉMAS DU PRODUIT | LLUSTRAZIONI DI PRODOTTO | ILUSTRACIONES DE PRODUCTO NAMEPLATE TRANSLATIONS
1 2 3 4 5
DE Produktname Modell Batterietyp Maximaler Wasserdurchuss Produktionsjahr
EN Product Name Model Battery Max Water Flow Production Year
PL Nazwa produktu Model Typ baterii Maksymalny przepływ wody Rok produkcji
CZ Název výrobku Model Typ baterie Maximální průtok vody Rok výroby
FR Nom du produit Modèle Type de batterie Débit d'eau maximal Année de production
IT Nome del prodotto Modello Batteria Massimo scorrimento dell'acqua Anno di produzione
ES Nombre del producto Modelo Tipo de batería Flujo máximo de agua Año de producción
6 7
DE Ordnungsnummer Hersteller
EN Serial No. Manufacturer
PL Numer serii Producent
CZ Sériové číslo Výrobce
FR Numéro de serie Fabriquant
IT Numero di serie Produttore
ES Número de serie Fabricante
NG
H
L
JI
M
C
D
K
F
E
B3
IN OUT
B1
A2
A1
C1
C3 C4
C2
B2
Manufacturer: expondo Polska sp. z o.o. sp. k.
ul. Nowy Kisielin-Innowacyjna 7, 66-002 Zielona Góra | Poland, EU
Design Made In Germany
expondo.com
Product Name
Model
Battery
Max Water Flow
Production Year
Serial No.
Solar Irrigation
HT-COSTIGAN-3600
3.6V 1200 mAh Ni-MH
36 L /h
1
2
3
4
5
6
7

CONTACT
expondo Polska sp. z o.o. sp. k.
ul. Nowy Kisielin-Innowacyjna 7
66-002 Zielona Góra | Poland, EU
e-mail: [email protected]
UMWELT –UND ENTSORGUNGSHINWEISE
Utylizacja produktu
Produkty elektryczne i elektroniczne po zakończeniu okresu eksploatacji wymagają segregacji i oddania ich do wyznaczo-
nego punktu odbioru. Nie wolno wyrzucać produktów elektrycznych razem z odpadami gospodarstwa domowego. Zgodnie
z dyrektywą WEEE 2012/19/UE obowiązującą w Unii Europejskiej, urządzenia elektryczne i elektroniczne wymagają segregacji
i utylizacji w wyznaczonych miejscach. Dbając o prawidłową utylizację, przyczyniasz się do ochrony zasobów naturalnych
i zmniejszasz negatywny wpływ oddziaływania na środowisko, człowieka i otoczenie. Zgodnie z krajowym prawodawstwem,
nieprawidłowe usuwanie odpadów elektrycznych i elektronicznych może być karane!
For the disposal of the device please consider and act according to the national and local rules and regulations.
Hersteller an Verbraucher
Sehr geehrte Damen und Herren,
gebrauchte Elektro – und Elektronikgeräte dürfen gemäß europäischer Vorgaben [1] nicht zum unsortierten Siedlungsabfall
gegeben werden, sondern müssen getrennt erfasst werden. Das Symbol der Abfalltonne auf Rädern weist auf die Notwendig-
keit der getrennten Sammlung hin. Helfen auch Sie mit beim Umweltschutz. Sorgen Sie dafür, dieses Gerät, wenn Sie es nicht
mehr weiter nutzen wollen, in die hierfür vorgesehenen Systeme der Getrenntsammlung zu geben.
In Deutschland sind Sie gesetzlich [2] verpichtet, ein Altgerät einer vom unsortierten Siedlungsabfall getrennten Erfassung
zuzuführen. Die öentlich – rechtlichen Entsorgungsträger (Kommunen) haben hierzu Sammelstellen eingerichtet, an denen
Altgeräte aus privaten Haushalten ihres Gebietes für Sie kostenfrei entgegengenommen werden. Möglicherweise holen die
rechtlichen Entsorgungsträger die Altgeräte auch bei den privaten Haushalten ab.
Bitte informieren Sie sich über Ihren lokalen Abfallkalender oder bei Ihrer Stadt – oder Gemeindeverwaltung über die in Ihrem
Gebiet zur Verfügung stehenden Möglichkeiten der Rückgabe oder Sammlung von Altgeräten.
[1] RICHTLINIE 2002/96/EG DES EUROPÄISCHEN PARLAMENTS UND DES RATES
ÜBER ELEKTRO –UND ELEKTRONIK –ALTGERÄTE
[2] Gesetz über das Inverkehrbringen, die Rücknahme und die umweltverträgliche Entsorgung
von Elektro – und Elektronikgeräten (Elektro – und Elektronikgerätegesetz – ElektroG).
expondo.com
Table of contents
Languages:
Other hillvert Irrigation System manuals