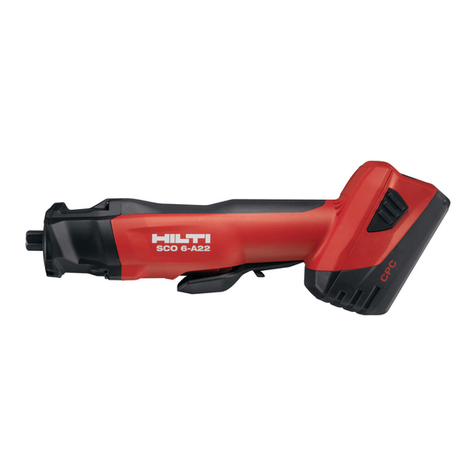
Hilti WSC 85 User manual

WSC 85
Bedienungsanleitung Handkreissäge
Operating instructions Hand-held circular saw
Mode d’emploi Scie circulaire électroportative
Istruzioni d’uso Sega circolare manuale
Gebruiksaanwijzing Handcirkelzaag
Manual de instruções Serra circular manual
Manual de instrucciones Sierra circular portátil
Brugsanvisning Håndrundsav
Käyttöohje Käsipyörösaha
Bruksanvisning Handcirkelsåg
Οδηγιες χρησεως
Χειροπρίονο
Instrukcja obsługi Ręczna pilarka tarczowa
Návod k obsluze
Ruční okružní pila
Пайдалану бойынша
басшылық Қол циркулярлық арасы
*314714*
314714
Printed: 14.05.2014 | Doc-Nr: PUB / 5138537 / 000 / 01

Printed: 14.05.2014 | Doc-Nr: PUB / 5138537 / 000 / 01

11
1Cutting depth adjusting lever
2Angle adjustment clamping screw
3Parallel guide clamping screw
4Cutting line indicator
5Parallel guide
6Baseplate
7Inner clamping flange
8Spindle
9Riving knife
10 Spindle lockbutton
11 Screw
12 Clamping flange
13 Pivoting guard
14 Riving knife fastening screws
ORIGINAL OPERATING INSTRUCTIONS
Power input: 1800 W (220–240 V); 1650 W (110 V)
Power output: 1260 W (220–240 V)
Spindle speed under no load: 4500/min.
Spindle speed under load: 3100/min.
Blade peripheral speed under no load: 54 m/sec.
Blade peripheral speed under load: 37.3 m/sec.
Cutting depth at 0°: 0 to 85 mm
Cutting depth at 45°: 0 to 60 mm
Cutting depth at 60°: 0 to 43 mm
Angular adjustment: 0° to 60°
Maximum saw blade diameter: 230 mm
Minimum saw blade diameter: 207 mm
Blade mounting hole diameter: 30 mm
Riving knife thickness (standard): 2.0 mm
Dust extraction connector internal dia.: 35 mm
Weight as per EPTA-Procedure 01/2003: 7.8 kg
Protection class as per EN 60745 Z / II
Technical data
15 Extraction system adapter
16 Chip ejector
17 Switch-on interlock
18 On/off switch
19 Hexagon socket wrench
20 Ventilation slots
21 Cutting angle scale
22 Cutting depth scale
23 Cutting depth locking device
24 Auxiliary grip
The accompanying list of safety precautions
and the applicable regulations issued by your
trade association must be observed.
Noise and vibration information (measured in accordance with EN 60745):
Typical A-weighted sound power level 111 dB (A)
Typical A-weighted emission sound pressure level 100 dB (A)
For the given sound power level as per EN 60745, the tolerance is 3 dB.
Wear ear protection!
Triaxial vibration value (vibration vector sum)
Cutting wood (ah) 2.5 m/s2
Uncertainty (K) for triaxial vibration value 1.5 m/s2
Right of technical changes reserved
Manufacturer’s warranty - tools
Please contact your local Hilti representative if you have questions about the warranty
conditions.
WSC 85 hand-held circular saw
NOTE
The vibration emission level given in this information sheet has been measured in
accordance with a standardised test given in EN 60745 and may be used to compare
one tool with another. It may be used for a preliminary assessment of exposure. The
declared vibration emission level represents the main applications of the tool. However if
the tool is used for different applications, with different accessories or poorly
maintained, the vibration emission may differ. This may significantly increase the
exposure level over the total working period. An estimation of the level of exposure to
vibration should also take into account the times when the tool is switched off or when it
is running but not actually doing the job. This may significantly reduce the exposure
level over the total working period. Identify additional safety measures to protect the
operator from the effects of vibration such as: maintain the tool and the accessories,
keep the hands warm, organisation of work patterns.
User information as per EN 61000-3-11
Switching operations cause short voltage drops. If the mains electric supply conditions
are unfavourable, other tools / machines can be impaired. If the main electric supply
impedance is less than 0.15 Ohms, no disruptions / disturbances need be expected.
Printed: 14.05.2014 | Doc-Nr: PUB / 5138537 / 000 / 01

12
1. Safety instructions
1.1 General Power Tool Safety Warnings
a) WARNING
Read all safety warnings and all
instructions. Failure to follow the warn-
ings and instructions may result in
electric shock, fire and/or serious
injury. Save all warnings and instruc-
tions for future reference. The term
“power tool” in the warnings refers to
your mains-operated (corded) power
tool or batteryoperated (cordless) pow-
er tool.
1.1.1 Work area safety
a) Keep work area clean and well lit.
Cluttered or dark areas invite accidents.
b) Do not operate power tools in explo-
sive atmospheres, such as in the
presence of flammable liquids, gases
or dust. Power tools create sparks
which may ignite the dust or fumes.
c) Keep children and bystanders away
while operating a power tool. Distrac-
tions can cause you to lose control.
1.1.2 Electrical safety
a) Power tool plugs must match the out-
let. Never modify the plug in any way.
Do not use any adapter plugs with
earthed (grounded) power tools.
Unmodified plugs and matching outlets
will reduce risk of electric shock.
b) Avoid body contact with earthed or
grounded surfaces, such as pipes,
radiators, ranges and refrigerators.
There is an increased risk of electric
shock if your body is earthed or
grounded.
c) Do not expose power tools to rain or
wet conditions. Water entering a power
tool will increase the risk of electric
shock.
d) Do not abuse the cord. Never use the
cord for carrying, pulling or unplug-
ging the power tool. Keep cord away
from heat, oil, sharp edges or moving
parts. Damaged or entangled cords
increase the risk of electric shock.
e) When operating a power tool out-
doors, use an extension cord suitable
for outdoor use. Use of a cord suitable
for outdoor use reduces the risk of
electric shock.
f) If operating a power tool in a damp
location is unavoidable, use a resid-
ual current device (RCD) protected
supply. Use of an RCD reduces the risk
of electric shock.
1.1.3 Personal safety
a) Stay alert, watch what you are doing
and use common sense when operat-
ing a power tool. Do not use a power
tool while you are tired or under the
influence of drugs, alcohol or medica-
tion. A moment of inattention while
operating power tools may result in
serious personal injury.
b) Use personal protective equipment.
Always wear eye protection. Protec-
tive equipment such as dust mask,
non-skid safety shoes, hard hat, or
hearing protection used for appropriate
conditions will reduce personal injuries.
c) Prevent unintentional starting. Ensure
the switch is in the off-position before
connecting to power source and/or
battery pack, picking up or carrying
the tool. Carrying power tools with
your finger on the switch or energising
power tools that have the switch on
invites accidents.
d) Remove any adjusting key or wrench
before turning the power tool on. A
wrench or a key left attached to a rotat-
ing part of the power tool may result in
personal injury.
e) Do not overreach. Keep proper footing
and balance at all times. This enables
better control of the power tool in unex-
pected situations.
f) Dress properly. Do not wear loose
clothing or jewellery. Keep your hair,
clothing and gloves away from moving
parts. Loose clothes, jewellery or long
hair can be caught in moving parts.
g) If devices are provided for the con-
nection of dust extraction and collec-
tion facilities, ensure these are con-
nected and properly used. Use of dust
collection can reduce dust-related haz-
ards.
1.1.4 Power tool use and care
a) Do not force the power tool. Use the
correct power tool for your applica-
tion. The correct power tool will do the
job better and safer at the rate for
which it was designed.
b) Do not use the power tool if the switch
does not turn it on and off. Any power
tool that cannot be controlled with the
switch is dangerous and must be
repaired.
c) Disconnect the plug from the power
source and/or the battery pack from
the power tool before making any
adjustments, changing accessories,
or storing power tools. Such preven-
tive safety measures reduce the risk of
starting the power tool accidentally.
d) Store idle power tools out of the reach
of children and do not allow persons
unfamiliar with the power tool or
these instructions to operate the pow-
er tool. Power tools are dangerous in
the hands of untrained users.
e) Maintain power tools. Check for mis-
alignment or binding of moving parts,
breakage of parts and any other con-
dition that may affect the power tool’s
operation. If damaged, have the pow-
er tool repaired before use. Many
accidents are caused by poorly main-
tained power tools.
f) Keep cutting tools sharp and clean.
Properly maintained cutting tools with
sharp cutting edges are less likely to
bind and are easier to control.
g) Use the power tool, accessories and
tool bits etc. in accordance with these
instructions, taking into account the
working conditions and the work to be
performed. Use of the power tool for
operations different from those intend-
ed could result in a hazardous situa-
tion.
1.1.5 Service
a) Have your power tool serviced by a
qualified repair person using only
identical replacement parts. This will
ensure that the safety of the power tool
is maintained.
1.2 Additional safety instructions
1.2.1 Safety instructions for all saws
a) DANGER
Keep hands away from cutting area
and the blade. Keep your second hand
on auxiliary handle, or motor housing.
If both hands are holding the saw, they
cannot be cut by the blade.
b) Do not reach underneath the work-
piece. The guard cannot protect you
from the blade below the workpiece.
Printed: 14.05.2014 | Doc-Nr: PUB / 5138537 / 000 / 01

13
c) Adjust the cutting depth to the thick-
ness of the workpiece. Less than a full
tooth of the blade teeth should be visi-
ble below the workpiece.
d) Never hold piece being cut in your
hands or across your leg. Secure the
workpiece to a stable platform. It is
important to support the work properly
to minimize body exposure, blade bind-
ing, or loss of control.
e) Hold the power tool by insulated grip-
ping surfaces only, when performing
an operation where the cutting tool
may contact hidden wiring or its own
cord. Contact with a “live” wire will also
make exposed metal parts of the power
tool “live” and could give the operator
an electric shock.
f) When ripping always use a rip fence
or straight edge guide. This improves
the accuracy of cut and reduces the
chance of blade binding.
g) Always use blades with correct size
and shape (diamond versus round) of
arbour holes. Blades that do not match
the mounting hardware of the saw will
run eccentrically, causing loss of con-
trol.
h) Never use damaged or incorrect blade
washers or bolt. The blade washers
and bolt were specially designed for
your saw, for optimum performance
and safety of operation.
1.2.2 Further safety instructions for all
saws
Kickback causes and related warnings
kickback is a sudden reaction to a
pinched, bound or misaligned saw blade,
causing an uncontrolled saw to lift up and
out of the workpiece toward the operator;
when the blade is pinched or bound tight-
ly by the kerf closing down, the blade
stalls and the motor reaction drives the
unit rapidly back toward the operator;
if the blade becomes twisted or mis-
aligned in the cut, the teeth at the back
edge of the blade can dig into the top
surface of the wood causing the blade to
climb out of the kerf and jump back
toward the operator.
Kickback is the result of saw misuse
and/or incorrect operating procedures or
conditions and can be avoided by taking
proper precautions as given below.
a) Maintain a firm grip with both hands
on the saw and position your arms to
resist kickback forces. Position your
body to either side of the blade, but
not in line with the blade. Kickback
could cause the saw to jump back-
wards, but kickback forces can be con-
trolled by the operator, if proper pre-
cautions are taken.
b) When blade is binding, or when inter-
rupting a cut for any reason, release
the trigger and hold the saw motion-
less in the material until the blade
comes to a complete stop. Never
attempt to remove the saw from the
work or pull the saw backward while
the blade is in motion or kickback
may occur. Investigate and take cor-
rective actions to eliminate the cause of
blade binding.
c) When restarting a saw in the work-
piece, centre the saw blade in the kerf
and check that saw teeth are not
engaged into the material. If saw
blade is binding, it may walk up or kick-
back from the workpiece as the saw is
restarted.
d) Support large panels to minimise the
risk of blade pinching and kickback.
Large panels tend to sag under their
own weight. Supports must be placed
under the panel on both sides, near the
line of cut and near the edge of the
panel.
e) Do not use dull or damaged blades.
Unsharpened or improperly set blades
produce narrow kerf causing excessive
friction, blade binding and kickback.
f) Blade depth and bevel adjusting lock-
ing levers must be tight and secure
before making cut. If blade adjustment
shifts while cutting, it may cause bind-
ing and kickback.
g) Use extra caution when sawing into
existing walls or other blind areas.
The protruding blade may cut objects
that can cause kickback.
1.2.3 Safety instructions for circular
saws with a lower guard
Function of the lower guard
a) Check lower guard for proper closing
before each use. Do not operate the
saw if lower guard does not move
freely and close instantly. Never
clamp or tie the lower guard into the
open position. If saw is accidentally
dropped, lower guard may be bent.
Raise the lower guard with the retract-
ing handle and make sure it moves
freely and does not touch the blade or
any other part, in all angles and depths
of cut.
b) Check the operation of the lower
guard spring. If the guard and the
spring are not operating properly,
they must be serviced before use.
Lower guard may operate sluggishly
due to damaged parts, gummy
deposits, or a build-up of debris.
c) Lower guard may be retracted manu-
ally only for special cuts such as
“plunge cuts” and “compound cuts.”
Raise lower guard by retracting han-
dle and as soon as blade enters the
material, the lower guard must be
released. For all other sawing, the low-
er guard should operate automatically.
d) Always observe that the lower guard
is covering the blade before placing
saw down on bench or floor. An
unprotected, coasting blade will cause
the saw to walk backwards, cutting
whatever is in its path. Be aware of the
time it takes for the blade to stop after
switch is released.
1.2.4 Additional safety instructions for all
saws with a riving knife
Function of the riving knife
a) Use the appropriate saw blade for the
riving knife. For the riving knife to
function, the body of the blade must be
thinner than the riving knife and the
cutting width of the blade must be
wider than the thickness of the riving
knife.
b) Adjust the riving knife as described in
this instruction manual. Incorrect
spacing, positioning and alignment can
make the riving knife ineffective in pre-
venting kickback.
c) Always use the riving knife except
when plunge cutting. Riving knife must
be replaced after plunge cutting. Riving
knife causes interference during plunge
cutting and can create kickback.
d) For the riving knife to work, it must be
engaged in the workpiece. The riving
knife is ineffective in preventing kick-
back during short cuts.
e) Do not operate the saw if riving knife
is bent. Even a light interference can
slow the closing rate of a guard.
Printed: 14.05.2014 | Doc-Nr: PUB / 5138537 / 000 / 01

2. Correct use
The power tool is designed for cutting soft-
wood, hardwood, laminated wood, chipboard,
plastics and similar materials to a depth of up
to 85 mm. Cutting metals is not permissible!
The user of the power tool may be held liable
for damage resulting from improper use, e.g.
carrying the power tool by the supply cord,
unplugging by pulling the supply cord. The
use of saw blades not in compliance with the
given specification (e.g. diameter, speed of
rotation, thickness) or the use of cutting and
grinding discs or blades made from high-
alloy steel (HSS steel) is not permissible.
Sawing metals is not permissible. The list of
safety precautions and generally accepted
accident prevention regulations for working
with electric tools must be observed.
14
1.3 Additional safety precautions
1.3.1 Personal safety
a) Wear ear protection.
Excessive noise
may lead to a loss of hearing.
b) Use the auxiliary handle supplied
with the tool.
Loss of control of the
tool may lead to injury.
c) Breathing protection must be worn
when the tool is used without a dust
removal system for work that creates
dust.
d) To avoid tripping and falling when
working, always lead the sypply cord,
extension cord and dust extraction
hose away tho the rear.
e) Bring the blade into contact with the
workpiece only after the circular saw
has been switched on.
f) The area above and below the kerf
must be free of obstructions. Do not
saw into screws and nails etc.
g)Do not use the machine for sawing
overhead.
h)Do not attempt to brake the speed of
the saw blade by pressing it to the
side.
i) Do not use:
– cutting discs designed for use with
an angle grinder
– hardened steel saw blades (HSS
steel)
j) Do not touch the part of the blade
projecting beneath the workpiece, the
clamping flange or the flange screw.
k) Avoid overheating the tips of the saw
blade teeth.
l) When cutting plastics, melting of the
plastic should be avoided.
m)
Dust from material such as paint
containing lead, some wood species,
minerals and metal may be harmful.
Contact with or inhalation of the dust
may cause allergic reactions and/or
respiratory diseases to the operator or
bystanders. Certain kinds of dust are
classified as carcinogenic such as oak
and beech dust especially in
conjunction with additives for wood
conditioning (chromate, wood
preservative). Material containing
asbestos must only be treated by
specialists.
Where the use of a dust
extraction device is possible it shall
be used. To achieve a high level of
dust collection, use a suitable
vacuum cleaner of the type
recommended by Hilti for wood dust
and/or mineral dust together with
this tool. Ensure that the workplace
is well ventilated. The use of a dust
mask of filter class P2 is
recommended. Follow national
requirements for the materials you
want to work with.
n) The tool is not intended for use by
children, by debilitated persons or
those who have received no
instruction or training.
o) Children must be instructed not to
play with the tool.
1.3.2 Power tool use and care
a) Secure the workpiece. Use clamps or
a vice to hold the workpiece in place.
The workpiece is thus held more
securely than by hand and both hands
remain free to operate the tool.
b)Ensure that the insert tools used are
equipped with the appropriate con-
nection end system and that they are
properly fitted and secured in the
chuck
.
c) In the event of a power faillure, switch
the tool off and unplug the supply
cord.
This prevents inadvertent
starting when the power returns.
d) Hold tool by insulated gripping
surfaces when performing an
operation where the cutting tool may
contact hidden wiring or its own cord.
Contact with a “live” wire will make
exposed metal parts of the tool “live”
and shock the operator.
1.3.3 Electrical safety
a) Before beginning work, check the
working area (e.g. with a metal
detector) to ensure that no concealed
electric cables or gas and water
pipes are present.
External metal
parts of the tool may become live if,
for example, an electric cable is
damaged inadvertenly. This presents
a serious risk of electric shock.
b) Check the condition of the supply
cord and its plug connections and
have it replaced by a qualified
electrician if damage is found. Check
the condition of the extension cord
and replace it if damage is found.
Do not touch the supply in the event
of it suffering damage while
working. Disconnect the supply cord
plug from the socket
. Damaged
supply cords and extension cords
present a risk of electric shock.
c)Use of a fault current protection
switch increases safety at work.
1.3.4 Work area
a) Ensure that the workplace is well lit.
b) Ensure that the workplace is well
ventilated.
Poorly ventilated work-
places may be injurious to the health
due to exposeure to dust.
Wear ear
protection
Wear
protective
gloves
Wear
breathing
protection
Wear eye
protection
Wear a
hard hat
1.3.5 Personal protective equipment
The user and any other persons in the
vicinity must wear suitable eye protection,
a hard hat, ear protection and protective
gloves when the tool is in use. Breathing
protection must be worn if no dust
removal system is used.
Printed: 14.05.2014 | Doc-Nr: PUB / 5138537 / 000 / 01

4. Dust extraction
NOTE
The circular saw is equipped with a hose
connector suitable for use with convention-
al vacuum cleaner hoses with a diameter of
27 mm. In order to connect the vacuum clean-
er hose to the saw, use of a suitable adapter
may be necessary.
CAUTION
Dusts are hazardous to the health and can cause
respiratory or skin diseases and allergic reac-
tions.
WARNING
Certain dusts are considered to be carcinogenic
(cause cancer). These include mineral dust as
well as oak and/or beech wood dust, particu-
larly in conjunction with additional substances
used for the treatment of wood (chromate, wood
preservatives).
CAUTION
Use a Hilti vacuum cleaner of a type suitable
for the applicable application. Use a respi-
ratory protector of the P2 filter class with
half-mask facepiece if no dust removal sys-
tem is available or its use is impossible. In
addition, to keep the concentration of dust
low, always ensure good ventilation.
Use of a dust extraction system improves saw
dust removal performance, reduces the amount
of dust in the surrounding atmosphere and pre-
vents saw dust being spread over a wide area.
Connect the external extraction system when
you intend to work with the saw over a long pe-
riod or when materials that produce hazardous
dust are to be cut.
The extraction adapter 15 should only be left in
place on the machine when an external ex-
traction system is in use. The exit opening may
otherwise become blocked, especially when
15
3. Operation
Before operation
Before switching on the machine, check to
ensure that the saw blade runs true and ro-
tates freely, and that the riving knife is cor-
rectly adjusted.
■Caution! Disconnect the supply cord plug
from the mains socket before adjusting the
riving knife. The thickness of the riving knife
must be less than the cutting width of the
saw blade and greater than or equal to the
thickness of the blade’s steel disc.
For safety reasons, the riving knife must always
be used. The riving knife is designed to prevent
jamming/sticking of the saw blade. It should be
adjusted while cutting depth is set at maximum.
Loosen the fastening screws 14, adjust the riv-
ing knife 9 (fig. 5) and then retighten the screws
14.
■Remove any adjusting tools or wrench-
es etc. before starting the machine.
Operation
■Hold the machine securely and maintain
a secure stance.
■Put the machine down only after the piv-
oting guard has closed.
The mains supply voltage must correspond with
the information printed on the rating plate.
Switching the machine ON/OFF
■Caution! Do not switch on the machine
while the blade is in contact with the work-
piece.
Switching on: Press the switch-on interlock
17 and the ON switch 18 simultaneously.
Switching off: Release the ON switch 18.
The circular saw is equipped with an automat-
ic saw blade brake. The braking procedure be-
gins immediately after releasing the ON/OFF
switch 18, causing the saw blade to come to
a standstill.
Protecting the saw blade
■Protect the circular saw blade from damage.
■Never lay the circular saw blade down on
hard materials. The carbide-tipped teeth could
suffer damage.
Changing the saw blade (Fig. 3)
■Caution! Disconnect the supply cord
plug from the mains socket before
changing the saw blade.
Lay the machine down on the supporting ribs
at the motor end. When changing a saw blade,
prevent rotation of the motor spindle by using
one hand to press the spindle lockbutton 10.
Removing the saw blade (Fig. 3)
The hex. socket wrench required for releas-
ing the flange screw is located beneath the
motor endcap. Adjust the saw to a cutting
depth of 0 by way of the cutting depth adjust-
ing lever 1. Use the hex. socket wrench 19 to
unscrew the screw 11 in a counter-clockwise
direction and remove the clamping flange 12
(fig. 3). Swing back the pivoting guard 13, hold
it securely in place and remove the saw blade.
Fitting the saw blade (Fig. 3/5)
Note the correct direction of rotation when
fitting the saw blade. The teeth and the arrow
printed on the saw blade must point in the
direction of the arrow on the upper part of the
blade guard. Clean wood chips and other dirt
or dust etc. from the surfaces and check that
the inner clamping flange 12 is correctly
seated. Fit the clamping flange 12 and then
insert and tighten the screw 11. The thick-
ness of the riving knife must be less than
the cutting width of the saw blade and
greater than or equal to the thickness of
the steel disc of the blade.
■Check the data for the saw blade to
ensure that it matches the data for the ma-
chine.
cutting damp wood. Fit the extraction adapter
from the front, with the opening facing the rear
of the machine, and insert it into the dovetail
socket until it clicks into place. The extraction
system will be attached securely only when the
connector has been felt to click into place.
■Observe the accident prevention regulations.
4.1 Procedure if the extraction adapter is
blocked
1. Disconnect the supply cord plug from the
power outlet.
2. Clean out the extraction adapter.
3. Check for misalignment or binding of
moving parts, breakage of parts and any
other condition that may affect the power
tool’s operation.
5. Using the saw
■Always disconnect the supply cord plug
from the mains socket before making any
adjustments to the machine.
Sawing along a line
Rest the front part of the baseplate on the
workpiece, switch on the machine and push
the circular saw forward evenly in the
direction of the cut.
The baseplate is equipped with four cutting
line indicators 4 for 0°, 22.5°, 45° and 60°.
The edge of the cutting line indicator
corresponds with the inside edge of the saw
blade.
Sawing using the parallel guide (Fig. 4)
The parallel guide 5 permits precise cuts to be
made parallel to the edge of a workpiece or,
respectively, permits strips of equal width to
Printed: 14.05.2014 | Doc-Nr: PUB / 5138537 / 000 / 01

16
be cut. To adjust the cutting width, release the
clamping screw 3, adjust the guide to the
required position and then re-tighten the
clamping screw 3. The parallel guide can be
mounted on either side of the baseplate in the
same way.
The parallel guide may be fitted in the reverse
position (with the guide pointing upwards). In
this position, it serves to increase the width of
the baseplate.
Adjusting the cutting depth
The cutting depth can be adjusted as desired
by way of the cutting depth adjusting lever 1.
Set the cutting depth according to the scale
22. Release the cutting depth locking device
23, adjust as required, and then re-tighten
the locking device.
The quality of cut edges can be optimised by
ensuring that the cutting depth is set to a
depth at least 2 mm greater than the
thickness of the material being cut.
Adjusting the cutting angle (Fig. 1)
Release the cutting angle clamping screw 2
and bring the blade to the desired cutting
angle according to the scale 21. Retighten
the clamping screw 2. Before bringing the
baseplate back into its original position, clean
the parts to remove wood chips or dust and
dirt in order to ensure unobstructed
movement.
Plunge cutting function (Fig. 2)
Mark the section of the workpiece to be cut
out. Set the cutting depth on the saw to 0 but
do not re-tighten the cutting depth clamping
screw. Place the circular saw on the
workpiece and bring the rear mark on the
baseplate into alignment with the line on the
workpiece. In order to reduce the risk of
kick-back when starting cutting, a wooden
batten or similar stop can be securely
fastened to the workpiece in alignment with
the rear edge of the baseplate. Press the
circular saw down onto the workpiece and
back against this stop. Switch on the
machine and use the free hand to press the
cutting depth adjusting lever 1down
smoothly until the desired plunge cutting
depth is reached. Continue the cut until the
mark at the front edge of the baseplate
meets the line on the workpiece. Switch off
the machine and lift the saw blade out of the
kerf once it has stopped rotating.
Note: Plunge cuts can be made at all angle
settings.
Auxiliary grip
The auxiliary grip 24 permits the saw to be
held and operated in the optimum,
ergonomic position.
6. Care, maintenance and
service
■Always disconnect the supply cord plug
from the mains socket before beginning
work on the machine.
■Keep the machine and the ventilation slots
20 clean at all times.
Resin deposits should be cleaned from
saw blades at regular intervals as a clean
blade improves performance. Resin deposits
can be removed by laying the blade in a bath of
paraffin (kerosene) or a commercially available
resin solvent for 24 hours.
Should movement of the depth adjustment
mechanism become stiff, the guide posts should
be lubricated on the spot.
■The machine is greased adequately by the
manufacturer during assembly. It is recom-
mended that the machine is inspected at a Hilti
service centre after a long period of heavy use.
This will increase the machine’s life expectan-
cy and avoid unnecessary repair costs.
■Repairs to electrical parts may be carried out
only by trained electrical specialists.
CAUTION
Keep the power tool, especially its grip
surfaces, clean and free from oil and
grease. Do not use cleaning agents
which contain silicone.
The outer casing of the tool is made from
impactresistant plastic. Sections of the
grip are made from a synthetic rubber
material. Never operate the tool when the
ventilation slots are blocked. Clean the
ventilation slots carefully using a dry
brush. Do not permit foreign objects to
enter the interior of the tool. Clean the
outside of the tool at regular intervals with
a slightly damp cloth. Do not use a spray,
steam pressure cleaning equipment or
running water for cleaning. This may nega-
tively affect the electrical safety of the tool.
6.1 Cleaning the safety devices
1. Remove the saw blade before cleaning
the safety devices.
2. Clean the safety devices carefully with a
dry brush.
3. Use a suitable tool to remove deposits or
wood chips from the inside surfaces of
the safety devices.
4. Fit the saw blade.
6.2 Checking the power tool after care
and maintenance
After carrying out care and maintenance
work on the power tool, check that all
protective and safety devices are fitted and
that they function faultlessly.
To check the pivoting guard, open the
guard fully by moving the guard operating
lever.
The pivoting guard must close quickly and
completely when the guard operating lever
is released.
7. Copyright
The information contained in these operating
instructions is protected by copyright and
remains the property of the Hilti Corporation,
FL-9494 Schaan, Principality of Liechtenstein.
These operating instructions are intended for
the use of the owner/operator and his/her
personnel only.
Copying, publication or any other form of
distribution of the information and instruc-
tions contained, in whole or in parts, is strictly
prohibited.
Violation of this copyright may lead to prose-
cution.
8. Disposal
Return waste material for
recycling.
Most of the materials from which Hilti power
tools are manufactured can be recycled. The
materials must be correctly separated before
they can be recycled. In many countries, Hilti
has already made arrangements for taking
back your old electric tools for recycling.
Please ask your Hilti customer service
department or Hilti sales representative for
further information.
Printed: 14.05.2014 | Doc-Nr: PUB / 5138537 / 000 / 01

17
Method of use
Rotation against the direction of feed (up-
cutting)
Rotation with the direction of feed – only
in stationary machines with mechanical feed
General information
1. Application
Circular saw blades may be used in hand-held
machines and stationary machines. It is
essential, however, that the blade’s specifi-
cation is in conformance with the technical
data applicable to the machine used, the
requirements set by the machine’s manufac-
turer, the instructions on care and maintenance
and the safety instructions for the machine.
2. Packaging and transport
The blade must be handled very carefully
when it is unpacked or re-inserted in the
package and when being fitted to the
machine. The very sharp cutting edges may
cause personal injury.
3. Use
The maximum permitted speed (r.p.m.) must
not be exceeded. Clean the area of the blade
in contact with the clamping flange carefully
before fitting.
4. The blade
Check the cutting edges. Check the machine
settings. The arrow on the circular saw blade
indicating direction of rotation must corres-
pond to the direction of rotation indicator on
the circular saw. Disconnect the supply cord
from the mains supply in order to ensure that
the machine cannot be started unintentionally
while the blade is being changed.
5. Before starting
The blade must be fitted and secured in accor-
dance with the directions given by the
Circular saw blades
Correct use
The circular saw blades are used for ripping, cross cutting and cutting grooves
in wood, wood materials, other similar materials or composites. If the system
is not used for the intended purpose, the machine and / or saw blade can be
damaged or fragments of the saw blade might break away. Fragments of the
saw blade which fly off or are stuck in or on the wood workpiece, increase the
risk of injury. In particular, metal foreign matter in wood, such as loose nails,
can cause saw teeth to catch and break or might be torn out of the workpiece
and exert an unforeseen force (reaction) on the operator's wrist / hand.
When selecting a circular saw blade, remember that it may be
used only for the materials recommended in the application
information.
You have purchased a high performance saw blade. It is essential that
the applicable safety regulations, instructions concerning protective
measures and the safety precautions listed in these operating
instructions are observed whenever the blade is handled or in use.
The most important safety precautions are summarised on these pages.
Please read them carefully before using the saw blade.
Hilti Corporation, Feldkircherstrasse 100,
FL-9494 Schaan
Paolo Luccini Jan Doongaji
Head of BA Ececutive Vice President
Quality & Process Management BU Power Tools & Accessories
BA Electric Tools & Accessories
01/2012 01/2012
Technical documentation filed at:
Hilti Entwicklungsgesellschaft mbH
Zulassung Elektrowerkzeuge
Hiltistrasse 6, 86916 Kaufering, Deutschland
9. EG declaration of conformity
(original)
Description: Hand-held circular saw
Designation: WSC85
Serial no.: 00000000–99999999
Year of design: 2003
We declare, on our sole responsibility, that this product com-
plies with the following directives and standards: 2004/108/EC,
2006/42/EC, EN 60745-1, EN 60745-2-5, EN ISO 12100,
2011/65/EU.
Only for EU countries
Disposal of electric tools together with household waste
is not permissible!
In observance of European Directive on waste electrical and
electronic equipment and its implementation in accordance
with national law, electric tools that have reached the end of
their life must be collected separately and returned to an
environmentally compatible recycling facility.
Printed: 14.05.2014 | Doc-Nr: PUB / 5138537 / 000 / 01

18
greater than or equal to the thickness of the
blade’s steel disc.
For safety reasons, the riving knife must always
be used. The riving knife is designed to prevent
jamming/sticking of the saw blade.
Sharpening and blade care
■The blade must no longer be used if its steel
disc show signs of cracking or deformation.
■Welding and brazing repairs to the steel
disc are not permitted for safety reasons.
Composite circular saw blades on which the
height or thickness of the brazed-on cutting
tips has been worn down to less than 1 mm,
must not be used.
■The use of separate, loose reducing rings
is not permitted. The use of firmly-seated,
pressed-in reducing rings to bridge diameter
differences is permitted when the usual fit
conditions are observed.
■Resharpening, maintenance and repairs to
circular saw blades may be carried out only by
a Hilti service centre or competent persons who
know the blade design requirements and
understand the applicable safety regulations.
■Correct professional maintenance has a
decisive influence on the blade’s long-term
precision.
Copyright
The information contained in these operating
instructions is protected by copyright and
remains the property of the Hilti Corporation,
FL-9494 Schaan, Principality of
Liechtenstein. These operating instructions
are intended for the use of the
owner/operator and his/her personnel only.
Copying, publication or any other form of
distribution of the information and
instructions contained, in whole or in part, is
strictly prohibited.
Violation of this copyright may lead to
prosecution.
Minimum dimensions of cutting tips of
composite circular saw blades in
accordance with DIN EN 847-1
Right of technical changes reserved.
manufacturer of the machine. The machine
manufacturer’s instructions must be observed.
6. Maintenance
Correct functioning and safe use can be
ensured only when maintenance is carried
out professionally.
7. Conformance
This circular saw blade was developed and
manufactured in accordance with the DIN EN
847-1 standard.
Safety precautions
■The currently applicable regulations must
be observed.
■The blade must not be misused or used
for applications for which it is not designed.
■Observe all instructions and warnings
concerning safety contained in the operating
instructions for the sawing equipment. If you
do not possess these operating instructions,
request a copy from the manufacturer of the
equipment.
■For your own safety, make use of
protective equipment for the eyes, ears and
mouth.
■Never leave a running machine unattended.
■Saw blades must be cleaned at regular
intervals to remove resin deposits. Clean
saw blades are more efficient, last longer
and are therefore more economical.
After falling to the floor, or any other
similar incident, a circular saw blade
must be checked for damage at a
Hilti service centre without delay. Damaged
circular saw blades must not be used.
Disconnect the supply cord plug from the
mains socket before adjusting the riving knife.
The thickness of the riving knife must be less
than the cutting width of the saw blade and
Hilti Corporation, Feldkircherstrasse 100,
FL-9494 Schaan
Paolo Luccini Jan Doongaji
Head of BA Ececutive Vice President
Quality & Process Management BU Power Tools & Accessories
BA Electric Tools & Accessories
01/2012 01/2012
Technical documentation filed at:
Hilti Entwicklungsgesellschaft mbH
Zulassung Elektrowerkzeuge
Hiltistrasse 6
86916 Kaufering
Deutschland
Printed: 14.05.2014 | Doc-Nr: PUB / 5138537 / 000 / 01

Hilti = registered trademark of Hilti Corp., Schaan W 2230 0314 10-Pos. 1 1 Printed in Liechtenstein © 2014
Right of technical and programme changes reserved S. E. & O.
Hilti Corporation
FL-9494 Schaan
Tel.: +423 / 234 21 11
Fax: +423 / 234 29 65
www.hilti.com
314714/ A6
Printed: 14.05.2014 | Doc-Nr: PUB / 5138537 / 000 / 01
Other manuals for WSC 85
11
Table of contents
Other Hilti Saw manuals

Hilti
Hilti DCH 300 User manual

Hilti
Hilti WSC 7.25-S User manual

Hilti
Hilti DSW 1005E User manual

Hilti
Hilti SCM 22-A User manual

Hilti
Hilti WSR 22?A User manual

Hilti
Hilti SR 30-A36 User manual

Hilti
Hilti WSC 85 User manual

Hilti
Hilti DS WS15 User manual

Hilti
Hilti DSH 700 User manual

Hilti
Hilti DST 20-CA User manual

Hilti
Hilti DCH 300 User manual

Hilti
Hilti SCM 22-A User manual

Hilti
Hilti SC 70W-A22 User manual

Hilti
Hilti WSR 36-A User manual

Hilti
Hilti DSW 1510-CA User manual

Hilti
Hilti WSJ 750-ET User manual

Hilti
Hilti WSC 255-KE User manual

Hilti
Hilti NURON DSH 700-22 User manual

Hilti
Hilti Nuron SC 30WR-22 User manual

Hilti
Hilti DSH 600-X User manual