Hipstreet HS-M702 WF User manual

UserManual 1
HS-M702 WF User Manual
July 2011

UserManual 2
Catalogue
1. Preface
2. Notes
3. Ready to use
3.1 Packing content list of the product
3.2 Products appearance
3.3 Instruction of press key function
3.4 Products function
3.5 Parameter of product technical specification
4. Quick guide
4.1Calibrating touch screen
4.2 Battery management and charging
4.3 On/off
4.4 Function icon use
4.5 Wi-Fi setting
4.6 APK installer
4.7 Use SD memory card (Optional)
5. Function operation details
5.1 System desktop (Multi-media Music / Video / Pictures / Explorer)
5.1.1 Music player
5.1.2 Video
5.1.3 Pictures
5.1.4 Recording
5.1.5 Resource manager/Explorer
5.2 System desktop (Web application functions)
5.2.1 Browser
5.2.2 E-mail
5.2.3 Maps
5.3 System desktop (other functions)
5.3.1 Calendar
5.3.2 Calculator
5.3.3 Alarm clock:
5.3.4 APK installer
5.3.5 device setting
5.3.5.1 Wireless and network settings
5.3.5.2 Voice and display settings
5.3.5.3 Application program setting
5.3.5.4 SD card and device memory setting
5.3.5.5 Language keyboard setting
5.3.5.6 Date and time setting
5.3.5.7 Touch screen calibration
5.3.5.8 About the device
6. Troubleshooting
Preface

UserManual 3
Support:
Thank you for purchasing a Hip Street product and we hope you enjoy using it
Please visit our website at www.hipstreetonline.com. We have a Frequently Asked Questions
FAQ section where you will find answers to most of your questions. If you do not find an answer
there, please use the option to contact our technical support department and kindly send us an
email detailing your question and we will get back to you promptly.
Kindly read and retain all the operating instructions before operating the unit. We cannot
assume any liability that may arise out of improper operation or incidental/accidental
damages.
The contents of this user manual are subject to change based on newer developments.
Customer and Technical Support: 1-888-456-2426
Monday through Friday: 8:30 am – 5:00 pm EST
This product has a built-in high-performance WiFi receiver module and is designed to meet your
portable eReader/media player entertainment needs. It also supports picture browsing, playing
music and videos, email, games as well as other features.
Declaration
1. The information in this manual may not, except under written license by The Company, be
copied, transmitted, distributed, or stored.
2. Although efforts have been made for correctness and completeness during the preparation
of the manual, there is no guarantee that this manual is free from any error or omission.
The Company assumes no liability regarding the errors or omissions that might exist in the
manual.
3. For sustainable development, The Company reserves the right to modify and improve any
product described in this manual without prior notice.
4. Under no circumstance shall the Company assume any liability, direct or indirect, related to
data or income loss, or any special, accidental, incidental or indirect losses.
Before using your eReader/multi-media player, please read all the information we have supplied.
This manual will introduce its functions, enabling you to use the device more easily and
conveniently. Through the manual you can obtain information about the product introduction,
usage and other aspects of knowledge, so you can better use it.
Precautions
For the correct use and good performance of the player, the user must fully understand the
manual as well as strictly follow the instructions provided.
zNever shake the Multimedia eReader violently.
zNever bring the product into contact with chemicals such as benzene, thinner etc.
zAvoid close contact to strong magnetic field, electric field etc.
zKeep away from direct sunlight or heating appliances.
zAll wireless devices may be susceptible to interference, which could affect performance.
zIf you are upgrading software or in the process of downloading data, do not suddenly power
off, or it will cause loss of data or a system error.

UserManual 4
zFollow any restrictions for WiFi devices. Wireless devices can cause interference in aircraft.
If you wish to use the device on a plane, please consult the airline.
zDo not use the device at a refueling station. Do not use this device near fuel or chemicals.
zDo not use the device at any place where blasting is occurring.
zNever privately dissemble, repair or modify the player.
zDo not use the eReader and or earphones during bicycling, car and motorcycle driving as
this is dangerous and may cause an accident.
zBack up important information stored in E-books or keep a written record, so as to prevent
loss.
zFirmware loss or corruption can cause operation of this product inconsistent with this manual.
Please use the software and instructions on the CD-ROM in the package to re-install the
software.
zUsing the earphones at a high volume could be harmful to your hearing.
zSeparate scraps from packaging, batteries, old electronic products and dispose of them
properly. This product contains a built-in lithium battery and should not be disposed of
in normal household waste. For proper disposal and recycling, please contact your
local waste management authorities. This will help us all protect the environment.
FCC and IC WARNING:
This device complies with part 15 of the FCC rules and Industry Canada licence-exempt RSS standard(s).
Operation is subject to the following two conditions: (1) this device may not cause interference, and (2) this
device must accept any interference, including interference that may cause undesired operation of the
device.
This equipment has been tested and found to comply with the limits for a Class
B digital device, pursuant to Part 15 of the FCC Rules. These limits are
designed to provide reasonable protection against harmful interference in a
residential installation. This equipment generates uses and can radiate radio
frequency energy and, if not installed and used in accordance with the
instructions, may cause harmful interference to radio communications.
However, there is no guarantee that interference will not occur in a particular
installation. If this equipment does cause harmful interference to radio or
television reception, which can be determined by turning the equipment off and
on, the user is encouraged to try to correct the interference by one or more of
the following measures:
-- Reorient or relocate the receiving antenna.
-- Increase the separation between the equipment and receiver.
-- Connect the equipment into an outlet on a circuit different from that to which
the receiver is connected.
-- Consult the dealer or an experienced radio/TV technician for help
Changes or modifications not expressly approved by the party responsible for
compliance could void the user's authority to operate the equipment.

UserManual 5
Le présent appareil est conforme aux CNR d’Industrie Canada applicables aux appareils radio exempts de
licence.
L’exploitation est autorisée aux deux conditions suivantes :
(1) l’appareil ne doit pas produire de brouillage, et
(2) l’utilisateur de l’appareil doit accepter tout brouillage radioélectrique subi, même si le brouillage est
susceptible d’en compromettre le fonctionnement.
3. Ready to use
3.1 Packing content list of the product
3.2 Product appearance
Item Quantity
Device 1
Power adapter 1
Earphones 1
USB data cable 1
Manual 1
Quick Start Guide 1
CD-ROM 1
Warranty card 1

UserManual 6
3.3 Instruction of press key function
Position Definition of press
key Function instruction
A RESET KEY When unit is unresponsive or system
crashes, press and release reset key
B POWER KEY Press and hold to power on or off.
Press and release to activate
sleep/wake-up function
C KEY Press and release to enter into
sub-function menu
D or Previous/back or Next/forward buttons
E KEY Press and release to return to previous
screen
F KEY Press and release to return to main
interface
G MicroSD Card
(Optional) MicroSD Card slot position
H EARPHONE JACK Earphone line interface
I DC JACK Externally connect the 5V DC charger
J MINI USB JACK MINI_5PIN connection line interface
K DISPLAY
SCREEN HD display screen area
3.4 Product function
7” TFT LCD 800 x 480 high definition touch screen
4GB built-in FLASH storage capacity – supports expansion MicroSD card up to 16GB
capacity
Support AVI, 3GP, MP4, RM, RMVB, FLV, WMV and other video formats. Supports a
maximum resolution of 1280 x 720
Support JPG, BMP, GIF (static), PNG and other picture browsing
Supports MP3, WMA, FLAC, OGG, WAV and other audio formats, plus a variety of EQ
modes
Supports e-book formats such as PDF, EPUB, FB2, TXT, PDB, RTF. Supports zooming,
bookmarks, page, etc.
Supports built-in WiFi and can access broadband wireless Internet on available networks.
Using the Android operating system, it can run on a variety of software, system pre-builds,
some commonly used software such as: Google browser, Internet, online MP3, online
novels, online games, e-books and others
Supports built-in microphone recording function (optional)
Supports G-Sensor screen rotation function
Supports stereo audio headphones/earphones
Supports multi-language settings
USB mobile disk, systems above WIN_2000 are installed free
3.5 Technical specifications
Overall dimension 192*127*11.6mm

UserManual 7
Size 7.0 inchDisplay screen Resolution 800*480 resolution
16 million color TFT LCD
Computer interface High Speed USB
2.0 (FS)
Built-in capacity Flash Memory:4GB
System memory RAM:DDR2
Expansion capacity Support MicroSD Card - capacity up to 16GB
Built-in 3.7V,1800mA/H Li-ion battery,
AC charger:Input:AC110V~240V, Output: DC 5V, 2A
Power supply
Built-in battery supports up to 3-4 hours of movie playback
time (factory default mode, at middle volume)
Play format MP3,WMA,FLAC,OGG,WAV,etc.
Support MP3 8Kbps ~ 390 Kbps
Music function Support WMA 5Kbps ~ 192 Kbps
Play formats AVI, 3GP, MP4, RM, RMVB, FLV,
WMV, etc.
Supports maximum
resolution Support maximum video resolution
1280*720.
Video function
Display width and
height ratio Selectable 4:3,16:9, as well as
full-screen playback mode
Picture browsing JPG, JPEG, BMP, GIF
E-books Format PDF,EPUB,FB2,TXT,PDB,
RT, etc.
Operating
languages English, French, Simplified Chinese, Traditional Chinese,
Japanese, German and other languages
Supports operation
systems Windows 2000/XP/Vista/WIN7
4.Quick guide
4.1 Touch screen calibration:
If the positions you touch on the screen appear to be offset when using the device, select
the "touch-screen calibration" feature in the "Settings" menu. Touch the center point of each
"cross" as they appear on the screen according to the indicated places of the red circles and
then the Android icon. After calibration is OK, the screen will display "Calibration
successful".

UserManual 8
4.2 Battery management and charging
a. You should charge the battery for 8 to 12 hours to ensure a full battery charge when
using your device for the first time.
b. The small plug end of the power adapter should be inserted into the DC socket on the
bottom of the unit and the other end should be plugged into an electrical outlet. The
Desktop battery icon (green scrolling display) will appear, indicating that charging
is in progress. Please wait until the battery is fully charged before unplugging the
charger. After device is fully charged, desktop battery icon stops scrolling.
If charging when the battery power is fully depleted, please wait at least a minute and
then reboot.
Note: In order to ensure the best use of lithium batteries, please note the following:
zDo not charge under high temperature environment (such as on a balcony or anywhere
in direct sunlight).
zLithium batteries do not need to discharge fully.
zWhen not using this product for a long time, please charge fully once at least every two
weeks, so as to avoid battery over-discharge and affect their performance.
Note: AC adapter used must meet the following requirements, otherwise damage may
occur to the unit:
zInput – AC110~240V, 50/60Hz Max. 300mA
zOutput – DC5.0V, 2000mA (DC)
Using the touch screen
zThis unit has a touch sensitive screen which allows you to place your finger on the
screen and move up or down (swipe the screen) to scroll as well as move from side to
side when turning pages. You can also touch an item/icon to select it. Simply use your
fingertip to manipulate icons, buttons, menu items, the on-screen keyboard and others.
Suggestion: Practice using the touch screen feature so that you get used to how it
operates. Note that a thin protective film covers the screen to protect it during
shipping. Peel this film off the screen before using the eReader/multi-media player.
When using your finger, the best results are achieved with the pointed end of the
UserManual 9
fingertip, rather than the flat pad of the finger.
zTouch any of the icons on the Main Graphic Interface to open that Option.
zTouch icon or press the 2button to return to previous screen or exit.
Adding memory to the device
This device has an expansion slot on the bottom for a Micro SD memory card (Memory Card
not included). It will accept 1GB, 2GB, 4GB, 8GB, and 16GB size cards. Adding one of these
cards will increase space for storing data.
Inserting the Card: The card will only go in one way. Do not force it. Insert it carefully into the
slot labeled “MICRO SD”. Press it in to lock it into place. When using the memory card, do not
remove it without ending the operation in progress as there may be data errors created. Avoid
storing the memory card in high temperatures or high humidity. Keep away from liquids and
corrosive materials.
Removing the Card: Press the card in to unlock and release it. Do not pull it out by force
without releasing first.
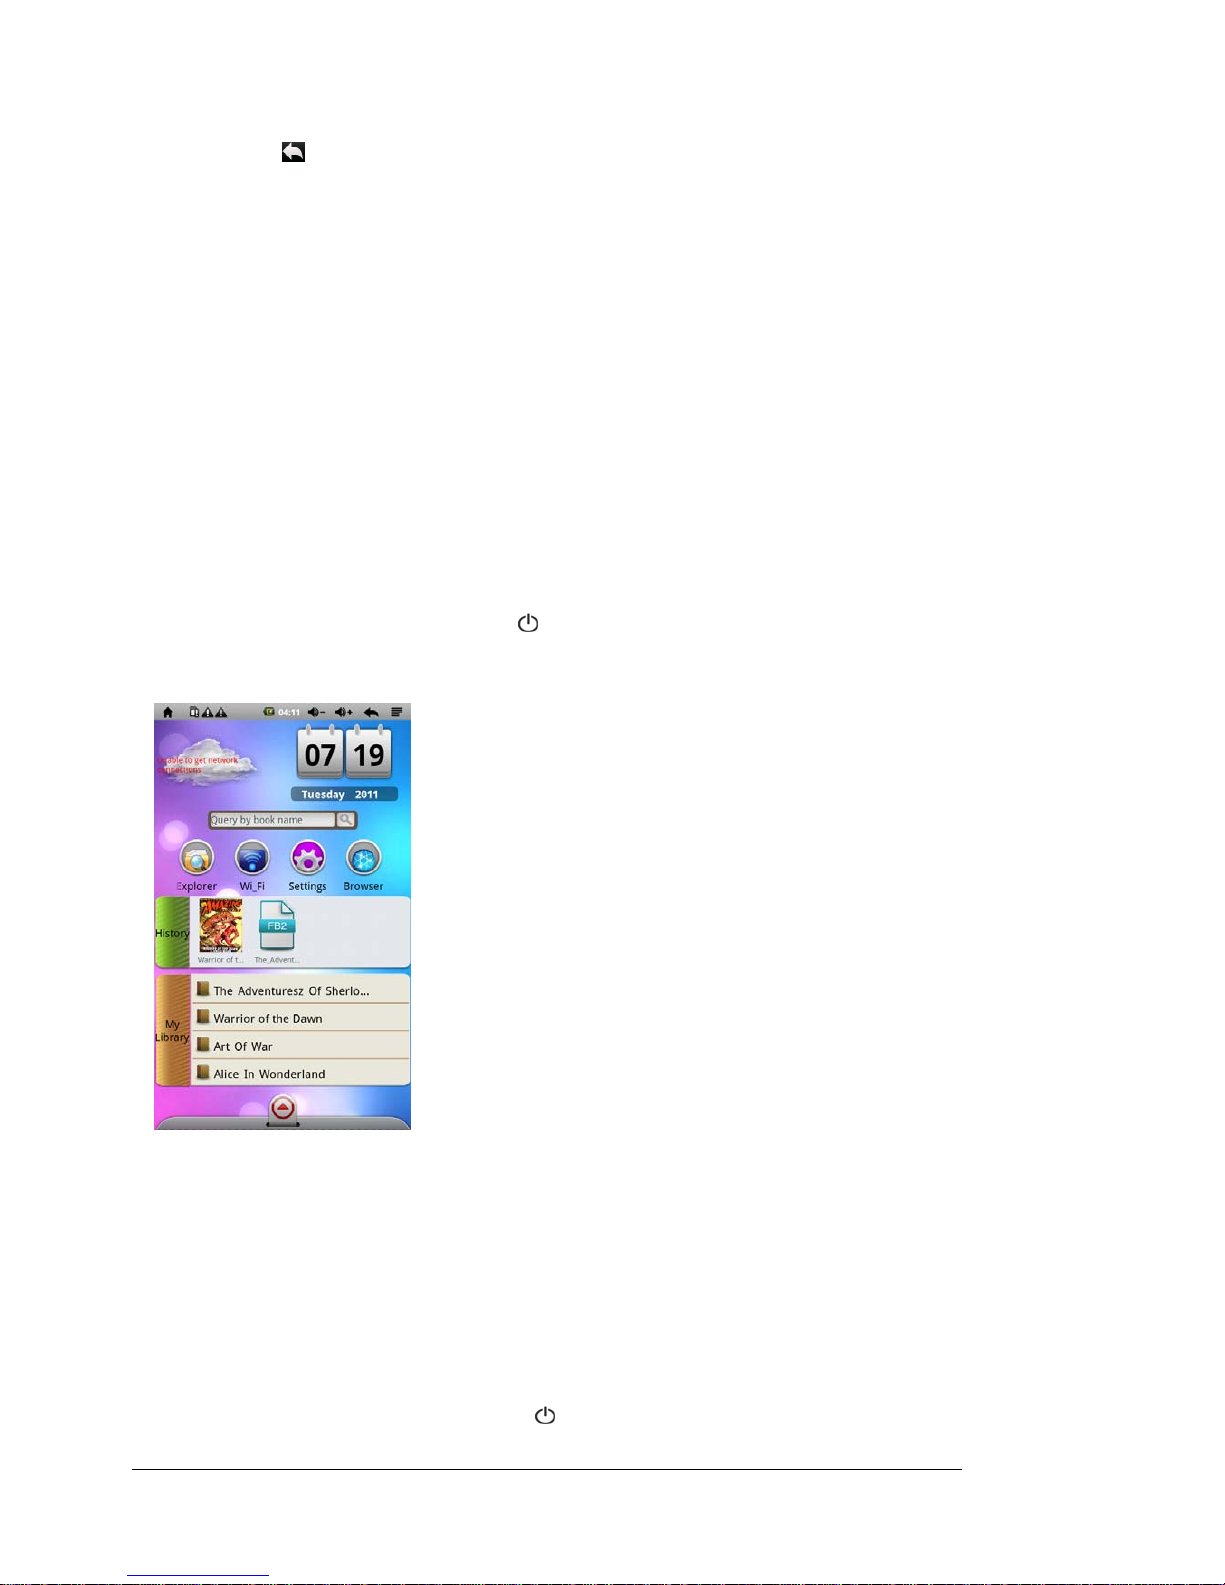
4.2 On/Off
On: Press and hold the Power Button [ ] until the unit turns on. Please be patient while the unit
starts up. When the unit powers up, it will enter into the eBOOK main interface as follows:
Power saving mode and lock desktop screen: When the device is on, press and release
"POWER" button to enter the SLEEP power mode. The screen will go black entering the locked
screen state. To reverse this, press and release the "POWER" button and the system will
restore the bright screen within one second.
Note: Originally selected operating functions will not be interrupted in the power-saving mode
and will continue to work. If you are listening to music then it will continue playing. If you are
watching a video it will pause and then resume after you have exited the power saving mode.
Off: Press and hold the Power Button [ ]for three seconds. The screen will show the Device

UserManual 10
Options window. Touch “Power off” option to confirm the shutdown and the Power Off screen
appears advising you that your “phone” will shut down. Touch OK and the system will
automatically shut down.
Note: When the battery power is low, the device will warn you and if it is not charged, the device
will automatically shut down. If the device cannot turn on, check whether the battery has power
or not. Charge the battery and then try to turn the power on again.
4.4 Function icon use
a. Definition of desktop function icon
Icon Function instruction icon Function instruction
Click return to main page
in any interface, during
main interface state,
click this icon to switch
between the two
interfaces
Indicates the removable
devices, such as the
micro SD card inserted
or not
Battery icon shows
current remaining
capacity Indicates that alarm
clock function is set
Displays current system
time Volume -
Return key Volume +
UserManual 11
Menu Function module menu
WIFI on and off switch
tool bar Music / Video media
library updated
b. Input settings
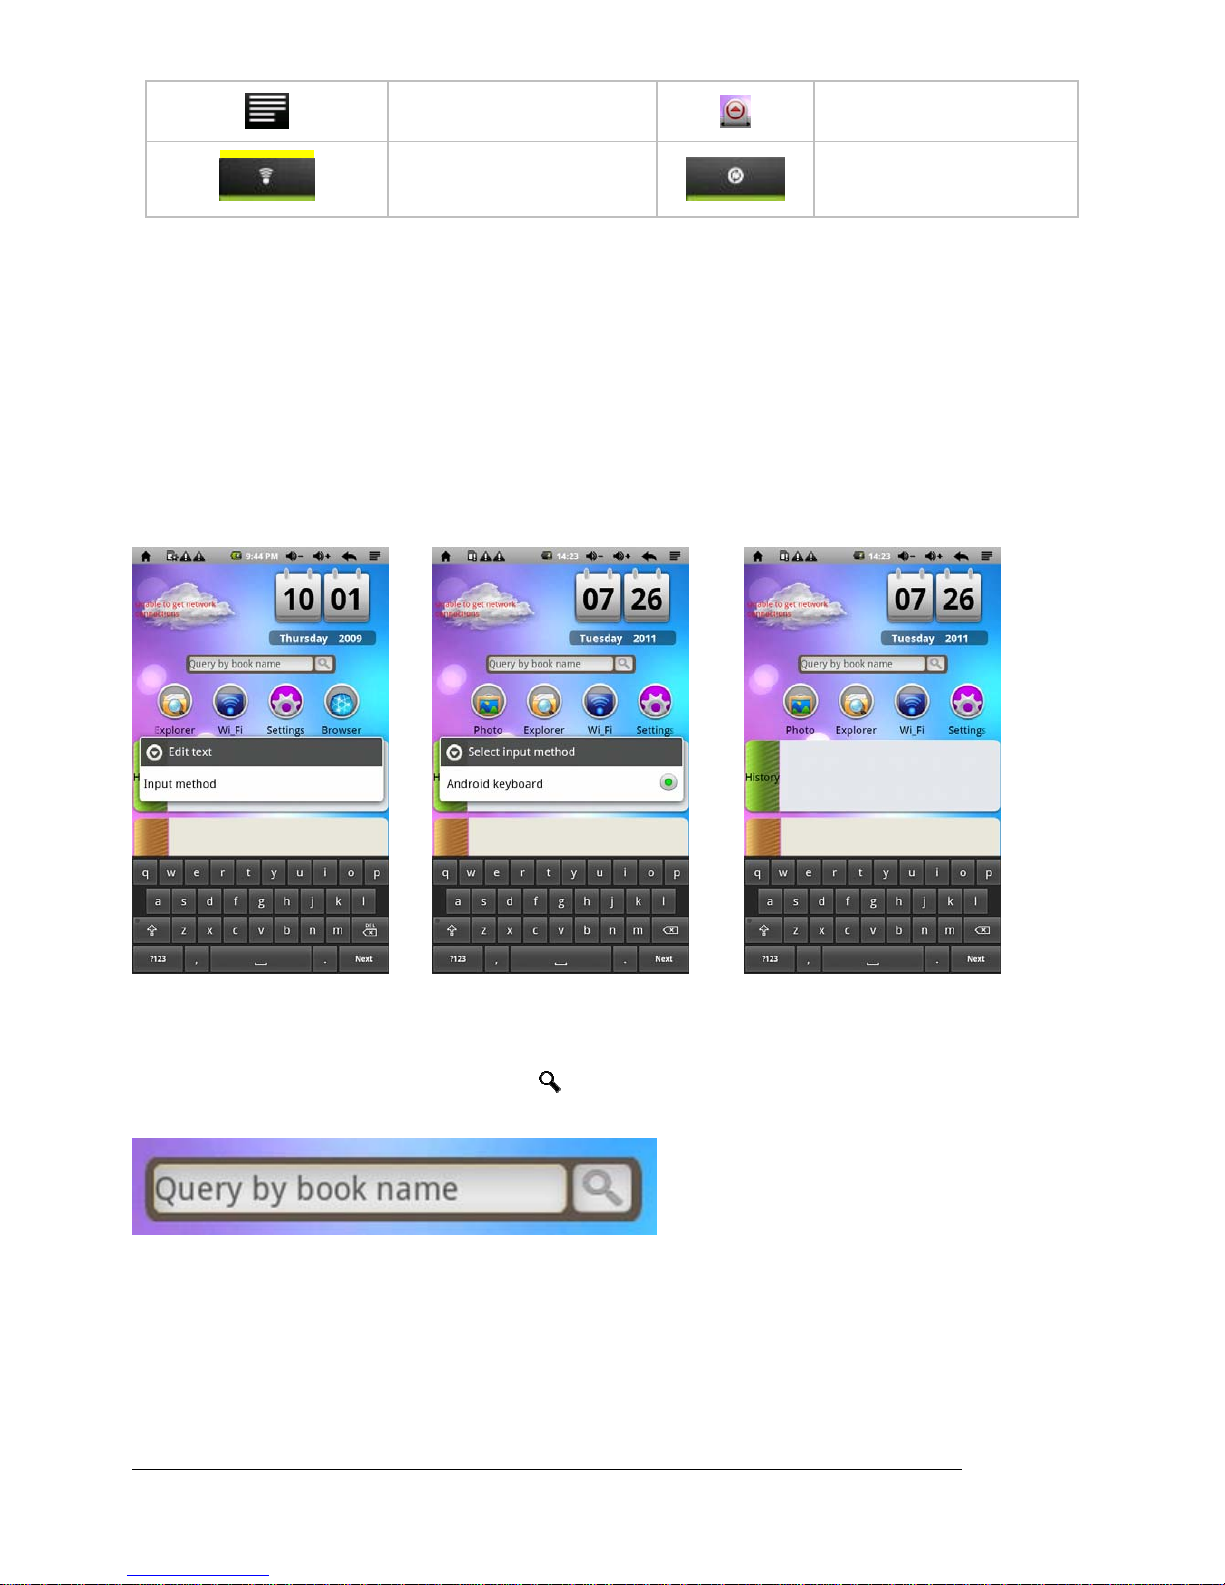
Press the search box to display the input method - see as follows:
c. Search function
To search for specific e-books stored in the device, you can enter partial names or the name of
the full title - then touch the search icon [ ] and the results will appear.
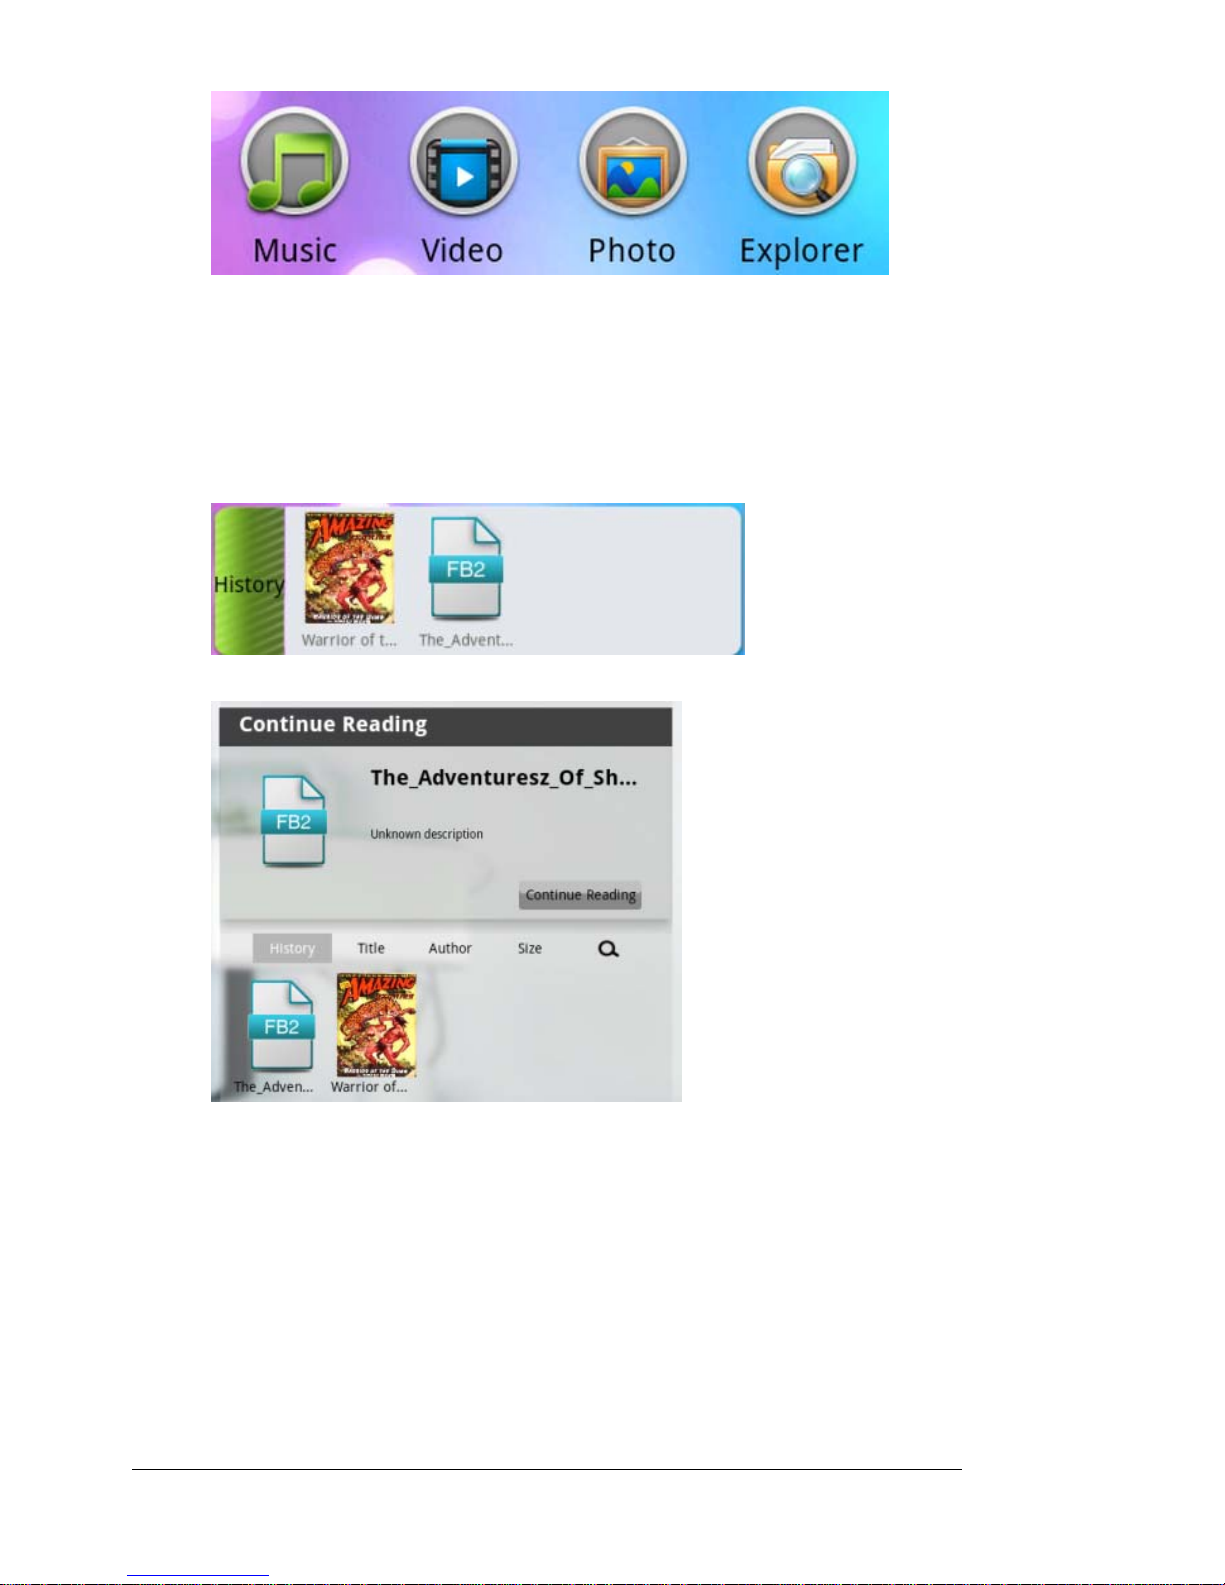
d. Shortcut toolbar
Touch any one of these icons for quick access to relevant functions such as music, videos,
pictures and documents.
UserManual 12
e. History record
Quick display only shows the most recent ten browsing records (Figure 5). Touching the
"History” record icon enters into history overview (see Figure 6) where the system has stored
the history records. To open an e-book that has been viewed, simply touch the cover of the
book you want and then touch the "Continue Reading" bar.
Figure 5:
Figure 6:
You may also position the books within the History record by selecting Title, Author or Size from
the sub-menu that appears above the books listed.
f. My library
Quick display shows up to 50 e-books in the eReader (Figure 7). Touch the "My Library" icon to
enter the library record overview (see Figure 8) system has stored e-Books on the device. To
open an e-book that is in My Library, simply touch the cover of the book you want and then
touch the "Continue Reading" bar display.
Figure 7:
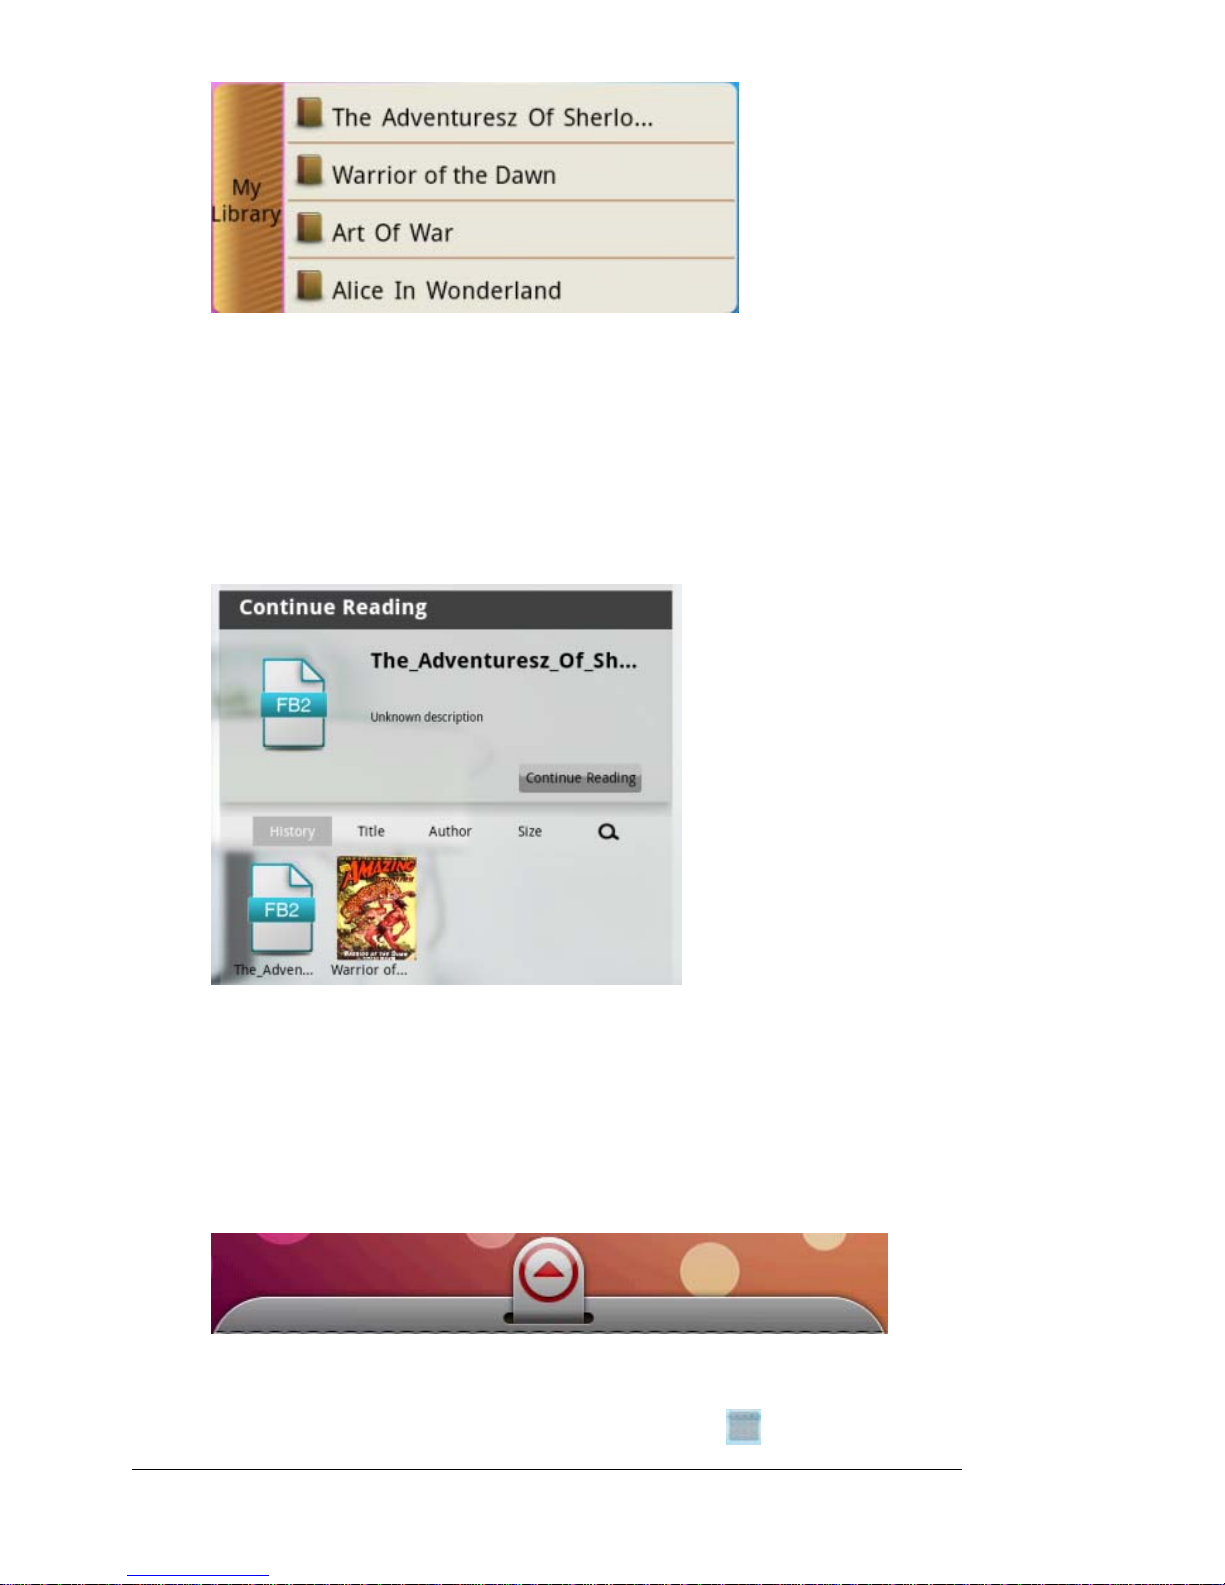
UserManual 13
Figure 8:
Note: the same as above
g. Menu column
Touch and Drag the arrow icon (at the bottom of the screen) upward to display all installed
applications and access the Settings menu icon. Drag the arrow icon downward to hide all
installed applications. (Figure 9)
Figure 9:
4.5 Wi-Fi setting
a. Open Wi-Fi setting:Touch the function module menu icon and enter the function enu

UserManual 14
list. Touch "Settings" to enter the settings page and then touch the "Wireless and network"
line. Touch Wi-Fi and the green checkmark will appear in the box on the right side. See the
red circle as follows:
Set Wi-Fi and Connect to the network: Touch "Wi-Fi Settings". The device will automatically
search for and find the names of available wireless networks (see the following). It has already
found two Wi-Fi networks in the example:
b. IP addresses and connection settings: IP address has two settings:
1.Automatically assign IP address:
Whether the IP address is automatically assigned depends on the Wi-Fi router itself. If network
showing is the network name of an automatically assigned IP address, simply touch the
icon in the upper right corner of the screen menu, and then enter into "advanced" settings to
remove the check mark beside the "Use Static IP" box, as follows:

UserManual 15
After setting, touch the icon in the upper right corner of the screen menu, and then
touch “Save” setting, as follows:
After finishing "Save", return to the list of network names and touch the Wi-Fi network
name that needs to be connected, for example, touch the "KW" network. The Connect to KW
window will appear asking you to input the wireless password. When finished entering the
correct password, click "Connect." The system will automatically connect and assign IP
addresses. If it connects successfully, it will show "connected". Touch the network,
connection and status will also appear, as shown below:
2. Manually setting IP address:
Manually assigning an IP address is first determined by the Wi-Fi router itself. If it is a network
name of a manually assigned IP address, simply click in the upper right corner of the menu
screen, and enter into the "advanced" settings. Touch the mark in the box beside "Use Static
IP" to add the check mark, and set up according to the assigned IP address by router, as shown
below:
After setting, touch the icon in the upper right corner of the screen menu, and then
touch “Save” setting as follows:
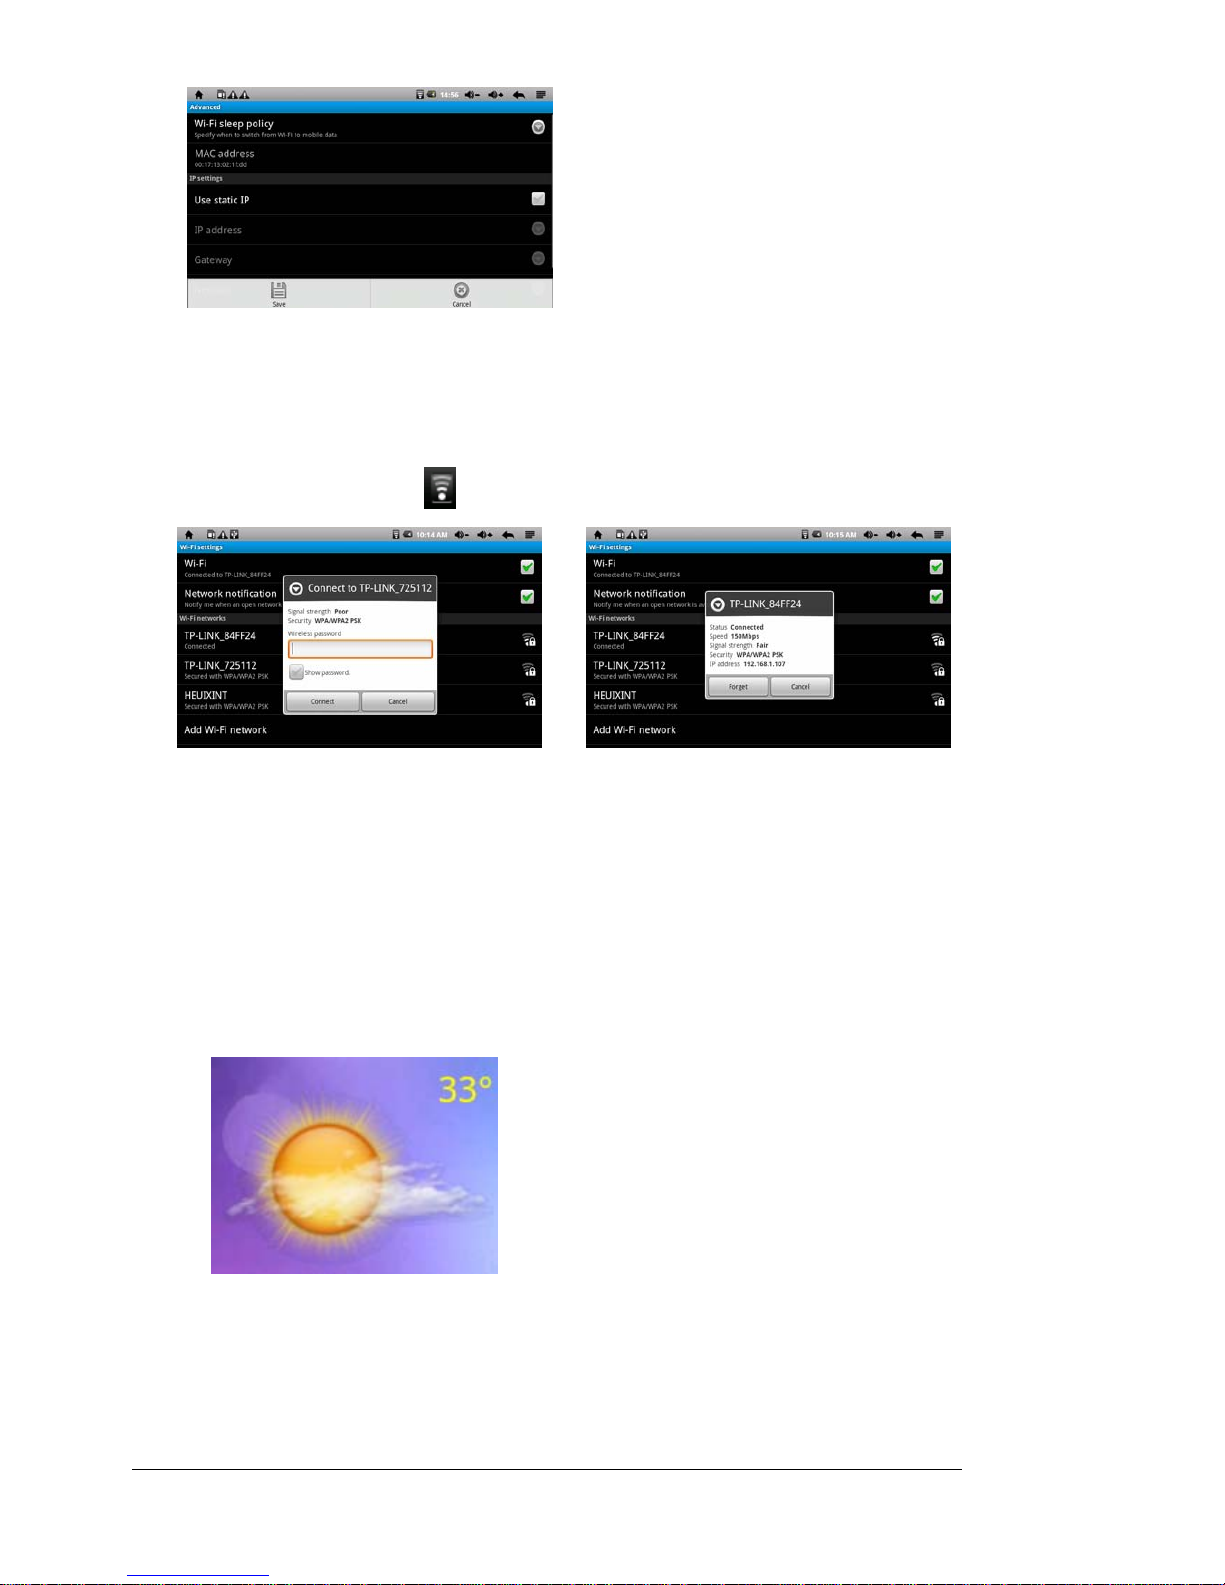
UserManual 16
After finishing "Save", return and touch the Wi-Fi network name that needs to be
connected, for example, click the "KW" network, The Connect to KW window will appear
asking you to input the wireless password. When finished entering the correct password, click
"Connect." The system will automatically connect and assign IP addresses, if connecting
successfully, it will show "connected". Touch the network and the connection status will
appear and the Wi-Fi icon will appear as shown below:
3. Weather function (this function will only operate when Wi-Fi is connected)
To use for the first time, you need to touch and press the weather display icon position (Figure
1). In the window screen that opens (Figure 2) you must either select the appropriate city or
enter a city name. For Canadian cities please go to the Search City area and enter the name of
your desired city in the Search bar.Then click on Search. The window will close and return
directly to the main interface of e-Book, and show the weather conditions and temperature for
the corresponding city selected.
Figure 1:
Figure 2:

UserManual 17
4.6 APK installer
The device supports third-party applications built on the Android platform. You can get most
applications from the Internet. It is downloaded into the built-in flash memory or onto an optional
MicroSD Card, then installed and used.
Touch APK Installer icon and the Apk installer interface opens with 3 options: Install,
Manage and Exit.
•Install: Touch Install to enter Apk installation interface.
Internal Memory and SD Card will respectively correspond to flash memory disk and Micro SD
card storage disk. After entering, choose APK setup program within the right box. Touch on
installation. When operation is complete, return to the main interface, completing the installation.
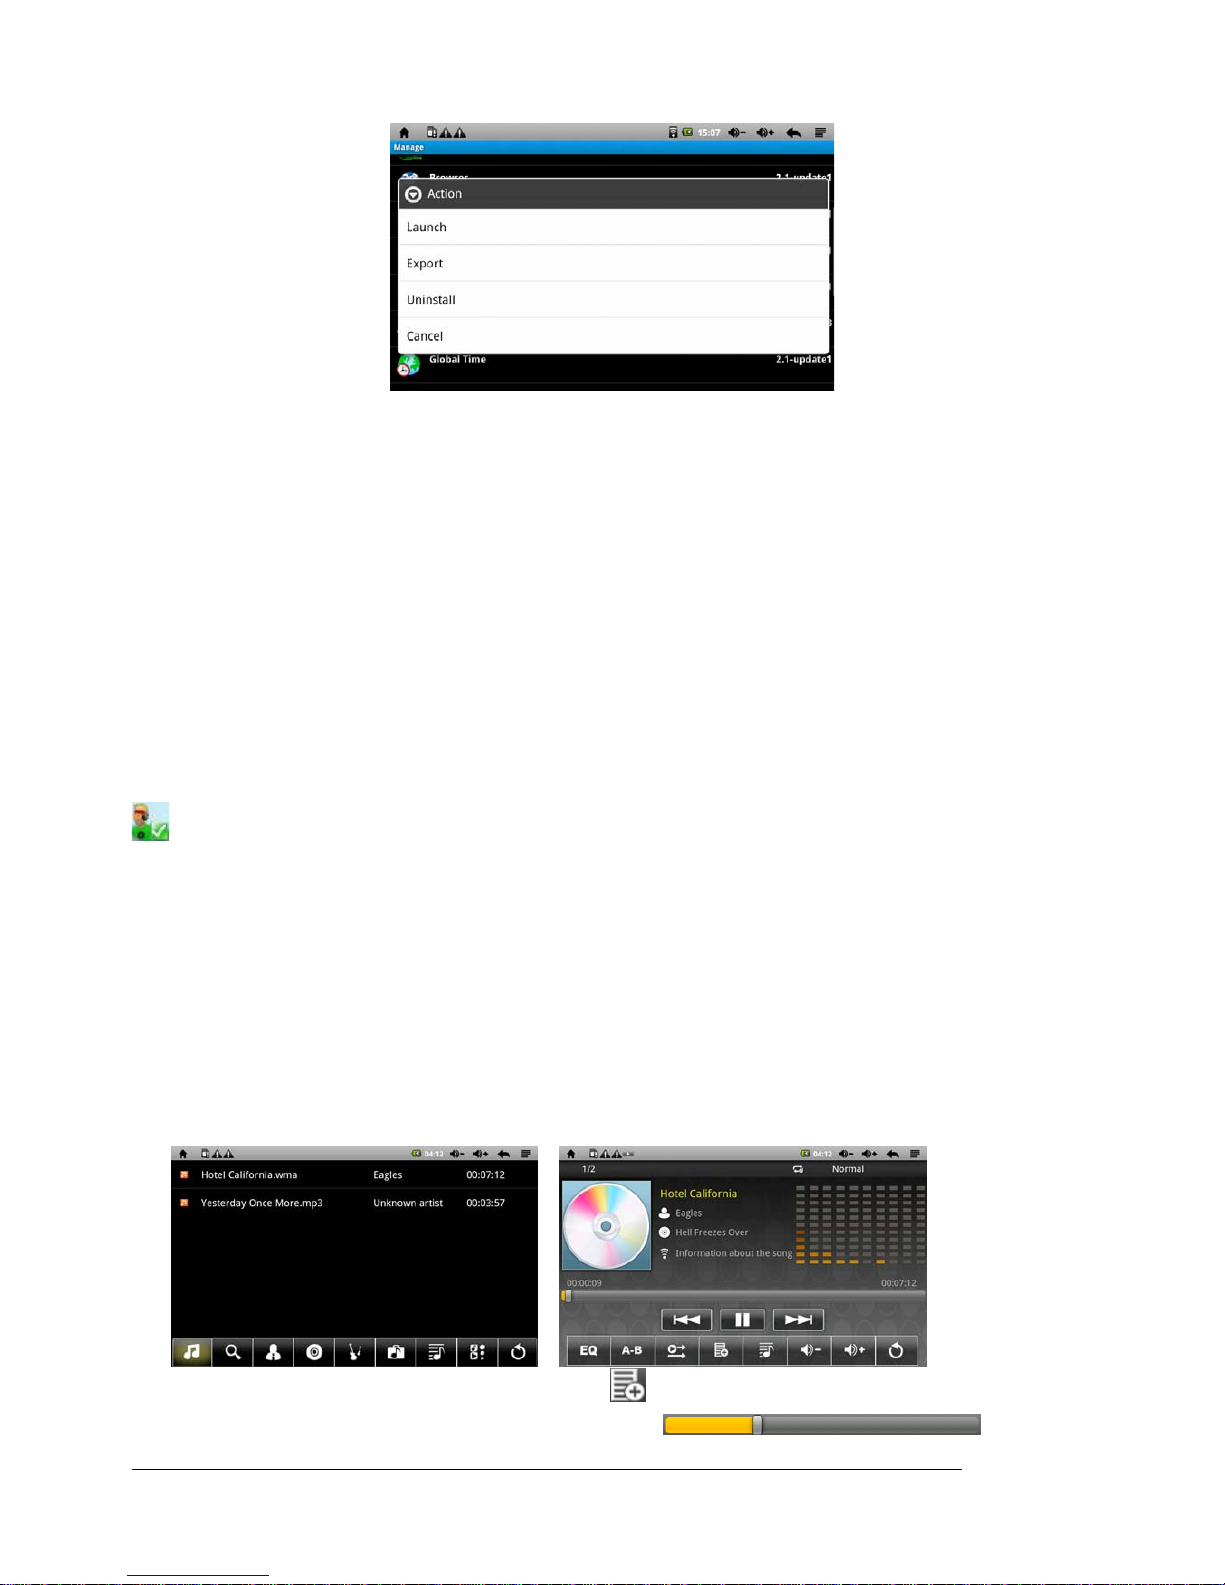
UserManual 18
• Manage:Touch Manage to enter into third-party software interface.
- Start: Run the software
- Export: Export software to MicroSD card
- Uninstall: uninstall the software
- Search: search for software in the software store
- Cancel: cancel the operation
• Exit: return to the main interface
5. Operation details
5.1 System desktop (Multimedia Music / Video / Images / Explorer)
5.1.1 Music player
On the main interface touch the Music icon or on the main menu, touch the audio player icon
to enter the music/audio playing mode:
zWhen there is no music file in the audio player list, after the system opens, the audio
player will automatically load the music files on the optional SD card to the playing list
( the device supports audio file formats: MP3, WAV, WMA). Play list appears as shown
below;
zIn music playing list area, if there is a larger number of songs, swipe the touch screen to
flip to the next list;
zTouch the underlined songs into your favorite audio player interface and start playing
the audio data.
zIn the music player interface, touch the icon to enter into the audio play list;
zTouch and drag the playback progress bar to adjust

UserManual 19
audio playback progress;
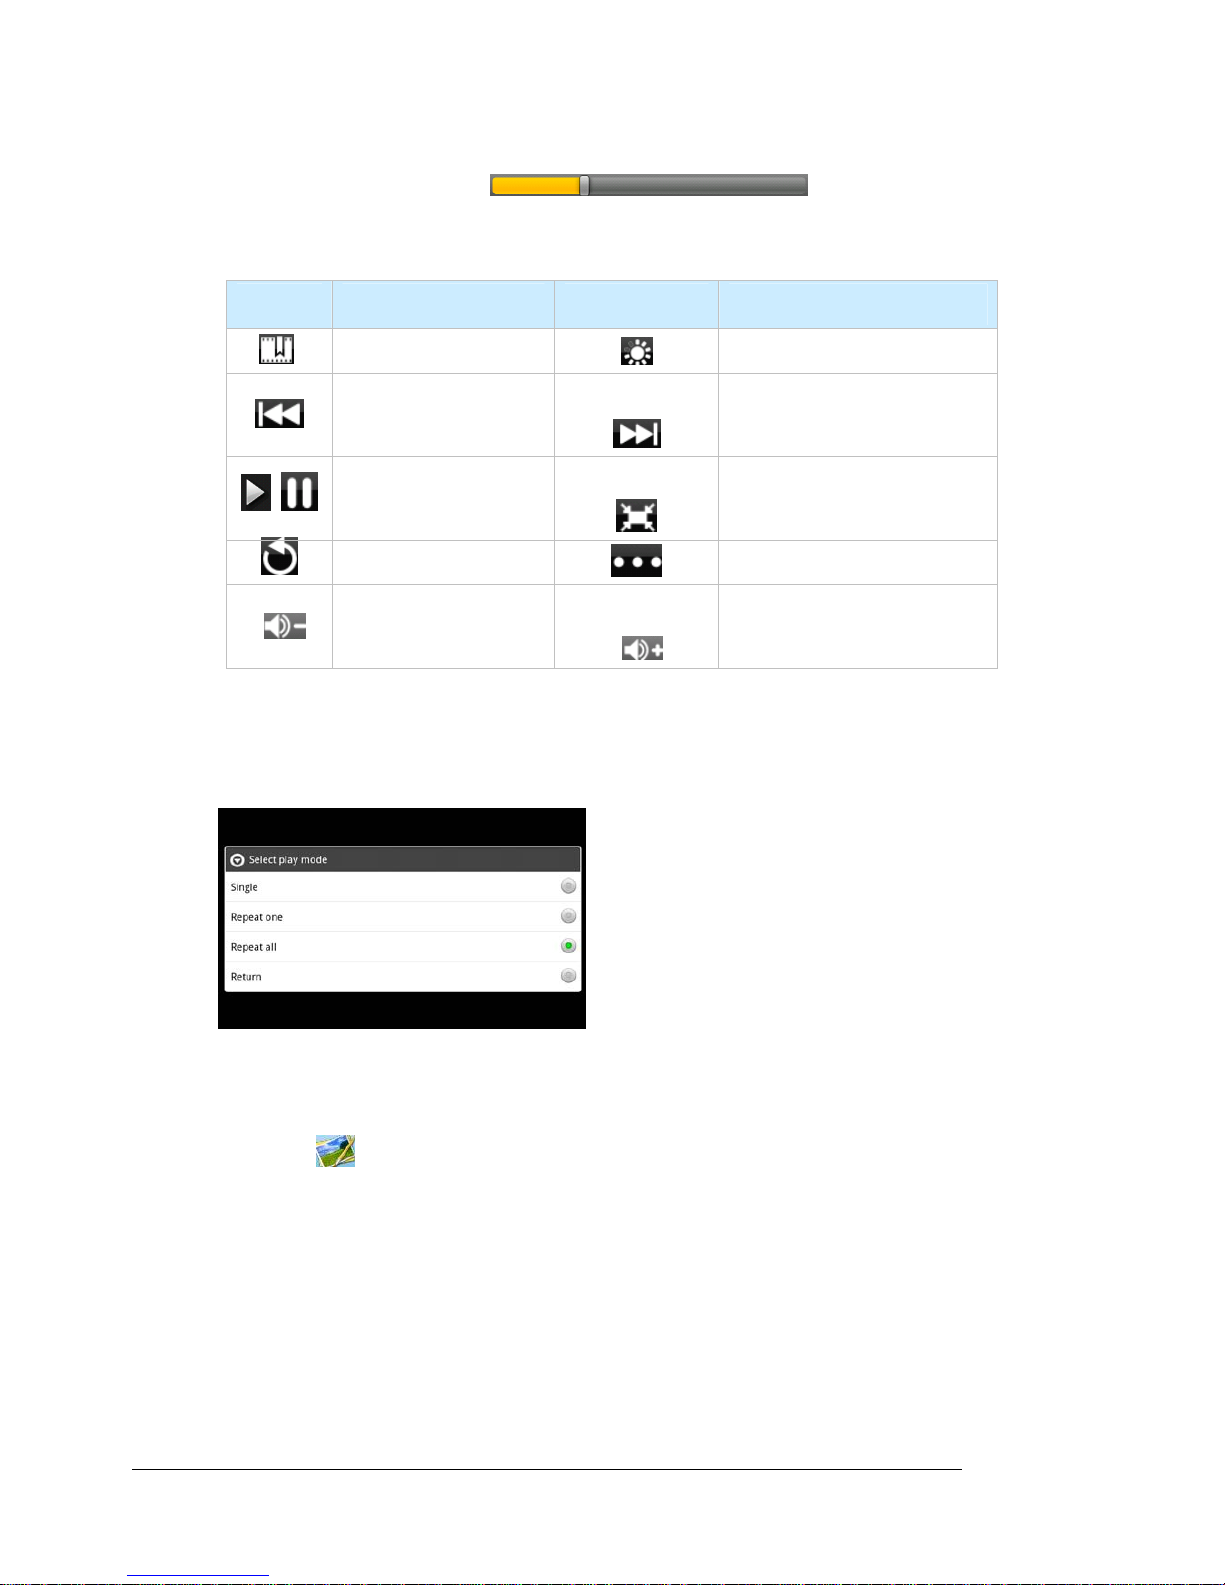
zAudio player buttons/icons:
Button Instruction Button Instruction
View playing list On line view of songs
Artist Album
Music Genre
View music files stored in
memory disk
New established play
list/recently played Switch to audio playing
Exit audio player
EQ setting (normal rock
p
classic, etc)
A-B repeat playback Playback sequence mode
Add audio to playing list Pause audio playback
Increase audio playing
volume
Reduce audio playb
a
volume 量
Play the previous song Play the next song
Play audio
Note: The audio player can play 3GP audio files.
。
5.1.2 Video
On the main interface touch the Video icon or on main menu touch on the video
icon to enter the video player interface. According to the storage of your files, open
the corresponding video folder by touching your desired video.
zSupported video file formats: MKV, AVI, RM, RMVB, MP4, MOV, VOB, DAT, FLV, 3GP
UserManual 20
zWhen there is no file in the video player list, after the system opens, the video player will
automatically load any video files on the inserted optional SD card to the video playing
list.
zDrag play progress bar to adjust video playing
progress
zVideo player icons/buttons:
Button Instruction Button Instruction
Add video bookmark Brightness adjustment
Play the previous
video Play the next video
Play the paused
video
Video format selection
16:9, 4:3, restore
Exit video player Menu
Reduce video
playing volume
Increase video playing
volume
a. Touch the play mode - choose single play, repeat one, repeat all touch return option
to return back:
5.1.3 Picture browser
zOn the main interface touch the Photo icon or on the main menu touch the picture
browser icon to enter the picture browser interface:


 user guide")


