6
Chapter 3 PowerPoint Control Mode – Part I
Note Please open the presentation PowerPoint file and other file(s) before using this
product. The default control mode of this product is PowerPoint control mode.
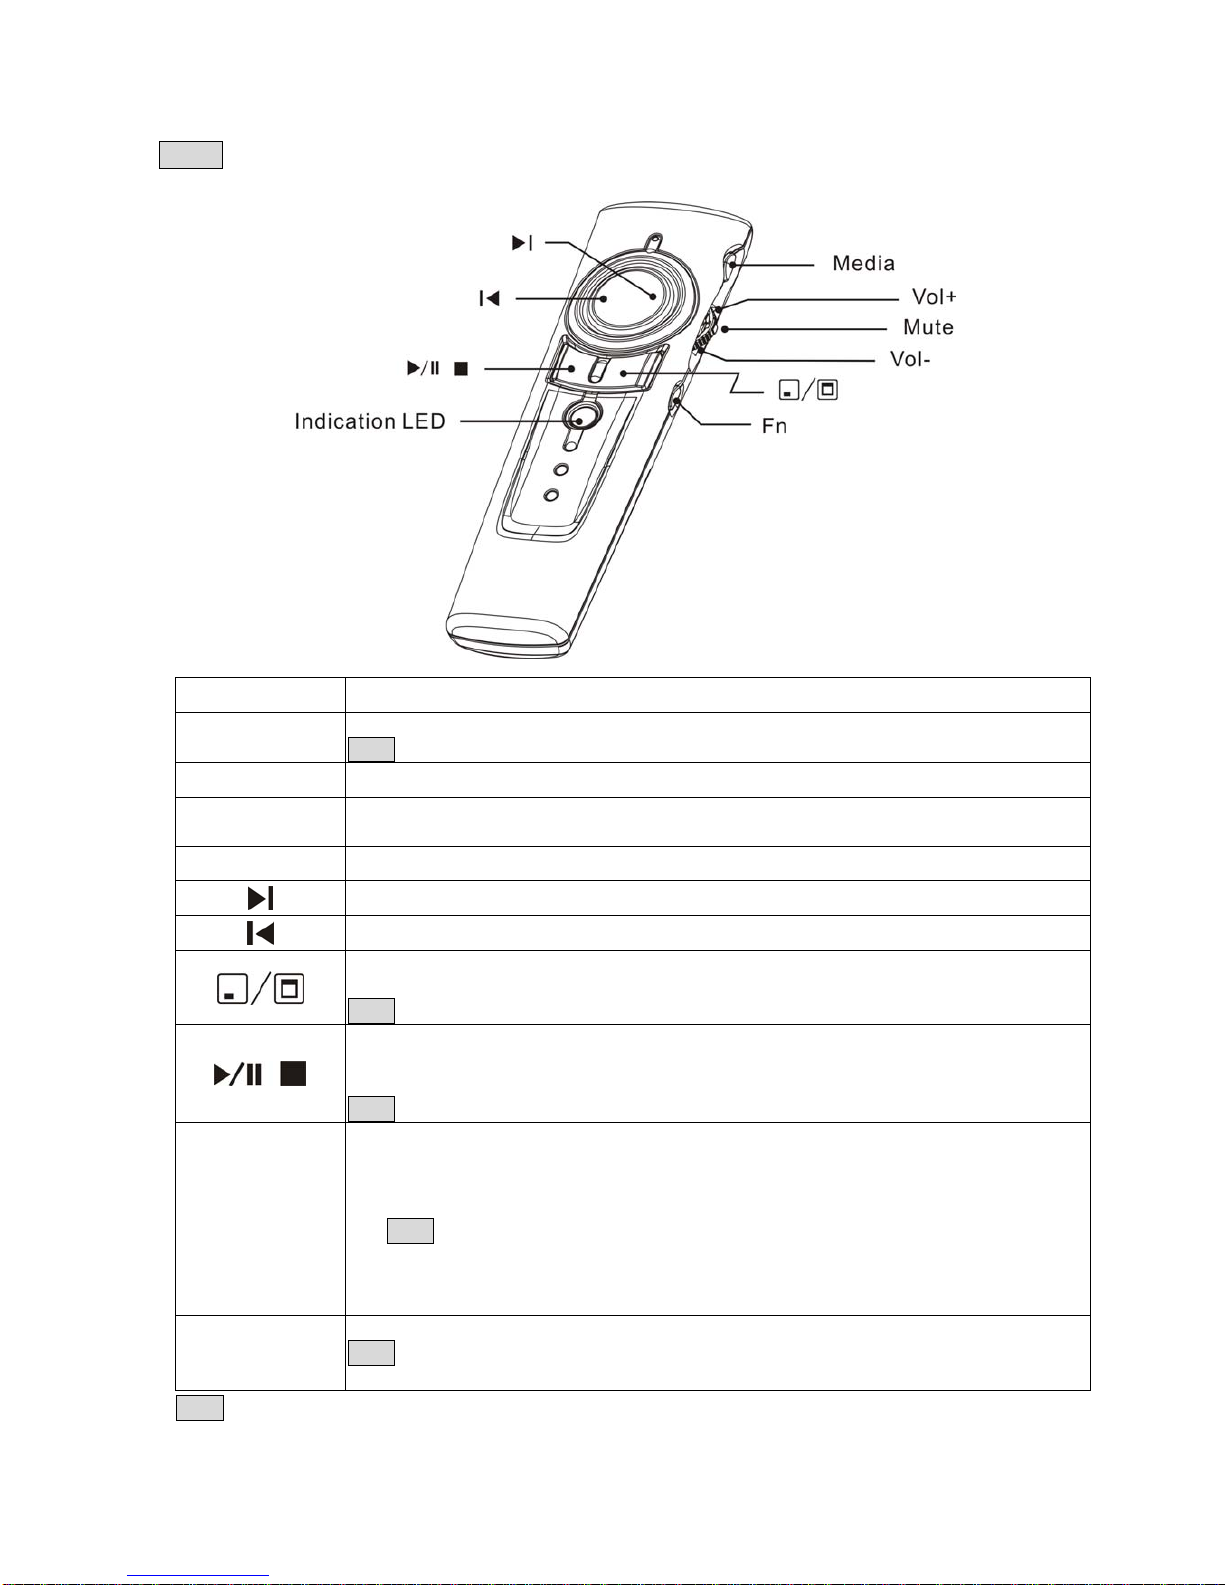
Print on key Function description
Laser
1. Press Fn and Laser On/Off keys simultaneously till the Indication LED blinking in
red to turn on or off laser pointer
2. When laser pointer is turned on, press Laser key to shoot the laser beam
Note This presenter has anti miss-touch and save power design. When laser pointer
is turned on and user continually presses the Laser key over one (1) minute or laser
is idled over 30 minutes, the laser pointer will be automatically turned off. To use the
laser function, user shall turns on the laser pointer again.
Main mouse Slightly put thumb on main mouse and rotate your thumb to have main mouse
function
Left mouse 1. Click as computer left mouse function
2. At PowerPoint file, click to go to next slide
Right mouse Click as computer right mouse function
Up Push up the switch to go to previous slide
F5/ESC 1. Click this key to start PowerPoint slide show
2. Press and hold this key more than one (1) second to exit PowerPoint slide show
Down Pull down the switch and go to next slide
Fn
1. Press and hold this key more than three (3) seconds to change between
PowerPoint control mode and Media Player control mode.
2. After successful change from PowerPoint control to Media Player control, green
indication LED will regularly blink
Note At Media Player control mode, Laser pointer has no function. Main/Left/Right
mouse will become Media Player control function
3. After successful change from Media Player control to PowerPoint control, please
remember to turn on Laser pointer if you want to use laser function
Indication LED 1. No LED blinks: The product is at PowerPoint control mode and laser pointer is off
2. Red LED blinks regularly: The product is at PowerPoint control mode and laser
pointer is on