9
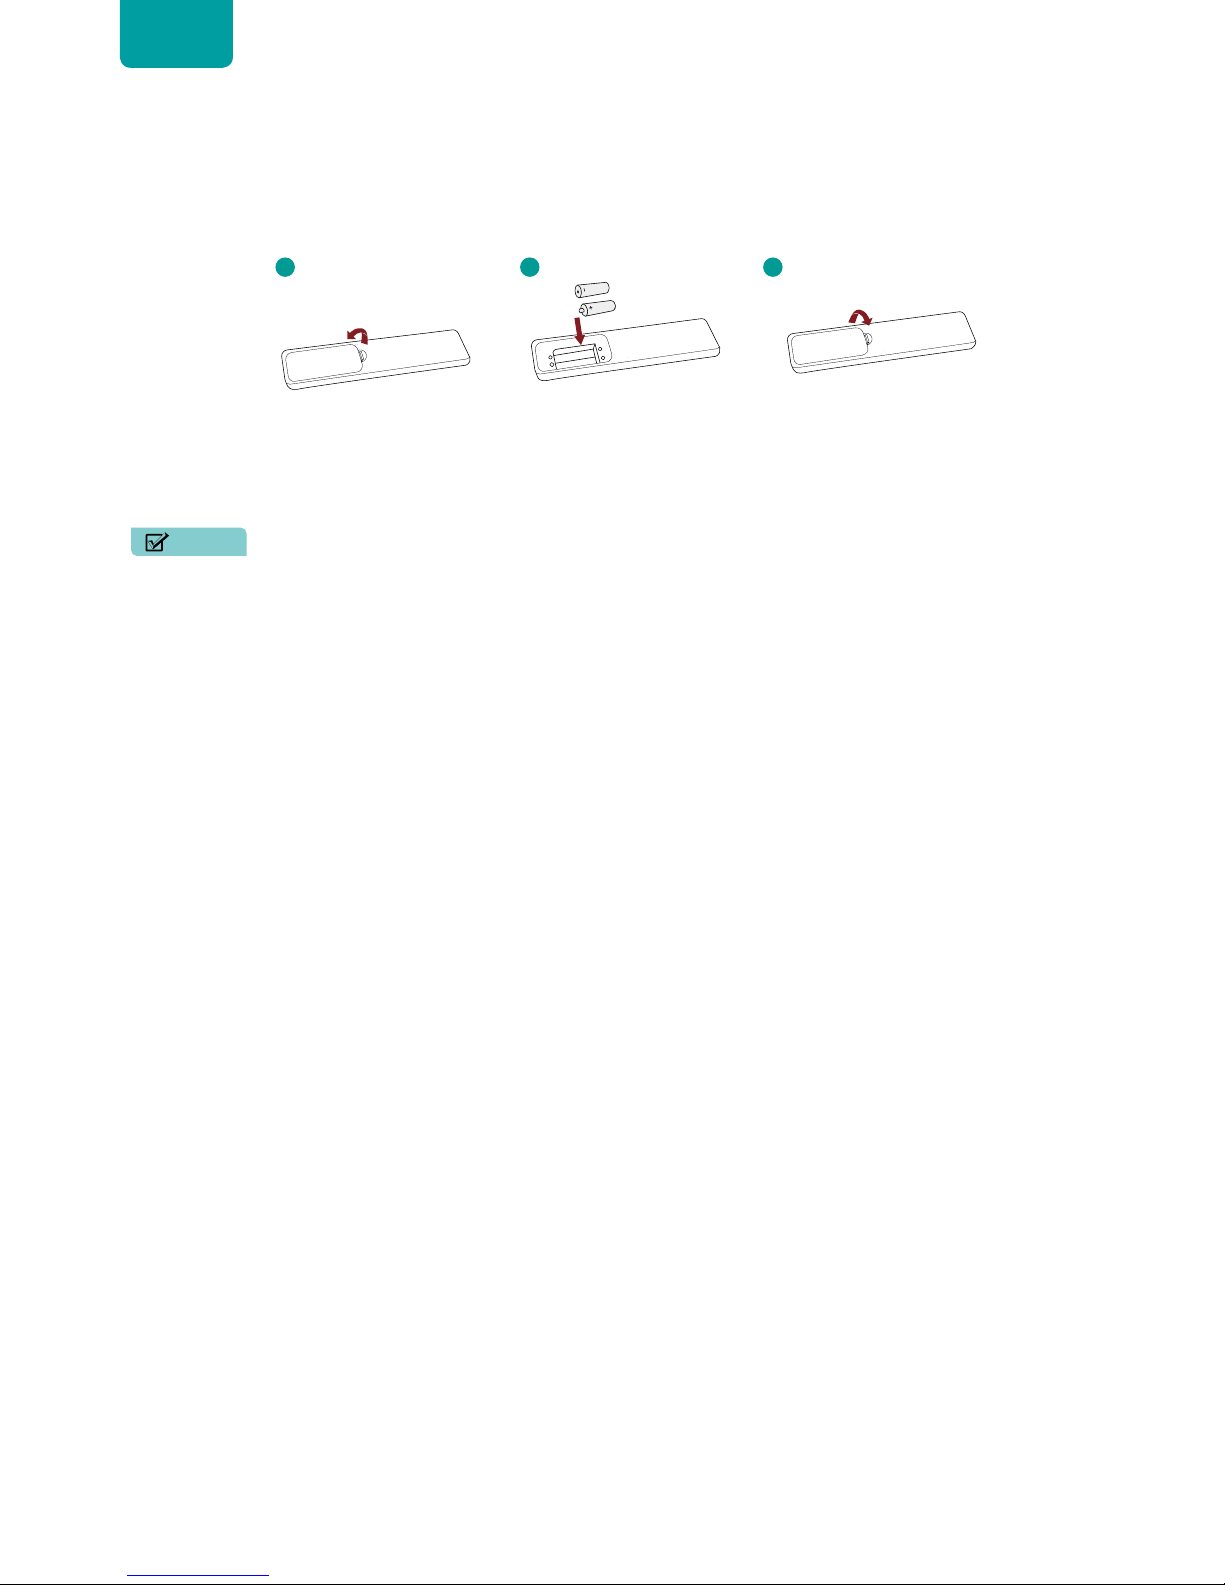
Begin using your remote
1. Press the battery case cover,when the cover is unlocked,pull it backward to open the battery compartment of the remote
control.
2. Insert two AAA size batteries. Make sure to match the (+) and (-) ends of the batteries with the (+) and (-) ends indicated in the
battery compartment.
3. Replace the battery compartment cover.
NOTES
• Discard batteries in a designated disposal area. Do not expose batteries (battery pack or batteries installed)to excessive
heat such as sunshine,fire or the like.
• Remove old batteries immediately to prevent them from leaking into the battery compartment.
• If you do not intend to use the remote control for a long time,remove the batteries.
• Battery chemicals can cause a rash. If the batteries leak,clean the battery com partment with a cloth. If chemicals touch
your skin then wash it immediately.
• Do not mix old and new batteries.
• Do not mix alkaline,standard (carbon-zinc) or rechargeable (NiCd,NiMH,etc.) batteries.
• Do not continue using the remote if it gets warm or hot.
• Call our Support Center immediately on the support website.
Program your universal cable or satellite remote control to operate your new television (only for USA)
If you would like to program your other household remote controls to your new television,please refer to the User’s Manual
supplied by your Cable or Satellite provider. The Cable or Satellite providers’ User’s Manuals should include instructions on how
to program their remote to your television.
A list of codes for the most common Cable and Satellite providers are listed below. Use the code that is associated with your
Cable or Satellite provider (if applicable).
DIRECTV
0178,10178,10019,10748,11314,11660,11710,11780,12049,10171,11204,11326,11517,11564,11641,11963,12002,12183
Time Warner Cable
386,0178,10178,400,450,461,456,0748,1463,0463,10463
Comcast
0178,10178,10463,11463,10748,11314,11660,10171,11204,11326,11517,11641,11780,11785,11892,11963,12002
Cox Communications
0178,10178,1326,1463
Dish Network
505,627,538,720,659
If the code associated with your Cable or Satellite provider is not listed,does not work or you cannot locate the instructions to
program your remote,call your local Cable or Satellite provider’s customer service center.
If your Cable or Satellite provider does not have a code available,please contact us.
Using your cable set-top box or satellite receiver remote as a ‘Universal’ remote
If you prefer to use your Cable Set-top Box or Satellite Receiver Remote as a ‘Universal Remote’,then visit the Support page to
view a list of the codes.
1 2 3
Insert the batteriesPress and pull it Press the cover