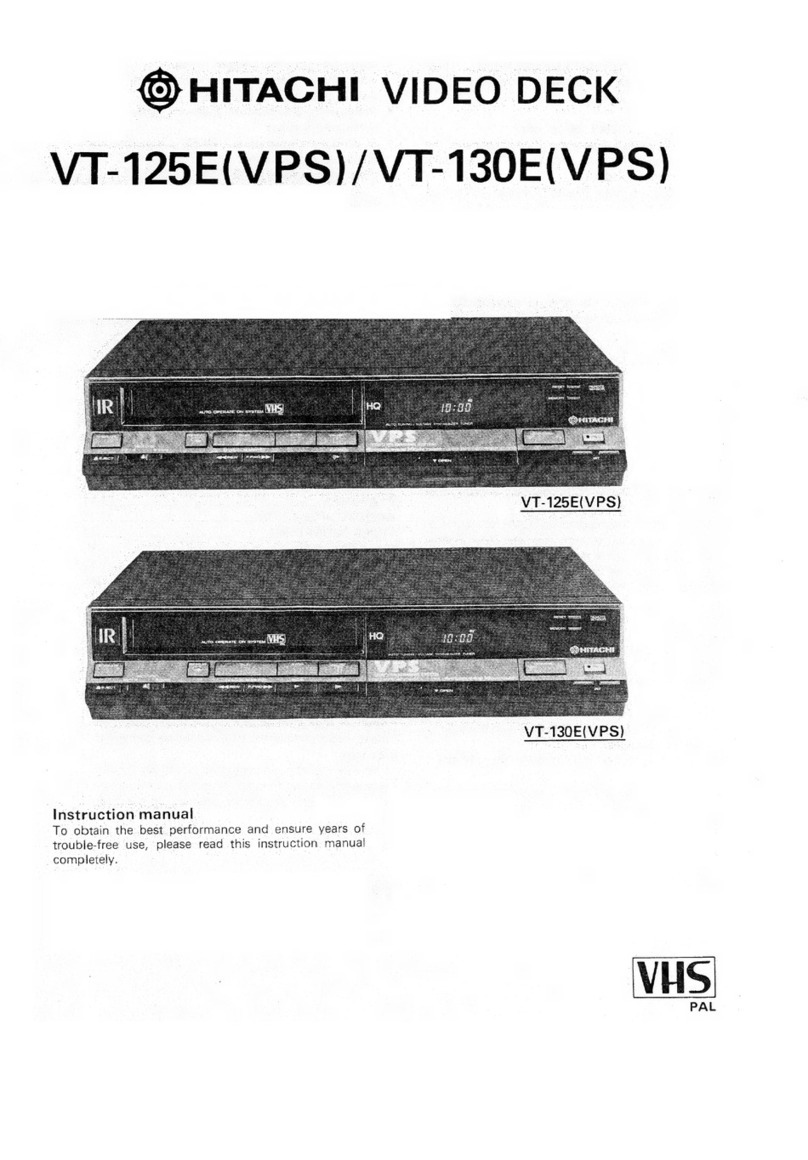
Hitachi VT-498EM User manual

@
HITACHI
VIDEO
DECK
V
T-498EM
Instruction
manual
To
obtain
the
best
performance
and
ensure
years
of
trouble-free
use,
please
read
this
instruction
manual
completely.
PAL
SECAM
NTSC

FOR
YOUR
SAFETY
Do
not
remove
panei
covers
by
unscrewing.
There
are
no
user
serviceable
parts
inside.
Refer
all
servicing
to
qualified
service
personnel.
Mains
supply
This
VTR
can
be
used
with
a
power
(mains)
voltage
of
100
to
110V,
115
to
127V,
200
to
220V
or
230
to
250V.
Be
sure
to
check
your
local
power
(mains)
voltage.
Turn
the
voltage
selector
located
on
the
bottom
of
the
VTR
to
your
desired
power
(mains)
voltage
with
a
screwdriver
until
the
selector
clicks.
Before
turning
the
voltage
selector,
unplug
the
main
power
plug
from
the
AC
outlet.
The
OPERATE
switch
located
on the
front
panel
of
the
VTR
switches
the
VTR
to
on
and
off,
leaving
the
clock/
timer
facility
unaffected.
As
to
the
indication
of
the
OPERATE
switch,
‘‘l’’
shows
ON
and
“
()
”
shows
electrical
power
stand-by.
If
the
unit
is
to
be
left
unattended
for
a
long
period
and
it
is
not
intended
to
use
the
timer
recording
function,
it
is
recommended
that
the
unit
be
completely
switched
off
and
the
piug
removed.
If
you
intend
to
record
dur-
ing
your
absence,
remember
there
is
no
necessity
for
the
TV
receiver
to
be
switched
on.
WARNING:
It
is
permissible
to
record
television
programmes
only
in
the
event
that
third
party
copyrights
and
other
rights
are
not
violated.
NOTE:
MESECAM
(Middle
East
SECAM
or
Mid
Europe
SECAM)
is
conventional
provisional
SECAM
and
the
B/G
SECAM
or
D/K
SECAM.
HQ!
The
Video
Tape
Recorder
(VTR)
with
this
marking
incorporates
high-quality
picture
technology
and
is
compatible
with
any
Video
Tape
Recorders
bearing
the
mark.
FEATURES
a
aa
TE
ENE
Multi-Record/Playback
system
It
may
be
more
realistically
understandable
to
you
how
attractive
this
Video
recorder
is,
if
actual
capability
for
recording/playback
video
signals
with
this
unit
are
listed
up,
as
follows.
(1)
PAL-SP
(Standard
Play)
tapes
{2)
PAL-LP
(Long
Play)
tapes
(3)
MESECAM-SP
tapes
(4)
MESECAM-LP
tapes
(5)
SECAM-SP
tapes
(6)
NTSC-SP
tapes
(7)
NTSC-LP
tapes
(Playback
only)
(8)
NTSC-EP
(Extra
Long
Play)
tapes
In
addition
to
the
above,
the
following
2
features
are
counted.
>
(9)
4.43
NTSC/3.58
NTSC
compatible
for
relevant
Colour
TVs.
(10)
B/G-PAL,
D/K-PAL,
I-PAL,
B/G-SECAM,
D/K-
SECAM
and
NTSC
recording
with
built-in
tuner,
&
Play
with
G/I/K/M
RF
converters
Multi-TV
tuners
built-in
(1)
B/G
for
B/G-PAL
and
B/G
SECAM
reception
(2)
D/K
for
D/K-PAL
and
D/K
SECAM
reception
(3)
1
for
I-PAL
reception
(4)
M
for
NTSC
reception
With
VT-498EM,
you
can
tune
in
to
Middle
East
B/G-
SECAM
broadcast,
American/Japanese
NTSC
broad-
cast,
European
B/G-PAL,
English
I-PAL,
the
People’s
Republic
of
China
D/K-PAL
and
U.S.S.R
D/K-SECAM
broadcast
for
recording
to
Video
tape
without
additional
TV
tuner.
8
hours
Long
Play/Long
Recording
Compatible
(1)
PAL/MESECAM
—
LP....maximum
8
hours
(E240)
(2)
PAL/MESECAM
—
SP....maximum
4
hours
(E240)
(3)
NTSC
—EP........
maximum
8
hours
(1160)
(4)
NTSC—LLP........
maximum
5
hours
20
min
(T160)
(Playback
only)
(5)
NTSC
—SP........
maximum
2
hours
40
min
(T1
60)
(6)
SECAM—SP.....
maximum
4
hours
(E240)
4
Heads
for
optimum
performance
for
both
SP
and
LP/EP
2
kinds
of
width
heads
are
installed
to
improve
picture
reproduction
both
for
Standard
Play
and
for
Long
Play
operations.
Recording
from
video
camera
HITACHI
video
camera
(PAL,
SECAM
or
NTSC)
can
be
used
for
recording
with
this
multi-video
recorder
and
with
an
optional
AC
adaptor.
Multi-RF
converters
built-in
(1)
G-position
for
B/G-PAL/SECAM
TV
(2)
|-position
for
I-PAL
TV
(3)
K-position
for
D/K-PAL/SECAM
TV
(4)
Automatic
Selection
for
NTSC
TV

LI
Ne
NL
ig
Infrared
Wireless
Remote
Control
*
The
provided
LCD
timer
remote
controller
lets
you
programme
the
VTR’s
timer
up
to
8
programmes
for
1
year
period.
In
addition
to
usual
VTR
operations
such
as
play,
stop,
pause,
etc.,
you
can
set
and
dis-
play
the
clock.
When
you
set
the
clock
and
date,
its
calender
timer
function
shows
you
the
day
of
the
week
as
far
as
99
years
ahead.
Direct
channel
selection,
counter
resetting,
slow-
motion
play
.....
all
from
the
comfort
of
your
armchair.
*
TV-VTR
Unified
Command
Compatible
[uc]
by
Tv-
VTR
Unified
Remote
Control
of
HITACHI
Colour
TV
(CMT2110,
CMT1910
etc.)
Large
Scale
Fluorescent
Panel
for
Multi-function
Display
(1)
Operation
functions
(2)
Clock/Date/Counter/Channel
(3)
Start/End
time
for
Timer
Recording,
etc.
Unattended
(timer)
recording
The
programmable
electronic
quartz
clock/timer
can
be
preset
1
year
in
advance
to
record
up
to
8
preselected
programmes.
79
TV
Stations
Preset
Memory
Capability
In
most
cases,
only
a
certain
number
of
channels
are
available.
For
simplified
tuning,
your
area’s
local
TV
stations
may
be
programmed
into
the
memory
up
to
79
stations.
Pressing
the
channel
up/down
button
will
ad-
vance
the
tuner
directly
to
the
next
preprogrammed
channel.
New
Instant
recording
timer
(New
IRT)
Not
only
recording
length
is
instantly
preset,
but
also
now
recording
start
time
can
be
preset.
Automatic
Operation
(1)
Automatic
play
(2)
Automatic
cassette
eject
without
its
tab
when
recording
(3)
Automatic
endless
play
(4)
Automatic
repeat
playback
(5)
Automatic
operate
on
(6)
Rewind
Automatic
Shut
off
(7)
Automatic
Rewind
(8)
Automatic
dimmer
at
operate
off
(9)
Automatic
colour
system
selector
for
NTSC/
PAL/SECAM
(10)
Automatic
Tuning
system
of
TV
stations
(11)
Automatic
selection
between
M
and
G/I/K
of
RF
converter
(12)
Automatic
tape
speed
selector
for
5
different
re-
corded
tapes
at
playback
mode.
CONTENTS
A
cr
a
a
TT
aE
IIA
FEATURES
Soi
sccciecceeves
cdveesvssins
tdagestvesvensss
dives
2
HOW
TO
ENJOY
THIS
MULTI-SYSTEM
VIDEO
DECK.
.
oo
cis
cd
cdecsevedes
ieovetivitesadtavedsdcuveaevslasecees
4
INSTALLATION...
oc.
.ciassceessceseccseslesesteasccscaveens
5a
CONTROLS
AND
FUNCTIONS.................00:0000
7
VIDEO
CHANNEL
SETTING
...............:0ccceeeeeenes
9
PRE-TUNING
OF
BUILT-IN
TV
TUNER.............
10
CLOCK
TIME
SETTING
.............cccccsccccseereeeeees
12
CASSETTE
TAPES.
..........::ccccccseeeceseeeeersenserees
13
RECORDING
TV
PROGRAMMES
................66
14
INSTANT
RECORDING
TIMER
(IRT).............+.
15
PLAYBACK
0c.
cecccde
isi
solni
cs
aabidde
eer
dedtacsivies
16
SPECIAL
CHARACTERISTICS
...............:c:eeeeee
17
e
Slow
function
e
Repeat
function
¢
Tape
counter
¢
Counter
memory
function
e
Fast
playback
*
Still
playback
¢
Automatic
rewind
©
Frame
advance
¢
Rewind
shut
off
¢
Visual
search
e
Beep
sound
¢
Auto
endless
play
TIMER
RECORDING..............ccceccscessscecasseeuces
19
REMOTE
OPERATION
............ccccecesceceeeeceeeeces
22
TAPE
DUBBING.
.............cccccscsccecucsseecercucereess
25
RECORDING
WITH
A
VIDEO
CAMERA
..........
26
MAINTENANCE
.............cccccececsececeeeecereneeeesens
27
PROBLEM
GUIDE
..............ccceccecscnececeeesseeeeees
27
SPECIFICATIONS
.............ccccsceseeeceecsseneenecenees
28
Moisture
condensation
a
If
you
pour
a
cold
liquid
into
a
glass,
water
vapor
in
the
air
will
condense
on
the
surface
of.
the
glass.
This
is
moisture
condensation.
Moisture
condensation
on
the
head
drum,
one
of
the
most
crucial
parts
of
the
VTR,
will
cause
damage
to
the
tape.
The
VTR
should
not
be
operated
for
at
least
2
hours
after
being
moved
from
a
cold
to
a
hot
environment
to
avoid
condensation
from
occuring
on
the
head
drum.
Precautions
¢
The
VTR
is
designed
for
use
in
horizontal
pos-
ition
only.
Allow
for
air
circulation
at
bottom,
top
and
back
of
unit.
Avoid
extreme
heat,
cold,
moisture
and
dust.
Avoid
use
near
magnetic
fields
and
places
subject
to
strong
vibrations.
Do
not
insert
wires,
etc.
through
the
cassette
compartment.
Do
not
move
the
unit
from
a
hot
place
to
a
cold
place
or
vice
versa.
Be
careful;.
when
the
surface
of.
the
case
is
wiped
with
a
volatile
agent
such
as
benzine,
alcohol,
thinner,
etc.,
or
a
chemically
processed
cloth,
the
surface
finish
may
deteriorate
or
its
coating
may
peel.

HOW
TO
ENJOY
THIS
MULTI-SYSTEM
VIDEO
DECK
There
are
various
colour
broadcasting
systems
in
different
parts
of
the
world.
Your
TV
set
can
receive
TV
broadcast
in
your
area,
but
perhaps
cannot
receive
colour
broadcasts
in
other
countries.
There
are
tapes
recorded
with
dif-
ferent
colour
broadcast
systems.
Use
this
unit
after
fully
understanding
the
following.
¢
Broadcast
systems
that
can
be
recorded
with
VT-498EM
Table
1
Broadcasting
system
|
B/gpar
|
1-PAL
|
D/K-PAL
|B/G-SECAMID/K-SECAM|
L-SECAM
for
colour
TV
Australia
Great
China
Saudi
Bulgaria
France
USA
West
Britain
Mongolia
Arabia
Ivory
Canada
Germany
Hong
Kong
Greece
U.S.S.R
Japan
Kuwait
Lebanon
Philippines
Major
Counries
India
Morocco
Mexico
Italy
G.D.R
Singapore
U.A.E
Malaysia
pase
|
ves
|
ves
|
Yes
|
paLtp
|
ves
|
ves
|
ves
|
Eee
<
m
wn
VTR
MESEPAM
mode
SECAM-SP
NTSC-SP
NTSC-LP
*1
SECAM
recording
from
VIDEO
IN
jack
is
possible,
howeverr,
L-SECAM
TV
tuner
is
not
built-in,
therefore
extra
separate
TV
tuner
is
required.
*2
Suffixes
‘-SP”,
‘’-LP”
and
''-EP’’
mean
the
tape
speeds
of
recorded
tapes.
*3
In
addition
to
the
above
recording
NTSC
4.43
for
VTR
recording
is
possibile
only
for
dubbing
purpose
from
NTSC
4.43
signal
from
other
VTR.
YES
*1
(YES)

When
combined
with
a
SECAM
(System
L)
TV
tuner
and
monitor
TV.
Aerial
To
“AUDIO
US
pin
cords
(generally
available
in
the
market)
OUT”
To
“VIDEO
OUT”
To
“AERIAL”
To
“VIDEO
IN”
To
“AUDIO
IN”
Foe
ee
tN
TV
Tuner
To
“VIDEO
OUT”
To
“AUDIO
OUT”
Monitor
TV
To
“AUDIO
IN”
To
“VIDEO
IN”
US
pin
cords
(generaily
available
in
the
market)
Notes:
©
When
recording
a
SECAM
(System
L)
signal,
a
TV
tuner
and
monitor
TV
will
have
to
be
bought
separately.
They
are
not
available
from
Hitachi.
¢
Playback
of
a
SECAM
(System
L)
recorded
tape
is
possible
when
the
unit
is
connected
to
a
MESECAM
(System
B&G)
TV
as
in
as
well
as
with
the
above
connection.
56

Before
operating
To
enjoy
the
multi-system
video
deck,
you
must
change
over
the
system
switches
as
follows.
COLOUR
SYSTEM
MESECAM/SECAM
SELECT
SWITCH
AUTO/MANUAL
SELECT
SWITCH
NTSC
3.58/4.43
MHz
SELECT
SWITCH
MANUAL
COLOUR
SYSTEM
SELECT
SWITCH
m@
Recording
Position
of
Switches
Record
ee
COLOUR
SYSTEM
|
manual
COLOUR
Signal
onthe
ystem
AUTO/MANUAL
SYSTEM
SELECT
|NTSC
3.58/4.43
MHz}
MESECAM/SECAM
‘ana
SELECT
SWITCH
SWITCH
SELECT
SWITCH
SELECT
SWITCH
PAL
MESECAM MESECAM
eens
~
7
SECAM
SECAM
MESECAN
MANUAL
MESECAM/SECAM
==
NTSC
m@
Playback
Position
of
Switches
i
Playback
Recorded
Signal
|
COLOUR SYSTEM
|
MANUAL
COLOUR
|rsc
3.58/4.43
MHz|
MESECAM/SECAM
|
|
arava
een
AUTO/MANUAE.
|
SYSTEM
SELECT
1
SELECT
SWITCH:
|.
SELECT
SWITCH
~
SELECT
SWITCH
SWITCH
a
i
a
a
7
_
SAL
MANUAL
PAL
AUTO
=
2
MESECAM
SECAM
MESEEAN
MANUAL
_|
MESECAM/SECAM
°
a
ai
re
ECAM
=
SECAM
SECAM
s
MANUAL
SECAM
88
483

CONTROLS
AND
FUNCTIONS
11.
8
9
10
11
12 13
14
15 16
.
OPERATE
SWITCH
Turn
system
power
on
and
off.
.
CASSETTE
COMPARTMENT
Insert
a
cassette
through
the
door,
and
loading
will
be
completed
automatically.
Note:
Power
is
turned
on
automatically
when
the
cassette
is
loaded.
.
COLOUR
MODE
INDICATORS
Indicates
the
mode
corresponding
to
the
colour
mode
which
is
being
recorded
or
played
back.
MODE
INDICATORS
.”
“"
appears
when
a
cassette
is
in
the
compart-
ment.
¢
“[PLAY]”
appears
during
the
playback
mode.
¢
“TREC
]”
appears
during
the
record
mode.
¢
“44”
appears
during
the
rewind
mode
and
flashes
during
rewind
visual
search
mode.
¢
“bP”
appears
during
the
fast
forward
mode
and
flashes
during
forward
visual
search
mode.
e
“—”
appears
during
the
play/record
pause
mode.
o"Q@"
appears
when
turning
the
power
off
after
pro-
gramming
the
timer.
DIGITAL
TIMER
DISPLAY
This
normally
shows
the
time
and
day
of
the
week.
.
DIGITAL
DATE/COUNTER
DISPLAY
This
shows
the
current
date
when
the
VTR
power
is
turned
off
or
shows
the
tape
counter
when
the
VTR
power
is
turned
on.
.
CHANNEL
INDICATOR
DISPLAY
This
shows
the
channel
number
corresponding
to
the
channel
selected.
REWIND/VISUAL
SEARCH
BUTTON
Press
to
start
rewind.
Press
this
button
during
playback
and
reverse
playback
picture
at
high
speed
can
be
seen.
.
PLAY
BUTTON
10.
FAST
FORWARD/VISUAL
SEARCH
BUTTON
Press
to
activate
fast
forward.
Press
this
button
during
playback
and
forward
playback
picture
at
high
speed
can
be
seen.
STOP
BUTTON
The
STOP
button
must
be
pressed
between
“RECORD”
and any
other
operation.
12.
13.
14.
15.
16.
17.
18.
19.
20.
21.
17
18
19
PAUSE
BUTTON
Press
to
pause
during
recording.
Press
to
view
a
still
picture
during
playback.
Press
again
to
release.
EJECT
BUTTON
Press
to
remove
cassette.
INFRARED
RAY
RECEIVING
SECTION
Receives
infrared
rays
from
remote
control
unit.
COUNTER
RESET
BUTTON
To
reset
counter
to
‘0000’.
MEMORY
BUTTON
Press
this
button
so
‘’M”’
is
indicated
in
the
display,
then
fast
forward
or
rewind
the
tape.
The
tape
stops
when
the
counter
reaches
approximately
“0000”.
Note:
Press
the
button
again
to
switch
off
the
“M”
in-
dicator.
CHANNEL
SELECT
BUTTONS
Select
the
channels
you
wish
to
view
or
record
by
press-
ing
these
buttons.
And
you
can
also
select
the
“AU”
position*
by
pressing
this
button
to
record
or
watch
the
programme
input
at
the
VIDEO
IN/AUDIO
IN
jacks.
*
One
channel
position
either
higher
or
lower
outside
the
range
of
your
preset
channels.
RECORD
BUTTON
Press
RECORD
button
to
record.
INSTANT
RECORDING
TIMER
BUTTONS
(IRT)
This
allows
unattended
recording.
Timer
will
switch
the
VTR
off
automatically
at
a
pre-
selected
time.
This
is
convenient
when
you
go
out
dur-
ing
recording.
PICTURE
CONTROL
Adjust
the
picture
so
it
is
easy
to
see.
TRACKING
CONTROL
To
minimize
noise
in
playback.
.
COLOUR
SYSTEM
AUTO/MANUAL
SELECT
SWITCH
This
switch
is
used
to
select
colour
systems
either
auto-
matically
or
manually.
AUTO:
Set
to
this
position
ordinarily.
Circuits
are
auto-
matically
switched
to
either
PAL,
MESECAM/
SECAM
or
NTSC.

23.
24.
26.
27.
29.
30.
20
21
22
23
24
25
26
27 28
29
MANUAL:
If
a
normal
picture
does
not
appear
{wrong
colour
system
is
judged
due
to
the
poor
picture,
picture
disturbed
or
colour
unstable,
etc.)
when
recording
or
playback
is
performed
with
this
switch
set
to
AUTO,
set
it
to
MANUAL
and
select
the
Manual
colour
system
select
switch
(23)
to
the
adequate
colour
system
so
that
the
normal
picture
may
appear.
MANUAL
COLOUR
SYSTEM
SELECT
SWITCH
After
setting
the
Colour
system
AUTO/MANUAL
select
switch
(22)
to
“MANUAL”,
change
over
this
switch
for
relevant
colour
system
position
either
PAL
or
MESECAM/
SECAM
and
or
NTSC.
It
is
not
effective
to
change
over
this
switch
when
the
Colour
system
AUTO/MANUAL
select
switch
is
set
to
“AUTO”.
NTSC
4.43/3.58
MHz
SELECT
SWITCH
This
switch
is
effective
when
the
Manual
colour
system
select
switch
(23)
is
set
to
‘‘NTSC”.
4.43:
Set
the
switch
to
this
position
when
connect
the
Multi-colour
TV
which
does
not
have
NTSC
3.58
but
only
4.43.
3.58:
Set
the
switch
to
this
position
normally
in
an
NTSC
area.
MESECAM/SECAM
SELECT
SWITCH
Make
selections
with
this
switch
when
recording
a
SECAM
broadcast
or
playing
a
tape
on
which
a
SECAM
or
MESECAM
signal
is
recorded.
BUZZER
SWITCH
When
this
switch
is
on,
a
beep
sound
will
be
heard
when
any
VTR
operation
button
is
pressed.
This
is
a
con-
venience
in
operation.
To
stop
this
function,
turn
the
switch
off.
EDIT
SWITCH
Turn
this
switch
on
when
using
this
VTR
for
playback
during
dubbing.
The
dubbed
tape
will
provide
clearer
pictures.
This
function
does
not
work
when
using
this
VTR
for
recording.
RESET
SWITCH
Press
this
switch
if
the
digital
display
malfunctions
or
no
operation
mode
can
be
engaged
to
reset
the
display.
Set
the
clock
to
the
correct
present
time.
CLOCK/TIMER/CHANNEL
PRESET
BUTTONS
REC
SPEED
SELECT
SWITCH
Select
standard
play
(SP)
or
long
play
(LP).
Letters
“LP”
appears
in
the
display
when
the
LP
speed
is
selected.
31.
S
S$
&
£
8B
&
41.
42.
32
33 34
35
36 37
38
30
31
39
40
41
42
43
Nothing
is
displayéé
when
the
SP
speed
is
selected.
Only
use
this
switch
when
recording.
Playback
speed
automatically
corresponds
with
recording
speed.
Refer
to
page
13
for
details.
SIMULCAST
SWITCH
Allows
you
to
record
audio
signal
from
AUDIO
IN
jack
and
video
signal
from
built-in
tuner.
The
SC
indicator
appears
in
the
display
when
this
switch
is
turned
on.
.
TSG
ON/OFF
SWITCH
Set
to
ON
and
check
that
the
video
channel
of
your
TV
set
is
correct.
After
checking,
set
this
switch
to
OFF.
.
RF
CHANNEL
CONTROL
Turn
TSG
ON/OFF
switch
to
“ON”
and
rotate
this
con-
trol
to
set
the
video
channel
correctly.
.
RF
OUTPUT
Connect
to
TV
aerial
input.
AERIAL
INPUT
SOCKET
Connect
external
aerial.
.
VIDEO
IN
Receives
video
signals
from
a
camera,
or
another
VTR.
.
VERTICAL
SYNC.
ADJUSTMENT
CONTROL
If
you
see
vertical
shaking
on
the
TV
screen
in
the
still
playback
mode,
rotate
this
control
to
minimize
shaking.
-
AUDIO
IN
Receives
audio
signals
from
a
camera,
external
sound
equipment
or
from
another
VTR.
.
G/I/K
SELECT
SWITCH
Set
this
switch
correctly
according
to
the
TV
set
con-
nected
to
this
video
deck.
.
ATTENUATOR
SWITCH
Generally
set
to
the
OFF
position.
Set
to
the
ON
position
when
interference
occurs
in
an
area
with
a
strong
signal.
CAMERA
PAUSE
JACK
Connect
Camera
pause
cable.
VIDEO
OUT
Permits
video
connection
of
your
unit
to
a
monitor
or
another
VTR.
.
AUDIO
OUT
Permits
audio
connection
of
your
unit
to
a
monitor
or
another
VTR.

VIDEO
CHANNEL
SETTING
The
RF
converter
changes
the
video
and
audio
signals
played
back
from
the
video
tape
to
the
same
type
of
sig-
nals
used
for
TV
broadcasts.
The
RF
converter
output
of
this
unit
is
set
to
UHF
channel
37
for
PAL/
SECAM
system
TV
receivers
(UHF
channel
34
—
36
for
NTSC
system
TV
receivers)
prior
to
shipment.
If
this
channel
is
employed
for
broadcasting,
the
converter
channel
must
be
reset
to
a
vacant
channel
between
CH30
—
CH39
for
PAL/SECAM
systems
(CH25
—
CH38
for
NTSC
system).
1
Turn
on
VTR
and
TV,
then
set
TV
to
UHF
channel
37
for
the
PAL/SECAM
systems
(channel
34
—
36
for
the
NTSC
system).
If
this
channel
is
employed
for
broadcasting,
select
a
vacant
channel
(CH30
—
CH39
for
the
PAL/
SECAM
systems,
CH25
—
CH38
for
the
NTSC
system).
The
test
pattern
appears
on
the
TV
screen.
Fine
tune
your
TV
until
the
test
pattern
is
received
clearly.
3
After
completing
adjustment,
set
the
TSG
ON/OFF
switch
a
to
OFF.
t
TSG
ON
NOTE:
If
it
is
not
possible
to
correctly
tune
to
the
test
pattern,
adjust
the
RF
converter
output
with
the
RF
channel
controi
using
a
small
screwdriver
and
readjust
your
TV
until
the
test
pattern
is
observed.
For
a
higher
channel
numbers;
turn
counterclockwise.
For
a
lower
channel,
turn
clockwise.
(UHF}
RF
CHANNEL
ADJ.
La)
HIGH
‘Sf
Low
User's
controls
When
connecting
the
VTR
to
a
TV
set
provided
with
auto-tuning
and
the
video
channel
cannot
be
set,
operate
as
follows:
1.
Remove
the
aerial
cable
from
the
AERIAL
terminal
of
the
VTR.
—
2.
Leave
the
TSG
ON/OFF
switch
“OFF”.
3.
Play
back
a
blank
tape.
4.
Press
the
PAUSE
button
to
obtain
the
pause
mode.
5.
Press
the
Auto-tuning
button
of
the
TV.
6.
Auto-tuning
starts
and
it
stops
at
video
channel.
Note:
The
auto-tuning
indicator
of
the
TV
set
changes
to
an
exact
tuning
indicator.
7.
Set
the
channel
memory
of
the
TV
to
ON
and
store
the
channel
which
was
set
in
item
6.
8.
Set
the
TSG
ON/OFF
switch
to
“ON”
and
check
that
the
picture
appears
on
the
TV
screen.
Now,
the
video
channel
of
the
TV
has
been
set
properly.
:
9.
Return
the
TSG
ON/OFF
switch
to
‘OFF’.
10.
Reconnect
the
aerial
cable
to
the
VTR.
ATTENUATOR
SWITCH
The
ATTENUATOR
-
switch
located
on
the
rear
panel
of
the
VTR
is
used
to
adjust
the
recep-
tion
of
the
signal
from
the
tuner
section.
If
the
image
develops
wavy
lines
during
the
reception
for
a
broad-
cast
from
a
local
TV
station,
it
may
be
that
the
signal
reception
is
too
strong.
In
this
case,
set
this
switch
to
ON
to
attenuate
the
inten-
sity
of
the
signal.
Normally
leave
this
switch
in
the
OFF
position.
Vero
ATT

PRE-TUNING
OF
BUILT-IN
TV
TUNER
Sa
This
VTR
incorporates
a
complete
television
tuner
with
the
required
tuning
controls.
Once
you
have
pre-tuned
to
preferred
stations,
you
can
select
any
of
them
by
merely
pressing
the
CHANNEL
select
button.
A
eee
ee
©
2
©)
oonoderemon
_
Nee
eee
User’s
controls
2
70
Turn
on
the
VTR
and
the
TV,
then
set
the
TV
to
the
pre-tuned
video
channel.
Press
the
PRESET
button
once.
The
display
indication
changes
from
the
clock
time
display
to
the
band
indicator
display.
Note:
Pressing
the
button
twice
will
lock
the
display.
If
you
have
pressed
it
twice,
press
it
once
more.
Press
the
CHANNEL
select
button
on
the
VTR
to
select
the
channel
to
be
memorized.
CHANNEL
For
example,
the
above
diagram
shows
that
chan-
ne!
4
has
been
selected.
Notes:
1.
The
Channel
Number
Display
can
be
now
con-
secutively
selected
from
“’00’’
through
‘’73”’
and
then
“95”
through
‘’99”
and
‘’“AU”’
by
pressing
the
CHANNEL
select
button
either
upward
or
downward.
In
this
case,
the
Channel
Number
may
be
any
number.
2.
When
“AFC”
is
not
indicated
in
the
display,
press
AFC
OFF
button
to
display
‘AFC’.
4
7
Press
the
Reverse
SET
(—)
button
to
select
the
desired
band
to
be
pre-tuned.
If
you
pre-tune
to
VHF
low
channels,
select
the
indication
“‘L”’.
Select
‘‘H”
for
VHF
high
channels.
Select
““U”
for
UHF
channels.
Refer
to
“CHANNEL
RECEIVED”
on
the
back
page
for
complete
information.
For
example,
the
above
diagram
shows
that
VHF
Low
band
‘‘L”’
has
been
selected.
Press
and
release
the
Forward
SET
(+)
button
to
start
tuning.
The
built-in
tuner
starts
searching
from
the
lowest
”
to
highest
frequencies,
and
‘‘—’’
appears
in
se-
quence
in
the
direction
of
the
arrow
during
searching.
At
a
station
that
is
broadcasting,
the
picture
ap-
pears
on
the
TV
screen.
If
the
station
received
is
different
from
the
channel
to
be
preset,
press
For-
ward
SET
button
again.
At
the
next
station,
the
searching
will
stop
and
the
new
station
can
be
preset.
Repeat
this
until
the
desired
station
is
reached.
Follow
the
same
steps
as
explained
in
steps
3
through
5
above
for
other
channels.
You
can
preset
up
to
79
channels
in
memory.
After
having
completed
tuning
all
channel
memories
you
want,
press
the
PRESET
button
once
again.
These
channels
preset
in
memory
as
shown
in
the
above
can
be
selected
by
the
CHANNEL
select
buttons
on
the
VTR.

AFC
(Automatic
Frequency
Control)
Since
this
unit
has
an
AFC
circuit,
when
a
channel
is
preset
following
the
above
procedure,
the
AFC
turns
on
automatically
and
you
can
receive
the
signal
in
optimum
condition.
if
a
TV
channel
signal
is
marginal
due
to
graininess
or
ghosting,
the
picture
may
sometimes
be
improved
by
manually
tuning
for
best
picture
and
then
defeating
the
AFC
action.
To
turn
AFC
off,
follow
the
procedure
below.
1
Select
the
desired
channel
by
pressing
the
CHANNEL
select
button.
CHANNEL
Press
the
AFC
OFF
button.
‘AFC’
disappears
from
the
display.
Note:
Pressing
the
button
once
again
will
turn
the
AFC
on.
:
Tap
on
the
SET
button
(For-
ward
or
Reverse)
alternately
for
fine
tuning.
Channel
selection
The
channel
up
and
down
con-
trols
on
the
VTR
permit
advanc-
ing
the
tuner
directly
to
the
next
higher
or
lower
programmed
channel.
CHANNEL
rare
Eliminating
unwanted
preset
channels
You
can
rearrange
the
desired
channels
by
eliminating
unwanted
preset
channels
for
channel
up/down
tuning.
1
Press
the
PRESET
button
once.
2
Press
the
CHANNEL
select
buttons
until
an
un-
wanted
channel
is
found.
CHANNEL
3
Press
the
SKIP
button
once.
SKIP
Sound
will
go
off
indicating
the
channel
has
been
erased
from
memory.
4
Repeat
steps
2
and
3
until
all
unwanted
channels
have
been
erased.
5
After
eliminating
them,
press
the
PRESET
button
once
again.
Note:
To
restore
the
erased
channel,
repeat
the
above
steps.
17

CLOCK
TIME
SETTING
The
built-in
digital
clock
is
based
on
a
12-hour
cycle
and
gives
you
a
constant
readout
of
the
time
and
day.
The
clock
time
can
also
be
set
with
the
remote
con-
trol
unit
provided.
See
page.23
for
operating
procedure.
:
.
ee
¢
When
the
MAINS
lead
is
plugged
in
for
the
first
time,
“—:——"
and
“DATE
——
——”"'
will
appear
in
the
display.
1
Press
the
CLOCK
button.
“AM
12”
hour
starts
flashing.
2
Press
the
SET
button
(Forward
or
Reverse)
to
set
the
present
hour.
Hoid
the
button
down
to
advance
rapidly.
3
Press
the
STORE
button
when
the
present
hour
appears.
“00’’
minutes
starts
flashing.
For
example,
the
diagram
shows
that
‘‘AM
10”
hours
have
been
set.
12
User’s
controls
4
Repeat
steps
2
and
3
to
set
minute,
day,
month
and
year.
“Year’
disappears
The
day
of
week
appears
automatically
after
the
year
has
been
entered.
The
year
disappears
from
the
display
when
the
STORE
button
is
pressed.
For
example,
the
diagram
shows
that
AM
10:30
THU,
2
of
June
1988
have
been
set.
Now
the
clock
has
been
set
to
the
correct
time
and
date.
To
correct
an
error
during
setting
You
can
correct
an
error
in
the
setting
any
time
before
the
last
step
by
pressing
the
CLEAR
but-
ton
repeatedly
until
the
digit
to
be
corrected
is
flashing.
Then
enter
the
correct
digit
and
continue
the
setting
sequence.
CLEAR
val
Notes:
¢
This
VTR
has
a
built-in
power
failure
compensation
circuit.
If
a
power
interruption
of
less
than
15
minutes
occurs,
the
clock
time
will
not
be
Jost.
¢
The
digital
display
is
bright
when
the
OPERATE
switch
is
turned
ON
and
automatically
becomes
dim
when
the
switch
is
off.

CASSETTE
TAPES
Use
video
cassette
with
the
mark
in
this
VTR.
Insertion
:
Push
the
cassette
through
the
door
until
the
VTR
mechanism
pulls
it
into
the
compartment.
VTR
power
automatically
turns
on
and
the
TAPE-IN
in-
dicator
turns
on
when
the
cassette
is
in
place.
TAPE-IN
indicator
¢
Will
light
when
the
cassette
is
in
the
VTR
regardless
of
turn-
ing
the
OPERATE
switch
on
and
off.
OO.
*
Will
flash
for
approx.
5
seconds
to
warn
you
to
insert
a
cassette
when
the
OPERATE
switch
is
turned
on
or
the
RECORD
or
PLAY
button
is
pressed
if
the
cassette
is
not
in
the
VTR.
Removal
1
Turn
the
OPERATE
switch
on.
OPERATE
1g
The
cassette
will
come
partially
out
of
the
compart-
ment
so
you
can
pull
it
out.
¢
The
TAPE-IN
indicator
turns
off
when
the
cassett
is
ejected.
To
avoid
erasing
a
recording
<a
Break
off
the
safety
tab
using
a
screw-
driver
or
similar
tool
To
re-record
on
a
cassette
which
has
its
safety
tab
removed
Cover
the
hole
with
cellophane
tape
Remember
that:
—
The
VTR
automatically
enters
the
playback
mode
when
a
cassette
without
a
safety
tab
is
inserted.
—
The
VTR
automatically
ejects
the
cassette
if
the
RECORD
button
is
pressed
when
a
cassette
without
a
safety
tab
is
in
the
VTR.
—
Be
sure
to
check
its
safety
tab
before
inserting
a
cassette
for
the
above
reasons.
Types
of
video
cassette
The
table
below
shows
how
to
distinguish
difference
in
_
recording
time
of
cassettes.
¢
PAL
&
MESECAM
Tapes
(SP
only
for
SECAM)
POSITION
OF
SPEED
SELECT
SWITCH
30
minutes
60
minutes
60
minutes
120
minutes
120
minutes
240
minutes
180
minutes
360
minutes
480
minutes
240
minutes
LP
(EP)
30
minutes
90
minutes
60
minutes
180
minutes
120
minutes
360
minutes
480
minutes
160
minutes
NOTES:
©
Change
over
the
REC
SPEED
select
switch
only
dur-
ing
recording.
It
is
set
to
the
speed
used
for
record-
ing
automatically
during
play,
so
it
is
not
required
to
change
over
it.
¢
It
is
recommended
to
record
in
the
SP
mode
for
tapes
with
higher
quality
picture
and
sound.
¢
The
display
indicates
only
“LP’’.
When
displaying
“LP”
and
recording
an
NTSC
signal,
the
tape
is
recorded
in
the
EP
mode.
This
VTR
cannot
record
an
NTSC
signal
in
the
LP
mode,
however,
it
can
play
a
tape
recorded
in
the
LP
mode.
73

RECORDING
TV
PROGRAMMES
1
Insert
a
cassette.
_Note:
Be
sure
to
check
that
the
erase
prevention
tab
is
not
missing.
If
it
is
removed,
the
VTR
goes
into
playback
mode
automatically.
2
Select
the
channel
to
be
recorded
by
pressing
the
CHANNEL
select
buttons.
CHANNEL
Set
the
REC
SPEED
select
switch
to
“SP”
or
“LP’’.
Itis
SPEED
REC
recommended
to
set.
this
switch
to
“SP”
to
obtain
the
best
picture
and
sound.
4
Press
the
RECORD
button.
Now,
recording
starts.
After
finishing
recording
press
the
STOP
button.
14
ne
:
Coe
Mhoro
ol
‘al
To
view
same
programme
while
recording
You
can
view
same
programme
while
recording
by
merely
selec-
ting
the
video
channel
(described
on
page
9)
with
your
TV
channel
button.
VIDEO
CHANNEL
To
record
one
programme
while
viewing
another
You
can
record
one
programme
while
viewing
another
by
merely
selecting
the
channel
you
want
to
view
with
your
TV
channel
button.
The
recorded
pro-
gramme
can
be
viewed
later
at
your
convenience.
Desired
Channel
To
record
video
from
the
built-in
tuner
and
audio
from
the
external
sound
equipment
Press
the
SIMULCAST
switch
in
the
secondary
control
door
or
press
the
buttons
[9
]and
[0]on
the
remote
con-
trol
unit.
The
SC”
indicator
will
appear
in
the
display.
Under
this
condition,
the
VTR
will
record
the
video
from
the
built-in
tuner
and
audio
from
the
AUDIO
IN
jack.
Notes:
1.
If
you
wish
to
avoid
recording
unwanted
material,
press
the
PAUSE
button.
Press
the
vie
PAUSE
button
again
to
release
the
pause
mode.
To
ies
prevent
tape
damage,
do
not
leave
the
unit
in
the
pause
mode
for
more
than
5
minutes.
2.
If
you
want
to
change
channels
while
in
the
record
mode,
press
the
PAUSE
button
then
select
the
desired
channel.
Press
the
PAUSE
button
to
release
the
pause
mode.
3.
If
the
cassette
in
the
VTR
has
its
safety
tab
removed,
the
VTR
will
eject
it
when
the
RECORD
button
is
pressed.
4.
Your
TV
does
not
have
to
be
on
to
make
a
recording
because
the
VTR
records
TV
programmes
without
the
aid
of
your
TV.
Its
only
use
is
for
monitoring
.

INSTANT
RECORDING
TIMER
(IRT)
SS
aE
CE
Instant
Recording
Timer
allows
you
to
make
simplified
timer
recording
without
using
the
programme
timer.
There
are
two
simplified
methods
as
explained
below.
FOR
IMMEDIATE
RECORDING
1
Insert
the
cassette
(one
with
an
intact
erase
prevention
tab)
into
the
cassette
com-
partment.
Press
the
CHANNEL
select
button
to
select
the
channel
to
be
recorded
then
select
the
tape
speed.
It
is
recommended
to
set
this
switch
to
“SP”
to
ob-
tain
the
best
picture
and
sound.
CHANNEL
rare
(
Press
the
LENGTH
button
to
set
the
timer
to
0:00’.
Then
press
LENGTH
once
again
to
indicate
the
recording
time
on
the
display.
esumawr
/”hemmmanal
The
time
changes
in
hours
and
minutes
in
the
order
of
0:30,
1:00,
1:30,
2:00,
3:00,
and
4:00
every
time
the
button
is
pressed.
Recording
starts
when
0:30
is
displayed.
During
recording,
the
remaining
time
is
displayed.
4
At
the
end
of
recording
the
display
reads
0:00;
the
VTR
will
automatically
stop
recording.
Note:
The
IRT
feature
does
not
operate
during
play
and
after
a
programme
timer
recording
has
started.
During
rewind
mode,
the
IRT
recording
will
automatically
start
after
the
tape
is
rewound
fully
to
the
end.
User's
controls
FOR
SIMPLIFIED
TIMER
RECORDING
First
perform
Steps
1
and
2
of
“FOR
IMMEDIATE
RECORDING”.
CHANNEL
Holding
the
button
down
will
increment
the
start
time
in
10-minute
steps.
Each
time
it
is
pressed
will
increment
the
start
time
by
1
minute.
Press
the
LENGTH
button
for
the
recording
time.
The
counter
display
is
reset
to
hours
and
minutes
in
the
order
of
0:00, 0:30,
1:00,
1:30,
2:00,
3:00
and
4:00
every
time
the
button
is
pressed.
Press
the
OPERATE
switch
off.
OPERATE
The
“@)”
indication
will
appear
on
the
Display.
The
recording
will
start
at
the
time
you
have
selected
and
will
automatically
stop
when
the
recording
time
display
reads
‘0:00’.
18

Notes:
1.
The
recording
time
can
be
ex-
tended
any
time
during
IRT
by
pressing
the
LENGTH
button.
The
recording
time
display
will
be
reset
to
0:30,
1:00,
1:30,
2:00,
3:00
or
4:00
as
selected.
2.
To
stop
the
VTR
during
IRT,
press
the
LENGTH
but-
ton
until
the
recording
time
display
reads
0:00,
or
press
the
OPERATE
switch
then
the
STOP
button
within
ten
seconds.
OPERATE
3.
To
change
the
IRT
programme,
the
previous
infor-
mation
must
be
first
cleared.
4.
lf
the
IRT
and
the
programme
timer
recording
over-
lap,
the
former
will
override
the
latter.
To
recall
the
IRT
programme
Press
the
START
or
the
LENGTH
button
to
recall
the
start
time
and
IRT
the
recording
time.
In
about
8
seconds
the
displays
return
to
the
present
time
of
the
day.
Note:
To
recall
the
start
time
or
the
recording
time,
press
the
LENGTH
button
only
once.
Pressing
more
will
change
the
recording
time
and
cause
a
need
for
resetting.
To
cancel
IRT
programme
Press
the
LENGTH
button
as
many
as
may
be
required
to
indicate
‘0:00’
on
the
display.
After
approximately
8
seconds
the
display
will
return
to
the
present
time
of
day,
and
the
IRT
has
been
now
cleared.
Note:
The
OPERATE
switch
may
be
on
or
off.
16
PLAYBACK
User’s
controls
Turn
the
TV
set
on
and
select
the
video
channel.
Insert
the
cassette.
Note:
When
the
cassette
(with
erase
prevention
tab
removed)
is
loaded,
playback
_
starts
automatically.
VIDEO
CHANNEL
Note:
When
no
color
appears
during
playback
of
a
tape
on
which
a
MESECAM
signal
is
recorded
in
the
LP
mode,
adjust
the
TRACKING
control
knob
to
obtain
the
color.
Press
the
STOP
button
to
fo
_
stop
playback.
—
———
Sete
rae
Picture
control
adjustment
Control
the
picture
as
you
like
(soft
or
hard).
PICTURE
COTT
TIS
“SOFT
<>
HARD
Tracking
control
adjustment
When
playing
prerecorded
tapes
or
those
recorded
on
units
other
than
your
own,
black
and
white
streaks
may
appear
on
your
TV
screen.
If
this
occurs,
adjust
the
TRACKING
control
until
the
streaks
disappear.
When
play-
back
of
this
particular
tape
is
over,
readjust
the
TRACKING
contro!
to
its
original
position.
The
original
position
is
normaily
in
the
center
position.
TRACKING
SIT
TT
| |
IAEA
maul
yi

SPECIAL
CHARACTERISTICS
‘rman
mnie
en
a
rithm
Peanrnnnnenenece
rennet
Tape
counter
This
indicates
the
amount
of
video
tape
transported
as
a
number.
Press
the
RESET
button
to
set
the
counter
reading
to
0000”
when
starting
recording
or
playing
back.
cyry
rey
ee
ee)
Note
the
number
on
the
Tape
counter
at
the
beginning
and
end
of
each
programme
you
record.
This
will
allow
you
to
use
the
counter
to
find
the
desired
programme
later.
Counter
memory
function
This
is
useful
if
there
is
a
section
of
tape
you
want
to
view
immediately
after
recording
or
if
you
want
to
return
to
the
same
point
several
times.
1,
Begin
recording
or
playing
back
a
tape.
2.
At
the
point
where
you
want
playback
to
begin,
reset
the
tape
counter
to
‘‘0000"
by
pressing
the
RESET
button.
3.
Press
the
MEMORY
button,
and
the
“’M”
appears
in
the
display.
=
Ca ey ee
I
arhr
cee,
4.
Continue
to
play
or
record.
5.
Press
the
STOP
button
when
recording
or
playback
finishes.
6.
Press
the
REWIND
button.
The
tape
will
automatically
stop
at
the
pre-selected
“0000”
pos-
ition.
Actually,
so
that
you
won't
miss
the
very
first
part
of
the
programme
to
be
viewed,
the
tape
will
stop
slightly
prior
to
“0000”
at
approximately
the
“9997”
position.
Note:
The
counter
memory
function
will
also
operate
during
the
fast-forwarding
mode.
Still
playback
Press
the
PAUSE
button
to
stop
the
picture
on
the
screen
during
playback.
|
ee
|
During
still
playback,
press
the
PAUSE
button
to
return
to
nor-
dus
mal
playback
or
the
STOP
button
to
stop
the
tape.
Notes:
¢
If
you
see
vertical
shaking
on
the
TV
screen
in
the
still
play-
back
mode,
rotate
the
VERT.
SYNC.
ADJ.
control
on
the
back
of
VTR
to
minimize
shaking.
¢
When
the
still
playback
mode
continues
for
about
5
minutes,
the
VTR
switches
to
the
stop
mode
automatically
to
prevent
damage
to
the
tape.
¢
The
playback
picture
will
have
some
noise
in
the
still
playback
mode.
¢
When
playing
a
tape
on
which
a
PAL
or
MESECAM
signal
is
recorded
in
the
LP
mode,
a
black
and
white
picture
appears
and
the
picture
may
be
inferior
in
some
case.
VERT
SYNC
ADJ.
Frame
advance
When
you
hold
the
F.ADV
but-
ie
ton
on
the
remote
control
unit
F.ADV
down
during
still
playback
mode,
>
tape
will
be
played
back
frame
by
frame.
It
operates
only
after
the
PAUSE
button
has
been
pressed.
Visual
search
This
allows
you
to
view
the
pic-
(ed
ture
from
a
recorded
tape
at
high
F-
FWD
speed
in
both
the
forward
and
the
reverse
directions.
@-VISUAL
SEAR
CH—&)
Press
the
PLAY
button
to
play
a
tape,
then
press
either
the
My
VISUAL
SEARCH
button
REW
or
F.FWD.
Pictures
can
be
viewed
at
high
speed
in
either
the
forward
or
the
reverse
direction.
Note:
©
The
playback
picture
will
have
some
noise
ba
in
the
visual
search
mode.
¢
A
black
and
white
picture
appears
when
playing
a
tape
on
which
a
PAL
or
MESECAM
signa’
is
re-
corded
in
the
LP
mode.
¢
If
you
see
vertical
shaking
on
the
TV
screengn
the
visual
search
mode,
rotate
the
TRACKING
cortrol
on
the
VTR
to
minimize
shaking.
17

Slow
function
Press
the
SLOW
button
on
the
remote
control
unit
during
play-
back,
and
the
tape
is
played
back
at
slow
speed.
Then
use
the
SLOW
SPEED
(S.SPEED)
buttons
on
the
remote
control
unit
to
vary
the
playback
speed.
Notes:
@
When
noise
appears
in
the
slow
playback
pictures,
it
may
be
minimized
by
pressing
the
SLOW
TRACK-
ING
(S.TRACKING)
buttons
on
the
remote
control
unit.
Minimizing
the
noise
in
the
slow
playback,
the
noise
at
Still
or
Frame
Advance
can
also
be
minimized
at
the
same
time.
e
When
the
slow
playback
mode
continues
for
about
5
minutes,
the
VTR
switches
to
the
play
mode
auto-
matically.
*
During
slow
operation,
some
noise
appears
on
the
screen
and
sound
is
muted.
No
colour
picture
ap-
pears
from
LP
tapes
of
PAL/MESECAM.
Repeat
function
Use
this
function
to
repeat
the
scene
you
have
just
viewed
during
playback.
1
During
playback,
"press
PLAY
button
at
the
scene
where
you
want
the
repeat
of
gn
the
playback
to
start.
The
playback
continues.
2
Press
the
REPEAT
button
on
the
remote
control
unit.
The
REPEAT
VTR
enters
into
the
reverse
search
mode,
then
enters
into
the
playback
mode
at
the
position
where
the
PLAY
button
was
pressed.
7
Fast
playback
Press
the
FAST
button
on
the
re-
mote
control
unit
during
play-
back
of
a
tape.
Pictures
can
be
viewed
2
times
faster
than
the
LX2
normal
speed
in
the
forward
direction.
To
release,
press
the
PLAY
or
STOP
button.
The
video
deck
will
change
to
the
mode
corresponding
to
the
button
pressed.
Note:
¢
If
you
see
noise
on
the
TV
screen
in
the
fast
playback
mode,
rotate
the
TRACKING
control
on
the
VTR
to
minimize
noise.
:
:
*
Sound
is
also
played
back
2
times
faster
than
the
normal
speed.
n
>
n
«a
S
18
e
When
piaying
a
tape
on
which
a
PAL
or
MESECAM
signal
is
recorded
in
the
LP
mode,
a
black
and
white
picture
appears
and
the
picture
may
be
inferior
in
some
case.
Automatic
rewind
The
VTR
automatically
rewinds
the
tape
when
the
end
of
the
tape
is
reached.
Rewind
shut
off
If
the
OPERATE
switch
is
pressed
during
rewind
oper-
ation,
power
will
be
turned
off
automatically
after
the
tape
has
been
completely
rewound.
Note:
If
the
counter
memory
function
is
turned
on,
the
VTR
will
stop
rewinding
and
switch
off
at
the
specified
position.
Se
Beep
sound
This
VTR
has
a
BUZZER
switch.
When
this
switch
is
ON,
a
beep
sound
will
be
heard
when
any
VTR
operation
button
is
pressed.
This
is
a
convenience
in
operation.
To
stop
the
beep
sound,
set
the
switch
to
OFF.
Auto
endless
play
Press
the
PLAY
and
the
STORE
buttons
simultaneously;
you
can
may
play
the
tape
from
the
beginning
to
the
end
repeatedly.
To
stop
endless
play,
press
the
EJECT
or
the
POWER
button.
Note:
If
the
counter
memory
function
is
turned
on,
the
VTR
stops
rewinding
at
‘‘0000”
then
starts
playback.

TIMER
RECORDING
The
programmable
electronic
clock/timer
permits
the
unattended
recording
of
8
preselected
programmes
within
a
period
of
1
year,
including
the
same
pro-
gramme(s)
repeated
on
every
day
and
the
same
pro-
gramme(s)
every
week.
It
turns
the
unit
on
and
off
and
selects
the
channel
automatically.
User's
controls
annem
ne
cee
The
timer
can
also
be
programmed
with
the
remote
control
unit
provided.
See
page
23
for
more
details
on
programming
procedures
with
the
remote
control
unit.
Preparations
for
timer
recording
*
Your
TV
does
not
have
to
be
on
to
make
a
recording
because
the
VTR
records
TV
programmes
without
the
aid
of
your
TV.
Its
only
use
is
for
monitoring.
1
Make
sure
that
the
clock
shows
the
present
time
and
day
correctly.
2
Insert
a
cassette.
Be
sure
to
check
that
the
record
safety
tab
is
not
miss-
ing.
If
the
record
safety
tab
is
missing,
recording
will
not
begin.
3
Select
the
speed.
It
is
recommended
to
set
this
eee
switch
to
‘‘SP”
to
obtain
the
best
picture
and
sound.
4
Programme
the
timer.
Programming
the
timer
for
unattended
recording
For
unattended
recording
the
timer
needs
to
know
what
day
to
make
the
recording,
the
time
to
start,
the
time
to
stop,
and
the
channel
to
be
recorded.
The
buttons
for
programming
the
timer
are
in
the
secondary
control
door;
PROGRAM,
SET
and
STORE
buttons.
If
you
input
erroneous
information
by
mistake
when
programming
the
timer,
press
the
CLEAR
button
and
input
the
correct
information
again.
CHECK
erence
@
PROG
——>
=
SET
+
>STORE
CLEAR
Aooam
1
Press
the
PROGRAMME
button.
An
unused
programme
number
is
automatically
selected
fromnumbers
1
to
8
in
numerical
order
and
the
channel
number
will
start
flashing.
NOTE:
Check
the
programme
numbers
in
the
display
before
pressing
the
PROGRAMME
button.
The
timer
allows
up
to
8
programmes
to
be
stored,
but
when
all
programme
numbers
1
to
8
are
lit
in
the
display,
no
programming
can
be
performed.
To
in-
put
a
programme
at
this
time,
clear
one
of
the
8
programme
numbers
(see
“To
clear
a_pro-
gramme’’).
When
the
PROGRAMME
button
is
pressed
while
all
the
8
programme
numbers
are
lit,
the
“FUL”
indicator
will
light
to
warn
you.
(When
the
BUZZER
switch
is
ON
in
this
state
a
beep
sound
will
be
heard
to
warn
you.)
2
Choose
the
channel
to
be
recorded
by
pressing
the
SET
or
the
CHANNEL
select
button.
Then
press
the
STORE
button.
Hour
starts
flashing.
For
example,
the
above
diagram
shows
that
chan-
nel
6
has
been
set.
3
Select
the
hour
for
recording
to
start
by
pressing
the
SET
button
(Forward
or
Reverse).
Hod
down
the
button
to
advance
it
rapidly.
Press
the
STORE
button
after
selecting
thehour
for
recording
to
start.
Minute
starts
flashing.
For
example,
the
above
diagram
shows
tht
“PM
8”
hours
has
been
set.
719

20
Select
the
minutes
for
recording
to
start
by
pressing
the
SET
button
(Forward
or
Reverse).
Hold
down
the
button
to
advance
it
rapidly.
Press
the
STORE
button
after
selecting
the
minute
for
recording
to
start.
“OFF’
will
appear
and
hour
starts
flashing.
For
example,
the
above
diagram
shows
that
‘’30"’
minutes
has
been
set.
Select
the
hour
and
minute
to
stop
recording
by
the
same
procedures
described
in
steps
3
and
4.
For
example,
the
above
diagram
shows
that
‘PM
10:00’’
has
been
set.
Be
sure
to
press
the
STORE
button
after
selecting
the
minute.
The
current
date
appears
and
starts
flashing.
Press
the
Forward
SET
(+)
button
to
select
the
day
and
month
of
recording.
For
example,
the
above
diagram
shows
recording
on
the
4th
of
June.
Notes:
¢
Day
of
week
appears
automatically.
©
If
you
want
to
start
recording
on
the
current
day,
simply
press
the
STORE
button.
©
The
above
diagram
shows
how
to
record
a
pro-
gramme
on
a
single
day.
To
record
a
programme
at
the
same
time
on
every
day
or
to
record
it
on
one
certain
day
of
each
week,
follow
the
procedure
described
below.
,
After
setting
the
day
and
month
press
the
STORE
button.
The
programme
indicator
flashes
and
the
display
shows
both
start
and
stop
times
in
a
few
seconds.
Then
display
shows
start
time
and
date.
Finally
the
display
returns
to
normal
together
with
lighting
programme
number.
NOTES:
|
‘
To
record
a
programme
at
the
same
time
every
day.of
the
week
or
to
record
a
programme
on
a
specified
day
at
the
same
time
each
week,
per-
form
the
following
step
instead
of
step
6
above.
To
record
at
the
same
time
every
day
of
the
week
Press
the
Reverse
SET
{—)
button
once.
All
day
indicators
light.
If
you
press
the
button
twice
or
more,
press
the
button
until
all
day
indicators
light.
Hold
down
the
button
to
advance
rapidly.
Then
press
the
STORE
button.
To
record
on
a
specified
day
at
the
same
time
each
week
Press
the
Reverse
SET
(—)
button
until
the
desired
day
indicator
lights
along
with
letters
“WKL”..
Hold
down
the
button
to
advance
it
“rapidly.
Then
press
the
STORE
button.
Now,
one
programme
has
been
completed.
7
Turn
off
the
OPERATE
OPERATE
switch.
The
“@)"
indicator
i
will
come
on.
[=]
co
Notes:
1.
If
the
erase
prevention
tab
is
removed,
the
cassette
is
ejected
automatically
and
‘’@)”
indicator
will
flash.
Stick
a
piece
of
cellophane
tape
over
the
erase
prevention
hole
on
the
cassette
to
enable
recording.
2.
The
‘“@"
indicator
will
flash,
if
a
cassette
is
not
inserted.
Table of contents
Other Hitachi Cassette Player manuals