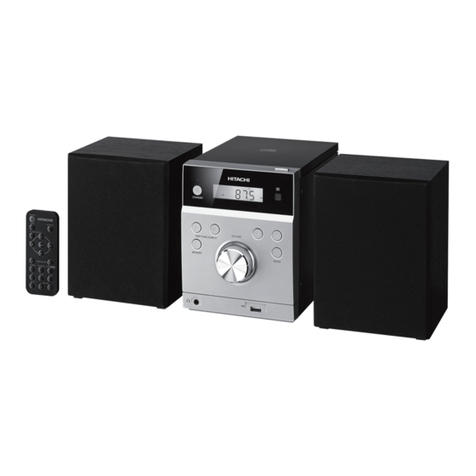
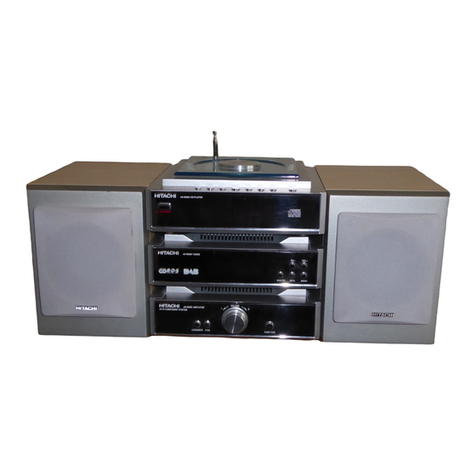
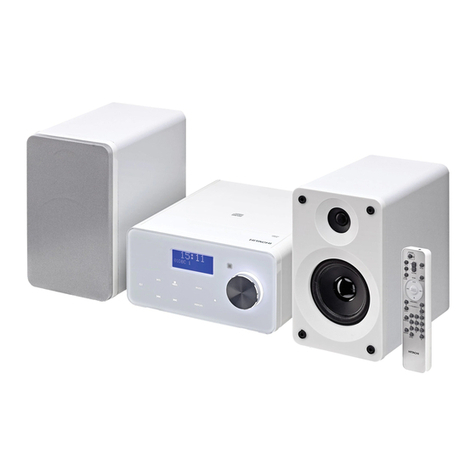
Hitachi TRK-W545W.HW User manual

Portable
component
system
move.
TRK-W545W.HW
INSTRUCTION
MANUAL
page
1—
9
4%
FA
aR
ARS
BR
11-18
MANUAL
DE
INSTRUCCIONES
pagina
20
—
27
28
—
37
trdvo
Jadstilly
Gloster
als
WARNING:
TO
PREVENT
FIRE
OR
ELECTRIC
SHOCK,
DO
NOT
EXPOSE
THIS
APPLIANCE
TO
RAIN
OR
MOISTURE.
Explanation
of
Graphical
Symbols
CAUTION
The
lightning
flash
with
arrowhead
symbol,
RISK
OF
ELECTRIC
SHOCK
within
an
equilateral
triangle,
is
intended
to
[ole
m
\\(enm@)-121\\|
alert
the
user
to
the
presence
of
uninsulated
“dangerous
voltage”
within
the
product's
en-
closure
that
may
be
of
sufficient
magnitude
to
CAUTION:
TO
REDUCE
THE
RISK
OF
ELEC-
constitute
a
risk
of
electric
shock
to
persons.
TRIC
SHOCK,
DO
NOT
REMOVE
COVER.
NO
The
exclamation
point
within
an
equilateral
USER-SERVICEABLE
PARTS
INSIDE.
REFER
triangle
is
intended
to
alert
the
user
to
the
SERVICING
TO
QUALIFIED
SERVICE
PER-
presence
of
important
operating
and
main-
SONNEL.
tenance
(servicing)
instructions
in
the
literature
accompanying
the
appliance.

KEY
TO
ILLUSTRATIONS
SERAMRRESFLB
CLAVE
PARA
LAS
ILUSTRACIONES
Geuce
gill
Cade
D®O@OOOO
®©®
@OH
OW
(E)
Sr
ae
oe
a
he
MD
DOHODDBOOHOD
OM
MM®

BI
ASSEMBLING
THE
SPEAKERS
RRM
RR
INSTALACION
DE
LOS
ALTAVOCES
Cle
lau!
avert
"ata
SS
ae
be
id
REMOVING
THE
SPEAKERS
i
EE
EXTRACCION
DE
LOS
ALTAVOCES
clelaul
abe

TO
USE
WITH
BATTERIES
ee
Awd.
USO
CON
PILAS
tayllaall
fe
aludauud
TO
USE
WITH
HOUSEHOLD
AC
ARBRE
USO
CON
LA
DOMESTICA
sal
Goa
GLI
afoaauyt
AC
110--127V
Bem
BATT/
spe
U
B
[
AC
BATT/
==DC
|
rac
tS
=|
AC
200—220V,
230—250V
Ee
Oem
4
ORF
Si
ic
25
Adaptador
de
enchufe
for
Australia
AC
240V
ERA
FRE
a
PR
FB
2
240
MK,
CA
240V
para
Australia
Set
the
VOLTAGE
SELECTOR
to
your
local
voltage
with
the
power
(mains)
lead
unplugged.
ebyd
VES
sade
565
WILY
WE
RPE
IRA,
RRIE
VOLTAGE
SELECTOR
(SB
8)
REAR
RAREBHME,
Regule
el
SELECTOR
DE
VOLTAJE
de
acuerdo
con
el
voltaje
local
teniendo
desenchufados
los
conductores
de
potencia.
Wa
setae
AL
oe
Ad
aaa
J!
ibd
UI
Gl
be
“A.
sity
dope
Catt
vlad)
VOLTAGE
SELECTOR
ERS
SELECTOR
DE
VOLTAJE
eitepee)
mareeaIweces
110
—
127V
200
—
220V

USE
A
CAR
BATTERY
AABARHER
USO
CON
BATERIA
DE
AUTOMOVIL
Bylouull
dyjtlos
05
ge
pladiaadl
Cigarette
lighter
socket
Sek
k
SS
ie
Enchufe
de
encendedor
de
eat
Raptor
cigarrillos
5
MAC
aE
lad
as,
Bros
Adaptador
de
automovil
TO
LISTEN
TO
A
RADIO
PROGRAMME
UNS
Het
a
A
AUDICION
DE
UNA
PROGRAMAS
RADIALES
goolyll
qalyal
glecaudt
00
6
8680
9
VOLUME
L
R
TUNING
®STEREO
FMS
VOLUME
FM
MODE
"STEREO
FMS
SWe
swin
toi

INSERTION
AND
REMOVAL
OF
A
CASSETTE
BR
Oe
A
FOR
INSERCION
Y
EXTRACCION
DE
UN
CASETE
coualslt
El
yblg
Sida!
SAFETY
TAB
FOR
SIDE
“B”
BRA
LENGUETA
DE
SEGURIDAD
DEL
LADO
‘’B”
<€
SAFETY
TAB
FOR
-
SIDE
“A”
A
7
ARRIBA
LENGUETA
DE
SEGURIDAD
DEL
LADO
“A”
;
wil»
ouelt
QhwJ
”
in
[1]
PLAYBACK
OF
A
RECORDED
TAPE
(TAPE
[1],
TAPE
[2])
PREESA
(BESO,
SBE)
REPRODUCCION
DE
UNA
CINTA
GRABADA
TAPE
[1],
TAPE
[2])
(BR)
py
testll
,
(deep
till)
Joruodar
ntl!
pais
OPERATE
VOLUME
Be
kt
i
SPEED
IEE
TAPE/
,
CONTI.
PLAY
DUBBING
5
oH
=
VOLUME
pole:
{NIN
=e:
~-_>
ui
fi
inal
ut
j
oe
|
Ca
(oo:
mn)
UHI
«

Portable
component
system
mopEL
TRK-W545W.H
BEFORE
USING
To
obtain
the
best
performance
and
ensure
years
of
trouble-free
use,
please
read
this
instruction
manual
carefully.
Notice:
The
switch
is
secondarily
connected
and
does
not
separate
the
apparatus
from
the
mains
supply
in
the
switched-off
position.
As
to
the
indication
of
the
operate
switch
“’
|
’’
shows
ON
and
*’
(”
electrical
power
stand-
by.
CONTENTS
FEATURES
...cccccceccceceeccececcecescecesscccenscecsesceeeceseeesseseeeesaeesssaeensneetesseresenaeassnaeensesaueeeneagany
3
PRECAUTIONS
.......cccceccceeecececcceseceseecennecseceeseeeeesesseneeesaeeneeeeenerseeesneeeaneneageseneneessaearsanans
3
KEY
TO
ILLUSTRATIONS
.........0ccccceseceeeceseeesceeseeceeeseeseeeceesaeesaneneesaneneneneesneseeenieataeegs
3
HANDLING
THE
SPEAKERS
......0....:ccccscceseeeesseeeeseeeeneteneeeneneeseeeneeesgessnesesaeeeneeesaanenanens
3
ASSEMBLING
THE
SPEAKERS
..........:::ceccscseeseeeeeeeeseeenneeseeerseeeesusensennsneseseseneaneenaneeaes
3
REMOVING
THE
SPEAKERS...........:cccesseceeeeeeesceeeeeesneeeseesseeeseeessueasneneneesesaeeesnanersanens
4
POWER
REQUIREMENTS
TO
USE
WITH
BATTERIES.
........0.ccccccceeeeesseeeseseeeeeeeeeceeeeanessaeesaesnesseneaeneeessoesensntenes
4
TO
USE
WITH
HOUSEHOLD
AC...........::cccecccescecesseeseeeeeeeceeeseeeereesetseseneesenaeeesneeesseatans
4
TO
USE
FROM
A
CAR
BATTERY
........::cceeccceseceeeeeeneeeeseeennereaeereneneaneenesenenessneeennartats
4
TO
LISTEN
TO
A
RADIO
PROGRAMME
............:cc:ccesesseeeeeeeeteeeeeeeessenaesenseneeeneeetanenenenney
4
INSERTION
AND
REMOVAL
OF
A
CASSETTE
..........:c0:ccceeeeeeeeseeeesseeseestaeeenseeensaeeenneetiney
5
PLAYBACK
OF
A
RECORDED
TAPE
(TAPE
[1],
TAPE
[2])
...------:sssessseesseseseereenenseeetaeeney
6
CONTINUOUS
PLAYBACK
(TAPE
[1]
™
TAPE
[2])
..........:cceceeceeeeesseesneessanesneesenseensaeens
6
RECORDING
(TAPE
[2])
RECORDING
A
RADIO
PROGRAMME
............::ccssccsecesesseeseeseneeseeseueneseaneereenneeeraeanicnes
6
RECORDING
FROM
BUILT-IN
MICROPHONE.
.........::::eeeeeeeseeees
cSt
rahe
ateys
Wh
aun
renueananae
6
DUBBING
(TAPE
[1]
=
TAPE
[2])........-:::sssscccseeeseeeeneceeeseeeseneseesseesseeaseneseanersentanesnanensons
7
CD
PLAYER
TO
LISTEN
TO
A
COMPACT
DISC
............:::scssceeeseeeseeeeeeenenenesessueensnaeeseensneetnereneeaes
7
RECORDING
FROM
A
CD
PLAYER
........--.sscccseseeeseeceseeeseerseeteatenseeseaneeneneneeeneneestantans
7
ERASING
(TAPE
[2]).......--2sseereeeees
Be
sate
co
neha
Aa
esc
oe
nehdalfot
waslven
bnrasleas
a
tegeuate
cegaeiramnanaee
7
MAINTENANCE
...........0:cecceseseeccecsecseeeccenseeeaeeseesesaeeseeaerecsetsesassesseeseenecauseeseanesasraseatsnteny
8
CHECK
THE
FOLLOWING
BEFORE
CALLING
FOR
SERVICE.............-sssssssseessseteetsetretees
8
SPECIFICATIONS.
.........ccscescsceseececceseeeeseeneesneneeneneecersenaseersessessaseenecauenesarsenresteseateasersey
9

IMPORTANT
SAFEGUARDS
SAFETY
POINTS
YOU
SHOULD
KNOW
ABOUT
YOUR
AUDIO
EQUIPMENT.
CAUTION:
¢
Read
all
of
these
instructions.
¢
Save
these
instructions
for
later
use.
*
Follow
all
warnings
and
instructions
marked
on
the
audio
equipment.
1.
Read
Instructions
—
All
the
safety
and
operating
instructions
should
be
read
before
the
appliance
is
operated.
2.
Retain
Instructions
—
The
safety
and
operating
instructions
should
be
retained
for
future
reference.
3.
Heed
Warnings
—
All
warnings
on
the
appliance
and
in
the
operating
instructions
should
be
adhered
to.
4.
Follow
instructions
—
All
operating
and
use
instructions
should
be
followed.
5.
Water
and
Moisture
—
The
appliance
should
not
be
used
near
water
—
for
example.
near
a
bathtub.
washbow/l.
kitchen
sink,
laundry
tub.
in
a
wet
basement.
or
near
a
swimming
pool.
etc.
6.
Carts
and
Stands
—
The
appliance
should
be
used
only
with
a
cart
or
stand
that
is
recommended
by
the
manufacturer
An
appliance
and
cart
combination
should
be
moved
with
care.
Quick
stops,
excessive
force,
and
uneven
surfaces
may
cause
the
appliance
and
cart
combination
to
overturn.
7.
Wail
or
Ceiling
Mounting
—
The
appliance
should
be
mounted
to
a
wall
or
ceiling
only
as
recommended
by
the
manufacturer.
8.
Heat
—
The
appliance
should
be
situated
away
from
heat
sources
such
as
radiators.
heat
registers.
stoves.
or
other
appliances
(including
amplifiers)
that
produce
heat
9.
Ventilation
—
The
appliance
should
be
situated
so
that
its
location
or
position
does
not
interfere
with
its
proper
ventila-
tion.
For
example,
the
appliance
should
not
be
situated
on
a
bed,
sofa.
rug,
or
similar
surface
that
may
block
the
ventilation
openings;
or,
placed
in
a
built-in
installation.
such
as
a
book-
case
or
cabinet
that
may
impede
the
flow
of
air
through
the
ventilation
openings.
10.
Power
Sources
—
The
appliance
should
be
connected
to
a
power
supply
only
of
the
type
described
tn
the
operating
in-
structions
or
as
marked
on
the
appliance.
11.
Grounding
or
Polarization
—
The
precautions
that
should
be
taken
so
that
the
grounding
or
polarization
means
of
an
appliance
is
not
defeated.
12.
Power-Cord
Protection
—
Power-supply
cords
should
be
routed
so
that
they
are
not
likely
to
be
walked
on
or
pinched
by
items
placed
upon
or
against
them.
paying
particular
attention
to
cords
at
plugs.
convenience
receptacles.
and
the
point
where
they
exit
from
the
appliance.
13.
Cleaning
—
The
appliance
should
be
cleaned
only
as
recom-
mended
by
the
manufacturer.
14.
Power
Lines
—
An
outdoor
antenna
should
be
located
away
from
power
lines.
15.
Outdoor
Antenna
Grounding
—
if
an
outside
antenna
is
connected
to
the
receiver,
be
sure
the
antenna
system
is
grounded
so
as
to
provide
some
protection
against
voltage
surges
and
built
up
static
charges.
Section
810
of
the
National
(FOR
U.S.A.)
Electrical
Code,
ANSI/NFPA
No.
70—1984.
provides
infor-
mation
with
respect
to
proper
grounding
of
the
mast
and
sup-
porting
structure,
grounding
of
the
lead-in
wire
to
an
antenna
discharge
unit.
size
of
grounding
conductors,
location
of
antenna-discharge
unit.
connection
to
grounding
electrodes.
and
requirements
for
the
grounding
electrode.
See
Figure
be-
low.
EXAMPLE
OF
ANTENNA
GROUNDING
ACCORDING
TO
NATIONAL
ELECTRICAL
CODE
INSTRUCTIONS
CONTAINED
IN
ARTICLE
810
—
“RADIO
AND
TELEVISION
EQUIPMENT”
GROUND
STANDOFF
INSULATORSD
Mast
ANTENNA
LEAD
IN
WIRE
SERVICE
ENTRANCE
EQUIPMENT
GROUND
WIRE®.D
ANTENNA
14
Ps
PX)
4
NIT
TOEXTERNAL
ANTENNA
TERMINALS
OF
PRODUCT
POWER
SERVICE
GROUNDING
ELECTRODE
SYSTEM
(e.g.
interior
metal
water
pipe)
GROUND
WIRE@®b
Cc)
BONDING
JUMPER!
GROUND
CLAMPS
OPTIONAL
ANTENNA
GROUNDING
ELECTRODE
DRIVEN
8
FEET
(2
44m)
INTO
THE
EARTH
IF
REQUIRED
BY
LOCAL
CODES.
SEE
NEC
SECTION
810
—
21
(f)
?
Use
No.
10
AWG
(5.3
mm2)
copper,
No.
8
AWG
(8.4
mm2)
aluminum,
No.
17
AWG
(1.0
mm2)
copper-clad
steel
or
‘bronze
wire,
or
larger,
as
a
ground
wire.
Secure
antenna
lead-in
and
ground
wires
to
house
with
stand-off
insula:
tors
spaced
from
4
feet
(1.22
m)
to
6
feet
(1.83
m)
apart.
©
Mount
antenna
discharge
unit
as
close
as
possible
to
where
tead-in
enters
house.
:
Fuse
jumper
wire
not
smalier
than
No.6
AWG
(13.3
mm2)
copper,
or
the
equivalent,
when
@
separate
antenna-grounding
electrode
is
used.
See
NEC
Section
810-21(j).
16.
Nonuse
Periods
—
The
power
cord
of
the
appliance
should
be
unplugged
from
the
outlet
when
left
unused
for
a
long
period
of
time.
17.
Object
and
Liquid
Entry
—
Care
should
be
taken
so
that
objects
do
not
fall
and
liquids
are
not
spilled
into
the
en-
closure
through
openings.
18.
Damage
Requiring
Service
—
The
appliance
should
be
ser-
viced
by
qualified
service
personnel
when:
A.
The
power-supply
cord
or
the
plug
has
been
damaged;
or
B.
Objects
have
fallen.
or
liquid
has
been
spilled
into
the
appliance;
or
C.
The
appliance
has
been
exposed
to
rain;
or
O.
The
appliance
does
not
appear
to
operate
normally
or
exhibits
a
marked-change
in
performance:
or
E.
The
appliance
has
been
dropped,
or
the
enclosure
dam-
aged.
19.
Servicing
—
The
user
should
not
attempt
to
service
the
appliance
beyond
that
described
in
the
operating
instructions.
All
other
servicing
should
be
referred
to
qualified
service
per-
sonnel

e
3-unit
portable
component
system
¢
Double
cassette
mechanism
¢
Auto
reverse
mechanism
(TAPE
[1])
PRECAUTIONS
¢
High
speed
dubbing
mechanism
e
5-band
graphic
equalizer
control
face
finish.
KEY
TO
ILLUSTRATIONS
Disconnect
the
AC
power
lead
plug
from
the
AC
outlet
when
the
unit
is
not
used
on
AC
power
for
a
long
period
of
time
or
you
are
away
from
home.
If
you
run
the
unit
from
the
mains
for
a
long
period,
or
when
not
using
the
unit,
remove
the
batteries.
Do
not
leave
dead
batteries
in
the
unit,
as
they
may
corrode
and
cause
damage.
Never
use
any
strong
detergents
or
solvents
to
clean
the
unit's
casing,
since
they
could
damage
the
sur-
Do
not
leave
in
direct
sunlight
or
in
extremely
hot
or
humid
places.
The
appliance
should
not
be
used
near
the
sea,
sand
and
where
there
is
fine
dust.
SPEAKER
ENCLOSURE
(LEFT)
TELESCOPIC
ANTENNA
(AERIAL)
OPERATE
SWITCH
OPERATION
INDICATOR
FM
STEREO
INDICATOR
BUILT-IN
MICROPHONE
(MONAURAL)
VOLUME
CONTROLS
GRAPHIC
EQUALIZER
CONTROLS
FUNCTION
SELECTOR
DUBBING
SPEED/FM
MODE
SELECTOR
BAND
SELECTOR
TUNING
CONTROL
SPEAKER
ENCLOSURE
(RIGHT)
HEADPHONES
SOCKET
TAPE
[1]
@
DIRECTION
INDICATOR
REVERSE
MODE
BUTTON
@)
PLAYBACK
BUTTON
REWIND
BUTTON
POOGOOO@OQOOOOHO
FAST
FORWARD
BUTTON
STOP/EJECT
BUTTON
@)
DIRECTION
BUTTON
@)
CASSETTE
HOLDER
TAPE
[2]
RECORD
BUTTON
PLAYBACK
BUTTON
REWIND
BUTTON
FAST
FORWARD
BUTTON
STOP/EJECT
BUTTON
PAUSE
BUTTON
CASSETTE
HOLDER
CD/LINE
IN
SOCKETS
SPEAKER
TERMINALS
@2.
AC/BATT.
(DC)
SELECTOR
@}
SPEAKER
ASSEMBLY/REMOVAL
TABS
VOLTAGE
SELECTOR
@)
DC
12V
SOCKET
OO
OO©COOSO
HANDLING
THE
SPEAKERS
This
set
can
be
used
as
the
portable
component
system
with
the
speakers
attached
to
the
main
unit
and
as
a
separate
component
system
with
the
speakers
removed
from
the
main
unit
and
installed
in
any
required
position.
ASSEMBLING
THE
SPEAKERS
@
Align
the
groove
in
the
speaker
enclosure
with
the
groove
in
the
side
of
the
main
unit
and
depress
the
speaker
in
the
direction
of
the
arrow
until
the
speaker
assembly/removal
tab
locks.
@
Connect
the
speaker
leads
to
the
speaker
terminals.
|
ros
|
[Be
sure
to
set
the
OPERATE
switch
to
”
()
’
when
connecting/disconnecting
the
speaker
leads.
w

REMOVING
THE
SPEAKERS
@
Push
the
speaker
assembly/removal
tab
on
the
rear
of
the
main
unit
in
the
direction
of
the
arrow.
@
Slide
the
speaker
enclosure
upward
to
remove
it.
POWER
REQUIREMENTS
[D]
TO
USE
WITH
BATTERIES
Set
the
AC/BATT.
(DC)
selector
to
“BATT”
and
insert
8
IEC
R20
batteries.
Note:
The
volume
drops
and
the
tape
speed
gets
slower
as
the
batteries
are
exhausted;
replace
the
batteries
when
this
happens.
[E]
TO
USE
WITH
HOUSEHOLD
AC
Set
the
AC/BATT.
(DC)
selector
to
‘‘AC’’
and
insert
the
AC
power
(mains)
lead
plug
to
the
AC
outlet.
Note:
When
the
AC/BATT.
(DC)
selector
is
not
set
to
“AC”
with
the
batteries
left
in
the
compartment,
the
batteries
will
be
discharged.
—F
*
Set
the
VOLTAGE
seletor
to
your
local
power
(mains)
voltage
before
using
this
unit.
¢
Connect
the
AC
power
(mains)
lead
plug
to
the
provided
plug
adaptor
and
then
insert
it
into
the
household
AC
socket
when
using
the
unit
in
a
200—220V
and
230—250V
area.
Note:
Set
the
VOLTAGE
selector
to
your
local
voltage
with
the
power
(mains)
lead
unplugged.
Replacement
plug:
Replacement
plugs
are
packed
in
the
provided
plug
adaptor;
install
the
plug
fit
to
your
wall
socket
as
shown
in
the
figure
to
use
the
adaptor.
Note:
Tighten
the
replacement
plug
firmly
by
the
screw.
Do
not
just
insert
it
into
the
socket;
it
is
dangerous.
=
[F]
TO
USE
FROM
A
CAR
BATTERY
¢
Set
the
AC/BATT.
(DC)
selector
to
‘‘DC’’
and
use
a
12V
car
battery
adaptor
(option).
(O—e)-)
e
Use
the
unit
while
idling
the
car
engine
to
prevent
the
car
battery
from
discharging.
|G|
TO
LISTEN
TO
A
RADIO
PROGRAMME
©
(s
Set
the
FM
MODE
selector
to
“STEREO”
when
the
station
is
broadcasting
an
FM
stereo
progranme.
¢
When
an
FM
stereo
signal
is
weak
or
noisy
for
enjoyable
stereo
listening,
set
the
FM
MODE
seector
to
“MONO”
to
reduce
the
noise.
ANTENNA
(AERIAL)
INFORMATION
FM
reception:
Extend
the
telescopic
antenna
(aerial)
to
its
full
length.
Change
its
direction
to
obtim
the
best
reception.
SW2
reception:
Extend
the
telescopic
antenna
(aerial)
to
its
full
length.
SW1
and
MW
reception:
The
built-in
ferrite-core
antenna
(aerial)
provides
good
reception
under
nornal
conditions.
Rotate
the
unit
to
find
the
position
in
which
the
best
reception
is
obtained.

LISTENING
INFORMATION
GRAPHIC
EQUALIZER
controls:
The
audio
spectrum
is
divided
into
5
bands.
When
each
knob
is
raised,
the
sound
is
emphasized,
and
when
each
knob
is
lowered,
the
sound
is
attenuated.
Adjust
them
to
obtain
your
favorite
tone.
The
characteristics
become
flat
with
the
5
knobs
set
to
the
center
(‘0’)
positions.
AUTO
LOUDNESS
system:
When
the
VOLUME
control
is
set
to
less
than
‘‘center’’,
the
built-in
LOUDNESS
circuit
functions
automatically
to
ensure
dynamic
sound
with
the
low and
high
frequencies
emphasized.
To
listen
using
HEADPHONES:
Connect
the
headphones
to
the
HEADPHONES
socket
to
enjoy
private
listening.
H
|
INSERTION
AND
REMOVAL
OF
A
CASSETTE
NOTE:
e
Insert
the
cassette
as
shown.
If
the
cassette
is
upside
down,
it
cannot
be
inserted.
The
safety
tab
must
be
in
place
if
you
want
to
record.
Remove
to
prevent
erasure.
If
the tab
is
removed
after
recording
and
you
wish
to
erase
the
tape,
cover
with
cellophane
tape.
Avoid
exposing
the
cassette
to
direct
sunlight.
Keep
away
from
a
heater,
etc.
Avoid
extreme
humidity,
violent
vibrations
or
shocks,
strong
magnetic
fields
(near
a
motor,
trans-
former
or
a
magnet)
and
dusty
places.
We
advice
you
not
to
use
C-120
cassette
tape.
C-120
tape
is
thinner,
consequently
a
greater
danger
exists
of
problems
arising
from
loose
or
curled
tape
and
variations
in
tension.
BEFORE
RECORDING
AND
PLAYBACK
NOTE
ON
INSTRUCTIONS
TAPE
[1]
is
equipped
with
an
AUTO
REVERSE
function
so
that
the
direction
of
the
tape
can
be
changed
without
removing
the
cassette
tape.
For
practical
purposes,
these
instructions
will
identify
playback
as
(
®
),
fast
forward
as
{
®P
)
and
rewind
as
(
<4).
When
the
tape
is
travelling
in
reverse
direction
(
<
)
will
mean
reverse
playback,
(
44
)
as
fast
forward
and
(
>>
)
as
rewind.
mw
REVERSE
MODE
BUTTON
m=
Both-way
mode
(two-way
mode)
When
playback
in
the
forward
direction
is
completed,
the
auto-reverse
mechanism
switches
to
reverse
direction.
At
the
end
of
the
reverse
side
of
the
tape,
the
player
stops
automatically.
C=
Endless
mode
Playback
will
continue
switching
from
forward
to
reverse
and
vice
versa
until
the
STOP/EJECT
button
is
pressed.
‘
this
button
is
pressed.
The
direction
indicator
(FWD
®
or
REV
4)
shows
the
tape
running
direction.
DIRECTION
BUTTON:
The
running
direction
of
the
tape
in
TAPE
can
be
switched
every
time
j

|||
PLAYBACK
OF
A
RECORDED
TAPE
(TAPE
[1],
TAPE
[2))
TAPE
[2]
CASSETTE
MECHANISM
PAUSE
BUTTON
If
you
want
to
stop
the
tape
temporarily
during
recording
or
playback,
press
the
PAUSE
button.
To
release
the
pause
mode,
press
the
PAUSE
button
again.
TAPE
[1]
AND
TAPE
[2]
CASSETTE
MECHANISM
STOP/EJECT
BUTTON
When
this
button
is
pressed
while
the
tape
is
running,
the
tape
stops.
When
the
button
is
pressed
in
the
stop
mode,
the
cassette
holder
opens.
FAST
FORWARD/REWIND
BUTTON
To
rapidly
advance
the
tape,
press
the
FAST
FORWARD
button.
To
rewind
the
tape,
press
the
REWIND
button.
Press
the
STOP/EJECT
button
after
fast
forwarding
or
rewinding.
AUTO
STOP
MECHANISM
When
the
tape
in
TAPE
[1]
reaches
the
end
in
the
both-way
(
=
)
playback
mode,
the
tape
stops
automatically
and
the
button
is
released.
When
the
tape
in
TAPE
[2]
reaches
the
end
in
the
record
and
playback
modes,
the
tape
stops
automatically
and
the
buttons
are
released.
When
the
tapes
in
TAPE
[1]
and
TAPE
[2]
reach
the
end
in
the
fast
forward
and
rewind
modes,
the
tapes
stop
but
the
buttons
remain
depressed.
Press
the
STOP/EJECT
button
to
release
the
buttons.
Notes:
¢
If
TAPE
[1]
is
operated
while
TAPE
[2]is
playing,
the
sound
played
back
by
TAPE
[2]
will
be
inter-
rupted.
(TAPE
[1]
has
priority)
e
When
the
operation
button
(PLAY)
of
TAPE
is
pressed
while
TAPE
[1]
is
playing,
the
sound
may
be
distorted.
Do
not
operate
TAPE
[2]
while
TAPE
[1]
is
playing.
CONTINUOUS
PLAYBACK
(TAPE
[1]
™
TAPE
[2])
This
unit
ts
provided
with
a
continuous
playback
mechanism,
so
that
when
the
playback
of
TAPE
[1]
is
completed,
playback
of
TAPE
automatically
starts.
@
cS
Be
sure
to
set
the
REVERSE
MODE
button
of
TAPE
[1]
to
the
both-way
(
=
)
mode.
I=
If
continuous
playback
is
started
from
the
reverse
direction
of
TAPE
[1]
as
soon
as
the
playback
on
TAPE
[1]
ends,
playback
of
TAPE
[2]
begins.
RECORDING
(TAPE
[2])
K|
RECORDING
A
RADIO
PROGRAMME
@
=
Follow
steps
@
to
@
in
“TO
LISTEN
TO
A
RADIO
PROGRAMME"
to
obtain
the
station
you
wish
to
record.
RECORDING
FROM
BUILT-IN
MICROPHONE
Note:
The
sound
from
the
built-in
microphone
will
be
recorded
in
monaural.
6

IM]
DUBBING
(TAPE
[1]
>
TAPE
[2))
Dubbing
(tape-to-tape
recording)
is
to
play
back
one
tape
and
record
its
content
onto
another
tape.
This
unit
employs
the
double
cassette
system,
so
the
content
of
TAPE
being
played
back,
can
be
recorded
directly
onto
TAPE
[2].
@
(cS
Insert
the
tape
to
be
played
back
into
TAPE
[1]
and
the
tape
to
be
recorded
into
TAPE
[2].
©
is
Select
the
DUBBING
SPEED
selector
position.
¢
To
dub
a
tape
at
the
normal
speed,
set
the
DUBBING
SPEED
selector
to
NORMAL.
¢
To
dub
a
tape
at
double
the
normal
speed,
set
the
DUBBING
SPEED
selector
to
HIGH.
@
(>
Press
the
STOP/EJECT
buttons
of
TAPE
[1]
and
[2]
to
stop
dubbing.
:
|
Note:
Do
not
change
over
the
DUBBING
SPEED
selector
during
recording.
This
equipment
should
not
be
used
for
taking
copies
of
tapes
in
breach
of
copyright.
Copyright
sub-
sists
in
most
pre-recorded
tapes.
|
ESE
eee
CD
PLAYER
[|
TO
LISTEN
TO
A
COMPACT
DISC
@
.@&
Connect
the
output
sockets
of
the
CD
player
and
the
CD/LINE
IN
sockets
of
this
unit
with
a
US
pin
lead.
©
(>
Operate
the
CD
player
for
playing
back.
RECORDING
FROM
A
CD
PLAYER
Recording
cassette
tapes
is
possible
while
playing
a
CD.
1.
Insert
the
tape
into
TAPE
[2].
2.
Follow
steps
@
to
@
shown
in
“TO
LISTEN
TO
A
COMPACT
DISC”.
Pressing
RECORD
button
and
PLAYBACK
button
simultaneously
will
start
recording.
|O|
ERASING
(TAPE
[2))
When
a
recording
is
being
made,
any
sound
on
the
track
is
automatically
erased
before
the
new
recording
is
made.
if
you
wish
to
erase
a
recorded
tape,
without
making
a
new
recording,
follow
steps
@
—
@
as
in
the
diagram.
Note:
Disconnect
external
programme
source
before
erasing
starts.
“

In
order
to
keep
this
unit
in
its
optimum
operating
condition,
clean
the
heads,
capstan
and
pressure
roller
periodically
with
a
cleaning
stick
moistened
with
alcohol
or
methylated
spirits.
Never
use
sharp
or
metallic
instruments
or
tools
for
cleaning
these
parts.
The
easiest
cleaning
method
is
by
using
a
Hitachi
head
cleaning
cassette
tape.
All
Hitachi
Cassettes
are
provided
with
piece
of
head
cleaning
tape
at
each
end
of
the
tape;
therefore,
all
accumulated
dirt
and
oxide
particles
are
removed
automatically
at
the
beginning
and end
of
the
tape.
CHECK
THE
FOLLOWING
BEFORE
CALLING
FOR
SERVICE
Before
you
jump
to
the
conclusion
that
it’s
out
of
order!
When
the
unit
is
not
operating
properly,
one
is
apt
to
assume
that
the
unit
is
faulty.
There
are,
however,
many
possible
faults
which
are
not
directly
attributable
to
the
unit
itself.
It
is
recommended
to
check
the
following
before
taking
the
unit
to
a
Hitachi
dealer.
[
Symptom
No
AC
power.
Cause
Is
the
AC/BATT.
(DC)
selector
set
to
AC’?
e
ls
the
power
lead
connected
properly?
Is
the
AC/BATT.
(DC)
selector
set
to
“‘DC’’?
Is
the
AC/BATT.
(DC)
selector
set
to
‘BATT’?
Are
the
batteries
properly
inserted
in
the
battery
com-
partment?
e
Are
the
batteries
exhausted?
No
car
battery
operation.
No
battery
operation.
No
sound
from
the
speaker
or
headphones.
Tape
does
not
run
when
a
button
is
pressed.
Is
the
cassette
upside
down?
Is
the
PAUSE
button
pressed?
If
so,
unlock
and
release.
e
Are
the
accidental-erasure
prevention
tabs
punched
out?
If
so,
cover
the
holes
with
plastic
tape.
Is
a
cassette
inserted
in
the
unit?
Cassette
cannot
be
inserted.
fi
recording.
Deteriorated
sound
or
irregular
tape
speed.
Slow
tape
speed
or
low
volume.
Clean
heads,
capstan
and
pressure
roller
with
a
cleaning
stick.
e
Are
the
batteries
exhausted?

SPECIFICATIONS
GENERAL
SPECIFICATIONS
Power
supply:
Power
(mains)
consumption:
Speakers:
Output:
Dimensions:
Weight:
RADIO
SECTION
Circuit
system:
Tuning
range:
Antenna
(aerials):
TAPE
RECORDER
SECTION
Tape:
Tape
speed:
Recording
system:
Erasing
system:
Playback
frequency
range:
Input
sensitivity
and
impedance:
Output
level
and
load
impedance:
AC:
110V
to
127V,
200
to
220V,
230V
to
250V,
50/60
Hz
DC:
12V
[’’D”
cell
(IEC
R20)
x
8
or
equivalent]
Car:
Use
12V
car
battery
adaptor
(optional)
18W
12
cm,
4
ohms
x
2
2
cm,
300
ohms
x
2
60W
P.M.P.
(AC
operation)
3.5W/CH
(10%
T.H.D.
DC
operation)
580(W)
x
220(H)
x
189(D)
mm
5.9
kg
(with
batteries)
FM/SW2/SW1/MW
4-band
superheterodyne
FM:
88
to
108
MHz
SW2:
7.0
to
22.0
MHz
SW1:
2.3
to
7.0
MHz
MW:
530
to
1605
kHz
FM/SW2:
Telescopic
antenna
(aerial)
SW1/MW:
Built-in
ferrite-core
antenna
(aerial)
Cassette
tape
4.75
cm/s
AC
bias
...
TAPE
Magnet
...
TAPE
60
~
12,000
Hz
CD/LINE
in:
700
mV,
100
kohms
Headphones:
8
to
100
ohms
Speakers:
4
to
8
ohms
Specifications
are
subject
to
change
for
performance
improvement
without
notice.
Table of contents
Other Hitachi Stereo System manuals

Hitachi
Hitachi FX-10 User manual

Hitachi
Hitachi AXC12EBS User manual

Hitachi
Hitachi AX-M131U User manual

Hitachi
Hitachi AXF100E User manual

Hitachi
Hitachi AX-M7E User manual

Hitachi
Hitachi AX-M68D User manual

Hitachi
Hitachi AX-M76E User manual

Hitachi
Hitachi AXM649BT User manual

Hitachi
Hitachi AXM139E User manual

Hitachi
Hitachi HPS809E User manual

Hitachi
Hitachi AXM8410C User manual

Hitachi
Hitachi AXM1204E User manual

Hitachi
Hitachi AX-M140 User manual

Hitachi
Hitachi AX-M83 User manual

Hitachi
Hitachi AX-F300 User manual

Hitachi
Hitachi AXM860E User manual

Hitachi
Hitachi axm525dbe User manual

Hitachi
Hitachi AX-M140 User manual

Hitachi
Hitachi AX-M140 User manual

Hitachi
Hitachi TRK-8190E User manual