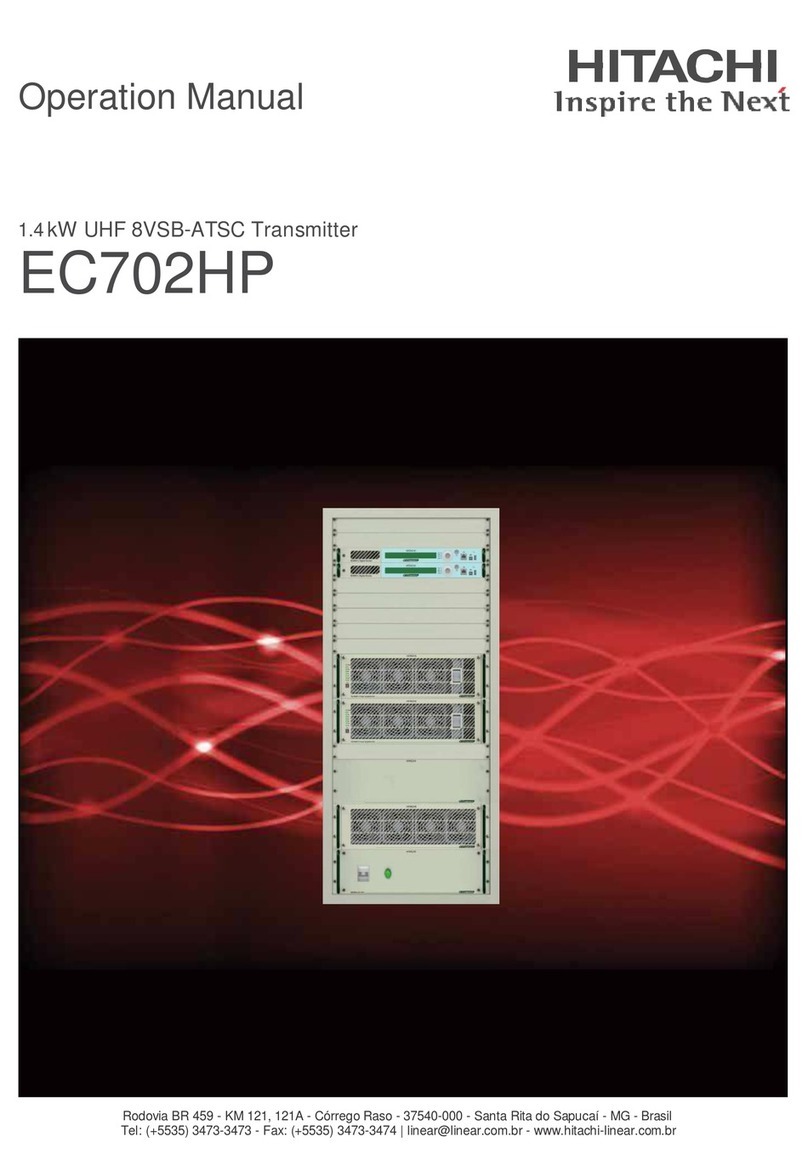
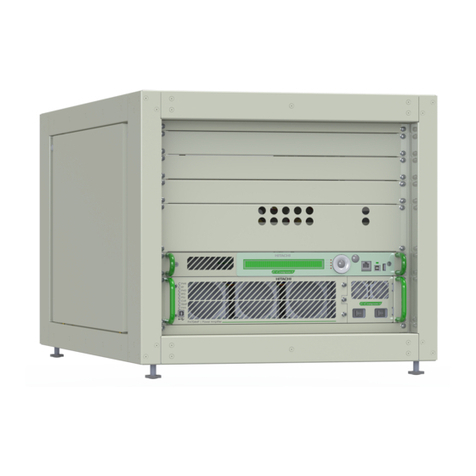
Hitachi E-Compact High Power Series User manual

1 | 169
E-Compact HP-BB3 Series
Operation Manual
UHF Digital TV Transmitters
ATSC 3.0: 930 to 3800 Watts RMS
ATSC 1.0: 1100 to 4400 Watts RMS
E-Compact High Power Series
Read before handling the equipment.
EC701HP-BB3
EC702HP-BB3
EC703HP-BB3
EC704HP-BB3

2 | 169
E-Compact HP-BB3 Series
Operation Manual
UHF Digital Transmitters
ATSC 3.0: 930 to 3800 Watts RMS
ATSC 1.0: 1100 to 4400 Watts RMS
E-Compact High Power Series
EC701HP-BB3 • EC702HP-BB3
EC703HP-BB3 • EC704HP-BB3
Rev R05 – EN-US
All rights reserved
Hitachi Kokusai Electric Comark LLC
104 Feeding Hills Rd, Soutwhick, MA 01077
United States of America
www.comarktv.com
W A R N I N G
All rights reserved to Hitachi Kokusai Electric
Comark LLC, thus any reproduction, adaptation,
translation, or misuse of this manual without prior
written permission is prohibited, except as
permitted by copyright laws.

3 | 169
E-Compact HP-BB3 Series
CONTENTS
1. Index
CONTENTS...........................................................................................................3
1. Index ................................................................................................................................................................3
2. Abbreviations .................................................................................................................................................8
3. About this Manual ..........................................................................................................................................9
4. Basic Knowledge Required.........................................................................................................................10
5. Structure........................................................................................................................................................10
Section 1 – Care, Warranty, and
Service ...............................................................................................................11
1. Care and Safety ............................................................................................................................................11
2. Warranty........................................................................................................................................................12
2.1. FCC Compliance...................................................................................................................................12
3. Technical Assistance...................................................................................................................................13
Section 2 – Minimum Installation
Requirements ....................................................................................................14
1. Introduction...................................................................................................................................................15
2. Minimum Requirements...............................................................................................................................15
2.1. AC Mains - Wire Gauge........................................................................................................................15
2.2. Grounding.............................................................................................................................................16
2.3. Stability..................................................................................................................................................16
2.4. Insulation...............................................................................................................................................16
2.5. Atmospheric Discharge Protection System ......................................................................................19
2.5.1 Lightning rods ..............................................................................................................................19
2.5.2 Protectors .....................................................................................................................................19
2.6 Air Conditioning ...................................................................................................................................19
2.6.1 Temperature..................................................................................................................................19
2.6.2 Humidity........................................................................................................................................20
2.6.3 Cooling..........................................................................................................................................20
2.7 AC Load and Thermal Dissipation Information for Infrastructure Install.......................................21
Section 3 – E-Compact BB3 High
Power Series UHF Digital
Transmitters.......................................................................................................22
1. Overview........................................................................................................................................................22

4 | 169
E-Compact HP-BB3 Series
2. Specifications...............................................................................................................................................23
3. Construction.................................................................................................................................................25
3.1. Single drive, Dual drive (optional), and touch screen display (optional).......................................25
3.2. EC701HP-BB3.......................................................................................................................................28
3.3. EC702HP-BB3.......................................................................................................................................30
3.4. EC703HP-BB3.......................................................................................................................................32
3.5. EC704HP-BB3.......................................................................................................................................34
4. Main Modules................................................................................................................................................36
4.1. Control Module CM9001 (MOD GV 40288) .........................................................................................37
4.1.1. RF Input.........................................................................................................................................37
4.1.2. Interfaces ......................................................................................................................................38
4.1.3. Communication ...........................................................................................................................40
1. ........................................................................................................................................................42
4.1.4. CM9001 Communication Schematic for EC701HP-BB3...........................................................42
4.1.5. Display interface...........................................................................................................................44
4.1.6. Equipment featurings ..................................................................................................................46
4.1.7. ALARMS - Front Panel Signaling and Shortcut Keys...............................................................47
4.1.8. System Operation (Display interface) ........................................................................................48
Main Menu > Setup...................................................................................................................................48
> Main Menu > Setup > Power: ...........................................................................................................49
> Main Menu > Setup > Transmitter Setup: .......................................................................................49
> Main Menu > Setup > Time and Date Setup: ..................................................................................49
> Main Menu > Setup > Password Setup:..........................................................................................50
> Main Menu > Setup > Alarms Mask:................................................................................................50
> Main Menu > Setup > Transistor Bias Adjustment:.......................................................................50
> Main Menu > Setup > Temperature: ................................................................................................51
> Main Menu > Setup > Control Mode:...............................................................................................51
Main Menu > Measurements ...................................................................................................................52
> Main Menu > Measurements > Power:............................................................................................52
> Main Menu > Measurements > Exciter Status:...............................................................................52
> Main Menu > Measurements > HPA Drawers:................................................................................53
> Main Menu > Measurements > HPA Drawers > RF Power: .......................................................54
> Main Menu > Measurements > HPA Drawers > Software Version: ..........................................54
> Main Menu > Measurements > HPA Drawers > Power Supply:................................................55
> Main Menu > Measurements > HPA Drawers > Drain Current:.................................................55
> Main Menu > Measurements > HPA Drawers > Temperature:..................................................56
> Main Menu > Measurements > Software:........................................................................................56
> Main Menu > Measurements > Communication Status: ...............................................................56
> Main Menu > Measurements > CM Driver Temp.: ..........................................................................57
Main Menu > System Alarms / Log.........................................................................................................57
> Main Menu > System Alarms/Log > Current Alarms:....................................................................58
> Main Menu > System Alarms/Log > Alarms/Log:...........................................................................58
> Main Menu > System Alarms/Log > Drawers Alarms:...................................................................59
> Main Menu > System Alarms/Log > Drawers Alarms > Current Alarms: ................................60
> Main Menu > System Alarms/Log > Drawers Alarms > Past Alarms:......................................60
>Main Menu > System Alarms/Log > Drawers Alarms > Clear Past Alarm:..............................61
Power Amplifiers Drawers (HPA) Alarms List...............................................................................62
> Main Menu > System Alarms/Log > Clear Alarm Log:...................................................................63
Control Module Main Alarm List.........................................................................................................63
Main Menu > Remote Access..................................................................................................................64

5 | 169
E-Compact HP-BB3 Series
4.1.9. WEB Interface – Remote Access................................................................................................65
Introduction...............................................................................................................................................65
Homepage features..................................................................................................................................67
Alarms .......................................................................................................................................................68
Log Alarms................................................................................................................................................68
Setup..........................................................................................................................................................69
Power Setup..........................................................................................................................................69
Transmitter Setup.................................................................................................................................70
PA Temperature Control......................................................................................................................70
Time and Date Setup............................................................................................................................70
Alarm Mask ...........................................................................................................................................71
Exciter....................................................................................................................................................71
Import/Export........................................................................................................................................71
Measurements ..........................................................................................................................................73
Software Version..................................................................................................................................73
Power.....................................................................................................................................................73
Communication Status........................................................................................................................74
Transistor Bias .....................................................................................................................................74
Exciter Status .......................................................................................................................................74
Drawers .....................................................................................................................................................75
Power Supply........................................................................................................................................76
Driver .....................................................................................................................................................76
Power Amplifier....................................................................................................................................77
Remote ......................................................................................................................................................80
SNMP .....................................................................................................................................................80
NETWORK.............................................................................................................................................80
User............................................................................................................................................................81
Software Update.......................................................................................................................................81
4.2. PA708HP - Power Amplifier Module (MOD GV 40272 / MOD GV 40276 )........................................82
4.2.1. Interfaces ......................................................................................................................................83
4.2.2. Specifications...............................................................................................................................84
4.2.3. Power Amplifier Drawer Functional Description ......................................................................85
4.2.4. A/C Power, RF Input and Communication Plug-In....................................................................86
4.2.5. Power Amplifier Drawer Address Configuration - MODBUS ...................................................87
4.2.6. Power Amplifier Signaling LED’s ...............................................................................................88
4.2.7. Power Supplies Signaling LED’s................................................................................................89
4.2.8. CP2000 - 2000 Watts Powers Supplies ......................................................................................89
4.2.9. Power Supply Redundancy Operation / Power Reduction ......................................................90
4.3. Dummy Loads Module.........................................................................................................................92
4.3.1. DL2K0W - Interfaces ....................................................................................................................93
4.3.2. DL2K0W - Signaling LED’s..........................................................................................................94
4.3.3. DL2K0W - Rear Connection ........................................................................................................94
4.3.4. MOD 40295 / MOD 40311 - Interfaces .........................................................................................95
4.4. EIA Low Pass Filter..............................................................................................................................96
4.4.1. Features.........................................................................................................................................96
4.5. EIA RF Output Line with Sample Probe.............................................................................................97
4.5.1. Features.........................................................................................................................................97
4.6. Mask Filter.............................................................................................................................................99

6 | 169
E-Compact HP-BB3 Series
4.7. MCCB (Molded Case Circuit Breaker)..............................................................................................100
4.7.1. 4.0kW MCCB (MOD 40307) ........................................................................................................100
4.7.2. 8.0kW to 18kW MCCB ................................................................................................................109
Interfaces.................................................................................................................................................110
Interlock Connection / Information Connection..................................................................................111
Mains Connection ..................................................................................................................................112
Circuit Breakers......................................................................................................................................113
Sparkover - Phase Surge Protection Device (SPD) ...........................................................................113
MCCB 8Kw – MOD GV 40256 (SINGLE-PHASE/2-PHASES)...............................................................115
MCCB 8Kw – MOD GV 40256 (3-PHASES)...........................................................................................118
MCCB 11Kw – MOD GV 40257 (SINGLE-PHASE/2-PHASES).............................................................121
MCCB 11Kw – MOD GV 40257 (3-PHASES).........................................................................................124
MCCB 18Kw – MOD GV 40258 (SINGLE-PHASE/2-PHASES).............................................................127
MCCB 18Kw – MOD GV 40258 (3-PHASES).........................................................................................130
4.8. Touch Screen Display (Optional)......................................................................................................133
4.8.1. Introduction ................................................................................................................................133
4.8.2. Access.........................................................................................................................................133
4.8.3. Connections................................................................................................................................134
4.8.4. Start / Configure .........................................................................................................................134
4.8.5. Touch Screen Operation............................................................................................................136
Section 4 – Installation....................................................................................137
1. Overview......................................................................................................................................................137
2. Inspection....................................................................................................................................................137
3. Installation Recommendations.................................................................................................................137
3.1. Preventive Protection ........................................................................................................................137
3.2. Tower...................................................................................................................................................137
3.3. Fastening of cables, antennas and connectors..............................................................................138
3.4. Indoors Equipment Installation.........................................................................................................139
3.5. Equipment Grounding .......................................................................................................................139
3.6. Electric Installation Grounding.........................................................................................................140
3.7. Power Supply......................................................................................................................................140
4. Equipment Assembly.................................................................................................................................141
4.1. Assembly.............................................................................................................................................141
4.2. Internal Connections..........................................................................................................................143
4.3. External RF Connections...................................................................................................................147
4.3.1. EC701HP-BB3.............................................................................................................................147
4.3.2. EC702HP-BB3.............................................................................................................................148
4.3.3. EC703HP-BB3.............................................................................................................................149
4.3.4. EC704HP-BB3.............................................................................................................................150
4.4. AC Electrical Line Connection..........................................................................................................151
4.4.1. Electrical line connection (EC701HP-BB3)..............................................................................151
4.4.2. Electrical line connection (EC702HP-BB3, EC703HP-BB3, EC704HP-BB3).........................152

7 | 169
E-Compact HP-BB3 Series
4.4.3. Electrical line connection (EC701HP-BB3)..............................................................................152
Section 5 – Initial Activation...........................................................................155
1. Overview......................................................................................................................................................155
2. Activation ....................................................................................................................................................156
3. Main Operations .........................................................................................................................................158
3.1. Power Changing.................................................................................................................................158
3.2. Communication ..................................................................................................................................158
4. Forbidden operations ................................................................................................................................158
5. Protections..................................................................................................................................................159
5.1. Reflected Power .................................................................................................................................159
5.2. Over-excitation ...................................................................................................................................159
5.3. AC Mains Line Protection..................................................................................................................159
5.4. Transmitter Operating Temperature Configuration........................................................................160
Section 6 – Preventive
Maintenance.....................................................................................................161
1. Overview......................................................................................................................................................161
2. Preventive Maintenance ............................................................................................................................161
2.1. Cleaning ..............................................................................................................................................161
2.2. Visual Inspection................................................................................................................................162
2.3. Reading Verification...........................................................................................................................162
Section 7 - Attachments..................................................................................163
1. POWER AMPLIFIER DRAWER: Fan Filter Access for Cleaning / Fan Replacement...........................164
2. DUMMY LOAD DRAWER: Fan Filter Access for Cleaning / Fan Replacement (mod 40295/40311 –
EC702HP-BB3 / EC703HP-BB3) ........................................................................................................................165
3. DUMMY LOAD DRAWER: Fan Filter Access for Cleaning / Fan Replacement (DL2K0 – EC704HP-
BB3).....................................................................................................................................................................166
4. USA AC Mains Types for E-Compact Series ...........................................................................................167

8 | 169
E-Compact HP-BB3 Series
2. Abbreviations
1PPS One Pulse per Second
A Amperes
AC Alternating Current
A-DPD Adaptive Digital Pre-distortion
AF After Filter
ALC Automatic Level Control
ASI Asynchronous serial interface
ASL Above Sea Level
ATSC Advanced Television System
Committee
BF Before filter
BISS Basic Interoperable
Scrambling System
BTS Broadcast Transport Stream
BTU British Thermal Unit
CAM Conditional Access Module
dB Decibel
DC Direct current
DDP Potential Difference
DPD Digital Pre distortion
DSP Digital Signal Processing
DVB-S Digital Video Broadcasting –
Satellite
DVB-S2 Digital Video Broadcasting –
Satellite – 2nd generation
FPGA Field Programmable Gate
Array
FWR Forward
HKC Hitachi Kokusa Electric
Comark
IP Internet Protocol
ISDB-T Integrated Services Digital
Broadcasting Terrestrial
(Brazil)
ISDB-Tb Integrated Services Digital
Broadcasting Terrestrial
LCD Liquid Crystal Display.
LPC Linear Pre correction
MCCB Molded Case Circuit
Breakers
MER Modulation Error Rate
MFN Multiple Frequency Network
MSps Million Sample per Seconds
N/A Not/Apply
NLPC Non-Linear Pre Correction
PA Power Amplifier
PCMCIA Personal Computer Memory
Card International
Association
PFC Power Factor Correction
PID Packet Identifier
PLL Phase Locked Loop
PS Power Supply
PSI Program-specific information
PSU Power Supply Unit
PW Power
RPM Rotations Per Minute
RTP Real-time Transport Protocol
RU Rack Unit
SFN Single Frequency Network
SI Service Information
SNMP Simple Network Management
Protocol
SNR Signal to Noise Ratio
TMCC Transmission and
Multiplexing Configuration
Control
TS Transport Stream
TSoIP Transport Stream over
Internet Protocol
U RU - Rack Unit
UDP User Datagram Protocol
UHF Ultra High Frequency
UPS Uninterruptable Power
Supply
VVolts
VAC Volts Alternating Current
VGA Variable Gain Amplifier
VGS Voltage Gate Source
VSWR Voltage Standing Wave Ratio
WxDxH Width x Depth x Height

9 | 169
E-Compact HP-BB3 Series
3. About this Manual
The purpose of this manual is to provide technical information required for the installation
and operation of High-Power E-Compact series of UHF TV signal transmitters (digital
ATSC).
EC701HP-BB3
930W UHF ATSC 3.0 Transmitter (6-poles filter)
1.1kW UHF ATSC 1.0 Transmitter (6-poles filter)
EC702HP-BB3
1.86kW UHF ATSC 3.0 Transmitter (6-poles filter)
2.2kW UHF ATSC 1.0 Transmitter (6-poles filter)
EC703HP-BB3
2.85kW UHF ATSC 3.0 Transmitter (6-poles filter)
3.3kW UHF ATSC 1.0 Transmitter (6-poles filter)
EC704HP-BB3
3.8kW UHF ATSC 3.0 Transmitter (6-poles filter)
4.4kW UHF ATSC 1.0 Transmitter (6-poles filter)
Hitachi Kokusai Electric Comark LLC recommends that you carefully read this manual
before installing or operating this equipment.
This manual is intended for use by qualified, trained installers.
Read this manual before working with the product. For personal and system safety,
as well as for optimum product performance, one must be sure to thoroughly
understand the contents before installing, operating, or maintaining this product.

10 | 169
E-Compact HP-BB3 Series
4. Basic Knowledge Required
The mandatory knowledge and skills to operate the equipment are as follow:
•Knowledge of RF electronic circuits
•Knowledge of electricity and electrical systems
•Knowledge of digital electronics
•Experience conducting tests and Digital TV signals measurements in ATSC standard
•Knowledge of transmission antenna
•Experience operating radio frequency measurement equipment
•Practice in the management of radio frequency measures equipment (spectrum Analyzer,
RF power meter, Vector Network Analyzer, couplers, attenuators, etc)
5. Structure
This manual is comprised of seven (7) sections, which provide the following information:
Section 1 – Care, Warranty, and Service
This section indicates the necessary care with the equipment, warranty criteria, and
technical assistance is needed.
Section 2 – Minimum Installation Requirements
This section comprises the minimum infrastructure requirements for installing these
devices, such as AC power, protection against lightning, and air conditioning.
Section 3 – E-Compact BB3 High Power Series UHF Digital Transmitter
This section presents all equipment characteristics, such as description, models,
functional description, and technical specifications of all models of the E-Compact
series High Power Transmitters.
Section 4 – Installation
This section provides procedures for physical and electrical installation.
Section 5 – Initial Activation
This section describes which steps to perform in the initial activation of the equipment.
Section 6 – Preventive Maintenance
This section provides information for preventive maintenance.
Section 7 – Attachments
This section provides additional information for this document.

11 | 169
E-Compact HP-BB3 Series
Section 1 – Care, Warranty, and Service
1. Care and Safety
Never open the device, as there is a risk of electric shock. If necessary, contact Comark
customer service.
Before Connecting the Machine to the AC Mains, one must ensure that the grid
Voltage meets the equipment’s settings.
Never expose the equipment to rain, moisture or direct sunlight, in order to avoiding risk of
fire or electric shock.
Avoid risks of accidents with regards to heights and electricity. Always install or
maintain this equipment by qualified technicians.
Never turn on the equipment without connecting it to an Antenna or RF Load, as this may
cause serious damage to the Equipment.
Never unplug any Power Amplifier Drawer while the Transmitter is on, as this
may result in a risk of equipment damage.

12 | 169
E-Compact HP-BB3 Series
2. Warranty
1. All equipment shall have warranty coverage by the supplier against manufacturing or assembly faults conducted by the
supplier for the period of 12 months, beginning upon the issuing of the sales invoice. The period is irrevocable except in cases
of extended warranty previously noted in the contract.
2. During warranty time, the supplier will repair, with no additional charge, the faulty products, providing adjustments, replacing
or re-manufacturing all the equipment or its modules and components that present unusual behavior;
2.1. The repaired/replaced products are covered for an additional period of 3 (three) months or up to the end of the original
warranty time, taking into count the longer period;
2.2. If the additional 3 (three) months term, referred above, is higher than the original warranty term, the warranty will only
extend to the repaired/replaced modules or components;
2.3. The warranty will become effective in the supplier’s factory; therefore, it is not a responsibility of the supplier: the
shipment of any modules, components or any other equipment or accessory. These expenses will be, when due, a responsibility
of the Purchaser.
2.4. The Purchaser may choose to have the supplier’s technical personnel travel to the Purchaser’s location, instead of
submitting the goods for factory repair, although the expenses relative to transportation, lodge and nourishment of the supplier’s
technicians will occur at sole expense of the Purchaser, upon budget approval.
3. The supplier is relieved of the warranty terms in the hereinafter situations:
3.1. Faults or defects caused by AC Mains variation, atmospheric phenomena or accidental;
3.2. Faults or defects caused by inadequate installation of the goods, not complying with the OPERATING MANUAL(S) or
by negligence of the minimum infrastructure requirements in the installation site, which is referred in the ANNEX 1 herein
attached.
3.3. Faults or defects caused by inadequate usage of the products, not complying with the OPERATING MANUAL(S) or by
lack of proper preventive maintenance recommended in the product’s manual.
3.4. In event of the goods and its accessories are submitted to 3rd Party maintenance, unauthorized by the supplier, as well
as removal or violation of its serial number.
4. The supplier shall employ, during warranty term, original parts and components listed by the product’s manufacturer.
5. The technical assistance must be held by the SUPPLIER or its accredited personnel or companies, failing which will result in
warranty voidance.
2.1.FCC Compliance
This equipment has been tested and found to comply with the limits for a Class A Digital device, pursuant to part 15 of
the FCC Rules. These limits are designed to provide reasonable protection against harmful interference when the
equipment is operated in a commercial environment. This equipment generates, uses, and can radiate radio frequency
energy and, if not installed and used in accordance with the instruction manual, may cause harmful interference to
radio communications. Operation of this equipment in a residential area is likely to cause harmful interference in which
case the user will be required to correct the interference at his own expense. The antenna(s) used for this transmitter
must be fixed-mounted on the outdoor permanent structures. RF exposure compliance is addressed at the time of
licensing, as required by the responsible FCC Bureau(s), including antenna co-location requirements of §1.1307(b)(3).
2. Changes or modifications not expressly approved by Hitachi Kokusai Electric Comark LLC could void the user's
authority to operate the equipment. 3. This device complies with part 15 of the FCC Rules. Operation is subject to the
following two conditions: (1) This device may not cause harmful interference, and (2) this device must accept any
interference received, including interference that may cause undesired operation.

13 | 169
E-Compact HP-BB3 Series
3. Technical Assistance
Since several devices are received in our Quality Management System without proper
identification and explanations; we are now working with previous approval for
maintenance devolution.
Therefore, in case of maintenance please contact:
Hitachi Kokusai Electric Comark LLC
Phone:
(800) 345-9295
/ Fax: (413) 998-1194 E-mail: support@comarktv.com
While submitting a requestion for assistance, please provide the following information:
Customer name, Equipment Part Number, Serial Number, and a brief explanation of the
occurrence.
With this intel we shall send the ARM number (Authorization for Return of Material), which
is mandatory for the invoice.

14 | 169
E-Compact HP-BB3 Series
Section 2 – Minimum Installation
Requirements
1.Adequate Grounding
2. Proper Lightning protection system
3.Shelter with ventilation, footprint, and temperature in
compliance with the transmitter’s standards
4. Voltage stabilizer or UPS (with isolating transformer)
according to the transmitter’s consumption
5. Surge suppressors
W A R N I N G
Minimum infrastructure requirements for
installation and operation of TV transmitters
Noncompliance with any of above-mentioned terms
will automatically result in the hereinafter
suspension of the warranty terms.

15 | 169
E-Compact HP-BB3 Series
1. Introduction
This section provides information on the minimum installation requirements for ATSC E-
Compact Series transmitters with recommendations on shelter, tower, antennas, cables,
grounding, mains, transient preventions, etc.
2. Minimum Requirements
2.1.AC Mains - Wire Gauge
The following details the consumption with the equipment running at its maximum power.
Current (A) on each wire:
The current values specified in the table are according to the load of each phase, which
will determine the size of the conductors and protection.
Said gauge is the minimum recommended for the transmitter in question, if the cable
length is large, consider voltage drop in the cable maximum of 5%.
The section of the neutral conductor should be the same as the phase.
The section of the ground conductor must be the same as the conductor’s phase.
M110 M220 B220 T220 T380
110VAC ±15%
Between Phase
and Neutral
220VAC ±15%
Between Phase B
(Wild Leg) and
Neutral
220VAC ±15%
Between
2-Phases
220VAC ±15%
Between
3-Phases
380VAC ±15%
Between 3 Phases
220VAC ±15%
Between Each
Phases and
Netural
AC load for infrastructure install (A) - E-Compact Series - ATSC
MODEL M110 M220 / B220 T220 T380
(A) Wire Gauge (A) Wire Gauge (A) Wire Gauge (A)
Typical Wire Gauge
mm² AWG mm² AWG mm² AWG mm² AWG
EC701HP-BB3 18.1 8.36 810.4 5.26 10 6.0 3.31 12
EC702HP-BB3 34.6 16.77 520.0 10.55 711.5 5.26 10
EC703HP-BB3 51.6 26.67 329.8 13.3 617.2 8.36 8
EC704HP-BB3 72.4 33.63 241.8 21.15 424.1 10.55 7
Not available or uncommon use

16 | 169
E-Compact HP-BB3 Series
2.2.Grounding
The grounding system to which the Comark TV transmitter will be attached is suggested to
be designed and implemented by a qualified professional. An improper grounding system
may jeopardize the equipment as well as the lives-of the professionals working in the
shelter. To be considered proper, the grounding is suggested have a resistance of no more
than 5 Ohms.
It is recommended that all of the devices involved in the transmission system are that the
same potential, so that there is no DDP, favoring the equilibrium of the flow of the
atmospheric load.
It is important to state that if there is a need for chemical alteration of the soil, in order to
provide the lowest impedance, it establishes a temporary condition for not being part of the
natural chemistry of the place, thus being naturally absorbed. In this condition, preventive
soil analyzes should be conducted as preventive maintenance procedure.
2.3.Stability
The voltages in each TV Transmitter phase should be stabilized. The use of voltage
stabilizers or stabilized uninterruptible power systems (UPS’s) is necessary since these
devices can protect the TV transmitter from power surges. The voltage stabilizer or UPS
design would be most effective if exclusively used with the Comark TV transmitter and is
sized to operate at least 30% above the kVA consumption specified by the TV transmitter.
For example, for the TV transmitter with maximum consumption of 38kVA, a voltage
stabilizer, or 50kVA UPS should be used.
Input voltage variations above 15% of the rated values specified for the Comark TV
transmitter may cause damage to the equipment and in this case will not be covered by the
factory warranty. In addition, it is important to check the potential difference between the
ground and neutral terminals (if any) that will be connected to the Comark TV transmitter.
This potential difference should be at most 3V.
2.4.Insulation
It is important to have isolation between the energy stations of the shelter and the TV
transmitter, which is achieved with the usage of isolator transformers. This guarantees that
no AC Mains’ transient coming from the shelter will be passed on to the TV transmitter or
vice-versa. Besides, Comark’s transmitters feature switching power supplies that require
purely sinusoidal power inputs and voltage regulators / no-breaks without isolator
transformers that have no assurance of a purely sinusoidal outputs. It is suggested that the
isolator transformer should also be exclusive to the transmitter and its dimensioning should
use the same standards employed in the dimensioning of the voltage regulators / no-break
(ie, at least 30% higher than the specified consumption transmitter’s (KVA)).

17 | 169
E-Compact HP-BB3 Series
Recommendations
1. We recommend that the transmitter "never see" the power grid directly.
2. We recommend the use of online double-conversion UPS and / or Delta-
conversion online UPS built with transformer insulation and with power
factor correction (PFC).
No break Example with Isolating Transformer
Benefits:
These types of UPS bring great protection and insulation to the transmitter due to its design.
The double conversion occurs because the AC network converts to DC and the DC voltage
converts back to AC, which eliminates any disturbance in the AC mains when converted to
DC, thus protecting the transmitter.
It is important to note that UPS’s do not necessarily need to have a battery bank, thus
minimizing the cost of the final product. This solution is much better than a conventional
stabilizer due to double conversion.
The correction of the power factor (PFC) in the no break is necessary to reduce the cost
of the electric energy, as it reduces the reactive power (VAr) and the total power (VA).
It is important to emphasize that it is not efficient to have a transmitter with power factor
correction (PFC) powered by a no-break without PFC, as all the advantage achieved
by the transmitter is lost in the UPS, resulting in no energy savings. When this type of
connection made you actually have an excellent load (resistive behavior) for the no-
break but your power grid will see the no-break input (without PFC, high consumption).
When we have a power factor correction (PFC) UPS, it perofrms well (low reactive
power, low power consumption) within the network even if it is connected to a PFC-free
transmitter, as it will correct the power factor of the entire system.

18 | 169
E-Compact HP-BB3 Series
Nobreak capatibity
Nobreak Power= PTX * (cos ĭ*Ș(nobreak) )
P
TX
:
Real Power [W]
cos ĭ:Transmitter Power Factor Correciton
Ș
(nobreak)
:
Nobreak efficiency
Double Conversion Online Nobreak
Delta Conversion Online Nobreak
STATIC BYPASS SWTICH
CACC
CA
CC
RECTIFIER INVERTER
BATTERY
STATIC BYPASS
SWITCH
DELTA TRANSFORMER
CONVETER DELTA PRINCIPAL
INVERTER
BATTERY

19 | 169
E-Compact HP-BB3 Series
2.5.Atmospheric Discharge Protection System
2.5.1 Lightning rods
The Atmospheric Discharge Protection System consists of the lightning rods and their
elements. The tower and shelter where the equipment will be installed must be protected
against atmospheric discharges by means of lightning arresters.
It is important to determine that all ferrous parts and accessories that make up the
Atmospheric Discharge Protection System should be galvanized.
In the path comprised of the lightning rod to the drainage well, no splicing is allowed,
much less pathways with acute angles (angles of less than 90º).
2.5.2 Protectors
The use of coaxial protectors is advisable for cables connecting external devices
(antennas, microwave heads, tower inverters) to the internal ones. These protectors are
devices equipped with gas spark plugs, which shorten to earth any discharge occurring in
the coaxial cable. They should be kept in the shelter near the equipment and with the
ground wire connected to the ground of the equipment rack.
It is favorable to use Faraday’s Ring or Cage on hilltops and areas of many transmission
sources, which in turn isolates the transmitter from the electromagnetic fields avoiding
interference caused by induction.
2.6 Air Conditioning
2.6.1 Temperature
For better performance and longer equipment life, it is important that, under the shelter,
the temperature is controlled strictly by means of air conditioners. For the shelter’s
design, one should consider the thermal dissipation specified for the transmitter (reported
in BTU / h), the dissipation of the other devices inside the shelter, the thermal load
generated by the solar incident, and other thermal loads present in the shelter. In
addition, it is recommended that the shelter’s internal pressure be slightly positive to
prevent the entry of contaminants. According to the transmission power, the internal
temperature of the shelter should be:
• E-COMPACT LOW POWER TV TRANSMITTERS: from 0º to 35ºC
• E-COMPACT MEDIUM POWER TV TRANSMITTERS: from 0º to 30ºC
• E-COMPACT HIGH-POWER TV TRANSMITTERS: 0º to 25ºC
If Comark equipment is damaged by the lack or inefficiency of the HVAC system, it will NOT
be covered by the factory warranty.

20 | 169
E-Compact HP-BB3 Series
2.6.2 Humidity
Relative air humidity inside the shelter is also considered a critical factor for improved
performance and longer equipment life. Comark equipment should operate in dry
environments, which can also be achieved using air conditioners. According to the
transmission power, the relative humidity inside the shelter should be:
• E-COMPACT LOW POWER TV TRANSMITTERS: 0 to 90%
• E-COMPACT MEDIUM POWER AND HIGH-POWER TV TRANSMITTERS: 0 to 80%
There must never be condensation since water can damage the internal circuits of the
transmitter.
2.6.3 Cooling
Cooling must be always in circulation, with the air conditioning lowering the temperature of
the room, without external air intake. For better performance of the cooling system, the air
conditioner must be installed in series with the transmitter cooling cycle, directing the
output air conditioning flow to the front of the Comark transmitter.
The physical installation of the transmitter should protect a free area around it for better
cooling efficiency and access to maintenance. See image below:
This manual suits for next models
4
Table of contents
Other Hitachi Transmitter manuals
Popular Transmitter manuals by other brands

ACR Electronics
ACR Electronics COBHAM B406-4 Abbreviated component maintenance manual

elero
elero TempoTel 28 260.0001 operating instructions

M-system
M-system W2PA instruction manual

Insignia
Insignia NS-M35FMT Quick setup guide

SMAR
SMAR TT302 Operation and maintenance instruction manual

Lucoro Broadcast
Lucoro Broadcast FMTX1 user manual