Hitron CGNV4 User manual

YOUR HITRON
CGNV4 ROUTER
QUICK REFERENCE GUIDE

WELCOME TO
YOUR NEW HITRON
BROADBAND ROUTER FROM
VIRGIN MEDIA BUSINESS
CONTENTS
Getting To Know Your Hitron CGNV4 Router 6
Top Tips 8
Setting Up Your Router 10
Making A WiFi Connection 12
Wireless Network Settings 14
Configuring Your Wireless 16
Setting Your Router Manually 18
How To Add A New Device To Your Wireless Network 26
How To Set Up A Wired Connection 27
What Is Dual Concurrent WiFi? 28
IP Addressing Explained 30
Need More Help? 32
Ultrfst is our most intense brodbnd
experience of the Internet, running t up to
300Mbit/s. But this isn’t just bout speed – it’s n
instnt upgrde for every device nd pp in your
business. How mny new things you do with this
whole universe of possibility is up to you.
Do more, sell more, be more.
Are you redy to ?

GETTING TO KNOW
YOUR HITRON
CGNV4 ROUTER
BEFORE YOU BEGIN,
PLEASE CHECK YOUR
HITRON BOX CAME
WITH THE FOLLOWING
EQUIPMENT:
• 12v 2.5 Amp (30W) power
adapter for UK mains
• RJ45 Ethernet cable
(1.8 metres long)
ABOUT YOUR
HITRON ROUTER:
IT EQUIPMENT
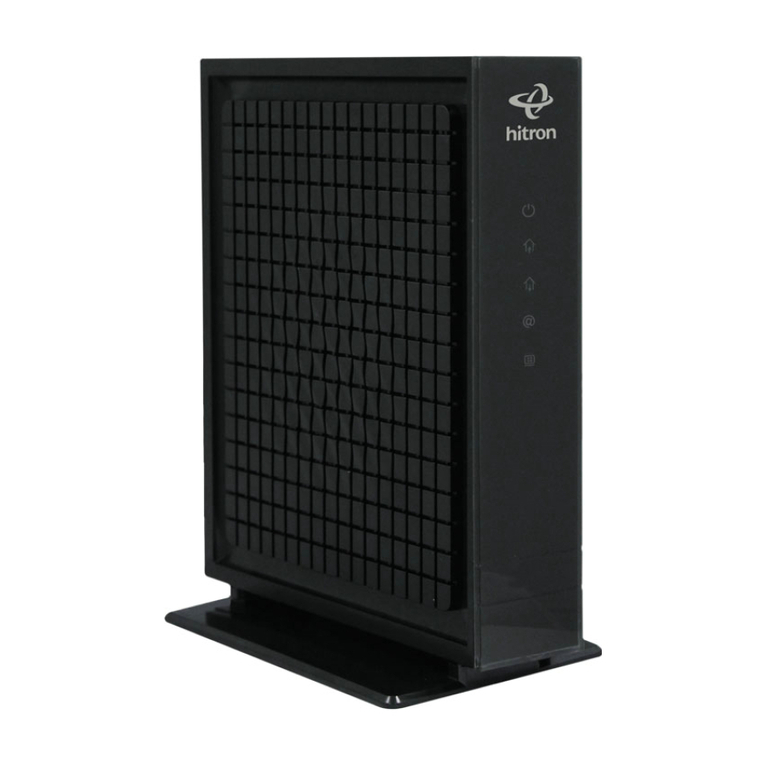
Cable modem to connect your devices to the Internet.
WIRELESS
WLAN supporting dual concurrent band wireless
‘n’ at 2.4GHz and 5GHz and wireless ‘ac’ at 5GHz.
Both bands use IEEE 802.11n/ac WiFi access and
are backward compatible with A/B/G devices.
WIRED DEVICES
Gigabit LAN switch and 4 port Gigabit Ethernet.
SECURITY
Configurable software firewall for setting
filters and controls.
7HITRON CGNV4

2. Don’t hide your router wy
Putting it inside a filing cabinet or closed shelving
can block your wireless signal.
3. Get clerer signl
Keep your router away from other electrical devices
and remember the more space around it the better
the signal. Your computer or device may also perform
better by changing from 2.4GHz to 5GHz if your
device is compatible with 5GHz functionality.
4. Switch chnnel by rebooting
Your router transmits a radio signal on a particular
wireless channel within the 2.4GHz band. If another
nearby wireless device is transmitting on the same
channel, the two will be fighting it out for the airwaves.
By rebooting your router it will automatically pick the
least congested channel, so it’s a good idea to do this
every now and again just in case a new wireless device
is competing for the airwaves.
10
11
12
6. You cn dd dditionl devices to your
wireless network
If you use all your WiFi devices at the same time,
your speed is shared across all of them and your
broadband speed might suffer. Try to stagger
downloading large files or run updates outside
office hours to ease congestion.
8. Tking dvntge of dul concurrent WiFi
If your device is compatible you’ll see the WiFi
network name finishing with 5G (e.g. VM123456-5G). 2.4GHz 5GHz
TO GET THE BEST WIRELESS CONNECTION,
YOU NEED TO MAKE SURE IT’S IN A HAPPY
PLACE. HERE’S HOW TO MAKE SURE YOUR
KIT WORKS AT ITS BEST.
TOP TIPS
1. Stnd your router upright
Stand your router on its back with the lights on
the front facing into the room.
5. Some devices re better for wireless thn others
For example, the more modern your computer the
better the wireless performance is likely to be.
But it isn’t just about how old your device is.
Tablets and smartphones are a brilliant way to
access the Internet, but they can’t give you the same
wireless performance as modern computers just yet.
7. Access your Hitron Network Mnger to personlise
your settings to suit your business’ needs
Connect your device to the router wirelessly or using
an Ethernet cable. In your web browser address bar,
enter ‘ADMIN’. Enter your password in the Hitron
Network Manager, which will be your WPS PIN and
click the Sign In button.
9HITRON CGNV4

SETTING UP
YOUR ROUTER
WE’LL INSTALL THE ROUTER
FOR YOU. BUT TO ENSURE YOUR
ROUTER IS RUNNING AS IT SHOULD,
PLEASE CHECK THE LIGHTS.
POWER
WPS/PBC
CABLE
RESET
LAN 1-4
LINE 1-2
USB*
LED STATUS DESCRIPTION
DS Green,
flashing The router is searching for a downstream frequency on the CABLE connection.
Green,
steady
The router has successfully located and locked onto a downstream
frequency on the CABLE connection.
Blue The router is engaged in channel bonding on the downstream connection.
Off There is no downstream activity on the CABLE connection.
US Green,
flashing The router is searching for an upstream frequency on the CABLE connection.
Green,
steady
The router has successfully located and locked onto an upstream
frequency on the CABLE connection.
Blue The router is engaged in channel bonding on the upstream connection.
Off There is no upstream activity on the CABLE connection.
STATUS Flashing The router’s cable modem is registering with the service provider’s CMTS.
On The router’s cable modem has successfully registered with the
service provider and is ready for data transfer.
LAN
Off No device is connected to one of the LAN ports.
Green,
steady
A device is connected to one of the LAN ports via a Fast Ethernet
(100Mbit/s) link, but is not transmitting or receiving data.
Blue,
steady
A device is connected to one of the LAN ports via a Gigabit Ethernet
(1000Mbit/s)) link, but is not transmitting or receiving data.
WIRELESS
(2.4GHz)
Off The 2.4GHz wireless network is not enabled.
Green,
steady
The 2.4GHz wireless network is enabled and no data is being transmitted or
received over the 2.4GHz wireless network.
Green,
flashing
The 2.4GHz wireless network is enabled and data is being transmitted or
received over the 2.4GHz wireless network.
WIRELESS
(5GHZ)
Off The 5GHz wireless network is not enabled.
Green,
steady
The 5GHz wireless network is enabled and no data is being transmitted or
received over the SGHz wireless network.
Green.
flashing
The 5GHz wireless network is enabled and data is being transmitted or
received over the SGHz wireless network.
LINE
1 and 2 –Use these ports to connect your analogue phones for VoIP services,
using cables with RJ11 connectors.
RESET –
Use this button to reboot or reset your router to its factory default settings.
To reboot: press the button and hold it for less than five seconds. The router
restarts, using your existing settings. To reset: press the button and hold it for
more than ten seconds. All user-configured settings are deleted, and the router
restarts using its factory default settings.
LAN
1, 2, 3 and 4 –Use these ports to connect your computers and other network devices,
using Category 5 or 6 Ethernet cables with RJ45 connectors.
WPS/PBC –
Press this button to begin the WiFi Protected Setup.
(WPS) Push-Button Configuration (PBC) procedure.
Press the PBC button on your wireless clients in the coverage area
within two minutes to enable them to join the wireless network.
The lights indicate the router is operating correctly. If you
move or unplug your equipment, please check the status of the
lights to ensure that things are working as they should.
*Please note: The USB port on your router will not be available and has been deactivated.
11HITRON CGNV4

MAKING A WIFI
CONNECTION
THE STICKER ON THE BACK OF YOUR
ROUTER CONTAINS THE INFORMATION YOU
NEED TO MAKE A WIRELESS CONNECTION.
1. WIFI NETWORK NAME SSID
This is the network name broadcasted by
your router. You need to select either 2.4GHz
or 5GHz network name (if shown) from your
computer or device’s wireless manager to
connect wirelessly. The Hitron router has a
dual concurrent WiFi feature.
2. PASSPHRASE
This is the passphrase (or WiFi password) you
will be prompted to enter after selecting your
WiFi network name (SSID).
HERE ARE THE KEY BITS EXPLAINED:
1 2
2.4GHz
SSID: AB9876543210
PassPhrase: 9876543210AB
5GHz
SSID: 1234567890YZ
PassPhrase: YZ1234567890
13HITRON CGNV4

WIRELESS
Select the relevant tick box to Enable / Disable
2.4GHz or 5GHz wireless functionality on your
router. Please see page 28 for more information.
SECURITY MODE
We recommend you select the ‘WPA Auto’
option. This gives you good security and the
connection will be supported on most computers
and devices.
SSID
This is the Service Set Identified (the name for
your wireless network). Simply leave it as the
default, or change the name to something else
if you prefer.
PASSPHRASE
You’ll find this on the back of your router. You can
change it so it’s more secure if you like.
CHANNEL
Your router will automatically scan and set itself
to the best available channel – but if you want
to you can choose any channel you like. This is
handy if there are signal interruptions caused by
microwaves, DECT phones or something similar.
WIRELESS
NETWORK SETTINGS
TO CHECK THE DEVICE’S CONNECTION
STATUS YOU’LL NEED TO LOG INTO THE
HITRON NETWORK MANAGER THEN
CLICK THE WIRELESS NETWORK SETTINGS
BUTTON ON THE LEFT HAND SIDE.
YOU’LL SEE THE FOLLOWING:
Plese note: The user experience quality may
deteriorate if the number of concurrent WiFi users
increases above 20 users.
15HITRON CGNV4

CONFIGURING
YOUR WIRELESS
EVERYTHING YOU NEED TO MAKE
YOUR WIRELESS SETUP WORK
FOR YOU, WHICHEVER DEVICE
YOU’RE CONNECTING UP.
You can create your own wireless guest network name. This can be anything
up to 32 (case sensitive) alpha/numeric characters. When connecting any
wireless enabled devices, you need to search for this name. In order to ensure
your wireless network remains secure, it’s important you use wireless security.
Failure to do so will leave your network and internet connection accessible to
third parties. On top of standard WLAN SSID you can set up two guest networks
per wireless channel (2.4GHz and 5GHz). Just go to advanced settings on the
Hitron Network Manager and click on the network you wish to amend:
Now visitors have access to your network, and the Internet, for as long as
you need them to. Don’t forget, guest networks use locally administered
MAC addresses. And remember, anyone using your network can potentially
make it unstable.
There are two ways to connect a wireless device to your router. Either
follow the simple WPS push-button method below, or follow the manual
method on page 18 depending on your operating system e.g. for Windows
Vista please go to page 23.
SIMPLE WPS PUSHBUTTON METHOD
Step 1: Press and hold the round WPS button until it flashes.
Step 2: Open your device’s Network Manager, or find the WPS button
on your device. Make sure you do this within two minutes of the button
flashing. If you can’t find it, follow the manual method on the next few
pages, or check your device’s user manual.
GUEST NETWORKS:
CONNECTING A WIRELESS DEVICE:
• 2.4GHz 1st guest wireless network
• 5GHz 1st guest wireless network
• 2.4GHz 2nd guest wireless network
• 5GHz 2nd guest wireless network
17HITRON CGNV4

SETTING YOUR
ROUTER MANUALLY
HERE ARE INSTRUCTIONS FOR YOUR
COMPUTER’S OPERATING SYSTEM.
WINDOWS 10 SET UP
Step 1
To access the list of available wireless
networks in Windows 10, click or tap
the Network icon ( ) from the
system tray.
Step 2
Locate your VMB SSID and click or
tap on its name and select the option
that says Connect automatically.
This way, whenever your device is
within the network’s range, it will
automatically connect.
Step 3
Once you click or tapConnect,
Windows scans for the security settings
of the network. It will ask you for its
security key that can be located.
Once you have entered the
passphrase required by the
network, click or tapNext.
If you want to double check the
accuracy of the passphrase, click or
tap the Eye icon ( ) before you
press Next.
That’s it! You should now be connected.
19HITRON CGNV4

WINDOWS 8 SET UP
Step 1
From the Start menu move your cursor
to the top right or bottom right corner
of the Start screen. A sidebar with five
icons will open.
Step 2
Click the icon at the bottom of
the sidebar and the settings panel
will open.
Step 3
Click the Available icon to show a list of WiFi connections available.
Step 4
Depending on the type of device, one
or two Virgin Broadband WiFi networks
(also known as SSID) will appear and
will be something like VM123456-2G
and/or M123456-5G.
We recommend you connect to the
5GHz wireless network connection
if your device is compatible (if your
device isn’t compatible it won’t show
you this option). See page 28 for
more information.
Click the network name and then
click Connect. If you don’t see these in
the list, click Flight mode to On and
then Off to scan again for available
wireless networks.
Step 5
Tick Connect automatically and click
Connect if you want this to be your
default wireless connection. Otherwise
just click Connect.
Step 6
Finally, you’ll be asked to enter the
Network Security Key (WiFi password)
for your router. This is printed on the
back of the unit. Once entered, click
Next (or click Next and just press the
WPS button on the front of the router).
That’s it! You should now be connected.
Settings
21HITRON CGNV4

WINDOWS 7 SET UP
Step 1
First locate the wireless network icon in the
system tray on the bottom right hand corner
of your screen.
Step 2
Click on the icon to show a list of wireless
network connections available.
Depending on the type of device, one or
two Virgin Broadband wireless network
connections (also known as SSID) will appear
and will be something like VM123456-2G
and/or VM123456-5G.
We recommend you connect to the 5GHz
wireless network connection if your device is
compatible (if your device isn’t compatible it
won’t show you this option). See page 28 for
more information.
Click the network name and then Connect.
Note: If you don’t see your connection, try clicking the
double arrow in the top right corner of the menu to scan
again for available wireless networks.
Step 3
Next, you should be prompted for the security
key or passphrase. This is printed on the back of
your router. Enter the security key and then click
Connect. To hide the security key on the screen
as you type it, tick the box Hide characters.
That’s it! You should now be connected.
WINDOWS VISTA SET UP
Step 1
Locate the wireless network icon in the
system tray on the bottom right hand corner
of your screen. Right click and select
Connect to a network.
Step 2
You should now see all the available
wireless networks.
Depending on the type of device, one or
two Virgin Broadband wireless network
connections (also known as SSID) will appear
and will be something like VM123456-2G
and/or VM123456-5G.
We recommend you connect to the 5GHz
wireless network connection if your device is
compatible (if your device isn’t compatible it
won’t show you this option). See page 28 for
more information.
Click the network name and then Connect.
Please note: If you don’t see your connection,
try clicking the double arrow in the top right corner
to scan again for available wireless networks.
Step 3
Next, you should be prompted for the security
key or passphrase. This is printed on the back of
your router. Enter the security key and then click
Connect. To show the security key on the screen
as you type it, tick the box Display characters.
That’s it! You should now be connected.
23HITRON CGNV4

WINDOWS XP SET UP
Step 1
Locate the wireless network icon in the
system tray on the bottom right hand
corner of your screen. Right click on the
icon and select View Available
Wireless Networks.
Step 2
You should now see all the available
wireless networks. If you don’t see any
wireless networks listed, click on Refresh
network list on the left hand side.
Depending on the type of device, one or
two Virgin Broadband wireless network
connections (also known as SSID) will
appear and will be something like
VM123456-2G and/or VM123456-5G.
We recommend you connect to the
5GHz wireless network connection if your
device is compatible (if your device isn’t
compatible it won’t show you this option).
See page 28 for more information.
Click the network name and then Connect.
Step 3
Next, you should be prompted for the
network key. The default network key
is printed on the back of your router.
Enter the network key (passphrase) and
then click Connect. You may need to
re-enter your network key (passphrase).
That’s it! You should now be connected.
MAC OS SET UP
Step 1
First click the AirPort wireless icon in the
top right of the screen, near the clock.
If you don’t see this icon, you’ll need to
connect to your wireless router via:
> Apple
> System Preferences
> Network
> AirPort
or, on older Macs, via:
> Applications
> Internet Connect
Your router should appear in the list as
VM123456-2G and/or VM123456-5G.
The actual network name (known as the SSID)
can be found on the back of the router.
Step 2
Click the network name.
If you have the option of ‘2G’ which
is 2.4GHz, or ‘5G’ which is 5GHz,
we recommend that you select 5G –
see page 28 for more information.
You should then be prompted for the
password. The default password
(passphrase) can be found printed on
the back of your router.
Then click OK.
That’s it! You should now be connected.
25HITRON CGNV4

HOW TO SET
UP A WIRED
CONNECTION
Step 1
Check that your computer has an Ethernet socket (it’s usually marked LAN)
and plug it in.
Step 2
Plug the other end of the Ethernet cable into one of the four Ethernet ports at
the back of the Hitron router. You can add 3 more wired devices by using the
remaining ports.
1
2
Step 1
Bring your device into the same room as the Hitron router. This will give
you the strongest wireless connection. (Don’t worry, once it’s connected
you can move around the office.)
Step 2
Select your wireless network from those available.
Open the wireless settings or Network Manager
on your device, then select your wireless network.
Depending on the type of device, one or two WiFi
network names (SSID) will appear and will be
something like VM123456-2G and/or VM123456-5G. Your WiFi
network names (SSID) can be found on the label on the back of your
router. We recommend you connect to the 5GHz SSID if your device is
compatible (if your device isn’t compatible it won’t show you this option).
Step 3
Enter the password (passphrase) for your
network when asked. You can also find this on
the back of your router.
That’s it! Your device should now be connected.
HOW TO ADD A
NEW DEVICE TO YOUR
WIRELESS NETWORK
FROM COMPUTERS AND LAPTOPS, TO
PRINTERS AND SMARTPHONES YOU’LL BE
SURPRISED AT HOW MANY DEVICES YOU
CAN CONNECT TO YOUR ROUTER.
WHEN YOU NEED TO SETUP A DIRECT
NETWORK TO VARIOUS DEVICES
USING ETHERNET CABLING.
27HITRON CGNV4

Wht is dul concurrent WiFi?
When you’re online, your WiFi connection uses radio waves
to pass information to and from your computer and wireless
devices like tablets and smartphones. Right now, just about all
broadband providers use the same radio band, which is 2.4GHz.
2.4GHz is a bit like a busy motorway. With so many people
using the same band at the same time, there’s lots of
congestion so information travels slower. It’s also affected
by other things like microwaves and DECT phones because
they use the same band to function too.
The router lets you connect to a different and less busy
band which is 5GHz.
Wht’s the difference between 2.4GHz
nd 5GHz signl?
As a general rule, the 5GHz band has a shorter
range but is great for demanding activities like
downloading large files. The 2.4GHz band is
better for long range but is more likely to suffer
from interference. An easy way to make sure
you’re getting the best connection is to check
your wireless manager and check the connection
strength by the number of bars showing.
How do I connect to dul concurrent WiFi?
If your device is 5GHz compatible it will
automatically pick up both the 2.4GHz and 5GHz
WiFi network names (SSID). All you need to do
is select the 5GHz SSID for compatible devices
and you’re away! If your device is not 5GHz
compatible you’ll only have the option to connect
to the 2.4GHz SSID. What’s also great is that you
can connect multiple devices on both 2.4GHz
and 5GHz at the same time, so all your devices
can access the best possible WiFi available. To
access, you simply click on the WiFi network
name (SSID) finishing with ‘2G’ or ‘5G’ in your
wireless manager, enter the WiFi password and
you’re up and running straight away.
Wek signl
Strong signl
2.4GHz 5GHz
WHAT IS DUAL
CONCURRENT WIFI?
HOW YOUR ROUTER MANAGES THE
GROWING DEMAND OF DAYTODAY
INTERNET TRAFFIC.
2.4GHz
5GHz
5GHz
29HITRON CGNV4

IP ADDRESSING
EXPLAINED
STATIC AND DYNAMIC IP ADDRESSES,
WHAT’S THE DIFFERENCE?
2. Run one or more email servers directly on your site that require
external access from the Internet
3. Run one or more FTP servers directly on your site that require
external access from the Internet
4. Run one or more DNS servers directly on your site that require
external access from the Internet
5. Run any other service or apps that require external access from
the Internet. Some licensed applications use a static IP address
for licensing purposes.
You require or allow incoming video or audio services or run an on-site
IPPBX. However, in some cases audio and/or video client applications
(including some IPPBXs) will require you to connect, or register, with an
external server which will forward incoming traffic. When using these
types of clients/applications you may not need a static IP address.
Please check the details with us.
IP ddresses on your router
A single dynamic public IP address will automatically be allocated to your
Business Broadband service. Dynamic IP addresses can change if you
reset your gateway device or switch it off and on again. IP addressing
within your network is then managed by the DHCP (Dynamic Host Control
Program) server built into the gateway. Each connected device will be
dynamically allocated an IP address when it’s connected to one of your
networks. Once allocated a private IP address, each of your devices can
communicate with other devices and services on your network and the
public Internet via the Hitron Network Address Translation (NAT) function.
We can supply static IP addressing but you need to request this at the
time of ordering. The available options are 1, 5 or 13 usable public IP
addresses. Multiple static IP addresses will be allocated as a sub-net of
sequential addresses. Once allocated, IP address sub-nets cannot be
extended. In the case that a larger allocation is required the old sub-net
must be replaced with a new one. This will require reconfiguration of the
gateway and the connected devices.
There re two types of IP ddresses – sttic nd dynmic
Static IP addresses are the same every time you connect to the Internet.
They’re used by all major websites, email services, FTP services and so on.
Dynamic IP addresses may change each time you connect to the Internet
and every time you send a message over the Internet.
When would I need dynmic IP ddresses?
You may require dynamic IP addresses if you use our broadband services
for any of the following:
1. Browsing the Internet
2. Sending and receiving emails via an off-site mail server (the normal
method and typically using your ISPs mail server) or a typically web
based mail service such as Gmail, Hotmail, Yahoo etc
3. Downloading or uploading files (using FTP or HTTP)
4. Instant messaging services or chat services
5. Running services such as web or FTP servers that ONLY require access
from your local area network (single site) or perhaps within a multi-site
corporate network, and DO NOT require or allow access from the Internet.
When would I need sttic IP ddress?
You may require one or more static IP addresses if you’re using
our broadband service for any of the following:
1. Run one or more web servers directly on your site that require
external access from the Internet
31HITRON CGNV4

60/60
Turn everything off and wait for a full minute. Then turn on your router,
wait another minute, then turn on your computer or device.
Check the connections to your router
Check all router cables and connections are properly in and the power is on.
Check the WiFi network nme
Check you’ve chosen the correct SSID (WiFi network name) from the list of
available wireless networks on your computer. Check you’ve entered your
network security key (WiFi password) correctly. It’s on the sticker on the back
of your router. If it’s been changed or forgotten, retrieve it by accessing the
Hitron Network Manager and view the wireless network settings page.
Check your wireless is switched on
For a laptop, check for a small side button. Some tablets also have a function
to turn wireless on and off.
Check your device’s wireless set up
For PCs you can normally find it by clicking on an icon in the bottom right
hand corner of your screen. Try clicking ‘Troubleshoot problems’.
Switching between 2.4GHz nd 5GHz
If your computer displays both SSIDs try switching from 2.4GHz to 5GHz or
vice-versa. For more information, see page 28. Your router won’t work at full
capacity if you’ve got other, slower wireless devices connected. If you don’t
have inbuilt wireless you’ll need to install wireless adapters before configuring
(you can buy USB adapters from us).
NEED MORE HELP?
FROM TIME TO TIME, YOU MAY DISCOVER
A LITTLE GLITCH WITH YOUR WIRELESS
CONNECTION. WE’LL HAVE YOU BACK UP
AND RUNNING IN NO TIME.
ENGINEER INSTALL ONLY:
WiFi network nme (SSID):
Network key (pssphrse):
Dte:
Account number:
Router mngement ppliction:
Web ddress: http://192.168.0.1
Pssword: changeme (enter in web browser address bar)
There’s lso plenty of helpful informtion online
if you don’t see wht you need here. Or you cn
cll us nd we’ll do our best to help you.
virginmedibusiness.co.uk/brodbndhelp
0800 052 0800
Plese note: Once installed, we’re no longer responsible for your local network or device support.
But rest assured, we’ll make sure the Hitron router we provide is replaced if it breaks down.
33HITRON CGNV4

CODE: QSG-UFBB-1215
Registered Office: Medi House, Brtley Wood Business Prk, Hook, Hmpshire, RG27 9UP. Registered in Englnd nd Wles No. 01785381.
Other manuals for CGNV4
1
Table of contents
Other Hitron Network Router manuals