Hiyoshi DP90-CN1 User manual

5th Edition
www.hiyoshidenki.co.jp
Hiyoshi Electric Manufacturing Co.Ltd.
User's Manual
Model DP90-CN1
Hybrid Anemometer

1.1 Meter Description
1-1
2.1 Introduction 1-1
2-1
2.2 Warranty
2-1
2.3General Specification 1-1
2-1
2.4 Range Specifications 1-1
2-1
2.4.1 Wind velocity 1-1
2-1
2.4.2 Temparature 2-1
2.4.3 Static Pressure 2-1
3.1 Measuring Preparation 3-1
3-1
3-1
3-1
3-1
3-1
4.1 Maintenance and Caution 4-1
4-1
Table of Contents
3-2 Wind velocity Measurement
3-3 Static Pressure Measurement
3-4 Measuring at height
3-5 Battery Replacement
3-6 Probe Exchange

1-1
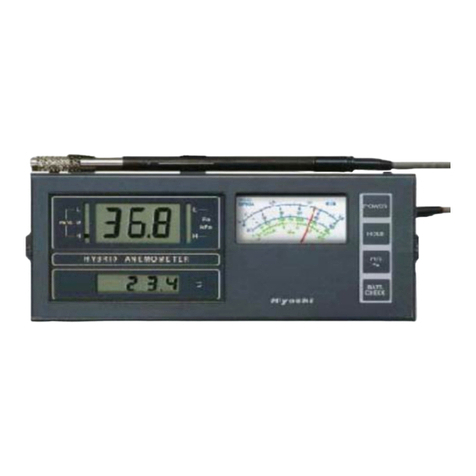
1. Digital Display (Wind velocity,Static pressure)
2. Digital Display (Temparature)
3. Analog Display
4. Key pad (See Below)
5.
6.
DP90-CN1
Batt.check: Press to check the current Battery level.
1-1 Meter Description
HOLE : Press to Freeze the currently measured value.
DP90-CN1
Digital Display
Wind
velocity,Static
Pressure
Digital display
(Temparature)
Analog meter
POWER KEY
HOLD KEY
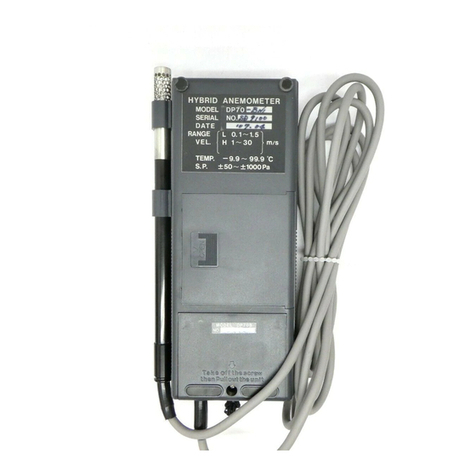
Battery Compartment are located on the back of the meter.
m/s pa KEY
BATT.CHECK KEY
sensor
(probe)
Sensor : Place the sensor in the area to be measured.
Power : Press to Turn the Meter on or off.
m/s pa : Press to Select the Wind velocity or Static pressure.

2-1
2-1 Introduction
Congratulations on your purchase of Hiyoshi's Hybrid-Anemometer.This meter measures
and displays Wind Velocity ,Static Pressure and Temparature This meter is shipped fully
tested and calibrated and,with proper use, will provide years of reliable service.
2-2 Warranty
Hiyoshi Electric Manufacturing co.,Ltd warrants this instrument to be free of defects in
parts for one year from date of shipment If it should become necessary to return the
instrument for service during the warranty period, contact the Customer Support
at support@hiyoshidenki.co.jp The sender is responsible for shipping charges, freight,
insurance and proper packaging to prevent damage in transit. This warranty does not
apply to defects resulting from action of the user such as misuse, improper, operation
outside of specification, improper maintenance or repair, or unauthorized modification.
2-3 General Specifications
Display Combined Analog,Digital Disply
Units of measure Wind velocity m/s (meters per second)
Static Pressure pa,kpa (pascal,kilopascal)
Temperature C°(celsius)
OutPut Linear output,apllicable in wind velocity,static pressure 0~1VDC.Wind velocity 0~50m/s
Pressure 0~±10kpa
Data hold Holds the currently Measure value when pressed during measure(only digital display)
Operating Temp -10~80 C°
Operating Humidity 65±20% RH
Enviromental Condition 1013 hPa Clean Air
Power Supply 6V battery
Weight Approx.1.5kg
Dimensions Meter (210 x 90 x 67mm);
Anemometer Probe Diameter x 9.5" (177mm)
Accessories Extendable Antenna,Soulder Bag, Static Adapter, User's Manual,Test Data
2-4 Range specification :
2-4.1 Velocity
Measurment Range Resolution Accuracy (%of span)
m/s(meter/second) 0.1-1.5m/s (0.01) ±(5%)
m/s(meter/second) 1-10 m/s (0.1) ±(5%)
m/s(meter/second) 5-50 m/s (0.1) ±(5%)
2-4.2 Temparature
Range Resolution Accuracy (%of span)
-10℃to100℃ 0.1% ±1.0
2-4.3 Static Pressure
Range Resolution Accuracy (%of span)
± 20 to ± 2.00kpa (1) ±5%
±1.00kpa to ±9.99 kpa (1) ±5%
DP90CN1

3-1
3-1 MEASURING PREPARATION
3-2 Wind velocity Measurement
Directivity point of the probe towards the windward exactly.
The tip of the probe will detect the wind velocity. Press the POWER button to turn the
Instrument on, The "L" range is selected to measure the wind velocity.
The Automatic range-switching function operates from "L"to "M" or "H" when a wind
The wind velocity is reading on Large LCD display , Analog meter simultaneously and
*Use Analog meter reading in case of severe fluctuations.
*The measuring function display is blinking during the "HOLD"
3-3 Static pressure Measurement
Press the POWER button to turn the Instrument on,Select the "m/s Pa" button to measure the
Static pressure and confirm indication of "Pa or kpa" on the measuring function display then
the static pressure will be displayed on the digital display , analog meter simultaneously and
Static pressure adapter:
Slightly loosen the unit of the accessory static pressure adapter ,insert the probe as far as possible ,
align the rear fitting of the probe and the white line on the static pressure adapter,and tighten the
nut. Place the orifice in the center of the rubber plate of the adapter on to the location where the
pressure is to be measured. For Example :A hole with diameter of about 10mm in a duct.
Positive pressure can be measured with the orifice at the head of the probe,while negative can
be measured with the orifice at the side.
The same number as the detection unit is attached to the adapter static pressure.
The measured values can not be guaranteed when used in combination with those other numbers.
Please use the same number of means be measured with the orifice at the side.
Use the accessory probe holder for measuring near the ceiling and at other high locations
(free retraction and extension between 0.2 mand 1m).
If the Digital Display does not switch on when the POWER button is pressed or when BATT.CHECK
button is pressed the disply shows "B0" ,Repalce the batteries
1. Remove the battery compartment.
2. Replace the 4 "AA"1.5V batteries observing polarity
* If the meter will not be used for long time, remove the batteries
If the probe should become damaged,Please contact the nearest sales office or
Hiyoshi Electric company .to buy a new one .
*The measuring values can not be guaranteed when a probe of a different model is used.
The pointer of the analog meter should aways be at the lower end (left end) of the scale before
power on.
lower LCD sub-disply shows the temperature reading.
Taking Measurements
3-4 Measuring at height
Press the POWER button to turn the instrument on .
Press the POWER button to disply the model name (90A,90B,90C) and Battery indicator (b0-b9)
Remove the probe from the clip, hold the probe by the handle in the area to be measured.
velocity corresponding to the "M"or "H"range is detected.
3-5 Battery Repalcement
3-6 PROBE EXCHANGE
DP90-CN1
lower LCD sub-display shows the temparature reading .

4-1
1The probe should never be exposed to temperatures of 100℃ or more.
2. In case of "Out of Range"
3.
4.
As measuring errors will be caused by clogging of the hole or the net at the tip of the probe,they
should be cleaned from time to time with a soft hair brush or by washing with alcohol,bezine,etc.
5. The digital display shows strange characters sometimes instanneously .It is no problem for
LCD'S character.
6. Auto switch off : 20 min.after last key press .
Temparature
Static Pressure
Blinking Values and dots"………"
Blinking Values
Output :0-1VDC/0-50m/s 0-10kpa
DP90-CN1
4-1 Maintenance and Caution
Under Range
Over Range
Wind Velocity
------

5th Edition
Printed in Japan
Hiyoshi Electric Manufacturing Co.Ltd.
〒223-0061
Tel 81-45-561-5500 Fax 81-45-561-8753
Aug.2016
5-23-48, Hiyoshi ,Kohoku-ku Yokohama, Kanagawa, Japan
Table of contents
Other Hiyoshi Measuring Instrument manuals
Popular Measuring Instrument manuals by other brands

PCE Health and Fitness
PCE Health and Fitness TDS 75 user manual
Trotec
Trotec 3110008001 operating manual
Sifos Technologies
Sifos Technologies PhyView PVA-3000 Reference manual
FLIR
FLIR DM284 quick start guide
Computech Systems
Computech Systems EGT Plus 4100 Series manual
Campbell
Campbell EPPLEY PSP instruction manual
