HMP LFGpro User manual


CONTENTS
Service +49(0)391 2514666 02/2017 Instruction Manual HMP FGpro – en
1
General Information
Applications .................................................................................... 2
Safety instructions .......................................................................... 2
Intended Use .................................................................................. 3
Technical Terms of Reference / Transport ..................................... 3
The Light Weight Deflectometer
Construction of the Instrument ....................................................... 4
Function .......................................................................................... 5
Specifications ................................................................................. 5
Electronic Settlement Measuring Instrument HMP LFGpro ...................... 6
Measuring
Getting Ready for Measuring ....................................................... 10
Measuring Procedure ................................................................... 11
Store, Print and Display Current Measured Data ......................... 12
Completing the Test ..................................................................... 13
Error Menus .................................................................................. 13
Measured Data
Display / Print the Stored Measured Data .................................... 14
Export the Stored Measured Data ................................................ 14
Delete Measuring Results ............................................................ 15
Settings
General ......................................................................................... 16
Display .......................................................................................... 16
Device ........................................................................................... 17
Printer ............................................................................................ 17
Service .......................................................................................... 17
Calibration Menu .......................................................................... 18
Maintenance Menu ....................................................................... 18
Options
Thermal printer AP1300 ................................................................ 19
Maintenance and Repair
Cleaning ........................................................................................ 22
Calibrating ..................................................................................... 22
Hotline ........................................................................................... 22
Attachment
1 Certificate „BASt-authorised calibration institute …“
2 Certificate of Conformity

GENERAL INFORMATION
Service +49(0)391 2514666 02/2017 Instruction Manual HMP FGpro – en
2
Applications
The dynamic plate load test employing the ight Weight Deflectometer is used
in earthworks and traffic route construction. It serves to determine the soil
bearing capacity and the degree of compaction of soils and non-cemented
base courses, and assists in soil improvement.
The test method is suited for coarse-grain and mixed-grain soils with a
maximum grain size of 63 mm. It may be used to determine the deformation
modulus of soil within the measuring range of E
vd
= 15…70 MN/m².
Further applications
❙
Road- and railway construction, earthworks
❙
Quality assurance in canal construction
❙
Compaction control in pipe trenches
❙
Testing of pavement beddings
❙
Testing of foundation backfill
❙
Quality inspection in boreholes
❙
Testing of modulus of deformation within the framework of soil examination.
The ight Weight Deflectometer being easy to handle and use is particularly
suited for intra-company monitoring.
Safety instructions
Information for sers
This instruction manual was prepared such that users can easily become
familiar with the » ight Weight Deflectometer – WD«, abbreviated herein-after
as WD, and make use of the tester for intended applications.
Users should carefully read this instruction manual and the safety instructions
prior to using the WD. Follow the instructions contained in this Instruction
Manual without exception.
Symbols sed
Warnings and instructions are highlighted as described below:
Warning
This symbol is used in conjunction with related text to draw user's
attention to hazards and risks which may cause bodily harms, failure
of tester components or adversely affect operating procedures, in
case users do not take the corresponding precautions.
Note
This symbol and the related text identify technical requirements and
provide additional information to be taken into account by the
operator to carry out the following operations effectively and safely.

GENERAL INFORMATION
Service +49(0)391 2514666 02/2017 Instruction Manual HMP FGpro – en
3
Legal terms of reference
The ight Weight Deflectometer complies with the current state of the art and
all applicable safety regulations.
The WD meets the basic safety requirements laid down in the EU Directives
for Harmonisation referenced in the EC Certificate of Conformity.
Construction and function of the WD meet the requirements laid down in
»Technical Test Code for Soil and Rock in Road Construction TP BF – StB
Part B 8.3 / Issue 2012« and »ASTM E2835-11 – Standard Test Method for
Measuring Deflections using a Portable Impulse Plate oad Test Device«.
Intended se
The ight Weight Deflectometer is exclusively intended for determining the soil
bearing capacity and the compaction quality of the soil referred to »Technical
Test Code for Soil and Rock in Road Construction TP BF – StB Part B 8.3 /
Issue 2012« and »ASTM E2835-11 – Standard Test Method for Measuring
Deflections using a Portable Impulse Plate oad Test Device«.
Its intended use also includes:
❙
Compliance with the safety instructions and safety regulations contained in
this operating manual;
❙
Compliance with the maintenance and servicing instructions contained in
this operating manual.
Any other use or any use beyond this definition is not intended and may cause
injury to people and damage to property.
The manufacturer/supplier shall not be held liable for damages resulting from
other than the intended use. The risk shall be borne solely by the user.
Technical Terms of Reference / Transport
To avoid damage to the unit and prevent accidents during transport the ight
Weight Deflectometer is provided with a transportation lock which is fixed to
the guide tube during transport.
The LWD is equipped with a transportation lock designed to avoid
damage to the instrument and make sure that it can be safely
transported and handled. This lock must be used to secure the drop-
weight on the guide tube whilst the equipment is moved from job to
job.
The drop height determined for the drop-weight by calibration ( calibration
record) has been preset. The drop height is secured against changes and
must not be altered by the user.
Engage the drop-weight in the release mechanism prior to any test. To release
the drop-weight, just actuate the release mechanism.
Prior to any measurement, test the release mechanism to be sure it
functions as necessary.
Support the drop-weight by hand after every impact to avoid faulty
measurements.

THE LIGHT WEIGHT DEFLECTOMETER
Service +49(0)391 2514666 02/2017 Instruction Manual HMP FGpro – en
4
Construction of the Instrument
The WD consists of the following assemblies:
❙
oading mechanism
❙
oad plate
❙
Electronic settlement measuring instrument
Loading Mechanism and Load Plate
Construction of loading mechanism and load plate is described below with
reference to Figure 1.
Loading mechanism
1 Handle 5 Drop-weight
2 Release mechanism 6 Transportation lock
3 Bubble level 7 Resilient element with prestressed
disc springs 4 Guide tube
Load plate
8 Cap with sensor
9 Sensor socket (to connect the measuring cable)
10 oad plate carrying handles
The sensor which serves to measure the settlement is arranged under the
cap (8) of the load plate. The leads of the sensor are led out on the sensor
socket (9) and are connected to the electronic settlement measuring instru-
ment via a measuring cable.
Electronic Settlement Measuring Instrument
The battery-operated settlement measuring instrument is housed in a hand-
held case.
Settlement measuring instrument
(Figure 2)
1 TFT colour display
2 Measuring cable
3 Ambient ight Photo Sensor
4 USB port
5 Printer port
6 Function keys
Carrying case
(Figure 3)
1 Carrying case
2 Settlement measuring instrument,
beneath: USB cable, charger for printer (optional)
3 USB car charger, USB stick
4 AC/DC adapter (beneath cover)
5 Thermal printer AP 1300 (optional)
10
2
3
4
5
6
7
8
9
1
2
3
4
5
1
6
2
5
3
4
1
Figure
1
Figure
2
Figure
3

THE LIGHT WEIGHT DEFLECTOMETER
Service +49(0)391 2514666 02/2017 Instruction Manual HMP FGpro – en
5
Function
The load plate is placed on the prepared area to be tested and the loading
mechanism is positioned on the load plate. Thereafter the connection is made
to the settlement measuring instrument. When the drop-weight is released and
drops freely onto the resilient element, the loading mechanism generates a
defined impulsive load. Thereby the total settlement of the soil under the load
plate is measured.
After the measuring routine is started (after the precompaction) three
measuring impacts are to be performed. After each impact, the measuring
instrument displays the settlement in millimetres and the settlement curve.
Upon completion of a series of measurement the individual settlement
amplitudes, the average settlement s
m
, the
path-speed-ratio s/v
and the
calculated deformation modulus E
vd
are displayed on the screen.
Results may be printed via a thermal printer or a printer at the PC, if required
(only instruments with thermal printer or PC-software).
Specifications
Mechanical loading mechanism
Total weight 15.0 kg
Weight of drop-weight 10.0 kg
Maximum impact force 7.07 kN
Duration of impact 17.0 ± 1.5 ms
Resilient element package comprising prestressed
disc springs
Load plate
Diameter 300 mm
Plate thickness 20.0 mm
Weight 15.0 kg
Electronic settlement measuring instrument
Power supply Rechargeable ithium-ion polymer
battery pack
( ithium polymer battery pack)
Dimensions 210 mm x 100 mm x 31 mm
Weight 0.45 kg
Settlement range measured 0.1 to 2.0 mm ± 0.02 mm
Range measured deformation modulus E
vd
< 225 MN/m²
Temperature range 0 bis 40 °C
Display 3.5“ TFT colour display
Interfaces Bluetooth, USB, thermal printer
GPS integrated
Memory capacity up to 1000 test series

THE LIGHT WEIGHT DEFLECTOMETER
Service +49(0)391 2514666 02/2017 Instruction Manual HMP FGpro – en
6
Electronic Settlement Measuring Instrument HMP LFGpro
Operation
The electronic settlement measuring instrument HMP LFGpro can be
operated easily and intuitively by means of the function keys.
Key Functions
Switch on / off measuring instrument
Select upward
Select downward
Select to the left / Scroll
Select to the right / Scroll
Confirm selection / Start action
Buttons/Symbols
The currently active button is displayed with colour, the inactive buttons are grey.
Main menu
Measuring page 11
(precompaction, measuring, store)
Measured data page 14
(… read, print, export, delete)
Settings/Service page 16.
(display, device, printer, support, calibration)
General
Back to the previous menu
Next / measuring initiate
Restore measurement readiness
Scroll (test series/measured data)
Store
Delete
Print test series
Export test series page 14
a

THE LIGHT WEIGHT DEFLECTOMETER
Service +49(0)391 2514666 02/2017 Instruction Manual HMP FGpro – en
7
Display
In the main menu the display is subdivided into status line and button area
(Figure 4).
In the submenus the display is subdivided into status line, button area/
indicating area and footer (Figure 5). With the keys can be switched
between button area/indicating area and footer.
The information on the left of status line will be changed according to several
menus. In the main menu (Figure 4) type and number of device are displayed
for example.
The information on the right side of status line is the same in all menus:
Status Bluetooth
displaying in status line, in case Bluetooth is active
(during data transfer only)
Status GPS
displaying in status line, in case GPS is active and available
State of charge of the printer
displaying in status line, in case printer is connected
State of charge of the measuring instrument
Overview Menu Functions
Measuring Precompaction
Measuring Store E
Delete D
Print B
Export Q
Measured data Show single measurements Print B
Export Q
Export Q
Delete (all measurements) D
Settings Display K Date
Time
anguage
Device X Drop weight
GPS
Unit
Calibration
Printer B Head datea
Date/time
Graphics
Service L
Calibration menu M
Maintenance R
By confirming the button G you always come back to the previous menu.
Figure
4
Figure
5

THE LIGHT WEIGHT DEFLECTOMETER
Service +49(0)391 2514666 02/2017 Instruction Manual HMP FGpro – en
8
Power Supply
The electronic settlement measuring instrument HMP LFGpro is powered by a
rechargeable ithium-ion polymer battery pack (abbreviated herein-after as
ithium polymer battery pack) which is provided with overcharge protection
and deep discharge protection.
Safety
❙
Do not dismantle, open or shred Lithium polymer battery pack.
Exposure to the ingredients contained within or their ingredients
products could be harmful.
❙
Do not expose Lithium polymer battery pack to heat or fire. Avoid
storage of device/battery pack in direct sunlight.
❙
Lithium polymer battery pack must not be short-circuited.
❙
Do not subject Lithium polymer battery pack to mechanical shock.
❙
Observe local, state and federal laws and regulations for disposal.
❙
The supplied accessories must only be used for devices supplied
by HMP and according to this instruction manual. Any other use
may cause damages.
Switching-off automatically
The electronic settlement measuring instrument HMP LFGpro switches off
automatically, in case there is no action for about 90 s.
The device will not switch off automatically, as long as it is in the
measuring mode.
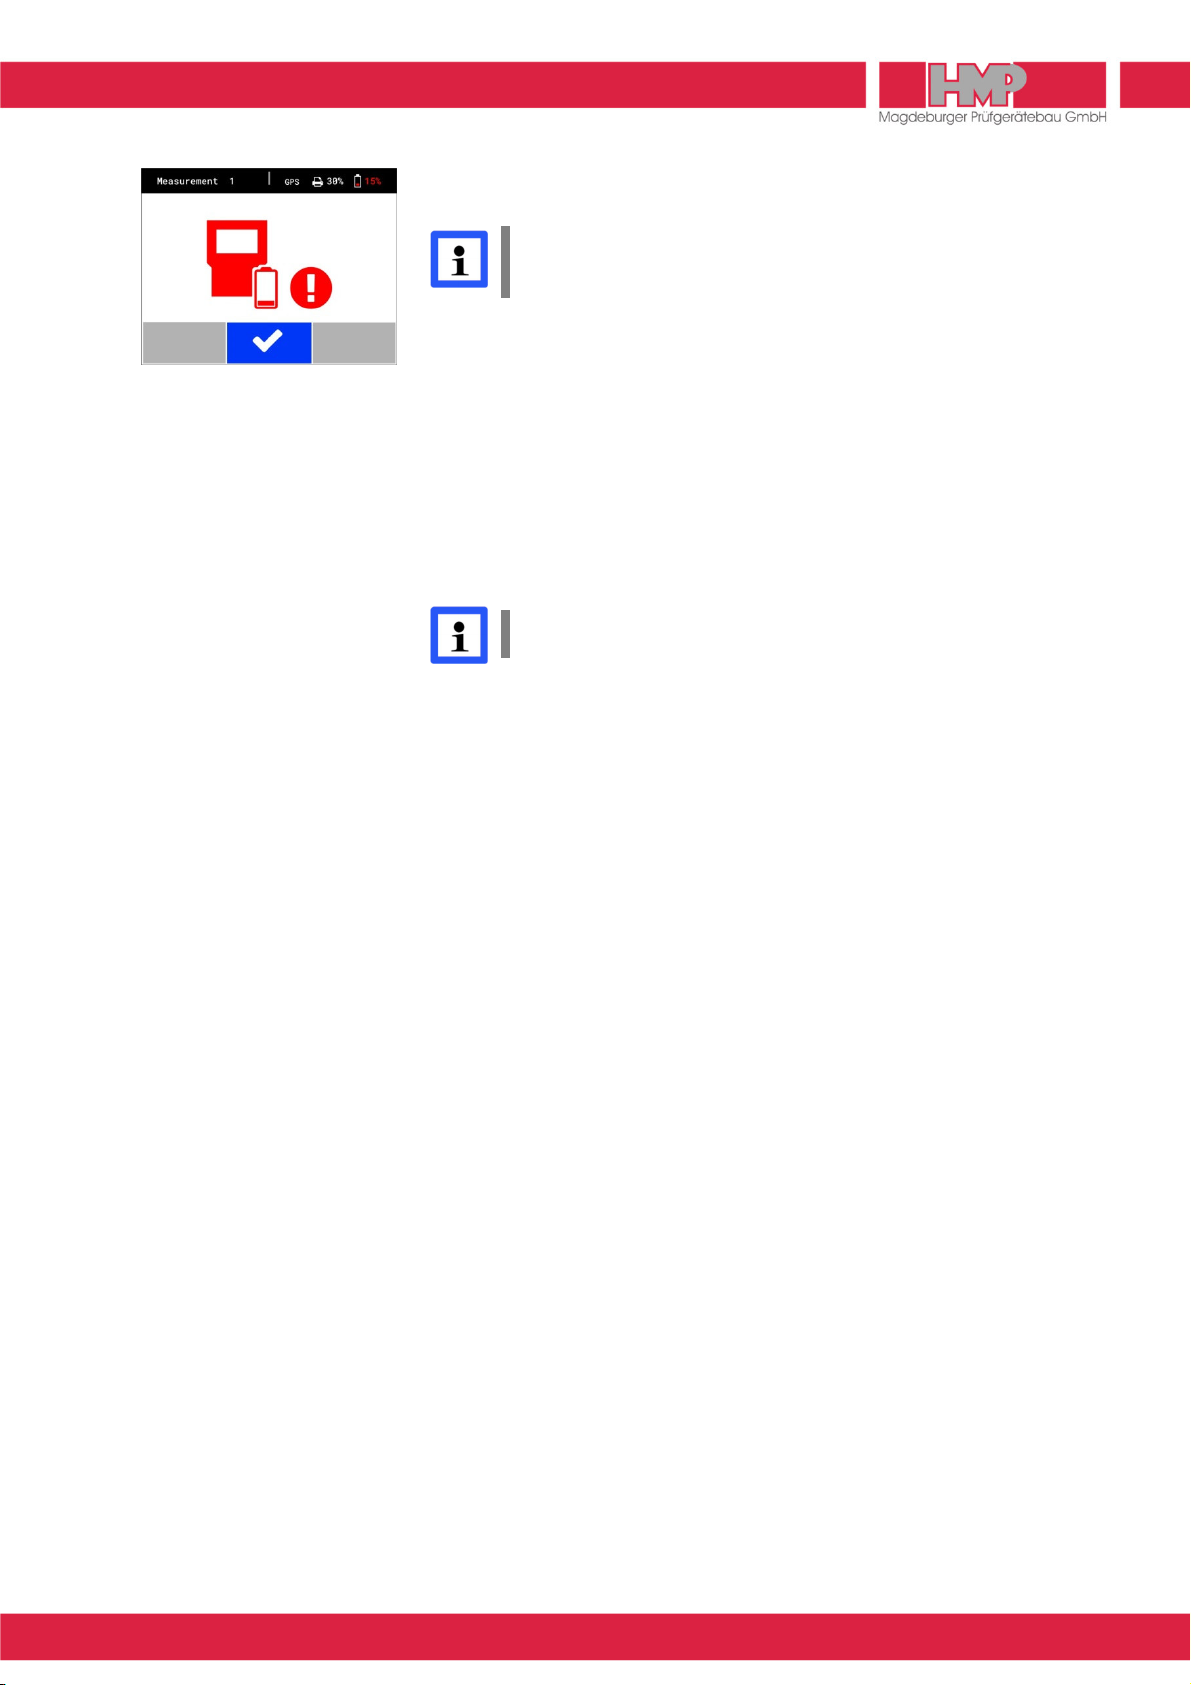
If the ithium polymer battery pack of the electronic settlement measuring
instrument drops below the voltage required for operation, the device switches
off automatically, in order to prevent a deep discharging of the battery pack.
Before switching on the instrument again, please charge the battery pack.
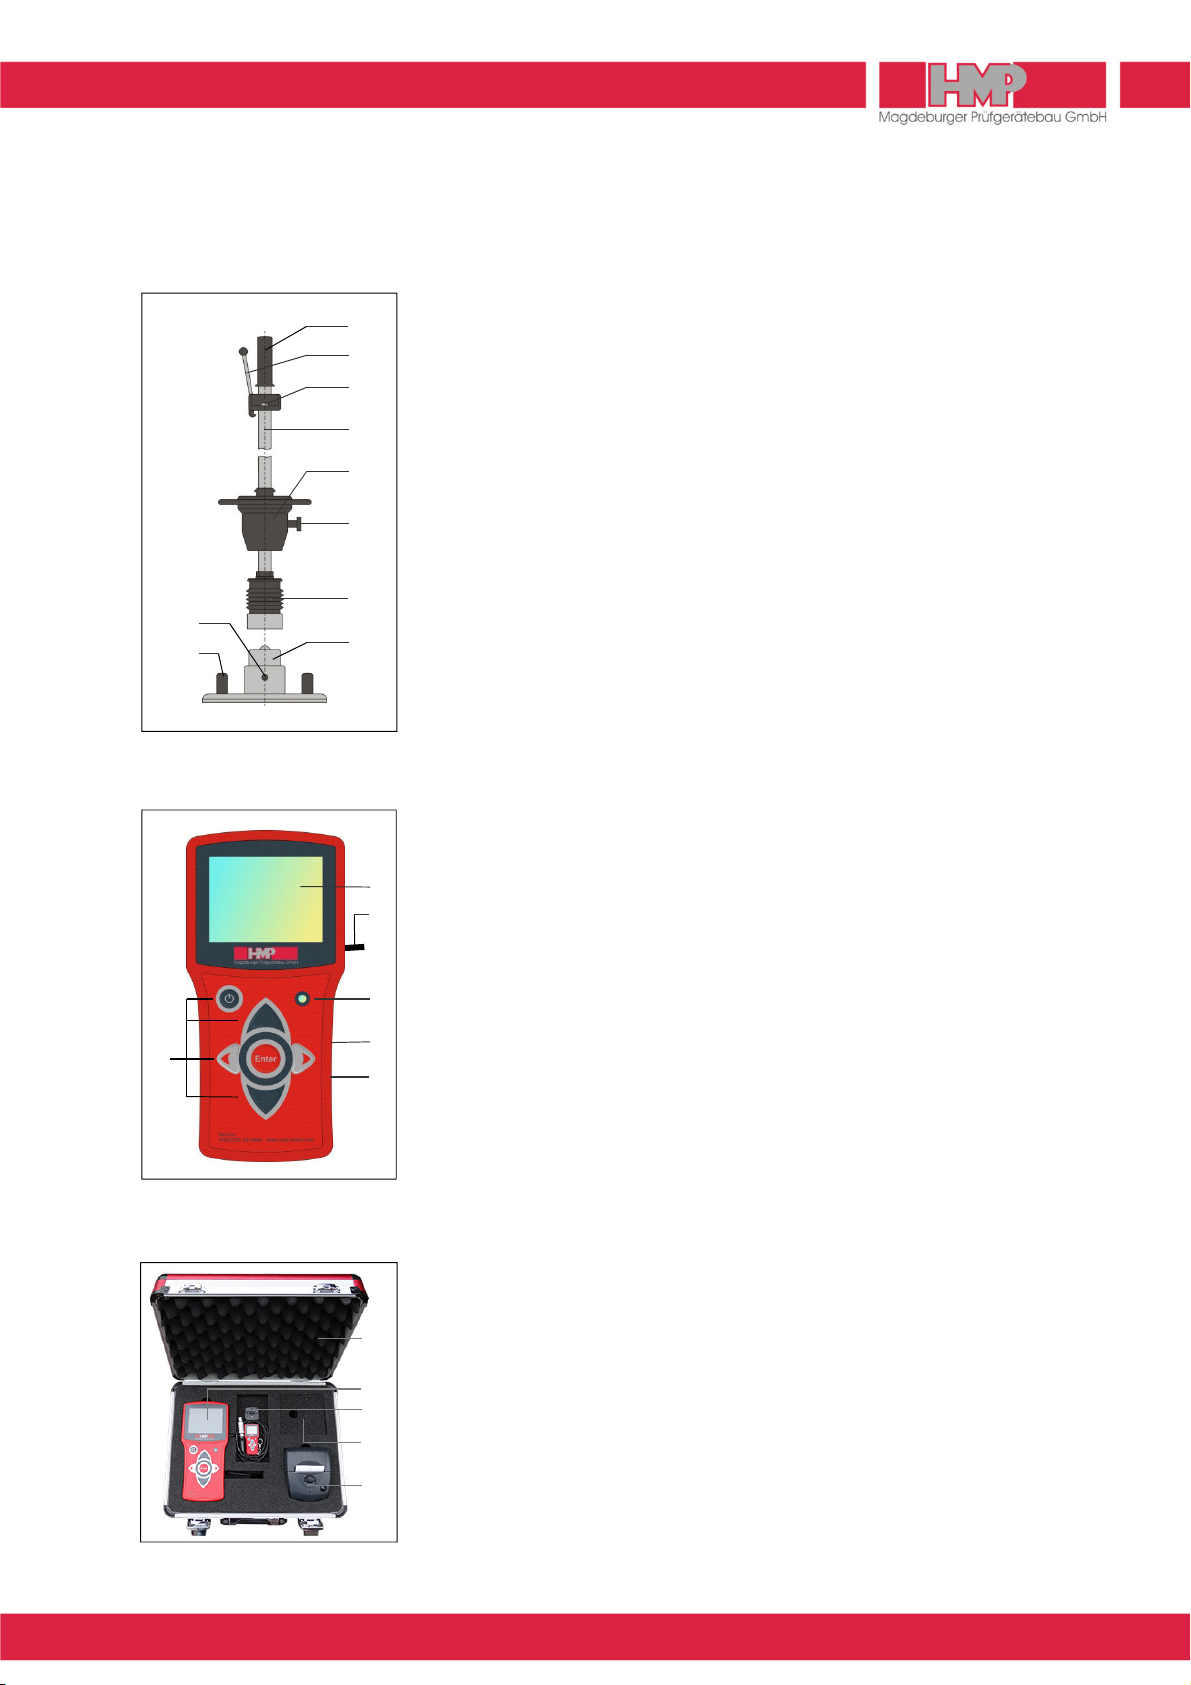
Charging of Lithium polymer battery pack
ithium polymer battery pack should be charged only by means of the
supplied accessories (Figure 6). Accessories for charging the battery pack –
USB cable (1), USB car charger (2) and AC/DC adapter (3) – are placed in the
carrying case.
The USB car charger can be connected with a car-battery 12 V or by means of
AC/DC adapter to mains 230 V / 50 Hz.
❙
For charging Lithium polymer battery pack only the supplied
chargers, which are provided for use with this device, should be
used.
❙
Lithium polymer battery pack should not be charged over a longer
period if it is not needed.
2
1
3
Figure
6

THE LIGHT WEIGHT DEFLECTOMETER
Service +49(0)391 2514666 02/2017 Instruction Manual HMP FGpro – en
9
ithium polymer battery pack of electronic settlement measuring instrument
should be charged before first use and in case that state of charge is 15% or lower.
Lithium polymer battery pack should be charged at the latest when
the note on the left (Figure 7) appears on the screen of settlement
measuring instrument.
■
Switch off electronic settlement measuring instrument and connect it with the
USB car charger via USB cable.
■
Connect the USB car charger to a car socket 12 V or via AC/DC adapter to
mains supply 230 V / 50 Hz.
■
Disconnect the charger from mains supply when charging of ithium
polymer battery pack has been finished.
It is not possible to overload the ithium polymer battery pack, since it is
equipped with an overload protection. When the battery pack is fully charged,
the charging current entry is automatically interrupted.
The Lithium polymer battery pack will only be charged, in case that
the electronic settlement measuring instrument is switched off.
Figure
7

MEASURING
Service +49(0)391 2514666 02/2017 Instruction Manual HMP FGpro – en
10
Getting Ready for Measuring
The procedure of preparation and performance of measurements is
laid down in »Technical Test Code for Soil and Rock in Road
Construction TB BF-StB Part B 8.3 / Issue 2012 – Dynamic Plate Load
Test by means of the Light Weight Deflectometer« and in »ASTM
E2835-11 – Standard Test Method for Measuring Deflections using a
Portable Impulse Plate Load Test Device«.
Preparing the area to be tested
The load plate must be in full-area contact, so that the impact force can be
optimally transmitted to the ground and the maximum settlement amplitude
under the entire area of the load plate is determined.
■
Select a plain area on the measuring site.
■
Position the load plate while slightly turning and pushing.
■
Fill hollow spaces under the load plate if necessary with loose medium
sand.
Connecting the settlement measuring instrument
■
Connect the sensor, which is located under the cap (8) of the load plate, via
sensor socket (9) with the settlement measuring device.
− Remove the cap from the sensor socket.
− Insert the plug of the measuring cable from the settlement measuring
instrument into the sensor socket until it is locked.
The plug locked in the sensor socket can only be removed by pulling
on the plug enclosure. Do not pull on the cable.
Take care to ensure that the contacts of the plug and the sensor
socket are not damaged.
se the protective cap provided on the cap to protect the sensor
socket from dirt and moisture.
Positioning the loading mechanism
■
Position the loading mechanism on the cap of the load plate.
The tilt protection enables free standing of the loading device on the load
plate.
Removing the transportation lock
A transportation lock (6) is provided to secure the drop-weight on the guide
tube. This lock must be released prior to performing measurements.
■
Withdraw red knob.
■
Rotate red knob through 90 deg.
The arrow is horizontal: either or drop-weight is locked
The arrow is vertical: either or drop-weight is unlocked
The transportation lock has to be unlocked before measuring,
otherwise mis-measurements and damages of the guide tube can be
caused.

MEASURING
Service +49(0)391 2514666 02/2017 Instruction Manual HMP FGpro – en
11
Measuring Procedure
The base settings of the electronic settlement measuring instrument
comply with the ordered device type.
Individual adjustments can be carried out in the »Settings« menu
( page 16).
■
Press the key to switch on the settlement measuring instrument.
Device will be powered up and GPS starts.
The main menu (Figure 8) appears on the screen with type & number of
device (xxxxx) and state of charge of the measuring instrument in status line
as well as the several menu buttons in main area of display.
Button »Measured data« is active until GPS data are determined.
Then button »Measuring« will be activated (Figure 9) and »GPS« is
displayed in status line.
GPS data are only available and they will only be stored with the test
series, in case »GPS« is displayed in status line. In case of switching
to button »Measuring« manually, before GPS data were determined,
the measurement takes place without capturing the GPS data!
In case that measurement shall be carried out without recording the GPS
data, then in the menu settings/device »Off« has to be chosen for GPS
( page 17). Immediately after starting device the button »Measuring« is
active and the measuring process can begin.
Precompacting the test area
To achieve an optimal position of the load plate on the base precompact the
test area under the load plate by three impacts.
■
Confirm the button »Measuring« (Figure 9) by pressing the key.
The menu »Precompaction« (Figure 10) is displayed on the screen and
an acoustic signal is emitted.
■
Move the drop-weight fully up on the guide tube and lock it in the release
mechanism.
■
Use the bubble level (3) to align the guide tube until it is in vertical position.
■
Release the lever, the drop-weight falls onto the resilient element package.
■
Catch the rebounding drop-weight by hand and lock it back in the release
mechanism.
■
Repeat this procedure twice each after acoustic signal each.
The button C will be activated automatically after precompaction (Figure 11)
and the measuring can then be started.
The button C is being activated after a short time (abt. 6 sec.) even without
precompaction impacts (Figure 12). In case that soil was already
precompacted, measurement can be started.
If precompaction shall be active again, proceed as follows.
■
Switch to button area/indicating area by pressing key.
■
Confirm with key.
An acoustic signal is emitted. Precompaction can be started or
continued.
Figu
re
8
Figure
9
Figure
10
Figure
11
Figure
12

MEASURING
Service +49(0)391 2514666 02/2017 Instruction Manual HMP FGpro – en
12
Start measuring
■
Start the measuring process by pressing the key, when button C is
active.
An acoustic signal is emitted; the measuring instrument is ready for
measurement.
The readiness for measurement only insists after acoustic signal.
nless the weight is allowed to drop within 6 seconds after the
acoustic signal, confirm button a to restore the readiness for
measurement.
■
Successively perform 3 impacts as follows.
■
ock the weight in the release mechanism.
■
Use the bubble level to align the guide tube until it is in a vertical position.
■
Release the lever, the drop-weight falls down, catch the rebounding drop-
weight by hand.
■
The values of settlement amplitudes s
1
, s
2
and s
3
with settlement curves
are displayed on the screen (Figure 13).
Failure to catch the rebounding drop-weight may cause undesirable
compaction of the test area and, hence, faulty measurements.
The measurement is automatically completed after the third impact. The menu
on the left (Figure 14) is displayed on the screen including the individual
settlement amplitudes, the average settlement s
m
, the
path-speed-ratio s/v
and
the calculated E
vd
-value.
If one settlement value deviates by 50% or more from the average
settlement sm an exclamation mark appears on the screen
(Figure 15). Probably it is a mismeasurement. This test series should
be rejected and measurement repeated
Store, Print and Display Current Measured Data
Upon completion of one measurement the current measured data can be
stored
E
or deleted
D
(Figure 14). After storing the current test series can be
printed
B
(only devices with printer) and/or exported
Q
(Figure 16) and there
is the possibility to display the curve data and the GPS data
M N
(Figure 17)
.
Before using the thermal printer AP1300 please read the instruction
manual ( page 19) and follow the given instructions regarding
putting it into operation and handling.
It is recommended to export the measured data stored in the
measuring instrument regularly ( page 14) and to delete afterwards
the data in the measuring instrument ( page 15).
In this way the transference time will be shortened and multiple data
transfer avoided.
Figure
13
Figure
14
Figure
15
Fig
ure
17
Figure
16

MEASURING
Service +49(0)391 2514666 02/2017 Instruction Manual HMP FGpro – en
13
In case memory is full the menu on the left appears on the screen
(Figure 18). Storage space in the measuring instrument has to be
created by transferring the stored series of measurements to the SB
stick or to the PC or via App ( page 14) and subsequent deletion
( page 15).
Completing the Test
■
Press the key to switch off the settlement measuring instrument.
■
Disconnect the cable establishing connection between the settlement
measuring instrument and the sensor on the load plate.
− Remove the plug from the socket by pulling on the plug enclosure.
■
Replace the cap on the sensor socket.
■
ock the drop-weight by means of the transportation lock.
− Withdraw red knob.
− Rotate red knob through 90 deg.
− At the same time, rotate the drop-weight in the lowermost position until
the pin locks into the hole in the guide tube.
The arrow is horizontal: either or drop-weight is locked
The LWD may not be relocated before the drop-weight is fixed by
means of the transportation lock.
Error Menus
To monitor the measuring procedure the measuring instrument provides
instructions which pops up as an error report before, during or after
measurement.
The following error reports may appear before the measurement:
Error report Error cause
connect measuring
device to plate
(Figure 19)
no connection between measuring instrument and load
plate (plug was not connected to the plate, measuring
cable defective, plug demolished)
short circuit in
measuring cable
(Figure 20)
no correct connection between measuring instrument
and load plate or measuring cable is damaged
■
Check / establish the connection.
■
Restart the measuring process by pressing the key, as soon as the
connection is correct.
Figure
18
Figure
19
Figure
20

MEASURED DATA
Service +49(0)391 2514666 02/2017 Instruction Manual HMP FGpro – en
14
Display / Print the Stored Measured Data
The in the database stored test series and -results can be displayed via
button
U
(Figure 21) on the screen and printed out if required (only devices
with printer).
When no data are safed in memory, the button is without function.
Before using the thermal printerAP1300 please read the instruction
manual ( page 19) and follow the given instructions regarding
putting into operation and handling.
■
Select and confirm the button
U
in the main menu.
The stored test series appear on the screen (Figure 22).
By confirming the buttons M or N with more test series can be
displayed.
■
Select the desired test series by means of the keys and confirm by
pressing the key.
The values of the selected test series are displayed on the screen
(Figure 23).
By confirming the buttons M or N with or by pressing the keys GPS
position and settlement curves with deformation rates (Figure 24) can be
displayed.
■
Select button
B
and confirm with key.
Data of selected test series are printed.
GPS data will only be printed, in case GPS is enabled J in menu
Settings/Device.
Export the Stored Measured Data
The test series and –results stored in the database can be transferred via USB
interface to the supplied USB stick or to PC or via HMPtransfer APP to web-
based evaluation software HMPreport.
Data Transfer Measuring Instrument → SB Stick
■
Connect the USB stick to the measuring instrument.
■
Select within measuring instrument under menu measured data
U
/
export
Q
the transfer mode P (Figure 25) and confirm with key.
The data are being copied to the USB stick.
After completion of data transfer the measuring instrument switches off
automatically.
To transfer the data from the USB stick to the PC see instruction manual
»Protocol software for the ight Weight Deflectometer«.
Figure
21
Figure
22
Figure
23
Figure
24
Figure
25

MEASURED DATA
Service +49(0)391 2514666 02/2017 Instruction Manual HMP FGpro – en
15
Data Transfer Measuring Instrument → PC
■
Connect measuring instrument and PC via the supplied USB cable.
■
Select within measuring instrument under menu measured data
U
/
export
Q
the transfer mode
R
(Figure 26) and confirm with key.
The measuring instrument works now just like removable media.
■
After completion of data transfer switch off the measuring instrument and
disconnect measuring instrument from PC.
To transfer data from measuring instrument to PC see instruction manual
»Protocol software for the ight Weight Deflectometer«.
Data Transfer Measuring Instrument → HMPtransfer APP / HMPreport
The following conditions must be met, in order to transfer the data from the
measuring instrument via the HMPtransfer APP to the web-based evaluation
software HMPreport.
❙
The HMPtransfer APP has to be installed on the Smartphone.
❙
In the Web Application HMPreport a user account including „import“ rights is
created.
The data transfer from measuring device to smartphone is carried out via
Bluetooth connection and is controlled by the HMPransfer APP from the
smartphone.
■
Select within measuring instrument under menu measured data
U
/
export
Q
the transfer mode
S
(Figure 27) and confirm with key.
Bluetooth interface will be enabled.
■
Carry out all further actions acc. to instructions of HMPtransfer APP.
The HMPtransfer APP imports all measured data, stored in the
settlement measuring instrument.
Regarding data transfer from HMPtransfer APP to web-based evaluation
software HMPreport see help for HMPtransfer APP.
Delete Measuring Results
The test series and –results stored in data base can be deleted via Button
D
.
■
Select and confirm the button
U
in the main menu.
■
Confirm button
D
by pressing the key (Figure 28).
The menu on the left is displayed on the screen (Figure 29).
■
Select button
D
and confirm with key.
All measurements will be deleted.
The main menu is displayed on the screen.
Stored series cannot be deleted individually.
Figure 27
Figure
28
Figure
26
Figure
29

SETTINGS
Service +49(0)391 2514666 02/2017 Instruction Manual HMP FGpro – en
16
General
Via button
F
in the main menu you can reach the menu settings (Figure 30),
in which different display-, device- and printer settings can be carried out.
All carried out settings are only saved, when returning to the main
menu. In case that the measuring instrument is switched off before,
all modifications get lost.
Display
In menu »Display«
K
settings for date, time and language can be carried out
(Figure 31).
Set Date
■
Select button »Date« and confirm with key.
■
Change the day by means of the keys.
■
Select the month by pressing the key.
■
Change the month by means of the keys.
■
Select the year by pressing the key.
■
Change the year by means of the keys.
■
Confirm the current date setting by pressing the key.
By pressing the key the menu »date« can be left at any time.
■
Select Footer G by means of the or key and confirm with key.
The menu »Settings« appears.
■
Select Footer G by means of the or key and confirm with key.
The set date will be saved and the main menu appears.
Set Time
■
Select button »Time« and confirm with key.
■
Change the minutes by means of the keys.
■
Select the hours by pressing the or key.
■
Change the hours by means of the keys.
■
Confirm the current time setting by pressing the key.
By pressing the key the menu »Time« can be left at any time.
■
Select Footer G by means of the or key and confirm with key.
The menu »Settings« appears.
■
Select Footer G by means of the or key and confirm with key.
The set time will be saved and the main menu appears.
Figure
31
Figure
30

SETTINGS
Service +49(0)391 2514666 02/2017 Instruction Manual HMP FGpro – en
17
Select Language
■
Press key so often until the desired language appears.
■
Select Footer G by means of the or key and confirm with key.
The menu »Settings« appears.
■
Select Footer G by means of the or key and confirm with key.
The set language will be saved and the main menu appears.
Device
In menu »Device«
X
the following settings can be carried out for device
configuration (Figure 32):
❙
Drop Weight (10 kg / 15kg
1)
) set configuration of loading mechanism
1)
The configuration 15 kg is only allowed to be used for a loading
mechanism with a drop-weight of 15 kg.
There is a separate test code for this.
❙
GPS (
J
/
Z
) activate / deactivate GPS
❙
Unit (MN/m² / MPa) set unit
❙
BT-direkt (
J
/
Z
) special version, not available
❙
Calibration (
J
/
Z
) show / don’t show calibration date on
start screen
❙
RESET Function for HMP-Service
Printer
In menu »Printer«
B
the following settings can be carried out for printer
configuration (Figure 33):
❙
Print head (
J
/
Z
) Print head »
J
« means, that always on every
printout the head with information regarding
measuring point will be printed out.
Print head »
Z
« means, that the first printout is
with head, all others without. This setting is
paper-saving and is used f. e. to print out an
inspection lot.
❙
Date / Time (
J
/
Z
) print out date / time
❙
Grafik (
J
/
Z
) print out curve
Service
In menu »Service« L various device information, which are relevant for HMP
service, are indicated.
Figure
33
Figure
32

SETTINGS
Service +49(0)391 2514666 02/2017 Instruction Manual HMP FGpro – en
18
Calibration Menu
The menu »Calibration« M is not available for users.
Maintenance Menu
The menu »Maintenance« R is not available for users.

OPTIONS
Service +49(0)391 2514666 02/2017 Instruction Manual HMP FGpro – en
19
Thermal printer AP1300
Included in the ight Weight Deflectometer scope of supply is a thermal printer
AP1300 (optional).
Power Supply
The printer can be operated independently from a power supply unit and is
powered by a 1.8 Ah NiMH power pack housed in the printer (Figure 34).
Thus, the printer can be carried from job to job.
Safety
❙
The NiMH power pack is provided with an internal fuse unit.
However, a short-circuit may occur when the NiMH power pack
gets into contact with metallic items.
❙
The power pack must not be opened; otherwise it may leak out or a
short-circuit may occur.
❙
Before you remove or replace the power pack, disconnect it from
the external power pack charger.
The power pack has to be charged only by means of the supplied power pack
charger. The power pack charger can be connected with a car-battery 12–24V
or by means of an AC/DC adapter to mains 230 V / 50 Hz. The AC/DC adapter
is included in the delivery contents of Settlement measuring instrument
HMP LFGpro. Charger and adapter are placed in the carrying case.
The printer AP1300 is shipped with a connected and fully loaded power pack.
❙
When the printer is used for the first time after a lengthy period or
has been standing idle for a lengthy period, recharge the power
pack prior to use.
❙
In the event of malfunction the printer may only be opened by
authorised personnel.
❙
The supplied accessories must only be used for devices supplied
by HMP and according to this instruction manual. Any other use
may cause damages.
Charging of Power Pack
❙
For Changing the power pack it is only allowed to use the supplied
power pack charger.
❙
Fully charging the power pack takes 15 hours at most.
❙
se the power pack charger only indoors. Disconnect the device
from the mains if it is not used. Do not operate the device in case of
damage to the housing or the mains plug.
❙
Only charge nickel/metal hydride power packs; use of the charger
for other batteries may cause an explosion hazard.
❙
Do not open the power pack charger.
Figure
34
Other manuals for LFGpro
1
This manual suits for next models
1
Table of contents
Other HMP Measuring Instrument manuals
Popular Measuring Instrument manuals by other brands

Parker
Parker PFM1 Series Installation and operation manual

TestAir
TestAir KPDM-1 user guide

Somogyi Elektronic
Somogyi Elektronic Home SMA 2101 instruction manual

Meinberg
Meinberg IMS-MDU312 manual

Agilent Technologies
Agilent Technologies MXA Series Installation note

Dräger
Dräger FG7000 Short operating instructions