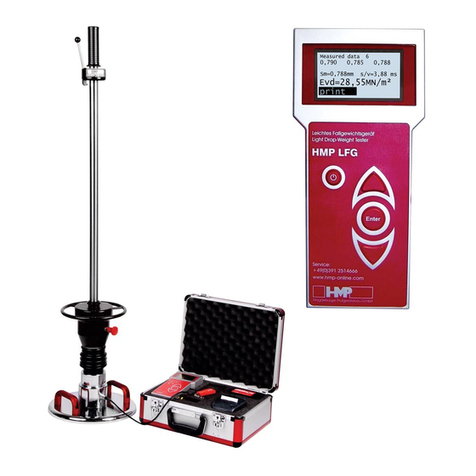
Rev. 2016-10-06
Pre aring the Test / Precom action
■
Place load plate on plain ground such that full-area
support is ensured.
■
Position loading mechanism onto load plate.
■
Release shipping & handling lock.
■
Connect settlement measuring instrument and load
plate by means of measuring cable.
■
Switch on the settlement measuring instrument.
Device will be powered up and GPS starts.
Button »Measured data« is active until GPS data
are determined.
Then button »Measuring« will be activated.
■
Confirm the »Measuring« mode.
The menu »Precompaction« is displayed on the
screen and an acoustic signal is emitted.
■
Precompact the soil three times:
− Engage the drop weight on the release
mechanism.
− Align the guide tube with the bubble level such
that it is normal to the load plate.
− Release the lever.
− Support the bouncing weight by hand.
GPS data are only available and they will only be stored with the test series, in case »GPS« is dis layed in
status line. In case of switching to button »Measuring« manually, before GPS data were determined, the
measurement takes lace without ca turing the GPS data!
Measuring Procedure
The base settings of the electronic settlement measuring instrument com ly with the ordered device ty e.
Individual adjustments can be carried out in the »Settings« menu.
Start measuring
■
Start the measuring process by pressing the [Enter]
key.
An acoustic signal is emitted; the measuring
instrument is ready for measurement.
■
Successively perform 3 impacts.
Handle the dro -weight as described for
recom action the soil. The readiness for
measurement only insists after acoustic signal.
The values of settlement amplitudes S1, S2 and
S3 with settlement curves appear on the screen.
After the third measurement the individual
settlement amplitudes, the average settlement
S
m
and the calculated E
vd
-value are displayed.
Store and rint current measured data
Upon completion of one test series the current
measured data can be stored E or deleted D. After
storing the current test series can be printed B (only
devices with printer) and/or exported Q and there is
the possibility to display the curve data and the GPS
data
M N
.
Hints for maintenance and servicing
For a long life and reliable operation of your Light
Weight Deflectometer, we recommend:
Before use:
■
Wipe the guide tube with a slightly oily rag to en-
sure unhindered movement of the drop weight.
(use only acid free oil)
After use:
■
Wipe off any dirt and wetness of the device.
■
Oil slightly release mechanism and drop weight.
■
Control the drilling of the shipping and handling
lock and remove existing slots and burr respec-
tively.
Monthly:
■
Check release mechanism and oil slightly.
■
Check shipping and handling lock and oil slightly.
■
Check drop height.
(specified size: see calibration sign on drop weight)
The detailed instruction manual, test codes for using the HMP LFG, PC software as well as videos
with HMP image and using HMP LFG and HMP PDG lease find on su lied USB stick.
Re-calibration is required at least annually and after any re air.
(In conformance with the German »Technical test code for soil and rock in road construction TP BF – StB part B 8.4 / 2016«.)
* These Brief Instructions are not a substitute for the Instruction Manual.
The right to introduce technical modifications is reserved.


