Hobby-Wing XERUN 4268 User manual

Warnings
CAUTIONS
Thank you for purchasing HOBBYWING XERUN 4268/4274 Sensored Brushless Motor.
High power motor can be very dangerous, so please read through this manual carefully.
Given that we have no control over the correct use, installation, application,
or maintenance of our products, no liability shall be assumed nor accepted for any
damages, losses or costs resulting from the use of the product. Any claims arising from
the operating, failure or malfunction etc. will be denied. We assume no liability for
personal injury and/or consequential damages resulting from our product or our
workmanship. As far as is legally permitted, the obligation to compensation is limited to
the invoice amount of the affected product.
ATTENTION
ATTENTION
01
03
Specifications
06
Gearing
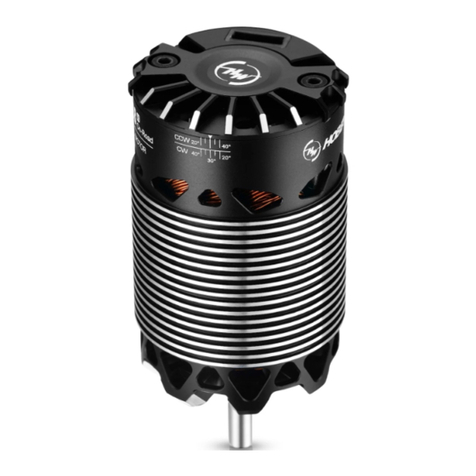
• (With the motor direction set to CCW), take the graduation/value after “CCW” on the motor case as
the starting point when adjusting the timing. (With the reversed triangle pointing at a value/graduation,
the smaller/bigger the value, the smaller/bigger the timing. The timing is 40 degrees in picture 1.
• (With the motor direction set to CW), take the graduation/value after “CW” on the motor case as the
starting point when adjusting the timing. (With the reversed triangle pointing at a value/graduation,
the smaller/bigger the value, the smaller/bigger the timing. The timing is 20 degrees in picture 1.
• The motor timing is 30 degrees by default (as shown in picture 2). The motor timing should be with in
30 to 40 degrees if you want to activate the Turbo timing. And the timing can be within 20 to 40
degrees if you have no intention to activate the Turbo timing.
05
Timing Adjustment
02
Features
07
Assembly and Disassembly
• Install the motor in its mount using M3 & M4 screws no longer than 8mm. (*M3: 4PCS, M4: 2PCS)
• There are 3 power wires coming from the ESC must be soldered to the motor. They are usually color
coded as Blue for Wire A, Yellow for Wire B and Orange for Wire C. When connecting the power
wires between the ESC and motor, please make sure that you match ESC Wire A to Motor Phase A,
ESC Wire B to Motor Phase B and ESC wire C to Motor Phase C (This is VERY important).
• When using Sensored ESC, make sure the sensor cable is clean and reliable. Connect the sensor cable
to both ESC and motor in the correct direction.
When using Sensorless ESC, swap any two wires if the motor runs in reverse.
• Double check you have all the connections correct before turning on the ESC (See connection
diagram as below).
The XERUN 4268/4274 is very strong in construction but also easy to disassemble for maintenance.
We recommend you check the bearings and clean the motor at regular intervals——depend on the frequency of usage and the track surface.
Please follow the steps in below to assemble the motor. When disassembling the motor, the sequences are reversed.
Parts List
USER MANUAL
XERUN 4274 / 4268
Sensored Brushless Motor
• Never leave this unit unsupervised when it is powered on.
• All wires and connections should be well insulated. Short circuits can possibly damage the products.
• Avoid incorrect connections between the electronic speed controller (ESC) and the motor.
• Never allow this product to come in contact with water, oil, fuel or other electro-conductive liquids.
If this happens, stop the use of your product immediately and let it dry carefully.
• Avoid overloading the motor due to wrong or too aggressive gear ratio. Different ESCs have
different internal timings, follow the ESC instructions.
• Never apply full throttle if the pinion is not installed. Due to the extremely high RPMs without load,
the motor can get damaged.
• Always wire up all the parts of the equipment carefully. If any of the connections come loose as a
result of vibration, your model RC may lose control.
• Never allow the motor case to get over 100 degrees Celsius (212 degrees Fahrenheit) because the
magnets maybe demagnetized by high temperature.
• Built-in chip for being easily identified by HOBBYWING ESCs. When pairing with HW 1/8th scale Sensored ESCs (i.e. XR8 Plus), the motor can work in the “Sensored” mode at all times with great output linearity after
it’s identified by the ESC. And the Turbo timing is allowed to be activated for higher output.
• Magnetic ring on the rotor prevents the motor from signal interference and guarantees its super stability in the “sensored” mode.
• Low cogging torque for smooth and stable low-speed running of the vehicle.
• Selectable mechanical timing of 20 to 40 degrees for different power output.
• New-style “U” solder tabs for easy soldering/wiring and high durability.
• CNC machined aluminum ribbed heatsink case with excellent coating.
• High temperature tolerance windings, high quality output shaft, high precision bearings, and rotor with a strong structure guarantees super durability.
1 2 3 4
Mount the motor rotor Mount the back end bell set Mount screws for fastening
the back end bell
Picture of the
assembled motor
Back End Bell x 1Pcs
Stator Set x 1Pcs
Screws for Fastening the
Back End Bell x 2Pcs
Rotor x 1Pcs
picture 1 picture 2
Model Buggy
W/FDR
XERUN-4268SD-1600KV-BLACK-G2
XERUN-4268SD-1900KV-BLACK-G2
XERUN-4268SD-2200KV-BLACK-G2
XERUN-4268SD-2600KV-BLACK-G2
XERUN-4268SD-3200KV-BLACK-G2
XERUN-4274SD-2250KV-BLACK-G2
LiPo
4S
4S
4S
4S
4S
6S
4KG/8
4KG/9
4KG/10
/
/
/
On-road
W/FDR
/
/
/
3KG/5.5
3KG/6.5
/
Truck
W/FDR
/
/
/
/
/
5KG/12
Monster Truck
W/FDR
/
/
/
/
/
6KG/16
Recommended Power Configuration
Motor B
Motor A
Motor C
XERUN 4274
Brushless Electronic Speed Controller
Sensor wire
XERUN 4268/4274 XERUN 4268/4274XERUN 4268 XERUN 4274
Model KV
(No-load)
No-load
Current Dimension shaft * Pole Weight Applicable
XERUN-4268SD-1600KV-BLACK-G2
XERUN-4268SD-1900KV-BLACK-G2
XERUN-4268SD-2200KV-BLACK-G2
XERUN-4268SD-2600KV-BLACK-G2
XERUN-4268SD-3200KV-BLACK-G2
XERUN-4274SD-2250KV-BLACK-G2
1600KV
1900KV
2200KV
2600KV
3200KV
2250KV
0.0151Ω
0.0084Ω
0.0073Ω
0.0051Ω
0.0035Ω
0.0047Ω
2.8A
4.5A
4.5A
4.6A
6A
5.4A
PN
30401900
30401901
30401903
30401902
30401904
30405000
LiPo Resistance
2-6S
2-6S
2-6S
2-4S
2-4S
2-6S
4
1/8 Buggy, GT, SCT
1/8 On Road
1/8 Monster Truck/Truck
322g (11.359oz)
325g (11.464oz)
325g (11.464oz)
328g (11.570oz)
316g (11.147oz)
396g (13.968oz)
Ø=42mm (1.654in)
L=68mm (2.677in)
Ø=42mm (1.654in) / L=74mm (2.913in)
Ø=5mm
(0.197in)
L=18.5mm
(0.728in)
• Attention! The motor temperature should be lower than 100 degrees Celsius (212 degrees Fahrenheit) in operation. Because high
temperature may cause the magnets to get demagnetized, the coil to get melt and short circuited, and the ESC to get damaged.
A suitable gearing can effectively prevent the motor from overheating.
• To avoid the possible damage to ESC and motor caused by the overheat, please start with a small pinion/a big FDR and check the
motor temperature regularly. If the motor and ESC temperatures always stay at a low level during the operation, change a big
pinion/a low FDR and also check the motor temperature regularly to ensure that the new FDR is suitable for your vehicle, local
weather and track condition. (Note: For the safety of electric devices, please check the ESC and motor temperatures regularly.)
• Right is a very rough idea of starting gear ratios for the motors, please be aware that these are guide ratios for ESC with ZERO
timing.
20170713
04
Installation & Connection

XERUN 4274
传感器线
电子调速器
B
A
C
CAUTIONS
感谢您购买本产品!无刷动力系统功率强大,错误的使用可能造成人身伤害
和设备损坏。在使用设备前,请务必仔细阅读本说明书,并严格遵守规定的
操作程序。我们不承担因使用本产品而引起的任何责任,包括但不限于对附
带损失或间接损失的赔偿责任;同时,我们不承担因擅自对产品进行修改所
引起的任何责任。我们有权在不经通知的情况下变更产品设计、外观、性能
及使用要求。
ATTENTION
ATTENTION
01
注意事项
02
产品特色
03
产品规格
04
安装和连接
07
装配说明
06
齿比选择
1、当电调设置的电机转动方向为CCW时,以电机壳上CCW后面的刻度为准,箭头指向的数值越
小,代表进角越小,箭头指向的数值越大则进角越大。如图一所示,该情况下进角为40度。
2、当电调设置的电机转动方向为CW时,以电机壳上CW后面的刻度为准,箭头指向的数值越小,
代表进角越小,箭头指向的数值越大则进角越大。如图一所示,那么该情况下进角为20度。
3、电机出厂默认进角为30度,如图二所示,如需开TURBO,建议电机进角在30-40度之间调整,
如不开TURBO,电机进角在20-40度之间均可。
05
进角调整
零件清单
XERUN 4274 / 4268
车用有感无刷电机
使用说明书
为了使电机寿命更长、效率更高,我们建议定期检查轴承并清理电机中的污垢,具体时间取决于您使用电机的频次和场地情况。
安装时,请遵循以下装配图的步骤;拆卸时,请按相反步骤执行。
·在产品处于通电状态时,请勿分散精力去处理其他事情。
·连接电机前,请确保需要绝缘的部位处理良好,短路会毁坏产品。
·连接电机前,务必认真核对电子调速器与电机的线序,避免线序错误的情况发生。
·请勿让本产品与水、油、燃料或其他导电液体接触,因为这些可能含有对电子电路有害
的物质。如果发生以上情况,请立即停用您的产品,并小心进行清洁和干燥处理。
·使用此电机前,请认真查看各动力设备以及车架说明书,确保动力搭配合理,避免因错
误的动力搭配导致电机超载而损坏。
·齿轮未安装前,禁止全油门操作。无负载情况下高速运转可能会损坏电机。
·请务必仔细连接好各部件,若连接不良,遥控模型车可能无法正常控制,或出现部件损
坏等其他不可预知的情况。
·勿使电机外壳温度超过100摄氏度(212华氏度),高温可能导致转子退磁并最终对电
机造成不可恢复的损坏。
·内置便于好盈电调识别的芯片,与好盈1/8有感电调(如XR8 Plus)搭配时,电调识别到此电机后,可全程运行在有感状态,输出线性极佳,同时可开启Turbo进角,输出超大的功率。
·电机具备一个独立用于给 HALL 检测的磁环,避免了HALL信号干扰,使电机运行有感状态时可发挥超强的稳定性。
·电机具有非常低的齿槽力矩,低速时非常顺滑,可以运行在极低的速度,对于弯道的操控和防止打滑有明显提升。
·电机可进行20至40度机械进角调整,以达到不同功率输出,满足各种应用的动力需求。
·电机接线采用全新的U型凹槽铜柱接口,易焊接、易布线、更灵活,更耐用。
·马达外壳采用刀斧式造型加上精美涂装,高硬度铝质CNC一体成型外壳。
·耐高温线圈、防爆转子、高韧性合金输出轴、进口高精度长寿命优质轴承打造电机超强耐用性。
型号 KV
(空载) 空载电流 外径 / 长度 轴径 / 外露轴长 马达
极数 重量 主要用途
XERUN-4268SD-1600KV-BLACK-G2
XERUN-4268SD-1900KV-BLACK-G2
XERUN-4268SD-2200KV-BLACK-G2
XERUN-4268SD-2600KV-BLACK-G2
XERUN-4268SD-3200KV-BLACK-G2
XERUN-4274SD-2250KV-BLACK-G2
1600KV
1900KV
2200KV
2600KV
3200KV
2250KV
0.0151Ω
0.0084Ω
0.0073Ω
0.0051Ω
0.0035Ω
0.0047Ω
2.8A
4.5A
4.5A
4.6A
6A
5.4A
322g (11.359oz)
325g (11.464oz)
325g (11.464oz)
328g (11.570oz)
316g (11.147oz)
396g (13.968oz)
PN
30401900
30401901
30401903
30401902
30401904
30405000
适用锂电 内阻
2-6s
2-6s
2-6s
2-4s
2-4s
2-6s
4
1/8 越野、
短卡、房车
1/8 平路车
1/8 大脚、卡车
Ø=42mm (1.654in)
L=68mm (2.677in)
Ø=42mm (1.654in) / L=74mm (2.913in)
Ø=5mm
(0.197in)
L=18.5mm
(0.728in)
1、安装电机
该电机安装螺丝规格为两组M3,一组M4,电机螺丝孔可锁入深度为6mm,安装电机到车上
前,请仔细确认所配螺丝规格是否合适,以免使用过长或过粗的螺丝而损坏电机;一般建议采
用长度不长于8mm的M3/M4螺丝,具体根据车架马达安装座厚度而定。
2、电机连接
电机需焊接三根输入线。这三根线通常以颜色区分,一般蓝色为A相,黄色B相,橙色为C相。
安装和连接时请注意以下几点:
·连接/焊接电调(ESC)的动力线时,请注意ESC标记,确保ESC和电机上的端子一一对应,
即: ESC电线A与电机A相匹配,ESC电线B与电机B相匹配,ESC电线C与电机C相匹配。
·如果使用有感ESC,务必确保感应线是干净的、未损坏的,并注意感应线的方位,将感应线
按正解的方位分别连接在电机和ESC的接线口上。
·如果使用无感ESC,若出现电机反转现象,此时只需调换任意两根连接线即可。
3、检查
开启遥控车电源前,请再次仔细检查电机安装的可靠性及所有连接的正确性。
1 2 3 4
锁螺钉装转子
装后端盖 装配完成
定子 1Pcs
转子 1Pcs
后端盖组件 1Pcs
内六角圆柱头螺钉 2Pcs
图一 图二
型号 越野
车重/齿比
XERUN-4268SD-1600KV-BLACK-G2
XERUN-4268SD-1900KV-BLACK-G2
XERUN-4268SD-2200KV-BLACK-G2
XERUN-4268SD-2600KV-BLACK-G2
XERUN-4268SD-3200KV-BLACK-G2
XERUN-4274SD-2250KV-BLACK-G2
锂电
节数
4S
4S
4S
4S
4S
6S
4KG/8
4KG/9
4KG/10
/
/
/
房车
车重/齿比
/
/
/
3KG/5.5
3KG/6.5
/
卡车
车重/齿比
/
/
/
/
/
5KG/12
大脚
车重/齿比
/
/
/
/
/
6KG/16
推 荐 搭 配
XERUN 4268/4274 XERUN 4268/4274XERUN 4268 XERUN 4274
齿比的合理选择非常重要,不合适的齿比可能会给您带来重大损失。请遵守以下要点来正确选择齿比!
1、电机的工作温度
电机在工作时,温度应低于100°C(212°F);温度高于100°C时,将会使电机转子磁性减弱,且线圈
可能出现局部烧熔短路现象,产生大电流而损坏电调。选择合适的齿比可以有效防止电机过热。
2、齿比选择原则
为防止电机过热引发潜在危险而导致电调和电机损坏,请从一个最少齿数的电机小齿进行齿比配置,并随时
检查电机温度,这是唯一能确保电机不过热的方法。车子在行驶途中,如果电机及电调温度一直处于稳定的
低温范围内,您可以试着使用齿数较多的小齿,并密切监测电机温度,以确定更改后的齿比是否适合您的模
型车、当地气候及赛道条件(请注意气候及赛道条件不是恒定不变的,而是经常会发生变化,所以频繁地监
测电调及电机的温度是一项重要的日常操作,它可以确保您的电子设备长期稳定地工作)。
3、右边是关于齿比的粗略数据(这些建议齿比是当ESC设置为零进角模式时的参数值)
20170713
This manual suits for next models
12
Other Hobby-Wing Engine manuals
