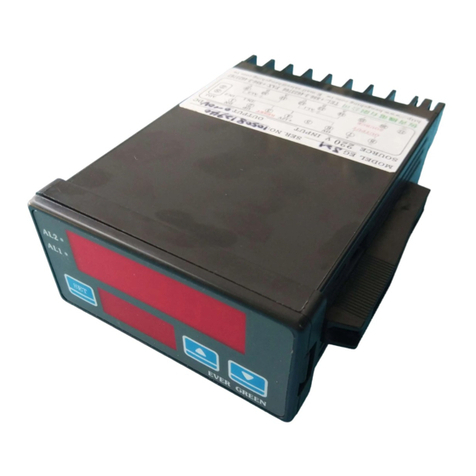
Hocom WSW-X Series User manual

0
WSW-X Weighing Indicator U
ser Manual
User Manual
DIGITAL WEIGHING INDICATOR
WSW-X
Series

1
WSW-X Weighing Indicator
User Manual
Cautions
Upon receiving the indicator, please take at least 8
hours to recharge the battery before you start to
operate this indicator.
Please recharge the battery after a long period of
storage (more than one month). It takes 8~10
hours to fully recharge the battery.
Please assemble the platter before powering on
the indicator.
Do not keep the weight placed on the platter for a
long period.
Keep the indicator away from the environment with
high temperature, high humidity, heavy press, and
heavy bump.
Always make sure the indicator is located in a flat
and plane surface.


1
WSW-X Weighing Indicator U
ser Manual
Dimensions
Indicator
245 x 145 x 80 mm (L x W x D)

2
WSW-X Weighing Indicator
User Manual
Symbols on LCD
Battery Symbol ( ) :
appears on the top left corner of LCD, and
indicates battery level display status.The battery will
reduce grid by grid until there is no electricity. When it
is running out of power, LCD will indicate -OFF-
Please power off the indicator and recharge the
battery immediately.
Zero Symbol (→0←):
→0←appears on the left side of LCD, and indicates
the indicator is at zero-point.
NET Weight Symbol (Net):
Net appears on the left side of LCD, and indicates the
tare weight has been deducted.
Lo Indication (◄):
◄Cursor appears on left side of LCD and indicates
the weight is at low situation.
ok Indication (◄):
◄Cursor appears on left side of LCD and indicates
the weight is at normal situation.
Hi Indication (◄) :
◄Cursor appears on left side of LCD and indicates
the weight is at high situation.
-
-

3
WSW-X Weighing Indicator
User Manual
Keyboard Description
:Switch on / off the scale.
[ UNIT ]
:
Select the weight mode: kg / lb / oz
[→0←ZERO]
:
Press this key to make the indicator be at zero point.
LCD will indicate →0←on the left-bottom corner.
[→T←TARE]
:
Press this key to deduct the tare weight. Put the
package or container on the platter and then press
[→T←]key. LCD will show →0←and Net, and
press the [→T←]key again back to 0.
[ F ]
:
1. Weight Limit Alarm :
Example: setup Hi/Lo weight range at 2kg ±500g.
A. Press and hold [ F ] key till LCD shows F-01, then
press [ TARE ]key twice to into Lo mode key in 1.50
(press [ TARE ] key to shift the flashing digit &
[ UNIT ] key to setup the flashing digit), then press
[ F ] key again to confirm the setting.

4
WSW-X Weighing Indicator
User Manual
B. And LCD will show -HI-then press [ TARE ]key to
into Hi mode key in 2.50, then press [ F ] key twice to
confirm the setting.
The indicator will show different color backlight and sound
beep continuously while :
Yellow color ≦Green color ≦Red color
(The measured weight)
2. Over-Weight Alarm:
Example: setup 1kg as the over-weight limit at -Lo-.
!!
Notice:-HI- mode must be 0.
Press and hold [ F ] key till LCD shows F-01, then press
[ TARE ]key twice to into Lo mode key in 1.00 (press
[ TARE ] key to shift the flashing digit & [ UNIT ] key to
setup the flashing digit), then press [ F ] key twice to
confirm the setting.
The indicator will show red color backlight and sound
beep continuously when the measured weight is ≧1kg.

5
WSW-X Weighing Indicator
User Manual
※Under pcs (simple counting) mode
!!
The suggested unit weight of the measured subject
should be heavier than the division of this
indicator.
3. Simple Counting: pcs
A. Press [F]key once LCD shows 0 pcs, and then
press and hold [F]key till LCD shows S = 10
(10、20、50、100 could be selected for the
sample-quantity of the measured subject).
B. Quickly (within 3 seconds) put 10 pieces of the
measured subject (with the same unit weight) on
the platter. Wait till LCD shows 10 pcs.
C. The indicator has finish calculating the averaging
unit weight of the measured subject.
Now the simple counting function is ready. This
indicator could be used as a simple counting.

6
WSW-X Weighing Indicator
User Manual
!!
Only can set the [ F ] Function when the mode is
under pcs. Press [ F ] once to select pcs mode.
Under [ F ] Function:
Press and hold [F]key till LCD shows F - 01, and
press [ UNIT ] key to select F - 01 mode to F - 06
mode, then press [ TARE ] to into mode.
Press [ UNIT ] key to switch or modify number.
Press [ TARE ] key to shift the flashing digit.
Press [ F ] key to confirm the mode setting.
F - 01 Setting the Hi / Lo value
F - 02 Animal function setting -On or -Off
F - 03 Animal function selects weight -HI- value or -Lo-
value
F - 04 Animal function selects weight speed -HI- or -Lo-
F - 05 Saving the Hi / Lo setting -On or -Off
F - 06 -On: beep on out of Hi / Lo values range;
-Off: beep on in of Hi / Lo values range.
After press [ F]key again to confirm the all mode setting.

7
WSW-X Weighing Indicator
User Manual
:
Optional device.
:
After using the [] function, please follow the steps
as below to get the Net and Gross Weight Value.
1. Pressing [ ] key once could recall the
deducted tare weight of container or package.
Pressing [ ] key once again, LCD will be
indicated 0.000, [→0←] and [Net].
2. Put the measured subject into the container or
package, LCD will be indicated the Net Weight
Value.
Pressing [ ] key once can obtain the total Gross
Weight Value.
Pressing [ ] key again, LCD will go back to the
Net Weight Value again.
NET
GROSS
NET
GROSS

8
WSW-X Weighing Indicator
User Manual
RS232 Interface Connection:<optional device>
RS232 Wiring Configuration:
Baurate: 9600
Parity: None
Stop Bit: 1
Data Bit: 8
GND
5
4
3
2
1
9
8
7
6
5
4
3
2
1
9
8
7
6
DATE OUT

9
WSW-X Weighing Indicator
User Manual
Recharge the Battery _______________
Power off the indicator and connect the power cord to
an AC outlet. CHARGE LED: will indicate the
ongoing status of the battery. It takes about 8~10
hours to fully recharge the battery.
CHARGE LED:
Color of LED
Status of the battery
RED
Initial connection
ORANGE
Charging
GREEN
Fully-charged
Power Requirements
AC: 220V±10%, 50Hz
DC: 6V/4Ah rechargeable battery;
P=0.2W(max)

10
WSW-X Weighing Indicator
User Manual
We do more than you expect
Digital Weighing Indicator
Table of contents
Other Hocom Measuring Instrument manuals