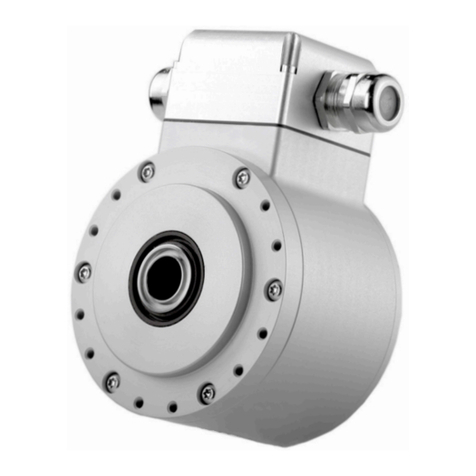
Hohner Automaticos VI96 User manual

DISPLAY

www.encoderhohner.com - info@encoderhohner.com - Tel.: (00 34) 972 16 00 17
1
User Reference Manual - VI96 Display
INDEX
INTRODUCTION
1. VI96 DISPLAY
1.1. Product reference ......................................................................................................................................................... 3
1.2. Impulse counter modes ................................................................................................................................................ 4
1.3. Ratemeter modes ......................................................................................................................................................... 4
1.4. Periodmeter modes ...................................................................................................................................................... 4
1.5. Funcions included....................................................................................................................................................... 4
1.6. Front view ..................................................................................................................................................................... 4
1.7. Power connecons........................................................................................................................................................ 5
1.8. Sensor conguraon and connecons.......................................................................................................................... 5
1.9. Rear view ...................................................................................................................................................................... 5
1.10. Signal connecons ...................................................................................................................................................... 6
1.11. Technical specicaons............................................................................................................................................... 6
1.12. Mechanical specicaons (mm) ................................................................................................................................. 7
1.13. Funcon 'Trigger Sense' .............................................................................................................................................. 7
1.14. Funcon 'Cycler Counter'............................................................................................................................................ 7
1.15. 'Slow' Mode ................................................................................................................................................................ 8
1.16. 'Fast' Mode ................................................................................................................................................................. 8
1.17. How to operate the menus......................................................................................................................................... 8
1.18. Message and errors .................................................................................................................................................... 9
1.19. Conguraon meny .................................................................................................................................................. 10
1.19.1 Inial set-up .......................................................................................................................................................... 10
1.19.2 Conguraon for 'cn.1'.......................................................................................................................................... 10
1.19.3 Conguraon for 'cnq. 2'....................................................................................................................................... 11
1.19.4 Conguraon for 'cnl. 3'........................................................................................................................................ 11
1.19.5 Conguraon for 'cnc. 4' ....................................................................................................................................... 11
1.19.6 Conguraon for 'cnd. 5'....................................................................................................................................... 12
1.19.7 Conguraon for 'rt. 6'.......................................................................................................................................... 12
1.19.8 Conguraon for 'rtq. 7'........................................................................................................................................ 12
1.19.9 Conguraon for 'Prd. 8'....................................................................................................................................... 13
1.19.10 Sensor conguraon ........................................................................................................................................... 13
1.19.11 Alarms ................................................................................................................................................................. 15
1.19.12 Fast access........................................................................................................................................................... 16
1.19.13 Super Fast Access ................................................................................................................................................ 16
1.19.14 Menu 'On Power Up'........................................................................................................................................... 16
1.19.15 Menu 'Key LE'...................................................................................................................................................... 16
1.19.16 Menus 'Overrage / Underrage'............................................................................................................................ 17
1.19.17 Le zeros ............................................................................................................................................................. 17

www.encoderhohner.com - info@encoderhohner.com - Tel.: (00 34) 972 16 00 17
2
User Reference Manual - VI96 Display
1.19.18 Vexc. Control ....................................................................................................................................................... 17
1.19.19 Funcon ' Password'............................................................................................................................................ 17
1.19.20 Factory reset ....................................................................................................................................................... 17
1.19.21 Firmware version................................................................................................................................................. 17
1.19.22 Brightness............................................................................................................................................................ 17
1.19.23 Acces to oponal modules.................................................................................................................................. 17
1.20. Full conguraon menu............................................................................................................................................ 18
1.21. Factory conguraon ................................................................................................................................................ 21
1.22. To access the instrumental ....................................................................................................................................... 22
1.23. Modular system ........................................................................................................................................................ 22
1.24. Precauons on installaon ....................................................................................................................................... 23
1.25. Warranty................................................................................................................................................................... 23
1.26. CE Declaraon of conformity.................................................................................................................................... 23
2. OUTPUT AND CONTROL MODULES
2.1. Module Relay .............................................................................................................................................................. 24
2.2. Module Transistor....................................................................................................................................................... 24
2.4. Module Control SSR .................................................................................................................................................... 25
2.3. Module Analogic Output............................................................................................................................................. 25
2.6. Module Modbus RTU.................................................................................................................................................. 26
2.5. Module RS-485............................................................................................................................................................ 26
2.7. Module RS-232............................................................................................................................................................ 27
2.8. Special Modules.......................................................................................................................................................... 27
3. ACCESORIES
4.1. Benchtop housing ....................................................................................................................................................... 28
4.2. Adapter ....................................................................................................................................................................... 28
4.3. Adapter ....................................................................................................................................................................... 28
4.4. Wall Box ...................................................................................................................................................................... 28
4.5. Protector ..................................................................................................................................................................... 28

www.encoderhohner.com - info@encoderhohner.com - Tel.: (00 34) 972 16 00 17
3
User Reference Manual - VI96 Display
INTRODUCTION
1. VI96 DISPLAY
Panel meter 96 x 48 mm (1/8 DIN) and 6 digits with 14 mm digit height, congurable with 5 impulse counter modes (see secon 1.2), 2
ratemeter modes (see secon 1.3) and a 1 periodmeter mode (see secon 1.4).
Highly congurable, accepts all types of sensors (NPN, PNP, push-pull, Namur, inducve, pick-up, mechanical, TTL, CMOS, ...) including
quadrature signals (single and bidireconal encoder signals).
Reading from 999999 to -199999 with decimal point, scalable reading with congurable mulplier factor (1 to 999999) and congurable
divider factor (1 to 999999). Includes internal pull-up and pull-down resistors, congurable trigger levels, detecon by rising or falling
edge, excitaon voltage congurable from 5 Vdc to 18 Vdc.
Opons for output and control with 1, 2 and 3 relays, transistor outputs, controls for SSR relays, isolated analog outputs, communicaons
in Modbus RTU, RS-485 ASCII and RS-232. Special opons with 4 and 6 relay outputs.
Independent alarms congurable as maximum or minimum, with 1 or 2 setpoints per alarm, hysteresis, independent acvaon and
deacvaon delays and control for inverted relay.
Front protecon IP65. Connecons by plug-in screw terminals. For industrial applicaons.
• ‘Fast access’ menu to selected funcons, accessible with key UP (5) (see secon 1.19.12)
• Funcon ‘On power up’ for system protecon on rst ‘cold’ start-up or automac reset (see secon 1.19.15)
• Special ‘FAST’ mode for fast counng applicaons (see secon 1.16)
• Special ‘SLOW’ mode for slow ratemeter applicaons (low frequency applicaons) (see secon 1.15)
• Direct conguraon for most usual sensor, at the ‘SnSr / Auto’ menu (see secon 1.19.10)
• Funcon ‘Trigger Sense’ helps to detect the correct trigger level (see secon 1.13)
Mulple display lters, memory for maximum and minimum reading, password protecon, 5 brightness levels.
Power Supply Opon 1 Opon 2 Opon 3
1.1. Product reference
VI96 -
1. 85-265 Vac/dc
2. 11/60 Vdc, 24 Vac, 48 Vac
1. 1 Relay
2. Analog output
3. Modbus RTU
4. RS-485
5. RS-232
6. 1 Transistor
7. 1 Control SSR
1. 1 Relay
2. Analog output
3. Modbus RTU
4. RS-485
5. RS-232
6. 1 Transistor
7. 1 Control SSR
1. 1 Relay
2. Analog output
3. Modbus RTU
4. RS-485
5. RS-232
6. 1 Transistor
7. 1 Control SSR

www.encoderhohner.com - info@encoderhohner.com - Tel.: (00 34) 972 16 00 17
4
User Reference Manual - VI96 Display
Funcons included Secon
Fast access Yes 1.19.12
‘SLOW’ Mode Yes, for slow frequencies 1.15
‘FAST’ Mode Yes, for fast counng 1.16
Mulplier and divider From 1 to 999999 1.19.2
Reset congurable Yes (front, rear and linked to
alarm acvaon)
1.19.15 y
1.19.11 y
1.10
Preset Yes 1.19.2
Trigger level Congurable 1.19.10
‘Trigger Sense’ Funcon Helps to set the trigger 1.13
Sensor selecon By menu 1.19.10
Cycle counter 1.14
Retenon memory Yes, recovers with power 1.11
‘On Power Up’ Yes 1.19.14
Excitaon voltage Congurable 1.19.10
Display lters Recursive
1.19.7 y
1.19.8 y
1.19.9
Memory Max., min., cycles 1.19.12
Password Blocks access to congura-
on menu 1.19.19
Alarms
Double setpoints
Acvaon delays
Desacvaon delays
Hysteresis
Inverted relays
Locked alarms
1.19.11
Display brightness 5 levels 1.19.22
1.5. Funcons included
1.6. Front view
1.2. Impulse counter modes
The instrument allows for 5 selectable impulse counter modes :
• Counter (‘cn.1’) (see secon 1.19.2)
• Counter quadrature (‘cnq.2’) (see secon 1.19.3)
• Counter with inhibion (‘cnI.3’) (see secon 1.19.4)
• Counter with control add / substract (‘cnc.4’) (see
secon 1.19.5)
• Counter dierenal (‘cnd.5’) (see secon 1.19.6)
Congurable up or down counng, ‘reset’ at rear terminals,
front key and/or at alarm acvaon. Congurable ‘Preset’ va-
lue. Relay acvaon and deacvaon delays.
Alarm funcons with ‘return to preset’ or ‘reset to 0’ genera-
te cycles of counng (instrument counts from ‘preset’ value to
alarm value in never ending cycle). The instrument provides
memory of cycles counter.
Scalable reading with congurable mulplier factor (1 to
999999) and congurable divider factor (1 to 999999). Memory
retenon in case or power loss. Retains conguraon and last
reading.
Counng frequency up to 250 KHz, in ‘FAST’ mode (see secon
1.16).
1.3. Ratemeter modes
In ratemeter mode the reading is proporonal to the measured
frequency. The instrument allows for 2 selectable ratemeter
modes :
• Ratemeter (‘rt.6’) (see secon 1.19.7)
• Ratemeter quadrature (‘rtq.7’) (see secon 1.19.8)
The ratemeter mode has a single input channel, with scalable
reading. The quadrature ratemeter mode has 2 inpur channels
available for detecon of sense of turn when working with
quadrature signals. Scalable reading with congurable mul-
plier factor (1 to 999999) and congurable divider factor (1 to
999999).
For low frequency applicaons, the ‘SLOW’ mode provides the
best response me for each applicaon (see secon 1.15).
Maximum frequency up to 500 KHz and minimum frequency
down to de 0.001 Hz (1 mHz) with ‘SLOW’ mode acve.
1.4. Periodmeter mode
Reading is proporonal to the signal period. Scalable reading
with congurable mulplier factor (1 to 999999) and congura-
ble divider factor (1 to 999999).
For applicaons with long periods (slow frequencies), the
‘SLOW’ mode provides the best response me for each applica-
on (see secon 1.15).
Alarms
Units
Logo
Buon ‘UP’ Buon ‘SQ’
Buon ‘LE’
‘Conguraon menu'
(ver sección 1.19)
‘Fast access‘
(see secon 1.19.12)
Front reset (see
secon 1.19.15)

www.encoderhohner.com - info@encoderhohner.com - Tel.: (00 34) 972 16 00 17
5
User Reference Manual - VI96 Display
1.7. Power connecons
Earth connecon - Although a terminal is provided for earth
connecon, this connecon is oponal. The instrument does
not need earth connecon for correct operaon nor for com-
pliance with the security regulaons.
Fuse - To comply with security regulaon 61010-1, add to the
power line a protecon fuse acng as disconnecon element,
easily accessible to the operator and idened as a protecon
device.
Power ‘H’ fuse 250 mA me lag
Power ‘L’ fuse 400 mA me lag
1.9. Rear view
~
~+
-
8 9 0
1.8. Sensor conguraon and connecons
Selecng one of the sensors listed at the ‘SnSr’ menu entry, will congure the sensor parameters to the values indicated in the table.
The table also indicates the typical connecons for each type of sensor. Parameters can be manually modied.
Connecons are indicated for a single sensor connected to the channel A. For two sensors (for inhibion control, quadrature signal, etc)
apply the same connecon criteria also to channel B.
Note : indicated values are typical values. Check the correct specicaons with your sensor datasheet and adapt the required congura-
on and connecons as needed.
Sensor Connecons Pulls Vexc. Anrrebound lter Trigger
Mechanical contact 0 V canal A pull-up no 100 mSeg. 2,5 Vdc
Namur canal A Vexc pull-down 9 Vdc no 3,0 Vdc
NPN 2 wires 0 V canal A pull-up 18 Vdc no 2,5 Vdc
NPN 3 wires 0 V canal A Vexc pull-up 18 Vdc no 2,5 Vdc
PNP 2 wires 0 V canal A pull-down 18 Vdc no 2,5 Vdc
PNP 3 wires 0 V canal A Vexc pull-down 18 Vdc no 2,5 Vdc
Push-pull 0 V canal A Vexc no 18 Vdc no 2,5 Vdc
TTL
CMOS
Pick-up
0 V canal A no 5 Vdc no 2,5 Vdc
AC<30 Vp
Inducve 0 V canal A no no no 0 Vdc
Signal
(see secon 1.10)
Opon 1 Opon 2Opon 3
Power
(see secon 1.7)
Detail of the plug-in screw terminals pro-
vided with the instrument. The instrument
is provided with all terminals needed, both
male and female.
12345 890

www.encoderhohner.com - info@encoderhohner.com - Tel.: (00 34) 972 16 00 17
6
User Reference Manual - VI96 Display
1.10. Signal connecons
1.11. Technical specicaons
Digits
Number of digits 6
Led 7 segments led
Color red
Digit height 14 mm
Reading
Maximum reading 999999
Minimum reading -199999
Decimal point congurable X.X.X.X.X.X.
Overrange / underrange congurable to ash, reset or
preset (see secon 1.19.16)
Display refresh 15 readings / second
Memory retenon yes, retains reading value in
case of power loss
Signals accepted NPN, PNP, Namur, pick-up, TTL,
inducve, mechanical, quadra-
ture
Max. Vdc at input ±30 Vdc
Input impedance 2K4 with pull-up or pull-down
resistor
470K without pull resistor
Accuracy of the quartz ±0.01 %
Thermal dri 20 ppm / ºC
Excitaon voltage congurable
Output voltage +18 Vdc, +15 Vdc, +9 Vdc,
+5 Vdc
Maximum current 70 mA
Protecon yes, current limited to 70 mA
Frequencies counter modes
ratemeter modes
periodmeter modes
Power
Power ‘H’ 85 to 265 Vac/dc
Power ‘L’ 11 to 60 Vdc and 24/48 Vac
Isolaon* 2500 Ve with power ‘H’
1500 Ve with power ‘L’
*tested for 60 sec.
Consumpon <1.5 W only meter
<4.0 W meter with opons
Conguraon 3 buons front keypad
Front protecon IP65
Output and control opons Relays, analog outputs, serial
communicaons (see secon 2)
Mechanical
Mounng Panel
Connecons Plug-in screw terminal
Housing material ABS, polycarbonate (V0)
Weight <150 grams
Front size 96 x 48 mm
Panel cut-out 92 x 44 mm
Depth from panel 91 mm (including terminals)
Temperature
Operaon From 0 to +50 ºC
Storage From -20 to +70 ºC
Warm-up me 15 minutes
Vexc.
12345
Channel B
Reset
0 V
Channel A
Counter Mode Frequency Secon
Counter
‘FAST’ mode acve max. 250 KHz 1.19.2
normal mode max. 9 KHz 1.19.2
Counter + inhibion max. 9 KHz 1.19.4
Counter + control A/S max. 9 KHz 1.19.5
Counter dierenal max. 9 KHz 1.19.6
Counter
quadrature
mode x1 max. 17 KHz 1.19.3
mode x2 max. 16 KHz 1.19.3
mode x4 max. 11 KHz 1.19.3
Ratemeter Mode Frequency Secon
Ratemeter
normal mode
max. 500 KHz
1.19.7
‘SLOW’ mode acve max. 200 Hz
min. 1 mHz 1.19.7
Ratemeter
quadrature
mode x1 max. 17 KHz 1.19.8
mode x2 max. 16 KHz 1.19.8
mode x4 max. 11 KHz 1.19.8

www.encoderhohner.com - info@encoderhohner.com - Tel.: (00 34) 972 16 00 17
7
User Reference Manual - VI96 Display
1.14. Funcon 'Cycler counter'
The counter modes allow to acvate a reset funcon (to ‘0’ or
to ‘preset’ value) when an alarm setpoint is reached. With this
conguraon, the instrument counts in cycles, counng from
the instrument preset value up to the alarm setpoint. Each cy-
cle is counted and accumulated into an internal memory, acces-
sible through the ‘fast access’ menu (key UP (5) (see secon
1.19.12)).
To reset the memory of cycles, visualize the value at the ‘uP’
menu, then press the (5) key and the ‘rSt’ message appears.
Press (<) to reset.
Reading
Time
Setpoint1
Impulse counter, with the ‘reset to preset’
when setpoint 1 is reached
Preset
Time
Cycle counter
01
2
3
1.12. Mechanical dimensions (mm)
1.13. Funcon 'Trigger Sense'
The trigger level is automacally congured when selecng
a sensor from the ‘Sensor / Conguraon’ (‘SnSr’ / ‘Auto’)
menu list. The trigger level can be also manually modied
from the ‘SnSr’ / ‘TrIG’ menu entry. The selected value applies
to channels ‘A’ and ‘B’ (the reset has a xed trigger level at
2.5 Vdc).
At the ‘SnSr’ / ‘TrIG’ menu, the instrument shows the trigger
level and two vercal leds to the le. These leds inform in
real me about the status (‘0’ or ‘1’) of the input channels
‘A’ and ‘B’. When the led switches between up and down
posion, it indicates that impulses are being detected at the
input. If the instrument does not detect impulses, the led
posions remain xed.
Increase the trigger level pressing key ‘UP’ (5) and decrease
pressing key ‘LE’ (3).
44
92
Panel cut-
out
16 8
75
96
48
Channel ‘A’
Status ‘1’ Trigger level
Status ‘0’
Leds of the ‘Trigger Sense’
funcon
Channel ‘B’
Periodmeter Mode Frequency Secon
Periodmeter
normal mode
max. 500 KHz
1.19.9
‘SLOW’ mode acve
max. 200 Hz
min. 1 mHz
(1000 sec.)
1.19.9
Vdc
Time
‘Trigger’ level
‘1’
‘0’ Signal
detected

www.encoderhohner.com - info@encoderhohner.com - Tel.: (00 34) 972 16 00 17
8
User Reference Manual - VI96 Display
1.15. 'SLOW' Mode
Special working mode for applicaons with low frequency
signals. Applies to ratemeter (‘rt.6’), ratemeter quadrature
(‘rtq.7’) and periodmeter (‘Prd.8’). The ‘SLOW’ mode allows
to measure slow frequencies down to 1 mHz (0,001 Hz) and is
funconal up to 200 Hz.
The ‘SLOW’ mode provides the fastest response me possible
for a given applicaon, calculang the frequency and the pe-
riod based on the me between consecuve impulses.
The ‘SLOW’ mode needs to dene the parameter ‘maximum
waing me’ to a value between 1 and 1000 seconds. If this
me expires without a single impulse being received, the rea-
ding jumps to ‘0’ (both for ratemeter and periodmeter modes).
The ‘GATE’ parameter is not used if ‘SLOW’ mode is acve.
In ‘ratemeter quadrature’ (‘rtq.7’) mode, the acvaon of the
‘SLOW’ mode calculates the frequency based on the me be-
tween consecuve impulses received on channel A, and cal-
culates the sense of turn (clockwise or counter-clockwise) by
comparing each impulse with the state of channel B. The ‘edge’
parameter is xed to a ‘1--1’. Typical applicaon for quadrature
frequency measure with two inducve sensors at low frequen-
cy.
1.16. 'FAST' Mode
Special working mode for counter applicaons with high fre-
quency signals, up to 250 KHz. Applies only to the counter
mode (‘cn.1’).
The acvaon of the ‘FAST’ mode congures the signal detec-
on by rising edge. The rst edge detected, either rising or fa-
lling edge, aer the instrument restart (power-up, or congu-
raon change) is used for internal inializaon and will not be
counted as impulse.
1.17. How to operate the menus
The instrument has two menus accessible to the user :
‘Conguraon menu’ (key SQ) (<)
‘Fast access’ menu (key UP) (5)
Conguraon menu
The ‘conguraon menu’ modies the conguraon parame-
ters to adapt the instrument to the applicaon needs. To access
the ‘conguraon menu’ press for 1 second the SQ (<) key.
This access can be blocked by acvang the ‘Password’ (‘PASS’)
funcon. While operang the ‘conguraon menu’, the alarm
status is ‘hold’ to the status they had before accessing the
menu, and the output and control modules remain in ‘error’
state. When leaving the ‘conguraon menu’, the instrument
applies a system reset, followed by a brief disconnecon of the
alarms and the output and control modules. Funconality is
then recovered.
For a detailed explanaon on the ‘conguraon menu’ see sec-
on 1.19, and for a full view of the ‘conguraon menu’ struc-
ture see secon 1.20.
‘Fast access’ menu
The ‘fast access’ menu is an operator congurable menu, pro-
viding fast and direct access to the most usual funcons of the
instrument with a single key pad stroke. Press key UP (5) to
access this menu.
See secon 1.19.12 for a list of funcons eligible for ‘fast ac-
cess’ in this instrument. The ‘Password’ (‘PASS’) funcon does
not block access to this menu. Accessing and modifying para-
meters in the ‘fast access’ menu does not interfere with the
normal funconality of the instrument, and it does not genera-
te any system reset when validang the changes.
Front key pad descripon
Key SQ (<) - press the SQ (<) key for 1 second to access the
‘conguraon menu’. Inside the menu, the SQ (<) key func-
ons as a ‘ENTER’ key. It selects and accesses the menu opon
currently displayed. At menus with numerical value entries, it
validates the number displayed.
Key UP (5) - the UP (5) key gives access to the ‘fast access’
menu. Inside the menus, it moves vercally through the die-
rent menu opons. At menus with numerical value entries, it
modies the digit selected by increasing its value to 0, 1, 2, 3,
4, 5, 6, 7, 8, 9.
Key LE (3) - inside the menus, the LE (3) key funcons as the
‘ESCAPE’ key. It leaves the selected menu, and eventually, will
leave the whole menu. When leaving the ‘conguraon menu’
with the LE (3) key, the changed parameters are acvated. At
menus with numerical value entries, the LE (3) key allows to
select the acve digit. To modify the value of the selected digit
use the UP (5) key.
Menu ‘rollback’
Aer 30 seconds without interacon from the operator, the ins-
trument will rollback and leave the ‘conguraon menu’ or the
‘fast access’ menu. All changes will be discarded.

www.encoderhohner.com - info@encoderhohner.com - Tel.: (00 34) 972 16 00 17
9
User Reference Manual - VI96 Display
Example of operaon inside the ‘conguraon menu’.
1. The SQ (<) key enters into the ‘conguraon menu’.
2. The SQ (<) key enters into the ‘Func’ opon menu.
3. The UP (5) key moves through the menu opons.
4. The SQ (<) key selects the desired range and returns to the
‘Func’ menu.
5. The LE (3) key leaves the actual menu level and moves to
the previous menu level.
6. The LE (3) key leaves the ‘conguraon menu’. Changes are
applied and saved at this moment.
1.18. Messages and errors
The error messages are shown on display in ash mode.
Funcon mode
(2)
(3)
(3)
(3)
(3)
(3)
(4)
(4)
(4)
(4)
(3)
(3)
(6)
(6)
(1)
Messages and error
‘Err.1’ Incorrect password.
‘Err.2’ at ‘oPt.X’ menu entry. Installed module is not recogni-
zed.
‘Err.8’ excitaon voltage overload.
‘999999’ + ashing mode. Reading is in overrange.
‘-199999’ + ashing mode. Reading is in underrange.

www.encoderhohner.com - info@encoderhohner.com - Tel.: (00 34) 972 16 00 17
10
User Reference Manual - VI96 Display
1.19.1 Inial set-up
To congure the inial set up of the instrument, select the func-
on mode, the decimal point posion, scale the reading and
congure the mode selected and the sensor.
Enter the ‘Funcon mode’ (‘Func’) menu and select the desired
funcon, from the 5 counng modes, 2 ratemeter modes and
the periodmeter mode available.
• ‘Counter’ (‘cn. 1’) - normal counter mode. Impulses input at
channel A. Channel B disabled.
• ‘Counter quadrature’ (‘cnq.2’) - counter mode for quadratu-
re signals. Impulses input at channel A and B, in quadrature.
• ‘Counter + inhibion’ (‘cnI.3’) - counter mode with inhibi-
on control. Impulses input at channel A. Inhibion control on
channel B.
• ‘Counter + control add / substract’ (‘cnc.4’) - counter mode
with control for add / substract. Impulses input at channel A.
Control for the add or substract funcon on channel B.
• ‘Counter dierenal’ (‘cnd.5’) - counter mode with dieren-
al funcon. Impulses received at channel A add. Impulses re-
ceived at channel B substract.
• ‘Ratemeter’ (‘rt.6’) - ratemeter mode. Impulses input at
channel A. Channel B disabled.
• ‘Ratemeter quadrature’ (‘rtq.7’) - ratemeter mode for qua-
drature signals. Impulses input at channel A and B, in quadrature.
• ‘Periodmeter’ (‘Prd.8’) - periodmeter mode. Impulses input
at channel A. Channel B disabled.
Access the ‘Decimal point’ (‘dP’) menu to select the decimal
point posion. Move the decimal point by pressing the ‘LE’ (3)
key.
Congure the funcon mode selected (‘cnF.2’ to ‘cnF.8’). See
secons 1.19.2 to 1.19.9.
Congure the sensor at the ‘SnSr’ menu. See secon 1.19.10.
1.19.2 Conguraon for 'cn. 1'
Conguraon menu for mode ‘counter’ (‘cn.1’). Total impulses
received are mulplied by the value of the ‘mulplier’ (‘MuLt’)
register and divided by the ‘divider’ (‘dIV’) register. Result is re-
freshed on the display.
• assign the value for parameter ‘Mulplier’ (‘MuLt’) from 1 to
999999.
• assign the value for parameter ‘Divider’ (‘dIV’) from 1 to
999999.
• assign the value for ‘Preset’ (‘PrSt’) from -199999 to 999999.
Reset acvaon loads on display the preset value.
• select the counng mode (‘ModE’) to ‘uP’ for upwards coun-
ng (impulses received add) or ‘doWn’ for downwards counng
(impulses received substract).
• to acvate the ‘FAST’ mode (‘FASt’) select ‘on’. See secon
1.16 for more informaon on the ‘FAST’ mode.
1.19. Conguraon Menu
Press ‘SQ’ (<) for 1 second to access the ‘conguraon menu’.
For a descripon on how to operate inside the menus see secon
1.17. For a full vision of the ‘conguraon menu’ structure see
secon 1.20.
Decimal Point
Funcon mode
Counter
Counter quadrature
Counter + inhibion
Counter + control
add / subtract
Counter dierenal
Ratemeter
Ratemeter quadrature
Periodmeter
The next menu accesses the conguraon parameters for the ‘funcon
mode’ (‘Func’) selected. Conguraon parameters are slightly dierent for
each ‘funcon mode’. In the next entries, all 7 possible conguraon me-
nus are explained, ‘cnF.1’ to ‘cnF.7’, one for each ‘funcon mode’.
Mulplier 1 to 999999
Divider 1 to 999999
Conguraon
counter Mulplier
Divider
Preset Preset value
-199999 to 999999
Mode Up
Down
‘FAST’ mode

www.encoderhohner.com - info@encoderhohner.com - Tel.: (00 34) 972 16 00 17
11
User Reference Manual - VI96 Display
1.19.3 Conguraon for 'cnq. 2'
Conguraon menu for mode ‘counter quadrature’ (‘cnq.2’).
Total impulses received are mulplied by the value of the ‘mul-
plier’ (‘MuLt’) register and divided by the ‘divider’ (‘dIV’) regis-
ter. Result is refreshed on the display.
• assign the value for parameter ‘Mulplier’ (‘MuLt’) from 1 to
999999.
• assign the value for parameter ‘Divider’ (‘dIV’) from 1 to
999999.
• assign the value for ‘Preset’ (‘PrSt’) from -199999 to 999999.
Reset acvaon loads on display the preset value.
• select the ‘edges’ to count for each quadrature cycle (‘q.124’).
Select ‘1--1’ for 1 impulse per quadrature cycle. Select ‘1--2’ for
2 impulses per quadrature cycle. Select ‘1--4’ for 4 impulses per
quadrature cycle.
1.19.4 Conguraon for 'cnl. 3'
Conguraon menu for mode ‘counter + inhibion control’
(‘cnI.3’). Total impulses received are mulplied by the value of
the ‘mulplier’ (‘MuLt’) register and divided by the ‘divider’
(‘dIV’) register. Result is refreshed on the display.
• assign the value for parameter ‘Mulplier’ (‘MuLt’) from 1 to
999999.
• assign the value for parameter ‘Divider’ (‘dIV’) from 1 to
999999.
• assign the value for ‘Preset’ (‘PrSt’) from -199999 to 999999.
Reset acvaon loads on display the preset value.
• select the counng mode (‘ModE’) to ‘uP’ for upwards coun-
ng (impulses received add) or ‘doWn’ for downwards counng
(impulses received substract).
• select the acvaon mode for the ‘inhibion’ (‘Inh’) control.
Select ‘on_h’ to inhibit the counng when channel B is at logical
state ‘1’. Select ‘on_0’ to inhibit the counng when channel B is
at logical state ‘0’.
1.19.5 Conguraon for 'cnc. 4'
Conguraon menu for mode ‘counter + control add / subs-
tract’ (‘cnc.4’). Total impulses received are mulplied by the
value of the ‘mulplier’ (‘MuLt’) register and divided by the ‘di-
vider’ (‘dIV’) register. Result is refreshed on the display.
• assign the value for parameter ‘Mulplier’ (‘MuLt’) from 1 to
999999.
• assign the value for parameter ‘Divider’ (‘dIV’) from 1 to
999999.
• assign the value for ‘Preset’ (‘PrSt’) from -199999 to 999999.
Reset acvaon loads on display the preset value.
• select the acvaon mode for the ‘control add / substract’
(‘Add’). Select ‘on_h’ acvates the addion of impulses recei-
ved on channel A when channel B is at logical state ‘1’ (impulses
on channel A substract if channel B is at logical state ‘0’). Select
‘on_0’ acvates the addion of impulses received on channel
A when channel B is at logical state ‘0’ (impulses on channel A
substract if channel B is at logical state ‘1’).
Mulplier 1 to 999999
Divider 1 to 999999
Conf. counter
+ inhibion Mulplier
Divider
Preset Preset value
-199999 a 999999
Mode Up
Down
Inhibion Inhibits if
channel B is high
Inhibits if
channel B is 0 Vdc
Conf. counter
quadrature
Mulplier 1 to 999999
Divider 1 to 999999
Mulplier
Divider
Preset Preset value
-199999 a 999999
Edges 1 imp. per cycle
2 imp. per cycle
4 imp. per cycle
Mulplier 1 to 999999
Divider 1 to 999999
Conf. counter
+ control add /
substract
Mulplier
Divider
Preset
Preset value
-199999 to 999999
Control S/R Adds if channel
B is high
Adds if channel
B is 0 Vdc

www.encoderhohner.com - info@encoderhohner.com - Tel.: (00 34) 972 16 00 17
12
User Reference Manual - VI96 Display
1.19.6 Conguraon for 'cnd. 5'
Conguraon menu for mode ‘counter dierenal’ (‘cnd.5’).
Total impulses received are mulplied by the value of the ‘mul-
plier’ (‘MuLt’) register and divided by the ‘divider’ (‘dIV’) regis-
ter. Result is refreshed on the display.
• assign the value for parameter ‘Mulplier’ (‘MuLt’) from 1 to
999999.
• assign the value for parameter ‘Divider’ (‘dIV’) from 1 to
999999.
• assign the value for ‘Preset’ (‘PrSt’) from -199999 to 999999.
Reset acvaon loads on display the preset value.
Impulses received on channel A add. Impulses received on chan-
nel B substract.
1.19.7 Conguraon for 'rt. 6'
Conguraon menu for mode ‘ratemeter’ (‘rt.6’). Frequency
measured is mulplied by the value of the ‘mulplier’ (‘MuLt’)
register and divided by the ‘divider’ (‘dIV’) register. Result is re-
freshed on the display. Measure is updated at the rate dened
on the ‘GATE’ register.
• assign the value for parameter ‘Mulplier’ (‘MuLt’) from 1 to
999999.
• assign the value for parameter ‘Divider’ (‘dIV’) from 1 to
999999.
• select the value for the ‘Time window’ (‘GAtE’). Available va-
lues are : 0.5, 1.0, 2.0, 4.0, 8.0 or 16.0 seconds. The me window
denes the display refresh me. This parameter has no eect if
the ‘SLOW’ mode is acve.
• for slow frequencies acvate the ‘SLoW’ parameter conguring
the ‘tIME’ parameter between 1 and 1000 seconds. Congure the
‘nuMb’ parameter between 1 and 32 impulses. See secon 1.15
for more informaon on the ‘SLoW’ mode.
• in case of unstable signals, acvate the ‘average lter’ (‘AVr’)
funcon. It acvates a recursive lter on the reading. the lter is
stronger for higher values, from 0.0 to 99.9.
1.19.8 Conguraon for 'rtq. 7'
Conguraon menu for mode ‘ratemeter quadrature’ (‘rtq.7’).
Frequency measured is mulplied by the value of the ‘mul-
plier’ (‘MuLt’) register and divided by the ‘divider’ (‘dIV’) regis-
ter. Result is refreshed on the display. Measure is updated at the
rate dened on the ‘GATE’ register.
• assign the value for parameter ‘Mulplier’ (‘MuLt’) from 1 to
999999.
• assign the value for parameter ‘Divider’ (‘dIV’) from 1 to
999999.
• select the value for the ‘Time window’ (‘GAtE’). Available va-
lues are : 0.5, 1.0, 2.0, 4.0, 8.0 or 16.0 seconds. The me window
denes the display refresh me. This parameter has no eect if
the ‘SLOW’ mode is acve.
• select the ‘edges’ to count for each quadrature cycle (‘q.124’).
Select ‘1--1’ for 1 impulse per quadrature cycle. Select ‘1--2’ for
2 impulses per quadrature cycle. Select ‘1--4’ for 4 impulses per
quadrature cycle.
Mulplier 1 to 999999
Divider 1 to 999999
Conf. ratemeter Mulplier
Divider
Time window
Seconds
Conguraon
counter
dierenal
Mulplier 1 to 999999
Divider 1 to 999999
Mulplier
Divider
Preset Preset value
-199999 a 999999
Mulplier 1 to 999999
Divider 1 to 999999
Conf. ratemeter
quadrature Mulplier
Divider
'SLOW’ mode
Average lter
Filter strength
(0 = disabled)
Max. waing me
Number of pulses
Time window
Seconds
Edges 1 imp. per cycle
2 imp. per cycle
4 imp. per cycle

www.encoderhohner.com - info@encoderhohner.com - Tel.: (00 34) 972 16 00 17
13
User Reference Manual - VI96 Display
• for slow frequencies acvate the ‘SLoW’ parameter conguring
the ‘tIME’ parameter between 1 and 1000 seconds. Congure the
‘nuMb’ parameter between 1 and 32 impulses. See secon 1.15
for more informaon on the ‘SLoW’ mode.
• in case of unstable signals, acvate the ‘average lter’ (‘AVr’)
funcon. It acvates a recursive lter on the reading. the lter is
stronger for higher values, from 0.0 to 99.9.
1.19.9 Conguraon for 'Prd. 8'
Conguraon menu for mode ‘periodmeter’ (‘Prd.8’). Period
measured is mulplied by the value of the ‘mulplier’ (‘MuLt’)
register and divided by the ‘divider’ (‘dIV’) register. Result is re-
freshed on the display. Measure is updated at the rate dened
on the ‘GATE’ register.
• assign the value for parameter ‘Mulplier’ (‘MuLt’) from 1 to
999999.
• assign the value for parameter ‘Divider’ (‘dIV’) from 1 to
999999.
• select the value for the ‘Time window’ (‘GAtE’). Available va-
lues are : 0.5, 1.0, 2.0, 4.0, 8.0 or 16.0 seconds. The me window
denes the display refresh me. This parameter has no eect if
the ‘SLOW’ mode is acve.
• for long periods acvate the ‘SLoW’ parameter conguring the
‘tIME’ parameter between 1 and 1000 seconds. Congure the
‘nuMb’ parameter between 1 and 32 impulses. See secon 1.15
for more informaon on the ‘SLoW’ mode.
• in case of unstable signals, acvate the ‘average lter’ (‘AVr’)
funcon. It acvates a recursive lter on the reading. the lter is
stronger for higher values, from 0.0 to 99.9.
1.19.10 Sensor conguraon
The sensor conguraon menu (‘SnSr’) provides conguraon
for the input secon of the instrument, the excitaon voltage
and the trigger level, for accurate detecon of the impulses.
• ‘Automac conguraon’ (‘Auto’) - if a standard sensor is
used, select one of the sensors provided at the ‘Auto’ menu list.
The instrument will automacally congure the parameters ac-
cording to Table 2 (see secon 1.8). If this conguraon does not
detect impulses, manually modify the values for the parameters
indicated below.
Sensor
NPN 2 wire
Mechanical
contact
Namur
Automac conf.
NPN 3 wire
PNP 2 wire
PNP 3 wire
Push pull
TTL
CMOS
Pick-up
Inducve
Vac <30 V
'SLOW’ mode
Average lter Filter strength
(0 = disabled)
Max. waing me
Number of pulses
Mulplier 1 to 999999
Divider 1 to 999999
Conf.
periodmeter
Mulplier
Divider
Time window
Seconds
‘SLOW’ mode
Average Filter Filter strength
(0 = disabled)
Max. waing me
Number of pulses

www.encoderhohner.com - info@encoderhohner.com - Tel.: (00 34) 972 16 00 17
14
User Reference Manual - VI96 Display
• ‘Pulls on channel A’ (‘PuL.A’) - acvates pull resistors at
channel A. Select ‘P.uP’ to acvate pull-up resistors (needed
for NPN sensors). Select ‘P.dn’ to acvate pull-down resistors
(needed PNP sensors). Pull-up and pull-down selecon con-
gure the trigger level to 2,5 Vdc.
• ‘Pulls on channel B’ (‘PuL.b’) - see previous menu entry ‘Pulls
on channel A’.
• ‘Pulls on reset’ (‘PuL.r’) - see previous menu entry ‘Pulls on
channel A’. Trigger level for reset channel is xed to 2,5 Vdc.
• ‘trigger level’ (‘trIG’) - input signal value in Vdc at which
the instrument detects impulse. Selectable between 0,0 and
3,9 Vdc. Trigger level is the same for channels A and B. Trigger
level for reset channel is xed at 2,5 Vdc. The two leds at the
le of the trigger level are part of the ‘Trigger Sense’ ulity for
easy locaon of the proper trigger level (see secon 1.13).
• ‘Acvaon for channel A’ (‘Act.A’) - congures the acvaon
of channel A by rising edge (‘on_h’) or by falling edge (‘on_0’)
• ‘Acvaon for reset channel’ (‘Act.r’) - congures the ac-
vaon of the reset channel by rising edge (‘on_h’) or by falling
edge (‘on_0’)
• ‘Excitaon voltage’ (‘V.EXc’) - congures the value of the ex-
citaon voltage at 5 Vdc, 9 Vdc, 15 Vdc and 18 Vdc. Select ‘no’ to
disable the excitaon voltage.
• ‘Anrrebound lter’ (‘rbnd’) - the anrrebound lter bloc-
ks addional rebounds (typically from a mechanical contact
sensor) from the same single impulse, prevenng that a single
impulse counts for more than 1. Value between 0 mSeconds
and 1000 mSeconds. When an impulse is received, impulse
detecon is disabled for the duraon of the me congured
in this parameter. Aer me has passed, impulse detecon is
enabled again. Recommended value for a mechanical contact:
100 mSeconds.
Anrrebound
by rising edge
by falling edge
Acvaon for
channel A
by rising edge
by falling edge
Acvaon for
reset
Excitaon voltage
Trigger level
Trigger level
(from 0.0 Vdc
a 3.9 Vdc).See
secon 1.15 for
‘Trigger Sense’
ulity
Anrrebound lter
(0 to 1000 mSec.)
Pull-down
Pull-up
Pulls on reset
Pulls on channel B
Pull-down
No pull resistor
Pull-up
Pull-down
No pull resistor
Pull-up
Pulls on channel A
No pull resistor

www.encoderhohner.com - info@encoderhohner.com - Tel.: (00 34) 972 16 00 17
15
User Reference Manual - VI96 Display
1.19.11 Alarms
The ‘Alarms’ (‘ALr’) menu congures the independent acvaon
of up to 3 relay outputs (or transistor or SSR modules), installed
with the R1 oponal modules (or T1 or SSR) (see secon 2.1). For
outputs up to 4 and 6 relays, see special modules R2, R4 and R6
at secon 2.6. The alarm states are indicated in the front display
with leds marked as ‘1’, ‘2’ and ‘3’.
To congure an alarm, enter into the alarm menu (‘ALr1’, ‘ALr2’
or ‘ALr3’) and congure the following parameters :
• select ‘Acve’ (‘Act’) to ‘on’
• at ‘Alarm type’ (‘TypE’) select the alarm to act as a maxi-
mum type alarm (‘MAX’) or a minimum type alarm (‘MIn’). The
maximum type alarm (or minimum type alarm) acvates when
the display value is higher (or lower) than the setpoint value.
• at ‘Setpoint’ (‘SEt’) enter the value for the alarm acvaon
point. This parameter is eligible for conguraon through the
‘Fast access’ menu (see secon 1.19.12).
• congure the hysteresis value at ‘Hysteresis’ (‘hySt’). The
hysteresis applies to the deacvaon process of the alarm. The
alarm deacvates when the reading has passed the setpoint va-
lue plus the hysteresis value. Hysteresis helps to avoid repe-
ve switching of the alarm relays, due to uctuang input signals
around the setpoint.
• at ‘Acvaon delay’ (‘dEL.0’) congure the delay to apply
before alarm acvaon. The acvaon delay starts counng
when the setpoint value is passed. Value from 0.0 to 99.9 se-
conds.
• at ‘Deacvaon delay’ (‘dEL.1’) congure the delay to apply
before alarm deacvaon. The deacvaon delay starts coun-
ng when the setpoint value plus the hysteresis value, is pas-
sed. Value from 0.0 to 99.9 seconds.
• to work with ‘windowed alarms’ (see graphical example be-
low) acvate ‘Setpoint 2’ (‘SEt2’) to ‘on’ and then congure the
desired second setpoint value. Second setpoint must always be
higher in value than the rst setpoint.
• the ‘Relay inverted’ (‘r.Inv’) parameter inverts the normal re-
lay connecons. When set to ‘on’ the relay will be acve when
alarm is inacve. For security applicaons where an inacve
relay controls the shutdown of the system.
• the ‘Locked alarm’ (‘A.Lck’) parameter disables the automa-
c deacvaon of the alarm. Alarm deacvaon must be per-
formed manually, by pressing the ‘LE’ front buon (see secon
1.19.14)
• the ‘On alarm’ (‘on.AL’) parameter assigns a predened
behaviour when alarm is acvated. Select ‘cont’ to connue
counng. Select ‘to_0’ to load ‘0’ on displays. Select ‘to_p’ to
load preset value on display. Parameter ‘dEL.1’ is set to 1 se-
cond when ‘to_0’ or ‘to_p’ are selected.
On alarm
Connue
To zero
To preset
Alarm 1
Setpoint
Hysteresis
Setpoint 2
Acve
Alarm type
Alarms
Acvaon delay
Deacvaon
delay
Relay inverted
Locked alarm
Reading
Time
setpoint
hysteresis
Alarm as maximum,
no hysteresis, no delays
on
o Time
acvaon
delay
on
o
deacvaon
delay
Time
Alarm as maximum, with
hysteresis and delays
on
o Time
Alarm as minimum,
no hysteresis, no delays
Reading
Time
Setpoint 2
Setpoint 1
Alarm as minimum,
with double setpoint,
no hysteresis, no delays
on
o Time

www.encoderhohner.com - info@encoderhohner.com - Tel.: (00 34) 972 16 00 17
16
User Reference Manual - VI96 Display
1.19. 12 Fast access
The ‘UP’ (5) key at the front of the instrument gives access to
a list of funcons congurable by the operator. See secon 1.17
for an explanaon on how to operate the ‘fast access’ menu.
The ‘Key UP (Fast access)’ (‘K.uP’) menu allows to select which
funcons will be accessible through the ‘fast access’ menu. Se-
lect ‘on’ to acvate each funcon.
• the ‘Setpoint 1’ (‘ALr1’) funcon allows to visualize and modify
the alarm 1 setpoint through the ‘fast access’ menu.
• the ‘Setpoint 2’ (‘ALr2’) funcon allows to visualize and modify
the alarm 2 setpoint through the ‘fast access’ menu.
• the ‘Setpoint 3’ (‘ALr3’) funcon allows to visualize and modify
the alarm 3 setpoint through the ‘fast access’ menu.
• the ‘Memory of maximum’ (‘MAX’) or ‘Memory of minimum’
(‘MIn’) funcons allow to visualize the maximum or minimum
reading value stored in memory. To reset this value, visualize the
memory value at the ‘fast access’ menu with key UP (5) and
when message ‘rSt’ is displayed, press (<) to reset.
• the ‘Memory of cycles’ (‘cYcL’) funcon allow to visualize and
reset the memory of cycles. To reset this value, visualize the me-
mory value at the ‘fast access’ menu with key UP (5) and when
message ‘rSt’ is displayed, press (<) to reset. The memory of cy-
cles countes ‘+1’ each me a reset alarm occurs (‘on_AL’ / ‘to_0’
or ‘to_P’) or a reset by ‘overrange’ / ‘underrange’ occurs.
• the ‘Preset value’ (‘PrSt’) funcon allows to visualize and mo-
dify the preset value congured.
1.19.13 Super fast access
If only a single funcon is selected for the ‘fast access’ menu,
pressing the the ‘UP’ (5) key will shortly display the funcon
name and then automacally jump to the funcon value.
1.19.14 Menu 'On Power Up'
The ‘On Power Up’ (‘on.Pu’) menu congures funcons to apply
at start-up. It applies only to instrument restart aer power loss.
It does not apply to instrument restart due to change in congu-
raon.
• parameter ‘Delay’ (‘dLAy’) assigns a waing me in seconds.
The instrument waits the congured me before starng normal
funcon. During this waing me, the display shows all decimal
points on in ash mode, all alarms are in ‘oFF’ state, there is no
signal acquision and there is no communicaons or control be-
ing performed. Aer the congured me is over, the instrument
starts in normal funcon. Delay value between 0 and 200 seconds.
• the ‘Reset’ (‘rSt’) parameter will execute a reset of the counter
each me the instrument is restarted.
1.19.15 Menu 'Key LE'
The ‘LE’ (3) key at the front of the instrument can be congured
to acvate a funcon.
• the ‘No funcon’ (‘nonE’) value assigns no funcon.
• the ‘Front reset’ (‘F.rSt’) value asigns the reset funon.
• the ‘Alarm unlock’ (‘A.Lck’) value assigns the manual unlock
of the alarms funcon, for instruments with the ‘Locked alarms’
(‘A.Lck’) funcon acvated (see secon 1.19.11)
• the ‘Reset and alarm unlock’ (‘Fr.AL’) assigns the two previous
funcons to the same buon.
Tools
Key UP
('fast access')
Memory of
maximum
Memory of
minimum
Setpoint 1
Setpoint 2
Setpoint 3
Memory of
cycles
Preset of values
On power-up Delay Seconds
Reset
Key LE
Front reset
Alarm unclock
No funcon
Reset and alarm
unclock

www.encoderhohner.com - info@encoderhohner.com - Tel.: (00 34) 972 16 00 17
17
User Reference Manual - VI96 Display
1.19.16 Menus 'Overrage / Underrage'
The ‘Counter overrange’ (‘c.orG’) and ‘Counter underrange’
(‘c.urG’) parameters congure the behavior of the instrument
when reading is higher than ‘9999’ (overrange) or lower than
‘-1999’ (underrange). Select ‘FLSH’ to enter reading into ash
mode. Select ‘to_0’ to apply a reset to ‘0’. Select ‘to_P’ to apply
a reset to preset value.
1.19.17 Le zeros
The ‘Le zeros’ (‘L.ZEr’) parameter controls the le zeros on or
o.
1.19.18 Vexc. Control
The ‘Vexc control’ (‘V.ctr’) parameters enables the ‘Err.8’ mes-
sage, when consumpon requested to the excitaon voltage is
higher than the current the instrument can provide.
1.19.19 Funcon 'Password'
At the ‘Password’ (‘PASS’) menu select a 6 digit code to block
access to the ‘conguraon menu’. Instrument conguraon will
not be accessible to non authorized personnel. To acvate the
‘Password’ select ‘on’ and introduce the code.
The code will be requested when trying to access the ‘con-
guraon menu’ (key ‘SQ’ (<)). The ‘fast access’ menu is not
password protected.
1.19.20 Factory reset
At the ‘Factory reset’ (‘FAct’) menu, select ‘yes’ to load the de-
fault factory conguraon for the instrument (see secon 1.21).
1.19.21 Firmware version
The ‘Version’ (‘VEr’) menu informs of the current rmware ver-
sion installed in the module.
1.19.22 Brightness
At the ‘Brightness’ (‘LIGh’) menu select the light intensity for the
front leds. With this funcon it is possible to adapt the instru-
ment to the environment light intensity.
1.19.23 Access to oponal modules
Menus ‘OPt.1’, ‘OPt.2’ and ‘OPt.3’ give access to the ‘congura-
on menus’ of the output and control modules installed at slots
Opt.1, Opt.2 and Opt.3.
See secon 2for a list of output and control modules available
for each slot. The ‘conguraon menu’ of each module is des-
cribed at the User’s Manual of each module.
Opon 1
Conguraon menu for the module installed
at Opt.1
Opon 2
Conguraon menu for the module installed
at Opt.2
Opon 3
Conguraon menu for the module installed
at Opt.3
Counter
overrange
Flash
To zero
To preset
Counter
underrange
Flash
To zero
To preset
Password
Version
Factory reset
Minimum
Brightness
Maximum
Standard
Le zeros
With le zeros
Without le zeros
Control Vexc.
With Vexc. error
control
Without Vex. error
control

www.encoderhohner.com - info@encoderhohner.com - Tel.: (00 34) 972 16 00 17
18
User Reference Manual - VI96 Display
1.20. Full conguraon menu
Select with key LE
Decimal point
Press ‘SQ’ (<) for 1 second to access the ‘Conguraon
menu’. See secon 1.19 for a descripon of each menu
entry.
Funcon mode
Counter
Counter quadrature
Counter + inhibion
Counter + control add / subtract
Counter dierenal
Ratemeter
Ratemeter quadrature
Periodmeter
Mulplier 1 to 999999
Divider 1 to 999999
Conguraon
counter
Mulplier
Divider
Preset Preset value
-199999 a 999999
Mode Up
Down
‘FAST’ Mode
Conf. counter
quadrature
Mulplier 1 to 999999
Divider 1 to 999999
Mulplier
Divider
Preset
Preset value
-199999 a 999999
Edges
1 imp. per cycle
2 imp. per cycle
4 imp. per cycle
Conf. counter
+ inhibion
Mulplier
Divider
Preset
Mode
Inhibion Inhibits if channel B is high
Inhibits if channel B is 0 Vdc
Mulplier 1 to 999999
Divider 1 to 999999
Conguraon
counter + control
add / substract
Mulplier
Divider
Preset Preset value
-199999 a 999999
Control S/R
Adds if channel
B is high
Adds if channel
B is 0 Vdc
Mulplier 1 to 999999
Divider 1 to 999999
Conguraon
counter
dierenal
Mulplier
Divider
Preset Preset value
-199999 a 999999
Mulplier 1 to 999999
Divider 1 to 999999
Seconds
Conf. ratemeter Mulplier
Divider
Time window
Mulplier 1 to 999999
Divider 1 to 999999
Preset value
-199999 a 999999
Up
Down

www.encoderhohner.com - info@encoderhohner.com - Tel.: (00 34) 972 16 00 17
19
User Reference Manual - VI96 Display
Mulplier 1 to 999999
Divider 1 to 999999
Conf. periodmeter Mulplier
Divider
Time window
Seconds
Mulplier 1 to 999999
Divider 1 to 999999
Seconds
Conf. ratemeter
quadrature
Mulplier
Divider
Window me
Edges
1 imp. per cycle
2 imp. per cycle
4 imp. per cycle
‘SLOW’ mode
Average lter Filter strength
(0 = disabled)
Max. waing
me
Number of pulses
Average lter
'SLOW’ mode
Filter strength
(0 = disabled)
Espera máxima
1 a 1000 Seg.
Number of pulses
Sensor
NPN 2 wire
Mechanical
contact
Namur
Automac conf.
NPN 3 wire
PNP 2 wire
PNP 3 wire
Push pull
TTL
CMOS
Pick-up
Inducve
Vac <30V
Trigger level
Trigger level
(from 0.0 Vdc
a 3.9 Vdc).
See secon
1.15 for
‘Trigger Sense’
ulity
Pull-Down
No pull
resistor
Pull-Up
Pulls on reset
Pulls on channel B
Pull-Down
No pull
resistor
Pull-Up
Pull-Down
No pull
resistor
Pull-Up
Pulls on channel A
Average lter Filter strength
(0 = disabled)
‘SLOW’ mode Max. waing
me
Number of pulses
Table of contents
Other Hohner Automaticos Measuring Instrument manuals
Popular Measuring Instrument manuals by other brands

LOVATO ELECTRIC
LOVATO ELECTRIC DMG900 instruction manual

ASTECH
ASTECH VLM500-DG user manual

Storch
Storch HPM basic manual

Thermo Scientific
Thermo Scientific Orion 7070iX quick start guide

Endress+Hauser
Endress+Hauser Proline 500 Brief operating instructions

Endress+Hauser
Endress+Hauser PROMAG 33 operating manual