Hokkaido HKED - HCND 261 X(-1) User manual

- 1 -
WALL-MOUNTED TYPE AIR CONDITIONERS
(SPLIT SYSTEMS, AIR-TO-AIR, HEAT PUMP TYPE)
USER’S MANUAL
WARNING:
please read carefully this manual before operating your new air conditioner.
R410A
HKED - HCND 261 X(-1)
HKED - HCND 351 X(-1)
HKED - HCND 511 X(-1)
HKED - HCND 631 X(-1)
New SMARTLine 2011
• Inverter Models:

- 2 -
IT
CE
All the products are in conformity with the following European provision:
- Low Voltage Directive 73/23/EEC
- Low Voltage Directive 2006/95/EC
- Electromagnetic CompatibilitY 89/336/EEC
- Electromagnetic CompatibilitY 2004/108/EC
ROHS
The products are fulfilled with the requirements in the directive 2002/95/EEC of the
European parliament and of the council on the Restriction of the use of Certain Haz-
ardous Substances in Electrical and Electronic Equipment (EU RoHS Directive)
.
WEEE
In accordance with the directive 2002/96/CE of the European parliament,
herewith we inform the consumer about the disposal requirements of the
electrical and electronic products.
DISPOSAL REQUIREMENTS:
Your air conditioning product is marked with this sym-
bol. This means that electrical and electronic products
shall not be mixed with unsorted household waste.
Do not try to dismantle the system yourself: the dis-
mantling of the air conditioning system, treatment of
the refrigerant, of oil and of other part must be done
by a qualified installer in accordance with relevant
local and national legislation. Air conditioners must be
treated at a specialized treatment facility for re-use, recycling and recovery.
By ensuring this product is disposed of correctly, you will help to prevent
potential negative consequences for the environment and human health.
Please contact the installer or local authority for more information. Battery
must be removed from the remote controller and disposed of separately in
accordance with relevant local and national legislation.
EUROPEAN REGULATIONS CONFORMITY FOR THE MODELS:
EN
TERMAL S.R.L. Via della Salute, 14 -- 40132 -- Bologna -- ITALY
Indoor Units:
Outdoor Units:
HKED 261 X, HKED 351 X, HKED 511 X, HKED 631 X
HCND 261 X(-1), HCND 351 X(-1), HCND 511 X(-1), HCND 631 X(-1)

- 3 -
Table of Contents
GENERAL INFORMATION....................................................................................................... 4
SAFETY PRECAUTIONS......................................................................................................... 6
INDOOR AND OUTDOOR’S UNITS OUTLINE.......................................................................11
LED PANEL ON INDOOR UNIT ............................................................................................. 12
RECOMMENDED OPERATING CONDITIONS ..................................................................... 12
INFRARED REMOTE CONTROLLER ................................................................................... 13
HEAT, COOL, FAN OPERATION ........................................................................................... 16
DRY OPERATION .................................................................................................................. 17
AUTO OPERATION................................................................................................................ 18
SLEEP OPERATION .............................................................................................................. 19
TIMER FUNCTION................................................................................................................. 20
TURBO OPERATION ............................................................................................................. 22
IR REMOTE CONTROLLER INSTALLATION AND OPERATION.......................................... 23
EMERGENCY OPERATION .................................................................................................. 24
ADJUSTING THE AIRFLOW DIRECTION ............................................................................. 25
HINTS FOR ECONOMICAL OPERATION ............................................................................. 27
CLEANING THE AIR CONDITIONER .................................................................................... 28
ORDINARY MAINTENANCE ................................................................................................. 30
TROUBLESHOOTING ........................................................................................................... 32
MALFUNCTION CODES........................................................................................................ 35
PROTECTION CODES .......................................................................................................... 36
AUTOMATIC RESTART AFTER A POWER FAILURE ........................................................... 37

- 4 -
DUST FILTER
The Indoor Unit is equipped with a high-efcency lter which do grant a higher comfort and a
healthy air quality inside the room.
INFRARED REMOTE CONTROLLER
All available functions of the air conditioner must be set using the infrared remote controller,
whose LCD panel shows immediately the operating parameters.
ON TIMER / OFF TIMER
ON Timer, allows to program the air conditioner start within 24 hours. TIMER ON is set by 1
hour’s steps.
OFF Timer, allows to program the air conditioner stop within 24 hours. TIMER OFF is set 1
hour’s steps.
DRY FUNCTION
When “DRY” function is selected, the air conditioner strongly reduces humidity inside the room,
and also keeps the room temperature at a constant value.
ADVANCED CONTROL FOR INDOOR UNIT FAN
Thermostatic stops. In Heating mode, when set temperature has been reached inside the
room, the compressor stops and the indoor fan speed is lowered to avoid cold drafts.
Hot Keep. At the beginning of operation in Heating mode, the indoor fan will start only 5 minutes
later, i.e. when the temperature of indoor heat exchanger is adequate.
“SLEEP” FUNCTION (ENERGY SAVING MODE)
It consists in automatic and gradual correction of the differential between the room temperature
and the set temperature. This avoids the Unit to operate continuously at peak capacity for long
periods.
“TURBO” FUNCTION
This Inverter Model of air conditioner is provided with Turbo function, which can be activated
by pressing TURBO button.
MICROCOMPUTER CONTROLLED DEFROSTING FUNCTION (HEATING MODE)
When the outdoor air temperature is very low and humidity is very high, frosting will occur to
the heat exchanger of the Outdoor Unit, which has negative impacts upon the efciency of the
heating performance. In such case, the automatic defrosting function will come into play. The
Heating operation will be stopped for 5-10 minutes to do the defrosting.
GENERAL INFORMATION
Outline of specic features

- 5 -
THERMOSTAT UNDER MICROCOMPUTER CONTROL
The thermostat being controlled by microcomputer allows remarkable energy saving and provides
more comfort, as the room temperature is checked with the greatest precision.
INDOOR FAN WITH LOW SOUND LEVEL
The indoor fan has been conceived and developed to grant very low values in sound level even
at the highest rotation speed.
FRONT GRILL & BACK GRILL IN METAL (OUTDOOR UNIT)
The front grill and the back grill of Outdoor Unit are both in metal; the screws and the outdoor
casing are all anti-rust.
MOTORIZED LOUVERS FOR AIRFLOW DIRECTION
The horizontal and vertical aps can be controlled directly from the remote controller. Several
options can be selected:
• “SWING” button allows the User to move the ap up & down continuously, or to x the ap to
a desired position. Three selections are possible:
1) natural ow: optimized air ow according to the selected operation mode
2) automatic swinging of the motorized ap
3) the motorized ap is xed to a desired angle.
• “AIR FLOW” button is used for selection of the left/right air ow direction: whenever pressed,
the ap will swing or it can be xed to a desired position (HKED 511, 631 X Models).
DIAGNOSTIC & PROTECTION FUNCTIONS
Shown by a codied lighting of LED indicators on the Indoor Unit’s front panel, they allow to
diagnose in a quite precise way the main malfunctions which may concern the air conditioner.
AUTORESTART AFTER A POWER FAILURE
• When a power failure occurs during operation, the air conditioner stops immediately.
• When power is restored, the RUNNING indicator on Indoor Unit’s frontal panel lights up.
• In particular, the air conditioner will restart automatically after 3 minutes have elapsed since
power is restored. This means that it is not required to press the ON/OFF button on remote
controller. The settings will be the same as before the blackout.
GENERAL INFORMATION

- 6 -
SAFETY PRECAUTIONS
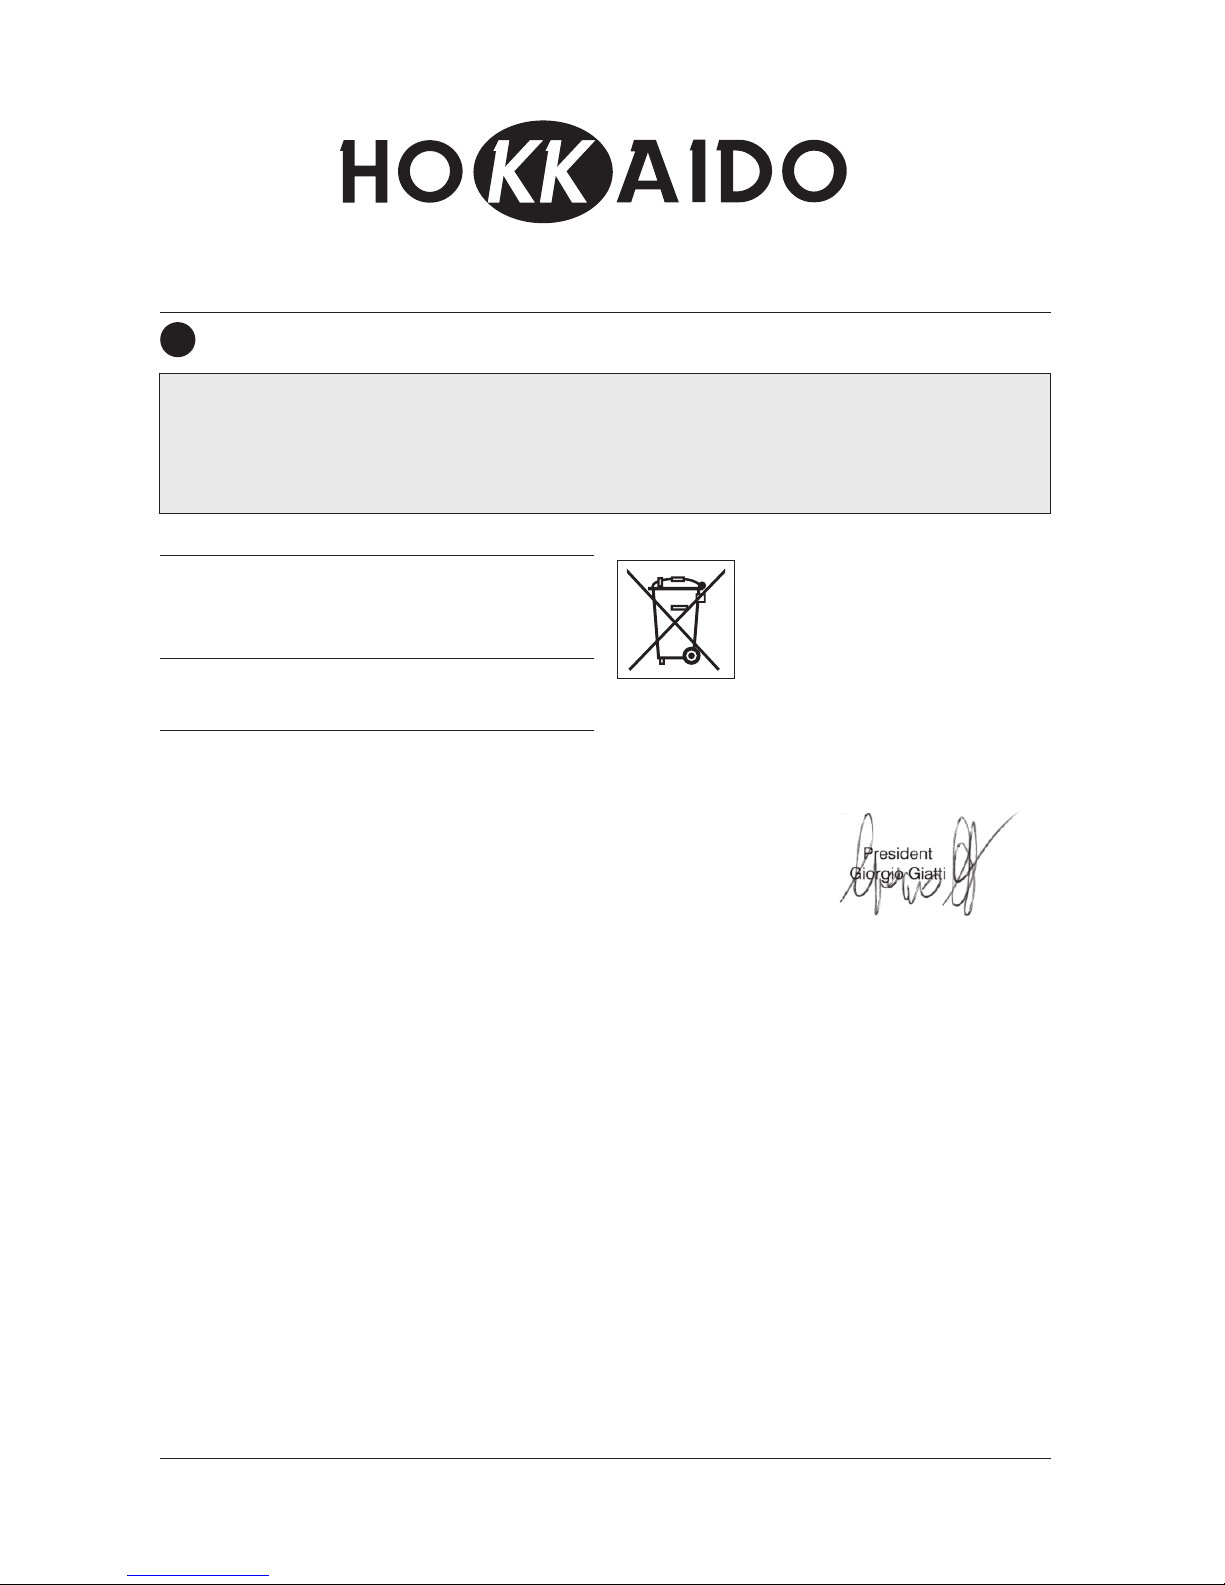
Disposal of an old air conditioner
Before disposing an old air conditioner, please
make sure it is inoperative and carry out the
disposal by adopting all safety precautions.
Unplug it from the power line in order to avoid
risks of electric shock.
Please remember that an air conditioner
contains refrigerant uid, requiring specialized
waste disposal.
The valuable materials contained in the air
conditioner can be recycled. Contact your local
Waste Disposal Center for adequate disposal or
contact your Dealer for any question.
Please make sure that piping of your air
conditioner does not get damaged before
being picked up by the relevant Waste Disposal
Center. You can contribute to the protection of
the environment by adopting an appropriate
anti-pollution method of disposal.
Disposal of the packaging of your new air
conditioner
All the packaging materials used in the package
of your new air conditioner can be disposed
without any danger for the environment.
The cardboard may be broken or cut into small
pieces and given to a Waste Paper Disposal
Service. The wrapping bag made of polyethylene
and the polyethylene goam pads contain no
uorochloric hydrocarbon.
All these valuable materials may be taken to a
Waste Collecting Center and used again after
adequate recycling.
Consult your local Authorities for the name
and address of the Waste Materials Collecting
Centers and Waste Paper Disposal Services
nearest to your house.
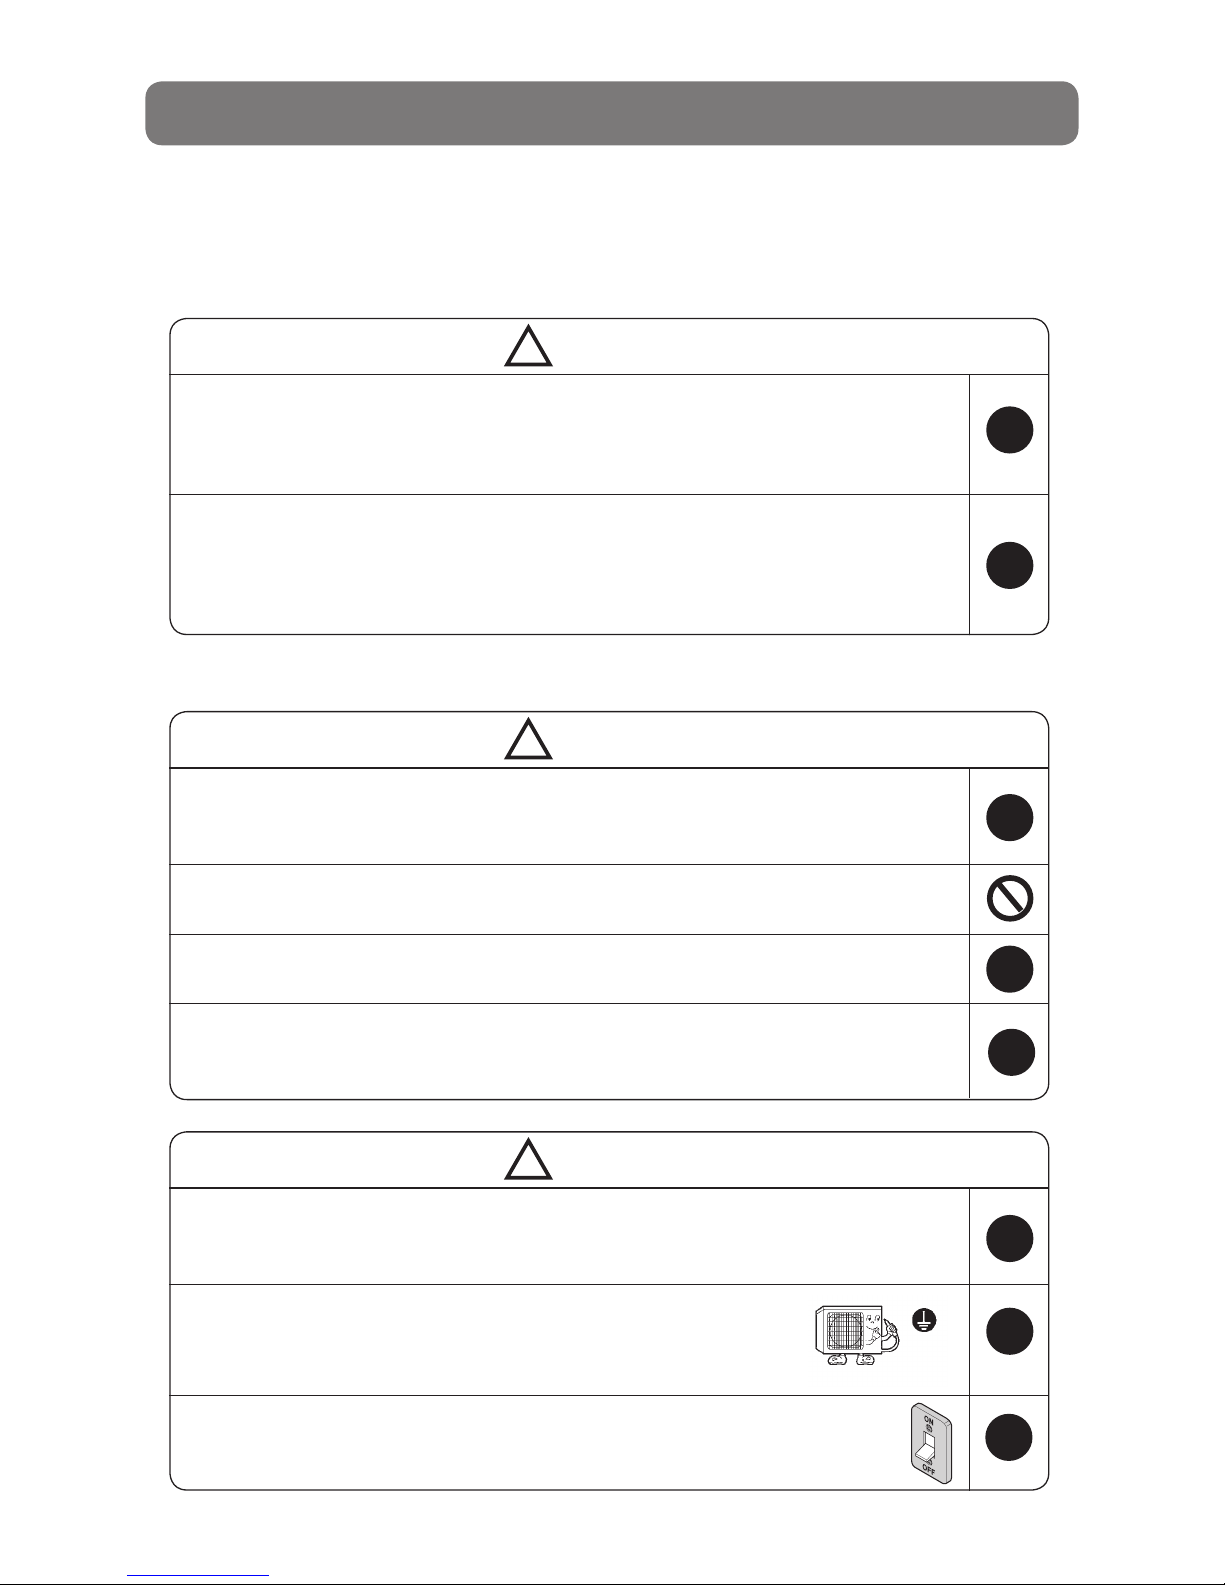
General warnings for safety
• Do not operate damaged air conditioners. In case of doubt, contact your Dealer.
• Use of air conditioner must be carried out in strict compliance with the instructions listed futher
on.
• Do not damage any parts of the air conditioner that carry refrigerant by piercing or perforating the
piping with sharp or pointed objects, by crushing or twisting the tubes or scraping off the surfaces'
coatings. If the refrigerant spurts out and gets into eyes, this may result in serious injuries.
• Do not obstruct or cover the ventilation grille of the air conditioner. Do not put ngers nor insert
objects into the inlet/outlet vent or into the motorized louver.
• Do not allow children to play with the air conditioner. Children should be never allowed to sit on
the Oudoor Unit.
• The appliance is not intended for children and disabled people. They must not operate the air
conditioner without supervision.
• Electrical works must be carried out according to the local laws. If the power cable is damaged, it
must be replaced by the Manufacturer or by qualied Personnel. Size of power cables and connecting
wires must be adequate to the characteristics of the air conditioner (current values and power input
values).
• If fuses on the PCB are blown, they must be replaced with new fuses of the same type and size.
• After installation, power plug should be properly disposed.
• Exhausted batteries (infrared remote controller) should be properly disposed.
• Always remember to unplug the air conditioner before opening the inlet grille. Never try to unplug
the air conditioner by pulling off the power cable. Always grip the power plug rmly and pull it straight
out of the power socket.
Before starting the air conditioner, please read carefully the information in this "USER'S MANUAL".
The User's Manual contains very important suggestions relatied to installation, operation and
maintenance of the air conditioner and concerning your personal safety.
The Manufacturer accept no responsibility for the damages that may arise due to non-
observance of the instructions listed in this "USER'S MANUAL".

- 7 -
SAFETY PRECAUTIONS
SAFETY INSTRUCTIONS
• Please read carefully the following Safety Instructions before operating the air conditioner.
• A strict observance of the instructions indicated in this "USER'S MANUAL" will prevent personal
hurt and incidents to the User. Moreover, correct operation and long life of the system will be
ensured.
• Depending on the seriousness of potential risks and damages, the reported Instructions are
classied in two types: "WARNING" and "CAUTION". A strict observance of the Instructions is
required to guarantee your personal safety and the safety of the environments where the Units
are installed.
• The following Instructions are related to the air conditioner's installation. They have been
reported in this "USER'S MANUAL" just to allow the User to check that installation has been
properly carried out. If an improper installation - not corresponding to the Instructions - is veried,
please contact the Dealer or the Authorized Technical Service.
The User must never attempt to repair, install or perform special maintenance by
himself.
Key to symbols
WARNING This symbol points out the risk of serious injury or death.
This symbol points out the risk of injury or damage to the
property.
Prohibition. Action or procedure not allowed, with serious effects
on objects and people.
CAUTION
Obligation. Compulsory action or procedure. The missed
observance could bring serious effects on objects and people.
!
!
!
• Strictly observe the instructions provided in this Manual.
• The air conditioning system contains inside its refrigerant circuit the R410A gas
under pressure. Never disconnect refrigerant pipes or connection joints.
• Never perform any handling on Outdoor Unit service valves or on Indoor Unit’s
unions.
• Keep this Manual in a safe place easy to reach at any time for convenient
reference.
• In case the air conditioner is transferred and reinstalled, this User’s Manual
should always be attached to the appliance.

- 8 -
SAFETY PRECAUTIONS
Installation
Never try to install this Unit by yourself, i.e. without the support of Tachnical Personnel. Never try to reapir
the Unit by yourself. The Unit's components can be reached only by opening or removing the covering
panels, and this involves exposure to high voltage. Even by disconnecting power supply, it is not always
possible to avoid the risk of electric shocks.
• Please always contact the Dealer or the Authorized Service Center for installation.
Never attempt to install the air conditioner by yourself, because improper installation
could cause electric shock, injuries, water leakage or re.
• Please always contact the Dealer or the Authorized Service Center for any servicing
operation or special maintenance.
Never try to repair or carry out special maintenance by yourself. Improper repair or
maintenance could cause electric shock, injuries, water leakage or re.
Please conrm that installation has been carried out according to the following prescriptions:
WARNING
!
!
!
• When instaling, all possible countermeasures must be taken to avoid refrigerant
leaks. If there is a high concentration of refrigerant gas in the room, oxygen lack may
occur.
• Do not install the air conditioner near burners, heat sources or ammable gas. This
is to avoid the risk of malfunctioning, re or explosion.
• Ensure that a circuit breaker has been installed on the power supply line of the air
conditioner, to avoid the risk of electric shocks.
• When installing in a small room, countermeasures should be taken in case of a
refrigerant leak exceeds the proper range. Otherwise, it will cause asphyxia.
CAUTION
!
!
!
!
• Ensure that drain hose and drain pipe installation has been carried out correctly.
Incorrect installation or maintenance will cause water leakage.
CAUTION
!
!
!
• Ensure that Indoor and Outdoor Units have been properly grounded.
Defective grounding could cause electric shock.
!
• This kind of appliance needs a specic circuit breaker with proper
protective devices against overcurrents and short circuits (fuses or
automatic switches).
Circuit
breaker
(specic)

- 9 -
SAFETY PRECAUTIONS
Always observe the operating precautions listed in the following tables. In this way, correct operation and
safeguard of people, animals and objects inside the air-conditioned room will be ensured.
WARNING
!
Use the correct voltage and frequency for power
supply.
Do not insert the air conditioner's plug into multiple
sockets or into sockets to which other appliances
are connected. Do not use plug adapters.
!
!
!
Fully insert the plug into the power socket and
make sure the connection is secure and without
play. Otherwise, sparks and re may occur.
Do not put heavy objects on the power supply
cord. Take care not to damage it. Do not use
supply cords which are faulty or damaged.
Do not pull the plug out of the power socket
by drawing the power cord. Damaging to the
power cord, to the plug or to the socket may
occur, and this could result in electric shock or
re generation..
Never turn off the air conditioner by pulling the
power supply plug out of the socket. Thsi could
cause electric shock or re.
Always press the "ON/OFF" button on remote
controller.
Do not use extension cords. Do not use rolled
power supply cords.
Never touch switches, sockets or power supply
plugs with wet hands. This could cause electric
shock.
If you smell soething burning, immediately turn
off the air conditioner, switch the circuit breaker
to "OFF" or "0", and contact the Authorized
Technical Service.
Do not insert any objects into the air inlet or
outlet of Indoor and Outdoor Units. Even if fans
are stopped, they could automatically start all at
once.
You should avoid to expose your body directly
to cool air for a long time. This may you cause
health problems to you.
Do not direct the airows towards infants, aged
or disabled people.
220~230V, 50Hz

- 10 -
SAFETY PRECAUTIONS
CAUTION
!
!
!
!
Do not use sprays near the air conditioner and do
not spray anything towards the appliance.
Do not expose plants or animals to the direct
airow of the air conditioner.
Ventilate the room regularly while the air conditioner
is operating. Fail to follow this advice could result
in lack of oxygen inside the room.
Do not place anything in front of the air conditioner
nor obstruct the air outlet.
!
Ventilation should be operated when using
at the same time the air conditioner and gas
burners.Insufcient ventilation may cause lack
of oxygen.
Do not place burners near the airow of air
conditioner.
To avoid the risk of electric shock, do not sprinkle
water nor other liquid on Indoor Unit. Do not
clean the air conditioner by water spurts.
Do not expose food, plants, animals, precision
devices or works of art to the direct airow of
the air conditioner.
When necessary, replace fuses with new ones
of the same type and size. Never use a piece
of iron or copper instead of the proper fuse,
as it could result in a malfunction or in a re
accident.
Do not put any object on the air conditioner. On the appliance's
upper part there is an air grille that must not be obstructed. Besides,
a heavy object may cause the air conditioner's fall.
Do not touch the heat exchangers' metal aps on Indoor and Outdoor Units. This could
cause hurts due to the sharp shape of the aps. Take care of this especially when
removing the air inlet panel and the air lters.
For proper performance, operate the air
conditioner under the recommended temperature
and humidity range (see page 12). If the Unit
operates beyond these conditions, malfunctions
may occur or dew may drip out of the Indoor Unit.

- 11 -
INDOOR AND OUTDOOR’S UNITS OUTLINE
The Figure below is for explanation purpose only. The real appearance of the components could be
rather different.
Indoor Unit
Outdoor Unit
Unit operation section
Air return grid
Takes in the indoor air
Left/right air flow
direction adjusting fin
Operational performance/indications
Up/down air flow
direction adjusting flap
Air outlet
Air filter
Drain tube
Air inlet
at sides & rear surface Refrigerant piping
connection, Electric
wiring cord
Emergency Operation Key
Note: Do not open the frontal panel at an angle over 60 degrees. Do not operate the Units with too much force.
How to close
How to open
Air discharge vent
Lightly push both sides of the frontal panel at the bottom
and pull it to this side till a resistance is felt.
This button can be used as an emergency measure to turn
on/off Unit when remote controller is not available.
Air blows out from here.
Removes dust or dirt out of the inlet air.
Drain the water dehumidified out of the air.
Push down the frontal panel and then push sides of air inlet
grid at the bottom.

- 12 -
To obtain the best performances from the Unit, it is recommended its use under the following
conditions:
NOTE: If the Unit operates in rooms which are satured with oil vapors or volatile matters, harmful
substances could coat and clog the indoor unit heat exchanger. Besides, scalings of saltness could form
on the Outdoor Units installed in sea-surroundings; if not removed, they will damage the Units in a very
short time. In both cases, please contact the Technical Service to require frequent maintenance.
Use of the air conditioner out of the above mentioned temperature ranges could cause the intervention
of built-in protective functions consequently stopping the system operation.
RECOMMENDED OPERATING CONDITIONS
LED PANEL ON INDOOR UNIT
1) RUNNING Indicator:
It lights up when ON/OFF button on remote controller is pressed for starting Unit’s operation.
3) TIMER Indicator:
It lights up when TIMER function has been set (TIMER ON,TIMER OFF mode).
2) SET TEMPERATURE, TIMER TIME & MALFUNCTION CODE Indicator:
This indicator may display:
• Setting Temperature, if SET TEMPERATURE buttons on remote controller are pressed.
• Timer Time, if TIMER is selected.
• Malfunction Codes, if there is a failure on Unit.
13
Receiver
of remote
control signal
2
On these Inverter Models, Led Panel on Indoor Unit is OFF during operation.
If you would like the Panel to be switched ON during operation, press LAMP button on remote
controller.
Note:
Outdoor temperature:
Indoor temperature:
45 to 0°C
16°C or more
32°C or less
COOLING OPERATION CAUTION:
Room relative humidity should be less than 80%. If the air conditioner
operates beyond this limit, the surface of heat exchanger could get
covered with frost.
Outdoor temperature:
Indoor temperature:
- 20 to 24°C
HEATING OPERATION

- 13 -
Remove the cover of the batteries’ box by sliding it as
indicated on the cover itself.
Replace used batteries with new ones. Pay attention to
insert them correctly according to polarities.
After replacing the batteries, press “RST” button (“reset”)
on remote controller.
If remote controller is not working well, you can take out
the batteries to clear off the display. Fit in batteries again
after a few minutes.
NOTE: Please use only new batteries of the same brand and type. If you are not going to use the air conditioner
for a long period, remove the batteries from the remote controller because it could get damaged by acid leakage.
The average batteries’ life is approximately one year.
Replace the batteries when the signal from the remote controller becomes weak and the Indoor Unit can not receive
it properly, or the indications on the display screen become blurred.
INFRARED REMOTE CONTROLLER
Replacement of batteries
For remote controller, 2 “AAA” type
batteries (1,5V) must be used.
•
•
•
•
CLK button
RST button
It does not work on these Model
s.
This button let computer reset.
(Push the RST button with the tip
of a ball pen or with a sharped
article).
Unload the back cover.

- 14 -
Outline of the remote controller’s buttons
INFRARED REMOTE CONTROLLER
SET TEMPERATURE
ON/OFF
SWING
AIR FLOW
SLEEP
LAMP
HOLD
MODE
FAN SPEED
TURBO
TIMER
NOTE: When TURBO operation is selected, room temperature is not controlled. If you feel the
room temperature is too cool or too heat, please cancel TURBO operation.
Transmission procedure
When each button on the remote controller is pressed with the remote
controller pointing toward the air conditioner Unit, signal is sent.
When the signal is received correctly, the receiving sound is emitted from
the Unit.
These buttons are for setting
room temperature.
If you press “+” button, set
temperature increases by steps
of 1°C.
If you press “-” button, set
temperature decreases by steps
of 1°C.
The room temperature range is
from 16°C to 32°C.
(Temperature is automatically set
at 25°C and unadjustable in AUTO
mode and DRY mode).
This button is used for start and
stop operation.
This button is used for selection
of the left/right air flow direction:
whenever pressed, the flap will
swing or fix (HKED 531, 611 X
Models).
Press this button to choose the
up/down air flow direction you
would like to set:
• natural flow: is displayed.
• swing: is flashing.
• fixed wind air: is displayed.
- It would be automatically set
at fixed wind air flow direction in
DRY mode.
This button changes to SLEEP
operation.
Press this button to lock or unlock
the keyboard.
Press this button to light on/switch
off the display.
This button changes the
operation mode:
• AUTO
• COOL
• DRY
• HEAT
• FAN.
Press this button to change
fan speed:
• LOW ( is displayed)
• MED ( is displayed)
• HIGH ( is displayed)
• AUTO ( is flashing).
In COOL and HEAT modes,
this button changes to TURBO
operation.
(It does not work in AUTO,
DRY and FAN modes).
This button is used to set TIMER ON
or TIMER OFF.
MODE
FAN SPEED
TURBO
SWING
TIMER
HOLD
AIR FLOW
SLEEP
LAMP

- 15 -
Outline of the remote controller’s display
INFRARED REMOTE CONTROLLER
TEMPERATURE
This indicator shows the set
temperature.
The room temperature
range is from 16°C to 32°C.
(Temperature is automatically set
at 25°C and unadjustable in AUTO
mode and DRY mode).
AUTO MODE
This indicator shows that the
Automatic mode has been
selected.
COOLING MODE
This indicator shows that the
Cooling mode has been
selected.
DRY MODE
This indicator shows that Dry
mode has been selected.
HEATING MODE
This indicator shows that Heating
mode has been selected.
FAN MODE
This indicator shows that Fan
mode has been selected.
SWING TIMER
Indicates TIMER time.
This indicator shows the up/down
air flow direction:
• natural flow: is displayed.
• swing: is flashing.
• fixed wind air: is displayed.
- It would be automatically set
at fixed wind air flow direction in
DRY mode.
SLEEP
This indicator is displayed
during SLEEP operation.
TURBO
This indicator is displayed
during TURBO operation.
KEY LOCK
This indicator is displayed when
the keyboard has been locked.
FAN SPEED
This indicator shows the set
fan speed:
• LOW ( is displayed)
• MED ( is displayed)
• HIGH ( is displayed)
• AUTO ( is flashing).
NOTE: The Figure below shows all indications for the purpose of explanation, but
practically only the pertinent parts are indicated.
This indicator shows the left/right
air flow direction:
HKED 511, 631 X Models:
AIR FLOW
• swing: is flashing.
• fixed wind air: is displayed.

- 16 -
HEAT, COOL, FAN OPERATION
HEAT, COOL, FAN Modes selection
To start operation:
Point the remote controller at the Unit, press the ON/OFF
button and select the needed mode:
1. Select your desired operating mode by pressing
MODE button:
• COOL (Cooling operation)
• HEAT (Heating operation)
• FAN (Fan only operation).
2.
Press the SET TEMPERATURE buttons to
increase or decrease the readings until the needed
temperature is displayed.
The room set temperature range is 16°C to 32°C.
3.
Select your desired speed for Indoor Unit's fan by
pressing FAN SPEED button:
- LOW ( is displayed)
- MED ( is displayed)
- HIGH ( is displayed)
- AUTO ( is flashing).
4.
To stop operation:
Press the ON/OFF button on remote controller to
stop the air conditioner.
NOTE FOR THE USER:
•In case of close stops/starts, the air conditioner does not immediately start operating, but 3 minutes
elapse because of a protective function for the compressor.
Press the SWING button to choose the up/down
air flow direction you would like to set:
• natural flow: is displayed.
• swing: is flashing.
• fixed wind air: is displayed.
5.
Press the AIR FLOW button to choose the left/right
air flow direction you would like to set:
• automatic swinging: is flashing.
• fixed direction: is displayed
(HKED 511, 631 X Models).
1
45
22
SWING
TIMER
HOLD
AIR FLOW
SLEEP
LAMP
MODE
FAN SPEED
TURBO
3

- 17 -
DRY OPERATION
DRY Mode selection
To start operation:
Point the remote controller at the Unit, press the ON/OFF
button and select the needed mode:
1. Press the MODE button and select DRY mode.
In DRY mode, temperature is automatically set at
25°C and unadjustable.
Fan speed is automatically set at LOW speed and
unadjustable: is displayed.
The up/down air flow direction is automatically set at
fixed wind air flow direction: is displayed.
To stop operation:
Press the ON/OFF button on remote controller to
stop the air conditioner.
NOTE FOR THE USER:
•In case of close stops/starts, the air conditioner does not immediately start operating, but 3 minutes
elapse because of a protective function for the compressor.
1
2
SWING
TIMER
HOLD
AIR FLOW
SLEEP
LAMP
MODE
FAN SPEED
TURBO
2.
Press the AIR FLOW button to choose the left/right
air flow direction you would like to set:
• automatic swinging: is flashing.
• fixed direction: is displayed
(HKED 511, 631 X Models).

- 18 -
AUTO OPERATION
AUTO Mode selection
To start operation:
Point the remote controller at the Unit, press the ON/OFF
button and select the needed mode:
1. Press the MODE button and select AUTO mode.
2.
Select your desired speed for Indoor Unit's fan by
pressing FAN SPEED button:
- LOW ( is displayed)
- MED ( is displayed)
- HIGH ( is displayed)
- AUTO ( is flashing)
3.
To stop operation:
Press the ON/OFF button on remote controller to
stop the air conditioner.
NOTE FOR THE USER:
•In case of close stops/starts, the air conditioner does not immediately start operating, but 3 minutes
elapse because of a protective function for the compressor.
Press the SWING button to choose the up/down
air flow direction you would like to set:
• natural flow: is displayed.
• swing: is flashing.
• fixed wind air: is displayed.
In AUTO mode, temperature is automaticallly set at
25°C and unadjustable.
1
34
SWING
TIMER
HOLD
AIR FLOW
SLEEP
LAMP
MODE
FAN SPEED
TURBO
2
4.
Press the AIR FLOW button to choose the left/right
air flow direction you would like to set:
• automatic swinging: is flashing.
• fixed direction: is displayed
(HKED 511, 631 X Models).

- 19 -
SLEEP OPERATION
SLEEP Mode selection
SLEEP Mode can be used to reduce operation sound
when sleeping or doing a work requiring concentration.
SLEEP function is useful in COOL and HEAT operation
modes.
Press the SLEEP button, the air flow sound from the
Indoor Unit is decreased.
COOL Mode
During the operation of Cooling, the room temperature
will be raised gradually by 2°C higher than the setting
after the machine begins to operate in the Sleeping mode.
Actual temperature is higher than set temperature to
prevent the room from getting too cold: this function also
allows to save electricity.
HEAT Mode
During the operation of Heating mode, the room temperature
will be dropped gradually by 5°C lower than the setting
after the machine begins to operate in the Sleeping mode.
Actual temperature is lower than set temperature to
prevent the room from getting too hot: this function also
allows to save electricity.
To cancel Sleep function:
Press again the SLEEP button to cancel the function.
SWING
TIMER
HOLD
AIR FLOW
SLEEP
LAMP
MODE
FAN SPEED
TURBO

- 20 -
Programmed Start (TIMER ON)
TIMER FUNCTION
TIMER ON function allows to automatically start the air
conditioner at your desired set time:
When the air conditioner is in standby mode,
press the TIMER button and the air conditioner
will enter the timed switch-on mode.
Repeatedly press the TIMER button to set the
needed time interval at the end of which the air
conditioner will automatically start operating.
Every time the button is pressed, time indication
changes by 1 hour’s steps.
The Timer can make the setting in the range from
1-24 hours.
After the setting of the timed switch-on, the digits
shown on the display screen will go down by 1
every elapsed hour. The displayed digits indicate
the remaining time prior to the time switch-on.
At the end of set time interval, the air conditioner
will automatically start operation.
To cancel TIMER ON function:
Repeatedly press the TIMER button till reaching
24h, then press TIMER button again to cancel
TIMER ON function.
SWING
TIMER
HOLD
AIR FLOW
SLEEP
LAMP
MODE
FAN SPEED
TURBO
Example:
in the selection shown in the Figure, the air conditioner
will automatically start after 10 hours. Every elapsed
hour, the display will show 9, 8, 7 h and so on, till
reaching the hour for automatic start.
This manual suits for next models
11
Table of contents
Other Hokkaido Air Conditioner manuals

Hokkaido
Hokkaido HRBU 266 Series User manual

Hokkaido
Hokkaido HMCZ 95 F User manual

Hokkaido
Hokkaido HSFU 530 ZAL User manual

Hokkaido
Hokkaido HKEI 275 XS User manual

Hokkaido
Hokkaido HCKU 565 X2R User manual

Hokkaido
Hokkaido HTFL 261 XMR User manual

Hokkaido
Hokkaido HKED 261 G User manual

Hokkaido
Hokkaido HCNL 531 X2R User manual

Hokkaido
Hokkaido V-Design Series User manual

Hokkaido
Hokkaido HKEI 515XS User manual