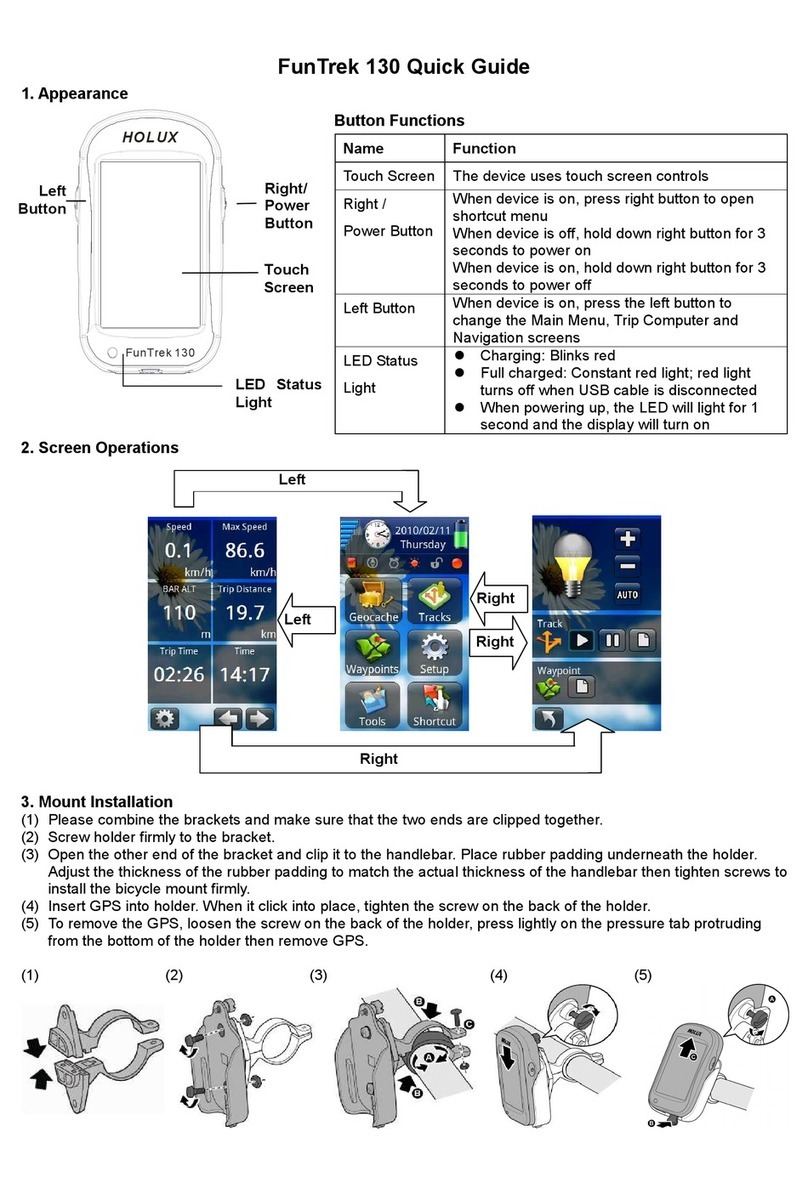
Holux GPS LOGGER M-241C User manual

HOLUX GPS Logger M-241cUser’s Manual
HOLUX
GPS LOGGER
M-241c
Technology, Inc.
No.1-1, Innovation Road1, Science-based Ind strial Park, Hsinch 300, Taiwan
TEL: 886-3-6687000 FAX: 886-3-6687111
Website: www.hol x.com
All Rights Reserved
User’s G ide

HOLUX GPS Logger M-241c User’s Manual
2
Table of Contents
1.
OVERVIEW ..................................................................................................................................4
2.
PACKING LIST............................................................................................................................6
3.
MAIN FEATURES .......................................................................................................................7
4.
SPECIFICATION .........................................................................................................................8
5.
ICONS & IN ICATORS ...........................................................................................................10
6.
PRO UCT OVERVIEW ........................................................................................................... 11
7.
BASIC OPERATIONS ...............................................................................................................12
B
EFORE YOU USE
..............................................................................................................................12
B
UTTON
D
EFINITION
..........................................................................................................................12
H
OW TO SELECT A MODE
..................................................................................................................12
O
PERATIONAL FLOW
.........................................................................................................................14
O
PERATIONAL MENU DESCRIPTION
...................................................................................................15
8.
CONNECTING THE EVICE TO THE PC ...........................................................................23
I
II
I
NSTALL
NSTALL NSTALL
NSTALL
USB
USBUSB
USB
DRIVER
DRIVER DRIVER
DRIVER
........................................................................................................................23
9.
TRANSFER LOG ATA TO PC...............................................................................................24
H
HH
H
OLUX
OLUX OLUX
OLUX
L
LL
L
OGGER
OGGER OGGER
OGGER
U
UU
U
TILITY
TILITYTILITY
TILITY
...................................................................................................................24
D
DD
D
EVICE
EVICE EVICE
EVICE
S
SS
S
ETTING
ETTINGETTING
ETTING
...............................................................................................................................25
C
ONNECTED
......................................................................................................................................26
T
TT
T
RACK
RACK RACK
RACK
L
LL
L
OG
OG OG
OG
S
SS
S
ETTING
ETTINGETTING
ETTING
.........................................................................................................................27
U
PLOAD
.............................................................................................................................................28
T
RACK
L
OG
F
ILE
S
TATUS
.................................................................................................................2
T
TT
T
RACK
RACK RACK
RACK
L
LL
L
OG
OG OG
OG
F
FF
F
ORMAT
ORMATORMAT
ORMAT
.........................................................................................................................31
T
TT
T
RACK
RACK RACK
RACK
L
LL
L
OG
OG OG
OG
P
PP
P
HOTO
HOTOHOTO
HOTO
...........................................................................................................................32
P
HOTO
C
OMBINE
S
ETTING
................................................................................................................35
D
OWNLOAD AND
U
PDATE
F
IRMWARE
...............................................................................................37
10.
INSTALLATION OF MINI GPS VIEWER PROGRAM...................................................40
11.
EXECUTE THE MINI GPS VIEWER PROGRAM ...............................................................41
12.
POWER...................................................................................................................................43
13.
WARRANTY ..........................................................................................................................43

HOLUX GPS Logger M-241c User’s Manual
3
14.
TROUBLESHOOTING.........................................................................................................44

HOLUX GPS Logger M-241c User’s Manual
4
1. Overview
The HOLUX M-241c GPS logger provides real time coordinate logging
and easy-to- se trip g iding service. The M-241c can record p to 130,000
positions, each position incl ding longit de, latit de, time, and altit de. The log
file can be transferred for analysis via USB connection. Yo can combine these
positions with yo r Digital camera photos to share the track histories and photo
locations to mapping application software s ch as Google Earth.
Position information, moving speed, free logging vol me and the date &
time can be shown on the LCD display directly at any time. The M-241c
s pports distance and time logging modes, kilometer and mile distance nits,
and 5 lang ages (English, Traditional Chinese, Simplified Chinese, German,
and French).
The M-241c is a high performance GPS logger with the following feat res:
• Powered by one AA battery.
• LCD display (32mm L* 8.9mm W) to show position information, speed, capable
logging memory size, date & time.
• Capable memory size to record p to 130,000 positions, incl ding longit de,
latit de, time, and altit de.
• Personal settings to select the logging mode by distance or time, nit by Kilometer
or mile, and 5 lang ages (English, Traditional Chinese, Simplified Chinese,
German, and French) s pport.

HOLUX GPS Logger M-241c User’s Manual
5
Applications:
* Vehicle tracing & Location base services
* Car navigation
* Marine navigation
* Distance meas rement
* Sports and Recreation
* Fleet Management
Software application program:
A ser-friendly software tility is provided with the following f nctions:
* Transfer recorded data to PC.
* Recording mode setting (Time / Distance)
* Erase recorded data
* O tp t data format
(1) Save exploring data to KML file format (Interface with Google Earth)
(2) NMEA file format (*.txt)
(3) Binary file format
(4) GPX file format

HOLUX GPS Logger M-241c User’s Manual
6
2. Packing List
Thank yo for p rchasing the M-241c GPS logger. Before yo start, make
s re that the following items are incl ded in yo r package. If any of these items
are missing, please contact yo r original local HOLUX dealer or distrib tor.
1. M-241c GPS logger 1 Set
2. AA Battery 1 Set
3. Car Charger *+ USB cable 1 Set
4. User g ide and Driver CD 1 Pcs
5. M-241c Q ick G ide 1 Pcs
6. Warranty card 1 Pcs
7. Nylon strap 1 Pcs
Option
1. Travel power s pply 1 Set
* Car Charger can only be sed as the power s pply adapter, it does not
have any battery charging f nction.

HOLUX GPS Logger M-241c User’s Manual
7
3. Main feat res
1. B ilt-in MTK Low power cons mption GPS chipset.
2. 32 parallel satellite-searching channels for fast acq isition and
reacq isition.
3. S perior sensitivity, p to -159 dBm.
4. B ilt-in WAAS/EGNOS/MSAS Demod lator witho t any additional
hardware.
5. S pport NMEA0183 V 3.01 data protocol
6. Compact and lightweight design for ease of se.
7. LCD display (32mm * 8.9mm /128 * 32 pixels) to show position
information, speed, capable logging memory size, date & time.
8. Capable memory size to record p to 130,000 position data, incl ding
longit de, latit de, time, and altit de.
9. Personal setting to choose the logging mode by distance or time, nit
by Kilometer or mile, and 5 lang ages (English, Traditional Chinese,
Simplify Chinese, German, and French) s pport.

HOLUX GPS Logger M-241c User’s Manual
8
4. Specification
Specifications
‧32 parallel satellite searching channels
‧Receiver: L1, 1575.42 MHz
‧Freq ency: 1.023 MHz
‧Update freq ency: 1 Hz.
‧Antenna type: B ilt-in
‧Satellite signal reception sensitivity: -159dBm
‧Dimensions: 32.1mm X 30mm X 74.5mm
‧Weight (excl ding battery): < 39g.
‧Switch: Slider switch
‧Operating temperat re: 0 ℃ to + 50 ℃
‧Storage temperat re: -10 ℃ to + 60 ℃
‧Operating h midity: 5% to 90%
Positioning
◆
◆◆
◆ Non DGPS (Differential GPS):
::
:
‧Position : 3.0 M CEP excl ding SA
‧Velocity: 0.1M / sec.
‧Interval: 0.1 sec to Sync GPS
◆
◆◆
◆ DGPS (EGNOS/WAAS/MSAS):
::
:
‧Position: < 2.2 M., Horizontal deviation 95% time
< 5 M., Vertical deviation 95 % time
*The above data is based on the specifications of the MTK GPS chip
Positioning
Timing
‧Time to reposition < 0.1 sec average
‧Hot boot 1 sec
‧Warm boot 33 sec
‧Cold boot 36 sec
*The above data are based on specifications of the MTK GPS chip
Protocol and
Interface
◆
◆◆
◆O tp t port: Mini-USB (CMOS Level)
‧NMEA protocol o tp t: V 3.01
Ba d rate: 38400 bps
Data bits: 8
Sync bits: N
End bit: 1
‧O tp t interface:
Standard: GPGGA (1 time per second), GPGSA (1 time per second),

HOLUX GPS Logger M-241c User’s Manual
GPGSV (1 time per second), GPRMC (1 time per second), GPVTG (1
time per second).
Physical
Specifications
‧Sea level: Max 18,000 M (60,000 feet)
‧Velocity: Max 515 M./sec ( 1000 knots)
‧Acceleration: Max 4G
‧Vibration: 20 M/ second
3
, Max.
B ttons 1 Power switch, 2 B ttons (Men and Confirm)
LCD display
page
‧System and satellite positioning stat s
‧Time
‧Position
‧Velocity
‧Distance meas rement
‧Set p

HOLUX GPS Logger M-241c User’s Manual
10
5. Icons & Indicators
Position
PositionPosition
Position
Icon
IconIcon
Icon
Descriptions
DescriptionsDescriptions
Descriptions
Position
PositionPosition
Position
Icon
IconIcon
Icon
Descriptions
DescriptionsDescriptions
Descriptions
1
Log by Time
2
Measure Distance On
1
Log by Distance
4
Lock On
3
Log On
7
Device & PC Connected
4
Waypoint
8
Battery is Full
6
GPS Fix
8
Battery is exhausted

HOLUX GPS Logger M-241c User’s Manual
11
1
2
4
3
5
6
6. Prod ct Overview
1
LCD Screen
LCD Screen LCD Screen
LCD Screen
2
MENU Button
MENU Button MENU Button
MENU Button
3
ENTER Button
ENTER Button ENTER Button
ENTER Button
4
Power Switch
Power Switch Power Switch
Power Switch
5
Battery Cover
Battery Cover Battery Cover
Battery Cover
6
USB Port
USB Port USB Port
USB Port

HOLUX GPS Logger M-241c User’s Manual
12
7. Basic Operations
Before yo se
1. If the user wants to use M-241c to record the coordinate for matching
the GPS coordinate of the picture in the camera, because the
integration of the two parties is performed under the comparison of the
time, it is recommended for the user to adjust the clock time in the
camera to match the GPS time in the M-241c.
2. M-241c does not have the water-proof feature; please pay attention to
the moisture while using it in a rainy day.
3. Before turning off, please press “stop” button to prevent log data
damaged when in logging mode.
4. Before changing a new battery,please turn off power first.
B tton Definition
MENU Button
MENU ButtonMENU Button
MENU Button -> Change & Select function.
ENTER Button
ENTER ButtonENTER Button
ENTER Button -> Confirm your select.
Except during the Setting Mode, user may press the “MENU” key
and “ENTER” key at the same time, all keys function will be “LOCK”
status. Press the “MENU” key and “ENTER” key at the same time
again to cancel the “LOCK” status.
* LCD screen will show the reference b tton f nction.
How to select a mode
1. Turn on the power switch. The device will turn on and show the Track
Log Mode on the LCD.
2. There are 6 operational modes on this device. Please use the
MENU Button to change operation mode.
(
( (
( Track Log Mode
Track Log ModeTrack Log Mode
Track Log Mode
-
--
->
> >
>
Time Mode
Time ModeTime Mode
Time Mode
-
--
->
> >
> Show Position Mode
Show Position ModeShow Position Mode
Show Position Mode
-
--
->
> >
> Show Speed & Altitude
Show Speed & Altitude Show Speed & Altitude
Show Speed & Altitude

HOLUX GPS Logger M-241c User’s Manual
13
Mode
ModeMode
Mode
-
--
->
> >
> Measure Distance Mode
Measure Distance ModeMeasure Distance Mode
Measure Distance Mode
-
--
->
> >
> Setting Mode
Setting ModeSetting Mode
Setting Mode
-
--
->
> >
> Track Log
Track Log Track Log
Track Log
Mode.
Mode.Mode.
Mode. )
) )
)
:
::
:Track Log
Track LogTrack Log
Track Log Mode
Mode Mode
Mode
:
::
:Time Mode
Time ModeTime Mode
Time Mode
:
::
:Position Mode
Position ModePosition Mode
Position Mode
:
::
:Speed & Altitude Mode
Speed & Altitude ModeSpeed & Altitude Mode
Speed & Altitude Mode
:
::
:Measure Distance Mode
Measure Distance ModeMeasure Distance Mode
Measure Distance Mode
:
::
:Setting Mode
Setting ModeSetting Mode
Setting Mode

HOLUX GPS Logger M-241c User’s Manual
14
Operational flow

HOLUX GPS Logger M-241c User’s Manual
15
Operational men description
:
::
:
Menu
MenuMenu
Menu: Go to Time mode
Enter
EnterEnter
Enter: Start / Stop the recording GPS data.
Note:
1. When power on M-241c, user will see “ ” before GPS
acquisition. After GPS is fixed, you will see the screen
as .
2. When user starts the “Track Log” function, the “ ” icon will
appear on the bottom-left corner of the screen.
3. The “ xxxxFree “signifies how many log data can be recorded.
:
::
:Time Mode
Time ModeTime Mode
Time Mode
Menu
MenuMenu
Menu: Go to Position Information mode
Enter
EnterEnter
Enter: Go to select the Time Zone Adjustment
Note:
1. This is UTC* time receiving from GPS, which can’t be adjusted but time
zone selecting is allowed. .
*UTC means the Greenwich Mean Time (Coordinated Universal
Time).
2. The RTC inside the GPS will continue to keep time information while
the battery power is available. Time information will be lost with the
absence of battery power.
3. GPS fresh from the factory, before GPS acquisition, or with recent
firmware update, or no battery power will show “ ” only.
4. After the first GPS acq isition, the RTC will start to retain time
information and the screen wil start to show time like .
5. With time information retained the RTC will show time with a q ote in
the front when no GPS is acq ired like . Time shown will
ret rn to q oteless like after GPS acq isition.

HOLUX GPS Logger M-241c User’s Manual
16
:
::
:T
TT
Time
ime ime
ime Z
ZZ
Zone
oneone
one Adjustment
Adjustment Adjustment
Adjustment
Menu
MenuMenu
Menu: Adjust the UTC time to meet user’s local time (circular:
+8,+9,+10,+11,+12,+13,-12,-11,-10,-9,-8,-7,-6,-5,-4,-3,-2,-1,0,+1,+2,+3,
+4,+5,+6,+7,Esc*)
Enter
EnterEnter
Enter: Setting and back to Time mode
*
**
*Esc:
Esc:Esc:
Esc:
means to cancel the change and restore to the previous
setting.

HOLUX GPS Logger M-241c User’s Manual
17
:
::
:Position
PositionPosition
Position Information
Information Information
Information Mode
Mode Mode
Mode
Menu
MenuMenu
Menu: Go to Speed & Altitude Information mode
Enter
EnterEnter
Enter: Record a current track log data once
Note: When Recording a current track log data once, the ” ” icon will
show for one second on the bottom-left corner of the screen.
Note: Because the satellite signal may be shifted easily due to the
interference when the moving speed is less than 10 km/hr or under the
environment with tall buildings that the satellite signal is not good, it is
normal that the user may see the shift of the satellite coordinate while
being in the static state.
:
::
:Speed & Altitude
Speed & AltitudeSpeed & Altitude
Speed & Altitude Information
Information Information
Information Mode
Mode Mode
Mode
Menu
MenuMenu
Menu: Go to Measure Distance mode
Enter
EnterEnter
Enter: No Function
Note:
1. Current Speed (Unit: km/h or mph) and altitude (Unit: m or ft) will show
on the LCD.
2. You can select the unit in setting mode, refer to km/mile menu.
Because the satellite signal may be shifted easily due to the interference
when the moving speed is less than 10 km/hr or under the environment
with tall buildings that the satellite signal is not good, it is normal that the
user may see the shift of the satellite coordinate while being in the static
state.

HOLUX GPS Logger M-241c User’s Manual
18
:
::
:Measure Distance Mode
Measure Distance ModeMeasure Distance Mode
Measure Distance Mode
Menu
MenuMenu
Menu: Go to Setting mode
Enter
EnterEnter
Enter: Start / Stop to measure distance
Note:
1. When user enables the “Measure Distance” function, the “ ” icon
will shows on the top-left corner of the screen
2. Because the satellite signal may be shifted easily due to the
interference when the moving speed is less than 10 km/hr or under the
environment with tall buildings that the satellite signal is not good, the
user may see the shift of the satellite coordinate while being in the static
state. Thus, while the distance is being measured, it is normal that there
might be accumulated error and the displayed total measured distance
will be different from the actual distance.
3. You can select the unit in setting mode, refer to km/mile menu.
:
::
:Setting Mode
Setting ModeSetting Mode
Setting Mode
Menu
MenuMenu
Menu: Go to Track Log Mode page
page page
page
Enter
EnterEnter
Enter: Go to “Distance By” menu of Setting mode
Menu
MenuMenu
Menu: Go to Distance By menu of Setting mode
Enter
EnterEnter
Enter: Go to select “Point” or “Route”
Note:
1. “Distance By” signifies that Measure Distance is by “The beeline
between Begin Point and End Point” or by “Route (Path) of all
points”.

HOLUX GPS Logger M-241c User’s Manual
1
Menu
MenuMenu
Menu: Select “Point” or “Route”
Enter
EnterEnter
Enter: Setting and back to Setting mode
NOTE:
1. When the user select the “Point” logging method, the logged
distance is the straight line distance between the starting point
and the end point.
2. If the “Route” logging method is selected , the logged distance
will be the accumulated distance of each segment between the
log points. However, because the distance between any two
log points may have error, the accumulated distance value may
have increased error with the increase of the number of the log
points.
Menu
MenuMenu
Menu: Go to km/mile menu of Setting mode
Enter
EnterEnter
Enter: Go to select “km” or “mile”
Note: “km/mile” signifies that the Units of Measure Distance and show
speed are “km” or “mile”.
Menu
MenuMenu
Menu: Select “km” or “mile”
Enter
EnterEnter
Enter: Setting and back to Setting mode

HOLUX GPS Logger M-241c User’s Manual
20
Menu
MenuMenu
Menu: Go to Log record menu of Setting mode
Enter
EnterEnter
Enter: Select “Full Stop” or “Overwrite”
Menu
MenuMenu
Menu: Select “Full Stop” or “Overwrite”
Enter
EnterEnter
Enter: Setting and back to Setting mode
Note:
1. “ Full Stop” -> Recording log data -> flash full -> Stop recording.
2. “ Overwrite” -> Recording log data -> flash full -> Overwrite the first log.
Menu
MenuMenu
Menu: Go to Log by Time menu of Setting mode
Enter
EnterEnter
Enter: Set Log Mode to “By Time” and select number of Sec.
Menu
MenuMenu
Menu: select the logging frequency .(circular:
1,5,10,15,30,60,120,Esc*)
Enter
EnterEnter
Enter: Setting and back to Setting mode
*
**
*Esc
EscEsc
Esc
means to cancel the change and restore to the previous setting.
Menu
MenuMenu
Menu: Go to Log by Distance menu of Setting mode
Enter
EnterEnter
Enter: Set Log Mode to “By Distance” and select the number of
meters.
Menu
MenuMenu
Menu: select the logging interval circular:
50,100,150,300,500,1000 meters , Esc*)
Enter
EnterEnter
Enter: Setting and back to Setting mode
*
**
*Esc
EscEsc
Esc
means to cancel the change and restore to the previous setting.
Table of contents
Other Holux GPS manuals

Holux
Holux M-1200XX User manual

Holux
Holux M-1200 User manual

Holux
Holux M-241 User manual

Holux
Holux Tracker-007 User manual

Holux
Holux M-1000 User manual

Holux
Holux GPSmile 61 User manual

Holux
Holux GR-88 User manual

Holux
Holux GM-305 Explorer User manual

Holux
Holux UB-93 SPECIFICATION V0.4 User manual

Holux
Holux GPSmile NAV iSlim Operational manual

Holux
Holux GPSPORT 260 PRO User manual

Holux
Holux M 1200E User manual

Holux
Holux GR-90 User manual

Holux
Holux 240 User manual

Holux
Holux GPSport 255 User manual

Holux
Holux GPSPORT 260 PRO User manual

Holux
Holux GM-120 User manual

Holux
Holux GR-213 User manual

Holux
Holux GPSlim23 User manual

Holux
Holux GM-120 User manual