manuals.online logo
Brands
  1. Home
  2. •
  3. Brands
  4. •
  5. holzhandlung raters
  6. •
  7. Plumbing Product
  8. •
  9. holzhandlung raters Patio M User manual

holzhandlung raters Patio M User manual

GSPublisherVersion 0.12.100.100
PATIO MGSPublisherVersion 0.4.100.100Patio M Sauna
GSPublisherVersion 0.12.100.100
PATIO MGSPublisherVersion 0.29.100.100
2,3484004501,151
3,326
2,348
2400400
3,290600600
200500
2,0851,085
5001920
845845690
x
Patio MPatio M Installation Manual
Marking Note Lenght pcs
01 40x146 WALL LOG 3210 16
EXTRA 40x146 WALL LOG 3210 1
01B
40x146 WALL LOG Width 136 (drawing) 3210 1
01C
40x146 WALL LOG
Width 68 (drawing)
3210
1
01D 40x146 WALL LOG Cutout (drawing) 3210 1
01E 40x146 WALL LOG Cutout (drawing) 3210 1
01F
40x30
WALL LOG
30x40 Roof Block
3210
1
02 40x146 WALL LOG 2400 32
02B 40x146 WALL LOG Width 136 (drawing) 2400 2
03B 40x146 WALL LOG Cutout (drawing) 1920 1
03C 40x146 WALL LOG Cutout (drawing) 1920 1
03D 40x146 WALL LOG Cutout (drawing) 1920 1
04B 40x120 WALL LOG Width 120 (drawing) 1875 1
05 40x146 WALL LOG 660 13
06 40x146 WALL LOG 560 13
07 40x146 WALL LOG 345 26
HAMMER BLOCK 2
PATIO M
01B Width 136 3210 1
01C Width 68 Half log 3210 1
01D 3210 1
01E 3210 1
01F 30x40 Block For roof 3210 1
02B Width 136 2400 2
03B 1920 1
03C 1920 1
03D 1920 1
04B Width 120 1875 1
PATIO M
CUTOUT DRAWINGS
Marking Note Lenght pcs
AR-1 45x95 FLOOR FRAME 3190 4
AR-2 45x95 FLOOR FRAME 2395 1
AR-2A 45x95 FLOOR FRAME Cutout (drawing) 2395 1
AR-3
45x95 FLOOR FRAME
2075
5
AR-4
45x95 FLOOR FRAME
1810
1
AR-5
45x95 FLOOR FRAME
1070
4
AR-6 45x70 FLOOR FRAME 45x70! 2075 1
KL-1
24x120 ROOF BOARD
2426
29+2
PL-1
24x120 FLOOR BOARD
1910
10+2
PL-2
24x120 FLOOR BOARD
1495
19+1
PL-3
24x120 FLOOR BOARD
385
19+1
T-1 45x95 BEAM 45x95! 3210 1
T-2 45x95 BEAM 45x95! 3205 2
T-3 45x45 BEAM 3210 1
EXTRA 45x45 BEAM/ FRAME 3210 1
P-1
45x45 CORNER POST
2240
2
P-2
45x45 CORNER POST
2170
3
T-4 45x45 BEAM/ FRAME 1995 2
UR-1
45x45 DOOR FRAME
1950
6
UR-2
45x45 DOOR FRAME
1690
2
T-5 45x45 BEAM/ FRAME 1040 1
T-6 45x45 BEAM/ FRAME 995 1
UR-3 45x45 DOOR FRAME 690 4
PATIO M
PATIO M
Marking Note Lenght pcs
EXTRA 18x95 MOULDING 3400 2
L-1 18x95 ROOF MOULDING 3326 1
L-2 18x95 ROOF MOULDING 3136 1
UL-1 18x95 DOOR MOULDING 2710 1
UL-2 18x95 DOOR MOULDING 2460 1
L-3 18x95 ROOF MOULDING 2400 2
L-4 18x95 CORNER MOULDING Oversize 30mm 2350 2
L-5 18x95 CORNER MOULDING Oversize 30mm 2250 6
UL-3 18x95 DOOR MOULDING 1920 2
UL-4 18x95 DOOR MOULDING 1840 2
UL-5 18x95 DOOR MOULDING 890 1
UL-6 18x95 DOOR MOULDING 18x145! 1835 1
UL-7 18x95 DOOR MOULDING 15x55! 1835 1
DI-0 45x45 CORNER MOULDING 2100 5+1
DI-1
15x55 DISTANCE BOARD OUTER LINING
BOARDS
2170 4
DI-2
15x55 DISTANCE BOARD INSULATION
2080
2
DI-3
15x55 DISTANCE BOARD INSULATION
1995
2
DI-4
15x55 BASE- AND CEILING BOARDS
~2.2
15+2
STP-1 14x121 CEILING LINING BOARDS 1910 29+2
STP-2 14x121 OUTSIDE LINING BOARDS 400 69+2
SLOPE DETAIL UNDER FLOOR BOARD 3MM 2070 2
SLOPE DETAIL UNDER FLOOR BOARD 6MM 2070 1
SLOPE DETAIL UNDER FLOOR BOARD 9MM 2070 1
SLOPE DETAIL UNDER FLOOR BOARD 12MM 2070 1
PATIO M
PATIO M
Marking Note Lenght pcs
SAUNA BENCH 600x1787 1
SAUNA BENCH 500x1485
1
SAUNA BENCH 500x1080
1
SAUNA BENCH 200x1075
1
BENCH SUPPORT SET 45x45 1
BENCH SUPPORT SET (SIDE) 45x45 1
GLASS DOOR 88x690x1860 BRONZE
PREMIUM HANDLE
WITHOUT FRAME! 1
GLASS DOOR 88x690x1860 BRONZE
1
WINDOW 88x845x1860 BRONZE
WITHOUT FRAME!
2
SPU INSULATION 30x600x1200 6
FOIL TAPE 10M 1
WATER DRAINAGE DETAIL 20mm 2085+ 1
Marking Note Lenght pcs
JOIST HANGER 45x97 4
SCREW 5x40 FOR JOIST HANGER 40
SCREW 6x180 FOR WALL LOGS
200
SCREW 5x90 FOR FLOOR FRAME 200
SCREW 4.5x70 WALL LOGS SAUNA BENCHES 600
SCREW 3x40 DOOR- AND WINDOW
MOULDINGS
200
SCREW 3.5x50 FLOORBOARD
300
NAIL 40 LINING BOARDS
400
NAIL 70 ROOF BOARDS 300
VENTILATION LOUVRE WOOD D100 1
VENTILATION GRID D100 3
ADJUSTABLE LEG 20MM 3
PATIO M
SCREWS FOR ROOF DETAILS 100 pcs
EPDM ROOF COVER 3.4x3.05 11 m2
EPDM GLUE 2.5l 2 pcs
EPDM QUICKPRIME (LITTLE CONTAINER) 1 pcs
EPDM SPLICE TAPE 3300 mm
PAINT ROLLER+ HANDLE 1 pcs
METAL ROOFING SHEET 1615mm 2
METAL ROOFING SHEET 63mm WIDTH 2600 2
1900 2
ROOF COVER
GSPublisherVersion 0.12.100.100
PATIO M
BBAACC1122
1,8103263263263263262,395
3,1902,0751,070
4,061
4,061
405405281281416
+3mm+3mm+6mm+9mm+12mmAR-1AR-1AR-1AR-1
AR-2AAR-2
AR-3AR-3AR-3AR-3AR-3AR-6(45x70)
AR-4
AR-5Cutout for water drainage45x25mmAR-5AR-5AR-5
45416
9522
AR-2A
AR-1 = 3190mm 4pcsAR-2 = 2395mm 1pcsAR-2A=2395mm 1pcsAR-3 = 2075mm 5pcsAR-4 = 1810mm 1pcsAR-5 = 1070mm 4pcsAR-6 = 2075mm (45x70) 1pcs
Floor Frame*Check floor frame diagonals
GSPublisherVersion 0.12.100.100
PATIO MFloor Frame01
AR-1AR-1AR-3AR-3AR-3AR-3AR-1AR-1AR-5AR-5AR-5AR-5
AR-2AAR-2AR-4
Water drainage detail*Use 90mm screws and battery drillTake care! Sharp edges!01Screws 90mm*Install water drainage detail before first log wall row
GSPublisherVersion 0.12.100.100
PATIO M
5mm
First log rowFix first log wall row to the floor frame with 180mm screws(Suggestion: drill hole before inserting the screws)Leave 5mm gap outside with floor frame and 1st wall row0202Screws 180mm
01
01D
03B0202
GSPublisherVersion 0.12.100.100
PATIO MPosts0303*Install 70mm screws as shown in scheme:* Use level tool and battery drill to fix walls to postsScrews 70mm*2 screws per wall log connection
GSPublisherVersion 0.12.100.100
PATIO M
BAC12
4005607006601,920
3,2902,0851,085845845690
21
136
2,400
2,312
123456789101112131415161702B02020202020202020202020202020202Wall A (view from outside)
21
1,875
5601,920
2,176
700660123456789101112131415161703B03C03D0505050505050505050505050506060606060606060606060606Wall BDoor 690x1860
21
136
2,400
2,312
12345678910111213141516170202020202020202020202020202020202BWall C (view from outside)
68
3,210
2,2441,875
3451,700120700345123456789101112131415161701C0101D01E
04B
0707070707070707070707070707070707070707070707070707CBA7001,700Wall 2 (view from outside)Door 690x1860Window845x1860Window845x1860
CBA3,210
1362,176
1234567891011121314151601010101010101010101010101010101BWall 1 (view from outside)
Top view:Wall A (view from outside):Wall B:Wall C (view from outside):Wall 2 (view from outside):Wall 1 (view from outside):*Fix all wall logs with 180mm and 70mm screwsWall layouts
GSPublisherVersion 0.12.100.100
PATIO MLast row03* To install wall logs use rubber hammer and hammer blockInstall last wall detail to the second to last wall detail with 180mm/ 90mm screws(Suggestion: drill hole before inserting the screws)Screws 180mmScrews 90mm(only wall 2)03
GSPublisherVersion 0.12.100.100
PATIO M
580629622
9595
580
580
580
Joisthanger
GSPublisherVersion 0.12.100.100
GSPublisherVersion 0.14.100.100Drawing nr5Date28/03/2022DrawingBeams
BBAA1122
456834568345
1,8301,9201,830T-1 45x90mmT-2 45x45mmT-2 45x45mm
Insulation SPU 30mmSlat 15mmInner boards 14mm
Joist hangerBeam 45x45mmBeam 90x45mmAttach 40mm screwsJoist HangerBeam 45x45mmCELING BEAMS
95
728mm from wall
728mm from wall45mm
12BA
456834568345
1,9181,8301,830
728728
T-1T-2T-2
Screws 40mmScrews 40mmTemporarily attach roof board on top of front and back wall. Measure out 95mm from roof board(downward) and 728mm from the wallfor the joist hangerCeiling beams and joist hangerTop view
BBAACC112232101,9953,2101,9951,040995T-1 (95x45)T-3 (45x45)T-4 (45x45)T-5 (45x45)T-6 (45x45)JoisthangerT-2 (95x45)T-2 (95x45)T-4 (45x45)
GSPublisherVersion 0.4.100.100PATIO XS
547547547
95
12AB
547547547
2,220
2,150
2,130T-1 (45x95mm)T-1 (45x95mm)T-2 (45x45mm)T-2 (45x45mm)
GSPublisherVersion 0.12.100.100
GSPublisherVersion 0.14.100.100Drawing nr5Date28/03/2022DrawingBeams
BBAA1122
456834568345
1,8301,9201,830T-1 45x90mmT-2 45x45mmT-2 45x45mm
Insulation SPU 30mmSlat 15mmInner boards 14mm
Joist hangerBeam 45x45mmBeam 90x45mmAttach 40mm screwsJoist HangerBeam 45x45mmCELING BEAMS
95
728mm from wall
728mm from wall45mm
12BA
456834568345
1,9181,8301,830
728728
T-1T-2T-2
Screws 40mmScrews 40mmTemporarily attach roof board on top of front and back wall. Measure out 95mm from roof board(downward) and 728mm from the wallfor the joist hangerCeiling beams and joist hangerTop view
Ceiling beams and joist hangerTop viewTop viewTemporarily attach roof board on top of the walls. Measure out 95mm from roof board(downward) and 547mm from the walls for the joist hangerJoist HangerBeam 45x95mmBeam 45x45mm
Ceiling beams and joist hangerTop viewTemporarily attach roof board on top of the walls. Measure out 95mm from roof board (downward).Measure out Joist hanger position as shown in scheme:
GSPublisherVersion 0.12.100.100
PATIO M
2426
1,98o
KL-1=
3,210
2426KL=
GSPublisherVersion 0.4.100.100PATIO XS
2,166
2.09o
KL-1
2,220T-1 =2215mmT-1 =2215mm
KL-1 = 2166mm
Roof boardsCut the last roof board to lenght
Beam 45x95mmBeam 45x95mm01C
Use 8 nails (75mm) per roof boardSUGGESTION: Start with halfroof board, otherwise the finalboard will be too small
Roof boardsCut the last roof boardto lenght
GSPublisherVersion 0.12.100.100
PATIO M
GSPublisherVersion 0.12.100.100Tape InsulationoverlapsUse tape for SPUinsulation overlapsInsulationInstall the SPU insulation to the beams/ rafters with the distance board and 70mm screwsDistance board 15mmInsulation KingspanScrew 70mmScrew 70mmDistance board 15mmInsulation Kingspan 30mmRoof board
1,995
1,830
1,995
1,8301,860
995
1,860
1,0252,085
1,920
3,2101,0852,085
2,400STP-1=1910mm
STP-2=400mm
CeilingInstall the SPU insulation to the beams/ rafters with the distance board and 70mm screwsCut the last ceilingboard to lenghtInsulation Kinspan 30mmDistance board 15mmScrew 70mmCeiling lining boards STP-1Ceiling board15x55mmOutside lining boards STP-2
GSPublisherVersion 0.12.100.100
PATIO M
+3mm+6mm+9mm+12mm+3mm
GSPublisherVersion 0.12.100.100
3
GSPublisherVersion 0.25.100.100
451 90045
29029245293290451 570
CutoutAR-1AR-1AR-1AR-1AR-1AR-1AR-1
AR-2-BAR-2
45
AR-3
7631 57076245
25
AR-2-BAR-2-B CUTOUT
Screw 90mm01Floorboards
Water drainage cutter
Cutout 45x25mm for water drainageFloor Frame*Install the water drainage detail before floor boardsFix with floor moduling01Water Drainage detail
1,410
1,920
7303373035
PL-1PL-1
PL-1PL-1PL-1PL-1PL-1PL-1PL-1PL-1PL-1PL-1PL-1PL-1PL-1PL-1PL-1PL-1PL-1PL-1PL-1PL-1PL-1PL-1PL-1PL-1PL-1PL-1PL-1PL-1PL-1PL-1PL-1PL-1PL-1PL-1
GSPublisherVersion 0.25.100.100
+3mm+6mm+0mm+0mm+3mm+6mmSectionSection
Cutout 45x25 for water drainagePlywood +6mmPlywood +3mm*Apply plywood (3/6mm) on floor frame before floor boardsSection floor boards incline
BaseboardFloorboardPlywood +3mmPlywood +6mmPlywood +3mmPlywood +6mmFloor board cutoff (Cut in site) 45x45mm in all cornersFloorboardsWater drainage detailLeave ~3mm gap betweenfloor board and wallApply plywood (3 and 6mm) to give floor board inclinefor water drainageInstall water drainage detail before floor boardsFix floorboards with 40mmscrews as shown :Floor boards
1,9101,495385
1,9951,040
1,830
260
1,860
260
1,830
1,0852,085
PL-1=PL-2=PL-3=
Water drainagedetail
GSPublisherVersion 0.12.100.100
3
GSPublisherVersion 0.25.100.100
451 90045
29029245293290451 570
CutoutAR-1AR-1AR-1AR-1AR-1AR-1AR-1
AR-2-BAR-2
45
AR-3
7631 57076245
25
AR-2-BAR-2-B CUTOUT
Screw 90mm01Floorboards
Water drainage cutter
Cutout 45x25mm for water drainageFloor Frame*Install the water drainage detail before floor boardsFix with floor moduling01Water Drainage detail
1,410
1,920
7303373035
PL-1PL-1
PL-1PL-1PL-1PL-1PL-1PL-1PL-1PL-1PL-1PL-1PL-1PL-1PL-1PL-1PL-1PL-1PL-1PL-1PL-1PL-1PL-1PL-1PL-1PL-1PL-1PL-1PL-1PL-1PL-1PL-1PL-1PL-1PL-1PL-1
GSPublisherVersion 0.25.100.100
+3mm+6mm+0mm+0mm+3mm+6mmSectionSection
Cutout 45x25 for water drainagePlywood +6mmPlywood +3mm*Apply plywood (3/6mm) on floor frame before floor boardsSection floor boards incline
BaseboardFloorboardPlywood +3mmPlywood +6mmPlywood +3mmPlywood +6mmFloor board cutoff (Cut in site) 45x45mm in all cornersFloorboardsWater drainage detailLeave ~3mm gap betweenfloor board and wallApply plywood (3 and 6mm) to give floor board inclinefor water drainageInstall water drainage detail before floor boardsFix floorboards with 40mmscrews as shown :Floor boards
Floor BoardsApply plywood slope details to give floor board incline for water drainage+3mm+6mm+9mm+12mm+3mmFloor board cutoff (cut in site)45x45mm in corners
GSPublisherVersion 0.10.100.100
PATIO MWindows1. Lift the window in sideways. Fix the window leaf to the door frame post with70mm screws.2. Fix the second window to the first window with 55mm screws.3. Fix the second window to the door frame post with 70mm screws.01020370mm screwsTop view45x45 Frame45x45 Frame45x45 PostREMOVE GLASS FROMWINDOW FRAME WHENINSTALLING!!!
GSPublisherVersion 0.10.100.100
PATIO M
GSPublisherVersion 0.12.100.100
6906901,390
Door top viewFix the door frame to the door leaf. Fix with 70mm screws.Lift the door in place sideways as shown, then fix the door leaf to the log wall fromoutsideDoor side viewDoor and window222These screw holes will be coveredwith door moulding11
Doors2. Fix the mouldings using the 40mm stainless screwsTop view:1. Lift the door in sideways. Fix the door leaf to the door frame post with 70mm screws.70mm screws40mmstainlessscrewsREMOVE GLASS FROMWINDOW FRAME WHENINSTALLING!!!

Other holzhandlung raters Plumbing Product manuals

holzhandlung raters PATIO XXS User manual

holzhandlung raters

holzhandlung raters PATIO XXS User manual

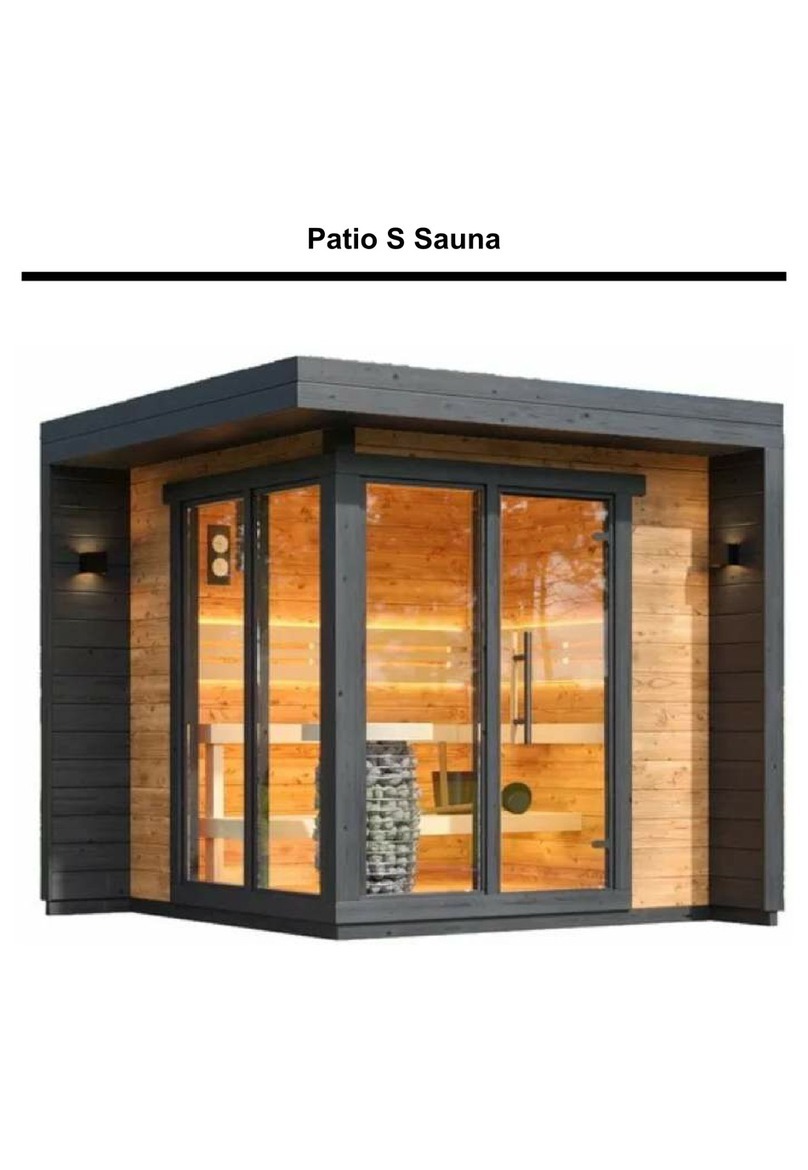
holzhandlung raters Patio S User manual

holzhandlung raters

holzhandlung raters Patio S User manual

Popular Plumbing Product manuals by other brands

DURAVIT D-Code 720094 Mounting instructions

DURAVIT

DURAVIT D-Code 720094 Mounting instructions

Spectrum Brands Pfister Tisbury LG42-TB0 Quick installation guide

Spectrum Brands

Spectrum Brands Pfister Tisbury LG42-TB0 Quick installation guide

Franke CMPX532WF Mounting instruction and Manual

Franke

Franke CMPX532WF Mounting instruction and Manual

Grohe Automatic 2000 19 605 manual

Grohe

Grohe Automatic 2000 19 605 manual

Elkay SwirlFlo DRKR14C Specifications

Elkay

Elkay SwirlFlo DRKR14C Specifications

Helvex Nuva TV-200 installation guide

Helvex

Helvex Nuva TV-200 installation guide

Grohe ESSENCE NEW 19 987 manual

Grohe

Grohe ESSENCE NEW 19 987 manual

AQUABELLA SHOWER AQUAS AQUAMAX PRO X JET 9.5 KW Instructions guide and user manual

AQUABELLA SHOWER

AQUABELLA SHOWER AQUAS AQUAMAX PRO X JET 9.5 KW Instructions guide and user manual

Kohler Mira Sport J03A Installation and user guide

Kohler

Kohler Mira Sport J03A Installation and user guide

Blue Bidet BB - 3500 Installation

Blue Bidet

Blue Bidet BB - 3500 Installation

Grohe 04058XX0 installation instructions

Grohe

Grohe 04058XX0 installation instructions

Laufen Citypro installation instructions

Laufen

Laufen Citypro installation instructions

NORMBAU Cavere Care Fixing instructions and directions for use

NORMBAU

NORMBAU Cavere Care Fixing instructions and directions for use

Helvex Argos TV-296 installation guide

Helvex

Helvex Argos TV-296 installation guide

Xmatch LT-901B instruction manual

Xmatch

Xmatch LT-901B instruction manual

oventrop Floorbox Installation and operating instructions

oventrop

oventrop Floorbox Installation and operating instructions

Everpure Dual Temp Faucet specification

Everpure

Everpure Dual Temp Faucet specification

American Standard 9504 Specification sheet

American Standard

American Standard 9504 Specification sheet

manuals.online logo
manuals.online logoBrands
  • About & Mission
  • Contact us
  • Privacy Policy
  • Terms and Conditions

Copyright 2025 Manuals.Online. All Rights Reserved.