Assembly
Assembling the Tinsel Halloween Gate
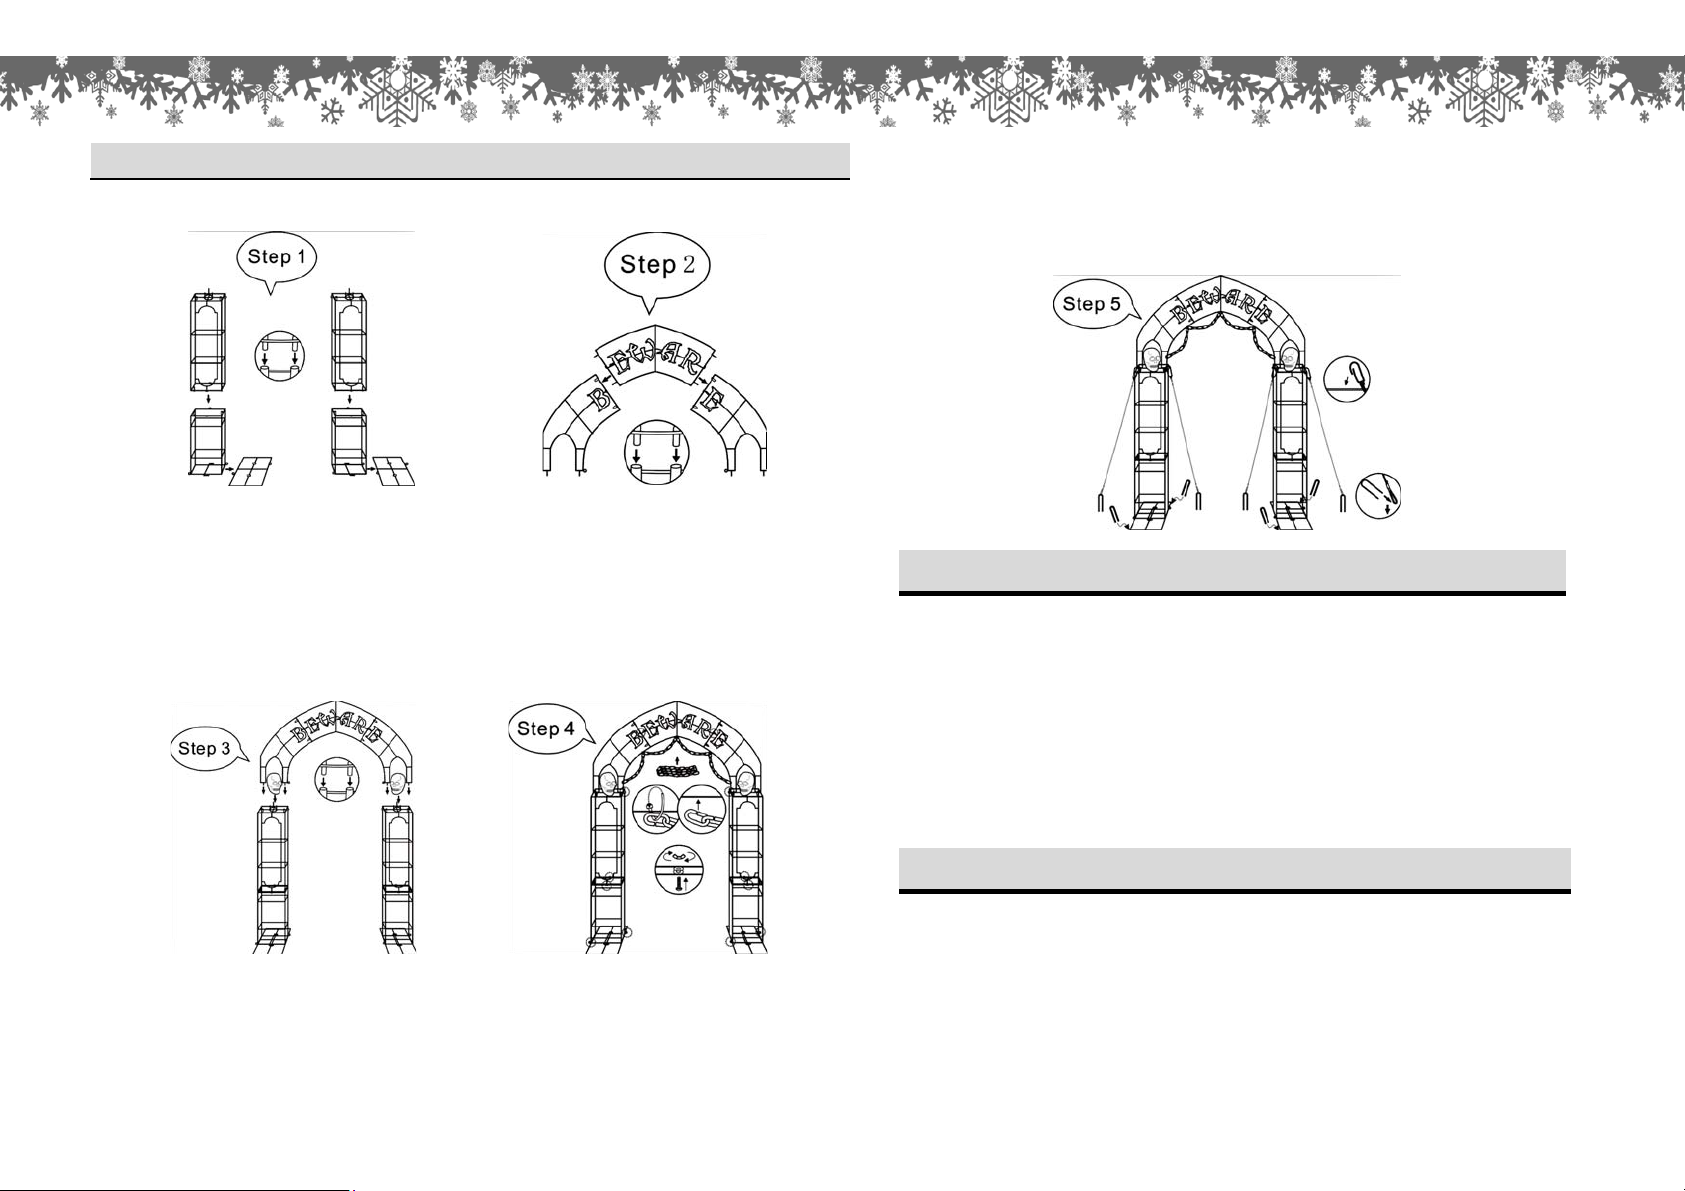
Step 1. Insert the connecting rods on the bottom of the Lower Section of Gate (C) into the
holes on the Gate Base Stand (D). Insert the connecting rods on the bottom of the
Middle Section of Gate (B) into the holes on the top of the Lower Section of Gate (C).
(FIG.1). Secure all sections with the Bolt and Wingnuts (G).
Step 2. Insert the connecting rods on the three parts of Upper Section of Gate (A) into the
matching holes with each other. (FIG.2). Secure all parts with the Bolt and Wingnuts.
Step 3. Place the Skulls (E) into the rods on the top of the Middle Section of Gate (B). Insert the
connecting rods on the bottom of the Upper Section of Gate (A) into the holes on Middle
Section of Gate (B). (FIG.3)
Step 4. Hang the Chain (F) on the Upper Section of Gate (A) and fasten with the Plastic Ties (I).
(FIG.4)
Step 5. Hook the plastic clip end of each of the four Anchoring Strings (M) onto the metal
loop at the top of the Middle Section of Gate (B). Place the "U" Shape Stake (H)
through the free end of each Anchoring String then firmly secure to the ground
evenly. (FIG.5)
Step 6. Insert "U" Shaped Ground Stakes (H) into the Ground over the Gate Base Stand.
(FIG.5)
Pre-Operation
CAUTION:Grasp the plug to insert or remove from the power source.
Do not unplug by pulling on cord.
CAUTION:The lighting string on this product is rated at 19.2Watts
(0.16 Amps). Do not overload. Do not connect to another lighting string, decorative
outfit or other electrical products. Before you use or re-use this product inspect it
carefully. Return to place of purchase with purchase receipt if the product has cuts,
damage, frayed wire insulation on cords, cracks in the socket enclosures, loose
connections or exposed copper wire.
CareandCleaning
a. Carefully remove the product from wherever it is placed. This helps to avoid any
undue strain or stress on the product conductors, connections, and wires. If the
product is placed somewhere other than the ground it should be well secured and
stable.
b. Wipe the product with a damp cloth and allow the product to dry before storing.
c. Store the product neatly in a cool, dry location protected from sunlight.
FOR INDOOR AND OUTDOOR USE
FIG.1 FIG.2
FIG.3 FIG.4
FIG.5


