4 5
When using your hOme™ Compact Air Purier (appliance), basic safety precautions should always
be followed to reduce the risk of re, electric shock, and/ or injury to person. Incorrect operation
due to ignoring instructions may cause harm or damage.
• All safety messages will tell you what
the potential hazard is, how to reduce
the chance of injury, and tell you what
can happen if the instructions are not
followed.
• Read all instructions before using the
appliance.
• Do not operate this or any other
appliance with a damaged cord.
• If the cord is damaged, contact hOme™
customer service at 1.800.898.3002 to
avoid a hazard.
• The appliance must be positioned so
that the plug is accessible.
• Connect plug to properly polarized
outlets only. No other appliance should
be plugged into the same outlet. Be sure
that the plug is fully inserted into the
receptacle.
• Do not run the power cord over
carpeting or other heat insulators. Do
not cover the cord. Keep the cord away
from trafc areas, and do not submerge
in water or any other liquid.
• We do not recommend the use of an
extension cord, as it may overheat and
become a risk of re.
• Never use the power cord to pick up,
carry, drag, pull, or lift the appliance. Do
not pull the cord against or around sharp
corners and edges. This could result in
injury to the user or damage to the cord.
• Unplug the appliance before cleaning or
making any repairs or servicing.
• Exercise caution and use reasonable
supervision when appliance is used near
children.
• Do not clean your appliance with
ammable uids. The fumes can create
a re hazard or explosion.
• Do not operate the appliance in any
greasy environment, such as in the
kitchen. This appliance is not intended
to lter oil or grease from the air.
• Do not tip over your appliance.
• Do not use the appliance in bathrooms
or other humid environments.
• Use care when operating the appliance
by keeping all foreign objects, ngers,
body parts, hair, loose clothing and
jewelry away from openings.
• Do not use the appliance near replaces
or in areas where ammable or
combustible vapors or appliances may
exist.
• This appliance operates at 100-240V,
50/60Hz only.
• To reduce the risk of re or electric
shock, do not use this appliance with
any solid-state speed control devices.
Safety Precautions
The appliance must be placed on a at
rm surface.
SAVE THESE INSTRUCTIONS / For Household Use Only
WARNING
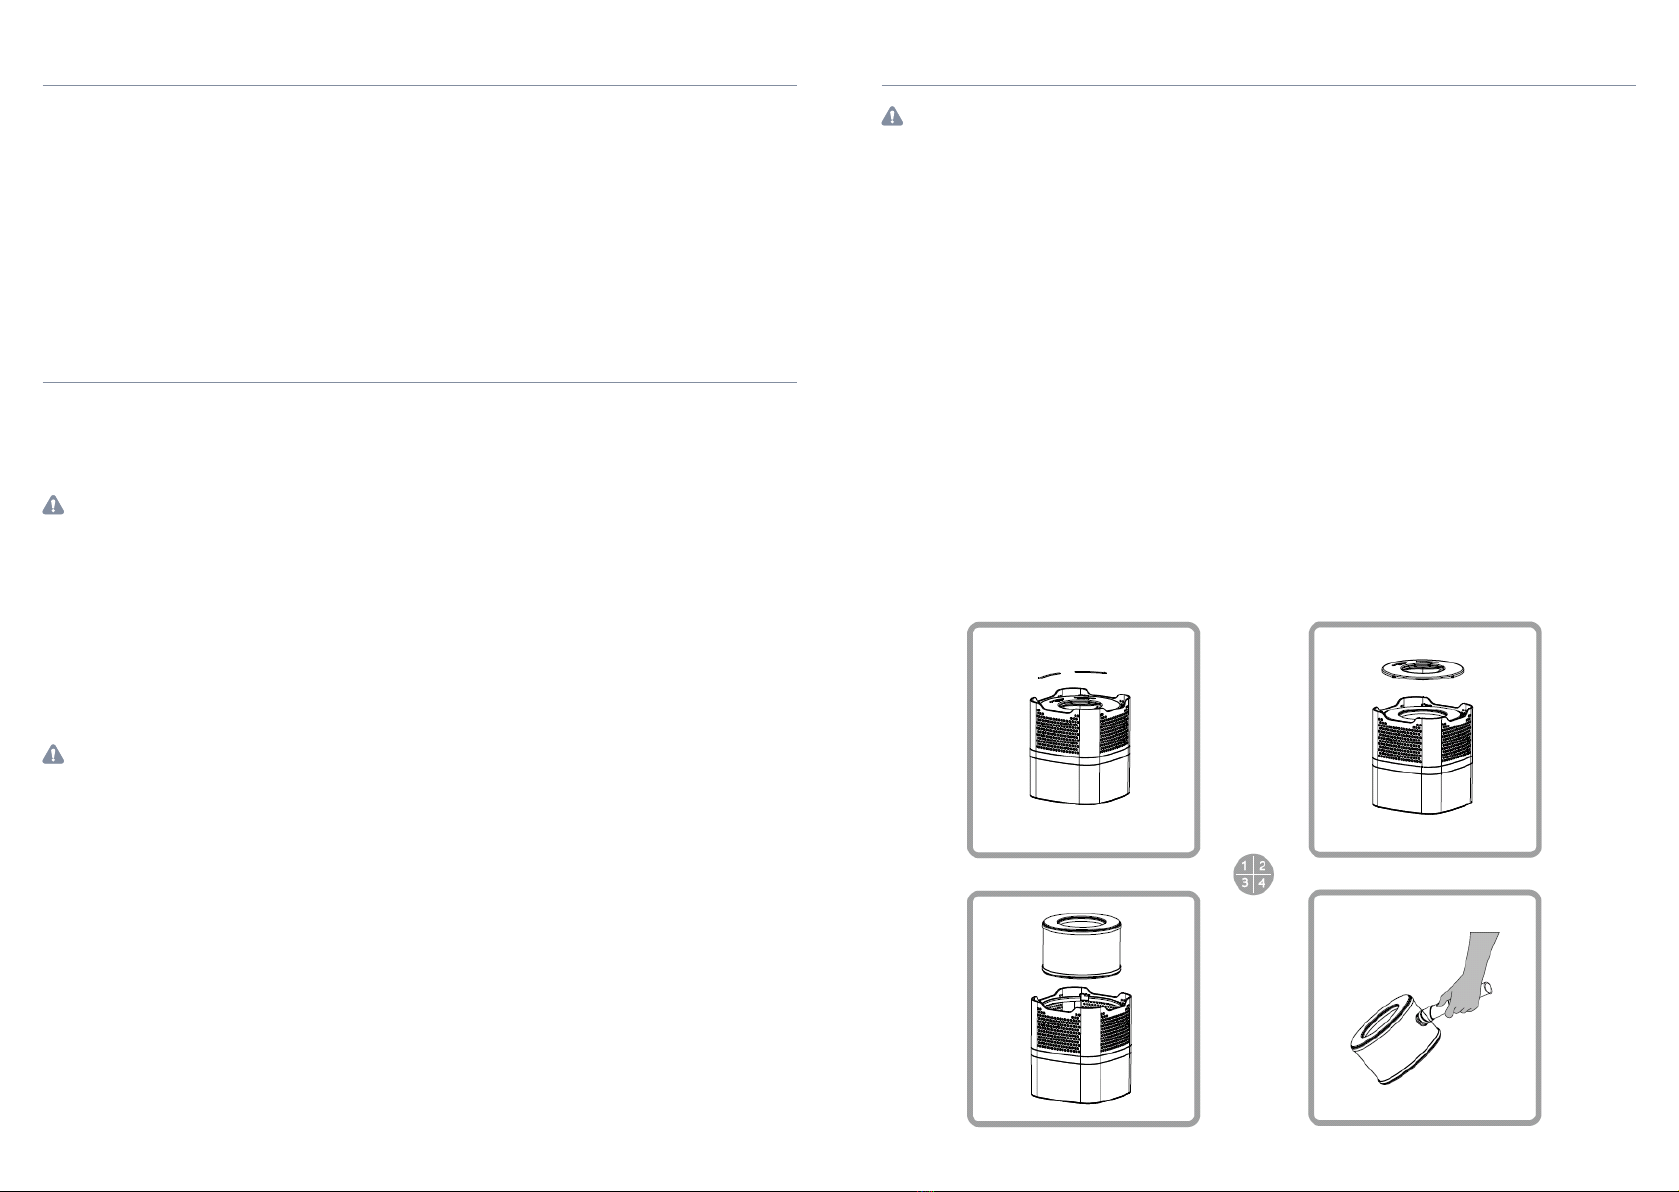
Change Filter
Indicator
Power Buon
Main Housing
Boom Cap
Adapter Connector of
Adapter
Filter
•
Get to Know Your Appliance