12
16. Limitations
1. No neonatal use
Do not sue for neonatal blood glucose testing.
2. Hematocrit range
Hematocrit in the range of 32~56% has been shown not to affect the glucose result. If you
do not know your hematocrit level, consult your healthcare professional.
3. Hemoglobin range
Hemoglobin levels of 500 mg/dL or below will not interfere with blood glucose test
results.
4. Elevated Cholesterol and Triglycerides
Cholesterol levels up to 500 mg/dL (12.9 mmol/L) and Triglycerides up to 1000 mg/dL
has been shown not to affect glucose results.
5. Medications
Interference was observed for therapeutic levels of L-DOPA.
No interference was shown for uric acid, acetaminophen, ascorbic acid and ibuprofen in
normal therapeutic levels. However, higher concentrations in blood may cause incorrect
results:
Uric acid: >10.9 mg/dL; acetaminophen: >6.2 mg/dL;
Ascorbic acid: >4.5 mg/dL; ibuprofen: >37.5 mg/dL.
6. The test strips may be used at altitudes up to 5,280 feet (1,609 m) without an effect on test
results.
7. Persons suffering from severe dehydration should not be tested using a capillary whole
blood sample.
8. Test results below 70 mg/dL indicate low blood glucose (hypoglycemia). Test results great-
er than 240 mg/dL indicate high blood glucose (hyperglycemia). If you get results below 70
mg/dL or above 240 mg/dL, repeat the test, and if the results are still below 70 mg/dL or
above 240 mg/dL, please consult your healthcare professional immediately.
9.Inaccurate results may occur in severely hypotensive individuals or patients in shock.
Inaccurate result may occur for individuals experiencing a hyperglycemic-hyperosmolar
state, with or without ketosis. Critically ill patients should not be tested with a blood
glucose meter.
17. Specifications
Test: Glucose
Sample: Whole Blood
Principle of the test method: Amperometric, glucose oxidase
Test sites: Fingertip, forearm
Measurement time: 6 seconds
Code required: No code device
Measurement Range: 20 ~600 mg/dL (1.1~33.3 mmol/L).
Batteries: 2 x AAA 1.5 V Alkaline 24A LR03
Operating Temperature: 10~40°C (50-104°F)
Humidity: 20~80% RH
Width: 48 mm
Length: 99 mm
Thickness: 14 mm
Weight: ~72g
18. Warranty Information
Your Easy Plus II Glucose Meter is warranted to be free of defects in materials and
workmanship for one year from the date of the original purchase. This warranty does not
cover device failure due to owner misuse or negligence, or normal wear and tear.
If you have a question about your Easy Plus II Glucose Meter or this warranty, please
contact:
Home Aide Diagnostics, Inc.
1072 S. Powerline Rd., Deerfield Beach, FL 33442, USA
TEL: 1-800-915-0116
Hours: 9 am to 5 pm EST/Mon. to Fri.
(Outside of these times, contact your healthcare professional)
Reference:
1. American Diabetes Association: Diabetes Care, January 2015, volume 38 (suppl. I), S8
– S16
2. American Diabetes Association-Diabetes Forecast website information:
http://www.forecast.diabetes.org/diabetes-101/hyperglycemia
http://www.forecast.diabetes.org/diabetes-101/hypoglycemia
10. Recalling the Memory and Viewing the Average
A. Using the Meter Memory
The test results for blood sample will be stored in the memory automatically. The meter can
store up to 500 of the most recent rest results. You can also view the average of test results
for various periods of 7, 14, 28, 60 and 90 days. The control solution test results will not be
stored in memory.
(Note: Please make sure that you press C key when you run a Control Solution test, so that
the control test result will not be added to memory.)
B. Recalling the Test Results from the Meter Memory
1. With meter off, press M key to turn on the meter, the meter will display the total number
of test data stored in memory. Then the screen will display “001” as the sequential number
of the most recent test result in memory. The memorized test data will be displayed next.
If there is no memorized result in the meter, “---" is displayed and the meter will turn off
after 60 seconds if no action is taken.
(The meter will display “---" if no previous results were memorized.)
2. The screen will display each of the memorized test data in sequence. Press M and C key to
review your test results in memory forwards and backwards.
3. To turn off the meter, press M key for 2 seconds, or the meter will turn off automatically
after 60 seconds of no activity.
C. Viewing the Average (AVG) of Test Data in Memory
1. To display the average (AVG) test result, please turn meter off. Press C and M keys at the
same time and hold for about 2 seconds, wait for AVG displayed on screen, then release the
two buttons. The meter will be in the average mode with “AVG” font displayed.
2. When the “AVG” is flashing at the lower left corner of screen, the number 7 will be displayed
under AVG and the average of the last 7 days test results will be displayed in the center of the
screen. The number of tests done in the last 7 days will be also displayed at the lower right
corner of screen. If you want to see the average of 14, 28, 60 and 90 days, keep pressing the M
key to move the LCD display forward from 7 day average to 90 day average. The average
display will move from 90 days backward to 7 days if you continue to press C key.
3. Press the M key and hold for 2 seconds to exit the recall mode and turn off the meter, or the
meter will automatically power off after 60 seconds.
4. W hen “---” is displayed, showing that there are no test results in memory.
Calculations:
The 7 days average is the average of the last 7 day test results.
The 14 days average is the average of last 14 day test results.
The 28 days average is the average of last 28 day test results.
The 60 days average is the average of last 60 day test results.
The 90 days average is the average of last 90 day test results.
9. Runnig A Blood Glucose Test
11. Expected Values Reference
Note 1: Note 1: To reduce the chance of infection:
Never share a lancet or a lancing device with anyone.
Always use a new, sterile lancet. LANCETS ARE FOR SINGLE USE ONLY.
Note 2: If the meter and test strips are moved from one temperature to another, allow thirty (30) minutes for
them to adjust to the new temperature before performing a blood glucose test.
Blood glucose levels normally will vary from time to time depending on food intake,
medication dosages, health, stress or exercise. Consult your physician or healthcare
professional for the target glucose value appropriate for you.
Expected plasma blood glucose values for normal, nondiabetic adults are as follows.
Before eating < 100 mg/dL
Two hours after meals < 140 mg/dL
Easy Plus II meter gives plasma equivalent results.
12. Transmitting Results
Note:
Easy Plus II Glucose Meter allows you to transfer the test results stored in its memory to your personal
computer. However, you will need to order software and a Data Download Cable separately from your
distributor.
Please download the software and its data download procedure from our website. https://homeaide.us/. You
can also check with your distributor for the software download option. The meter still keeps the results in the
memory after transmitting.
1. Before transmitting test data, you will need to set up the download software and USB driver
on your PC. The complete installation procedures for software application could be found in
the first section of User Guide: Download Software for meter on CD.
2. Launch the software application (Meter Download) on PC after installation is complete. Then
connect your meter and PC with the download cable before starting the data download. Hit the
“Connect (Download)” button on PC screen to get ready for data receiving. For more detailed
information and procedures about data download from meter to PC, please refer to User
Guide: Download Software for meter on CD.
3. With the meter off, hold the M and C key down at the same time for 5 seconds until “PC” is
displayed.
4. Press the C key to start transmitting. The meter will display a flashing “PC” during the
transmission process. When the “PC” on the screen stops flashing, it indicates the transmis-
sion is completed. The meter will power off if no action is taken in 60 seconds or M key is
pressed for 2 seconds.
5. Once the download is completed, the download report could be exported to Microsoft Excel
file. You can view, rename or delete the exported excel files on PC if needed.
13. Maintenance of your system
Please, treat this meter with proper care, and keep it in good condition.
1. Store your meter in its case, in a clean dry place at 46~86°F (8~30°C).
2. Always clean your meter after use. Wipe and clean surface of the meter with a soft
cloth that has been slightly dampened with mild detergent.
3. Please handle with care and do not drop the meter.
4. If this meter is used by healthcare professional infection control policies should be
strictly followed.
5. The meter has a shelf-life of 2 years.
We suggest you should periodically compare the test system to another test system
which is well maintained and monitored by a healthcare provider.
14. Troubleshooting
Following is a summary of all Error Messages. These messages help to identify certain
problems, but do not appear in all cases when a problem has occurred. Improper use may
cause an inaccurate result without producing an error message or a symbol. In the event of
a problem, refer to the information in the table under Solution.
Error messages:
E_1 : The temperature is too low.
E_2 : The temperature is too high.
E_3 : Battery Low.
E_4 : Memory damaged.
E_5 : The strip is wet or used.
E_6 : Error in meter or strip.
HI : The glucose level is too high.
LO : The glucose level is too low.
Note: Your meter can show results either in “mg/dL” or “mmol/L” units. Mg/dL is the unit used in the U.S.,
Please contact the manufacturer if your meter does not display mg/dL when you turn it on. The factory
set default for the meter is mg/dL, in the event that the meter loses power or the batteries are changed,
the factory set default is mg/dL. It is very important to use the correct unit of measurement to properly
manage your diabetes. If you live in the USA you should use mg/dL; your result will never have a
decimal point. If you live in Canada and some European countries you should use mmol/L; your result
will always have a decimal point. The mg/dL display is on by default.
15. Customer Service
If you need assistance with your Easy Plus II Glucose Monitoring System, please
contact:
Home Aide Diagnostics, Inc.
1072 S. Powerline Rd., Deerfield Beach, FL 33442, USA
TEL: 1-800-915-0116
Hours: 9 am to 5 pm EST/Mon. to Fri.
Outside of these times, contact your healthcare professional for medical issues or
advice.
For questions related to your health condition, please call your doctor or healthcare
professional.
11. Apply a small blood drop (● actual size)to the front edge of the test
strip, and the blood should be pulled into the test strip before the
meter begins to count down. Do not push your finger against the
test strip or try to apply a smeared blood sample.
12.The meter will start counting down for 6 seconds and your test result
will be displayed on the screen. Remove the used test strip by hand
or by pushing the ejector button. The meter will turn off and the test
result is stored automatically
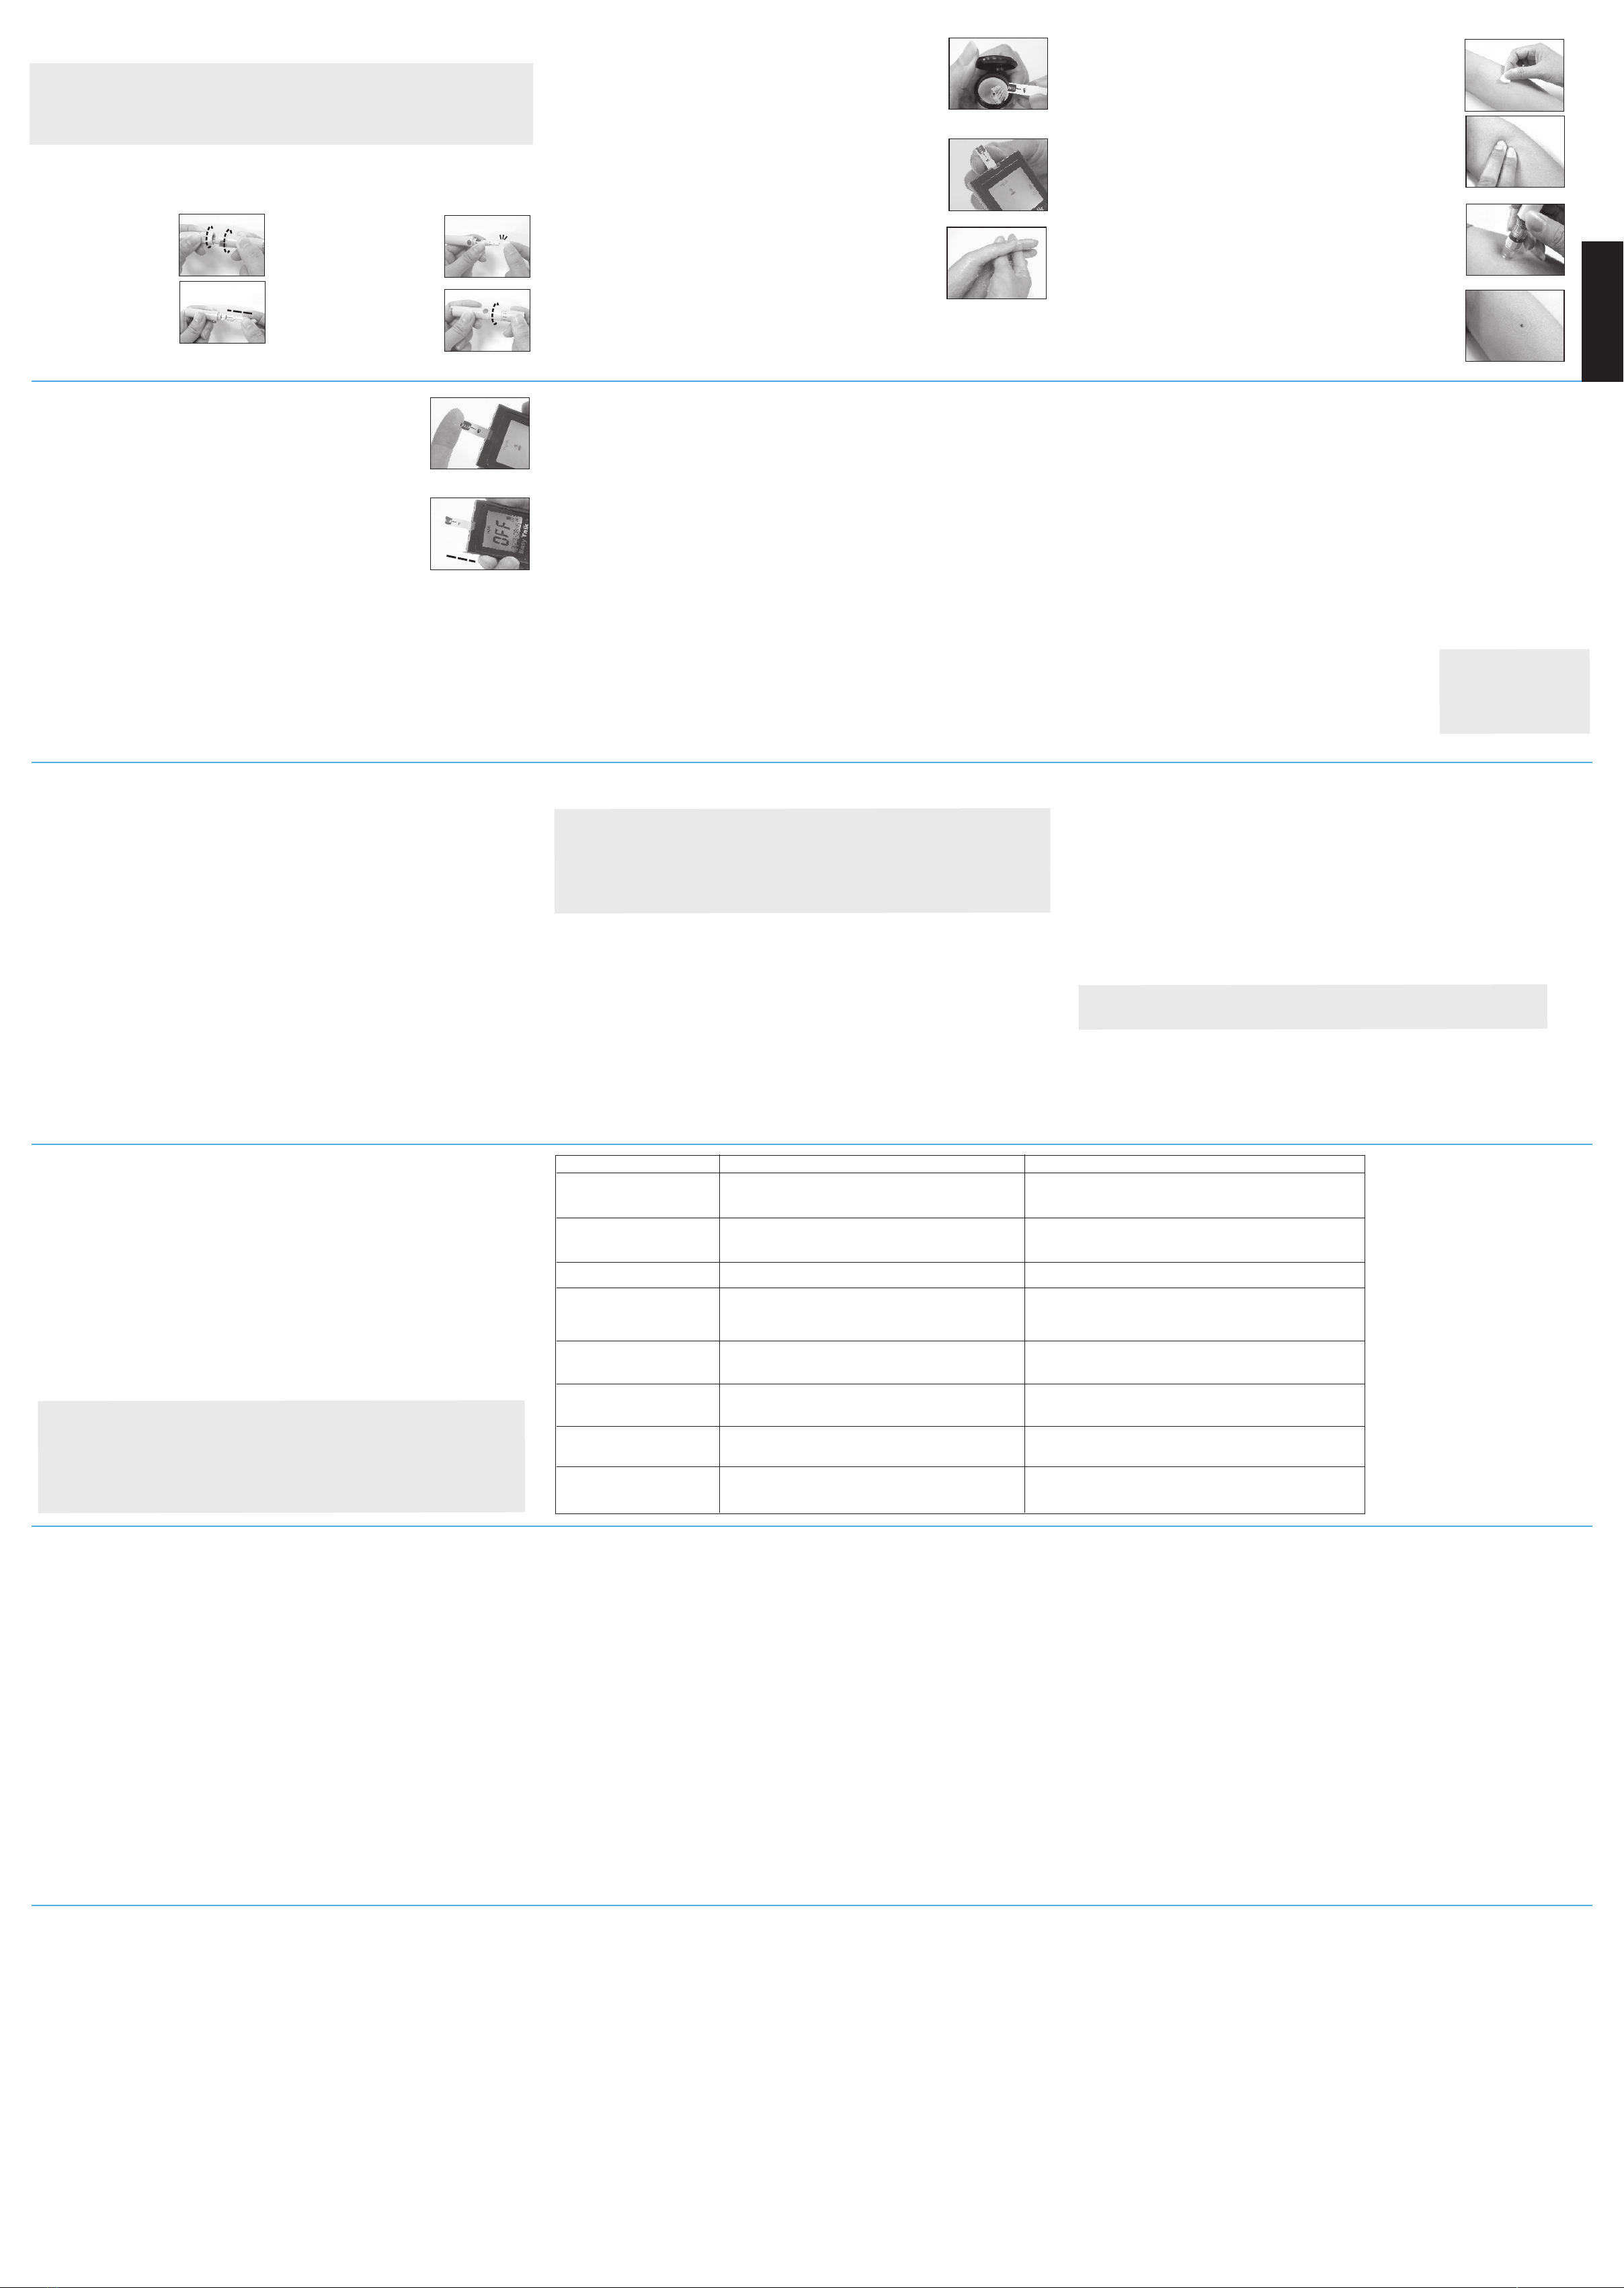
8. CHOOSE PUNCTURE SITE
a. AST ONLY: Select a soft, fleshy area on your forearm that is
clean and dry, away from bone and free of visible veins and hair.
b. AST ONLY: Massage the selected area gently to increase blood
flow to the puncture site. Clean the test location with an alcohol
wipe or with soap and water.
c. FINGERTIP ONLY: Use the adjustable lancing device or the
disposable lancet to take a blood sample from the fingertip and let
it form a small round blood drop.
9. Press and hold the loaded lancing device against the puncture site
for a few seconds, then press the puncture button.
10.Wait for a few seconds until the blood drop forms. Make sure you
have sufficient blood to fill the small window of the test strip. For
individuals who experience difficulty in getting sufficient blood
for a test, it may be helpful to rub the puncture site a little longer
before using the lancing device.
1
2
3
4
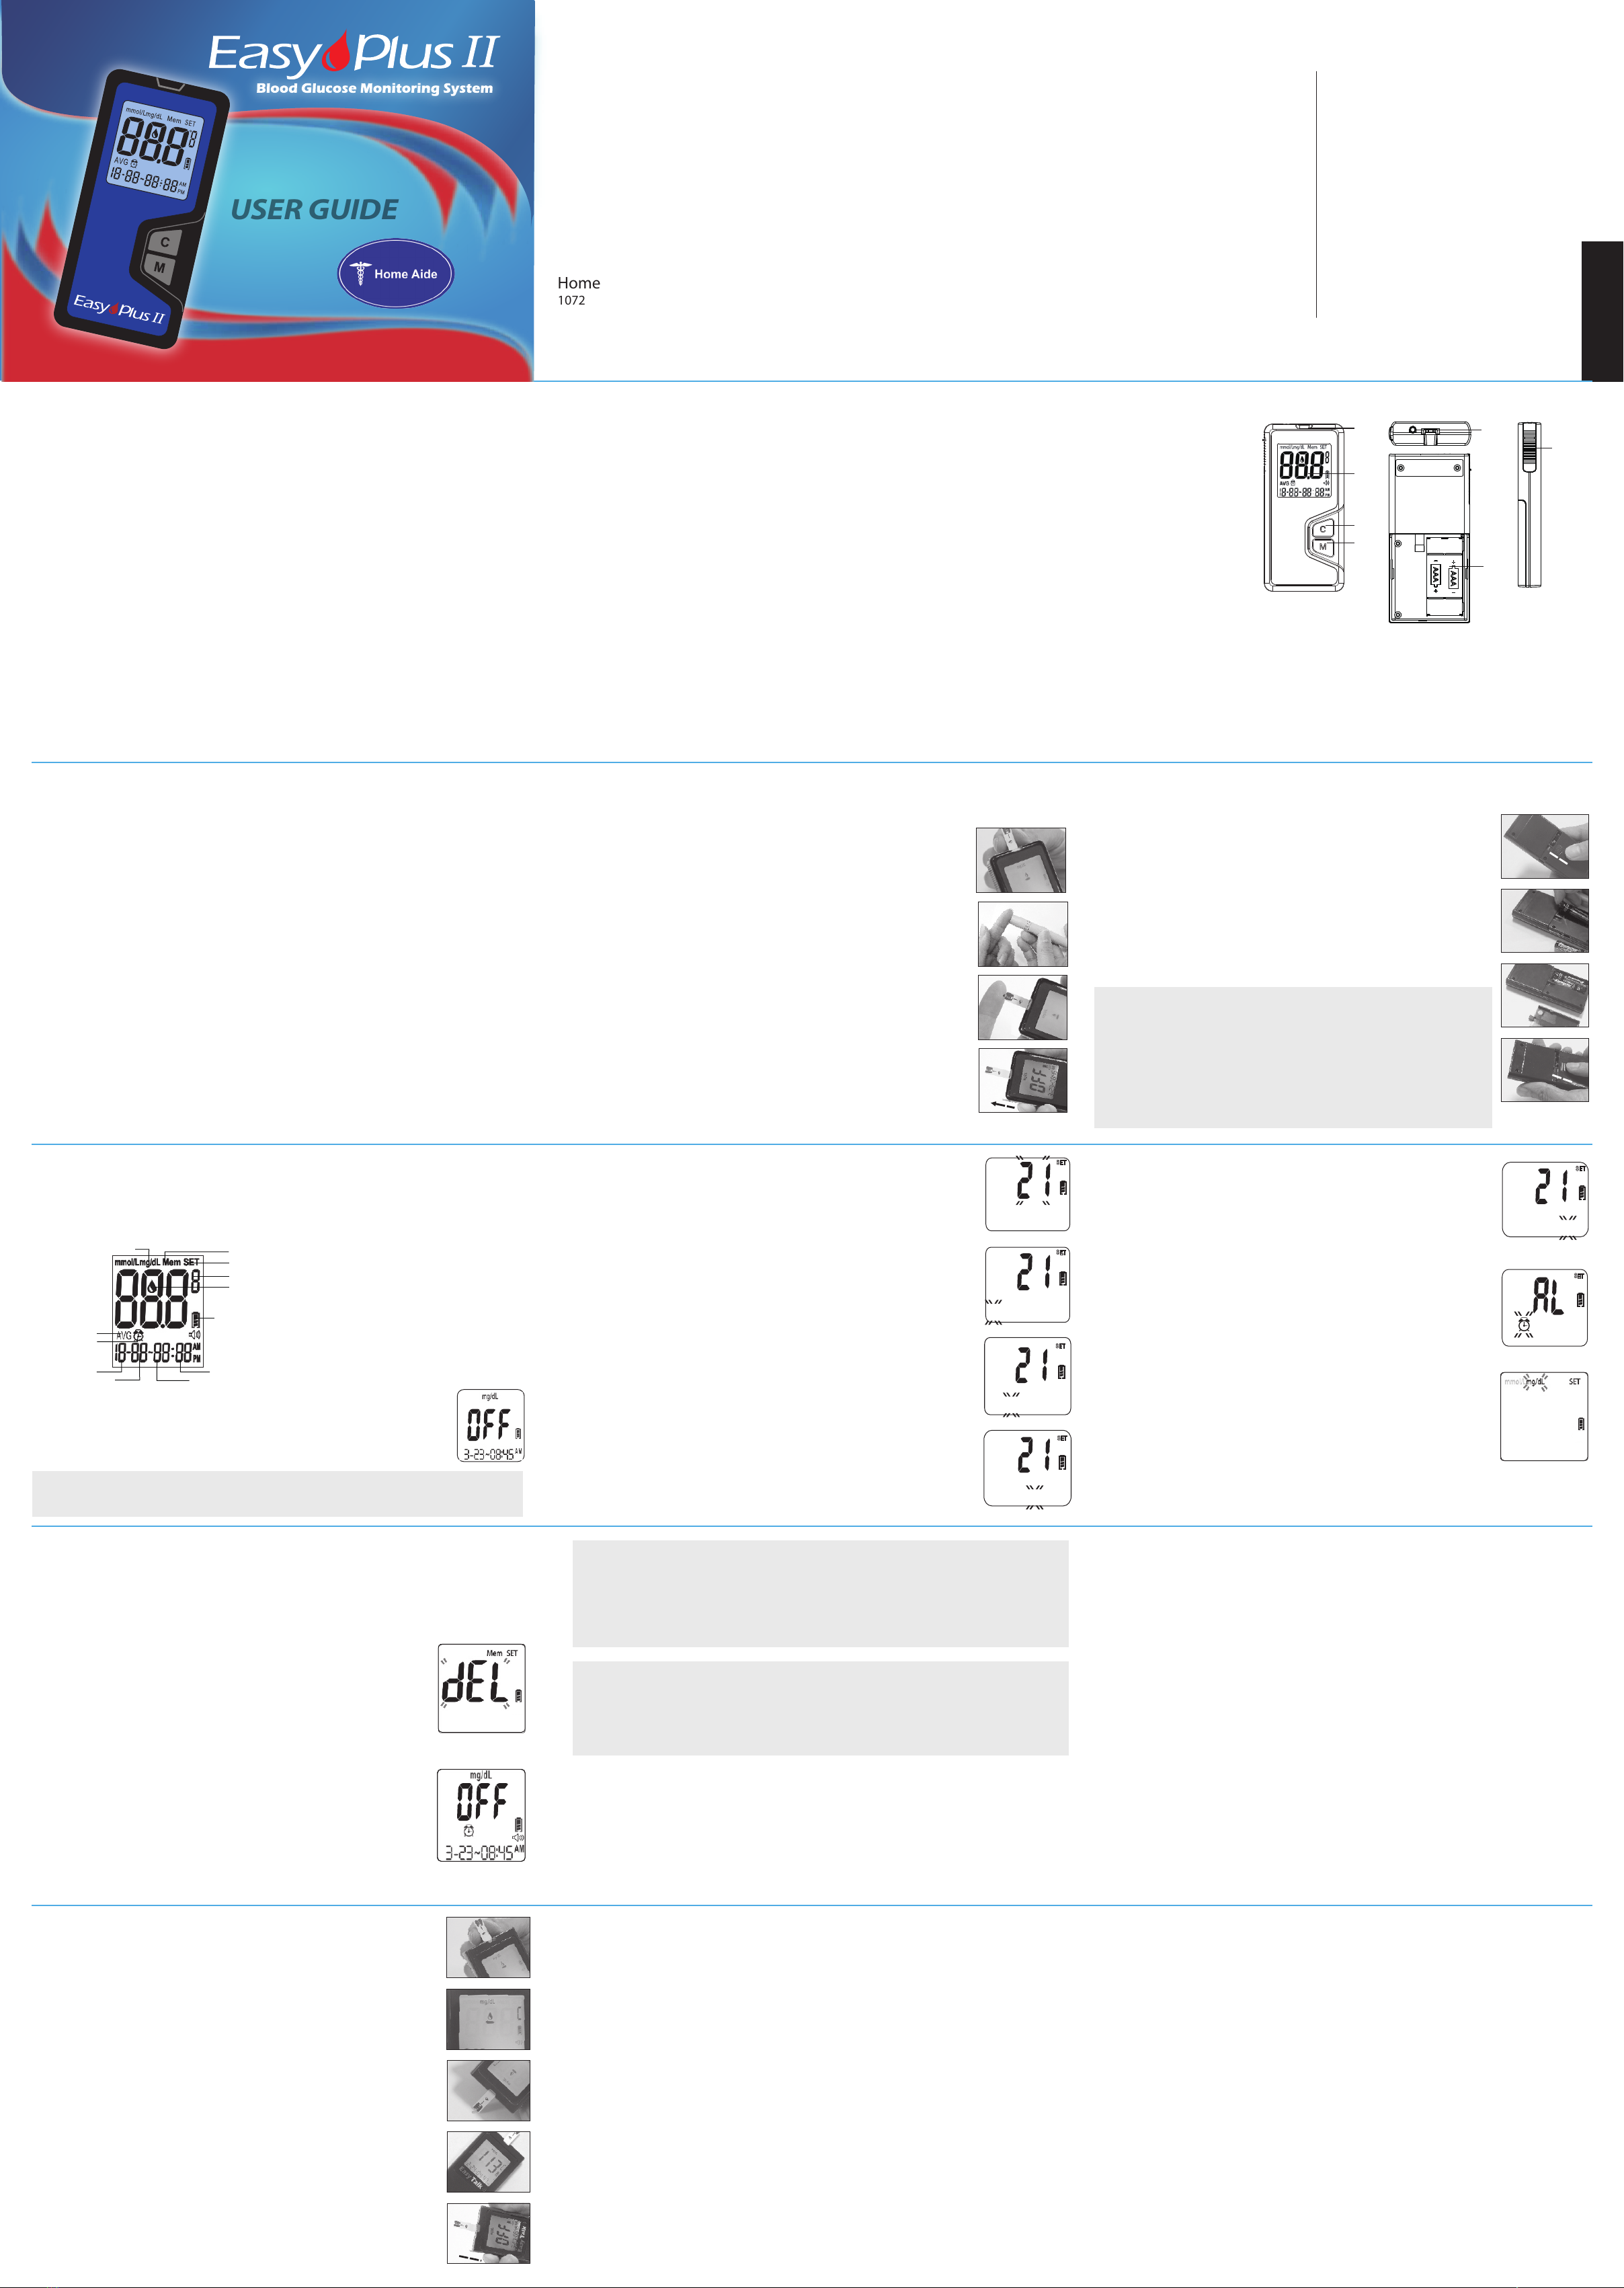
1.Please unscrew the
lancing device by
turning the end cap
counter clockwise.
2.Insert a new lancet
firmly into the lancet
holder
3. Twist off the protective
top of the lancet.
4. Close the end cap of the
lancing device and grasp
the lancing device as
shown. Slide into locking
position. If necessary,
please set the lancing
device for a deeper punc-
ture.
IMPORTANT:
1. Never reuse a test strip or a lancet. An “E_5” error message will be displayed in the
center of screen if a used strip is inserted into the meter.
2. Discard the test strip and lancet immediately in a puncture-proof container with a lid
after use.
Para un manual completo en español, por favor llame
al 1-800-915-0116 y pida un manual en formato PDF
sea enviado a su correo virtual para
descargar las instrucciones gratis
en su computadora.
Para más información, por favor
visítenos en nuestro sitio web al
www.homeaide.us o llámenos al
1-800-915-0116.
Gracias por usar el Easy Plus II
Sistema de Monitoreo de Glucosa!
(For use with generic lancing devices). Not included with meter. Unscrew the lancing
device by turning the end cap counter clockwise. A clear cap will come with the package of a
meter kit or a lancing device. The clear cap on the lancing device will make it easy for you to
get a drop of blood for AST.
5
6
5. Open the test strip vial. Take one new test strip out of the vial and
recap the vial quickly and firmly.
6. While the meter is off, insert a test strip into the meter's strip slot in
the right direction. The meter will turn on with a full screen display,
and a blood drop icon will be blinking on the screen. If no action is
taken in 2 minutes, the meter will turnoff automatically.
7. Use a single lancing device to take a blood sample from the finger-
tip or forearm.
7
8
9
10
Note:
1. HI/LO results are not stored
in the memory.
2. Do not insert the strip into
the meter when you want to
recall the test results.
Problem Possible Cause Solution
(1) The meter displays an
E_1 error message.
The meter is operating in an ambient
temperature below 10 ℃ or 50℉ which is the
lowest range of operating temperature.
(2) The meter displays an
E_2 error message.
The meter is operating in an ambient
temperature above 40 ℃ or 104℉ which is
the cap of operating temperature.
(4) The meter displays an
E_4 error message.
The memory chip of the meter could
be damaged or malfunctioning.
(5) The meter displays an
E_5 error message. The inserted test strip has been wet or used.
(6) The meter displays an
E_6 error message.
The meter is not working properly, either
because of a defective meter or a defective strip.
(7) The meter displays
HI on screen.
The test result is higher than the measuring range
of 600 mg/dL ( 33.3 mmol/L).
(8) The meter displays LO
on screen.
The test result is lower than the measuring range
of 20 mg/dL ( 1.1 mmol/L).
(3) The meter displays an
E_3 error message. The battery is too low to operate the meter.
Repeat the test after the meter and strip are in a
warmer environment and allow the meter warm up
for a while before retesting.
Repeat the test after the meter and strip are in a
cooler environment and allow the meter sit cooler
for a while before retesting.
The meter can perform the glucose measuring without
storing the test results into the meter’s memory. Please
write down the test results into the data logger before
you call a customer service representative.
Please check the strip if it is damaged or used. In
either case, please discard the strip and repeat the test
using a new strip.
Repeat the test with a new test strip. If E_6 continues
to show up on screen, please call a customer service
representative.
Test again following the user guide for correct glucose
measurement process. If you see HI again, please call
your medical doctor for advice immediately.
Test again following the user guide for correct glucose
measurement process. If you see LO again, please call
your medical doctor for advice immediately.
Please replace the two AAA batteries.