Easy Start
Page 7of 15
Note: If you cannot find an entry similar to 'TCP/IP' or 'TCP/IP -> Network Adaptor
Name' or 'Internet Protocol (TCP/IP)', you must install the TCP/IP protocol. Under
Install select 'Protocol' and click Add. In the next dialog box select 'Internet Protocol
(TCP/IP)' and confirm withOK.
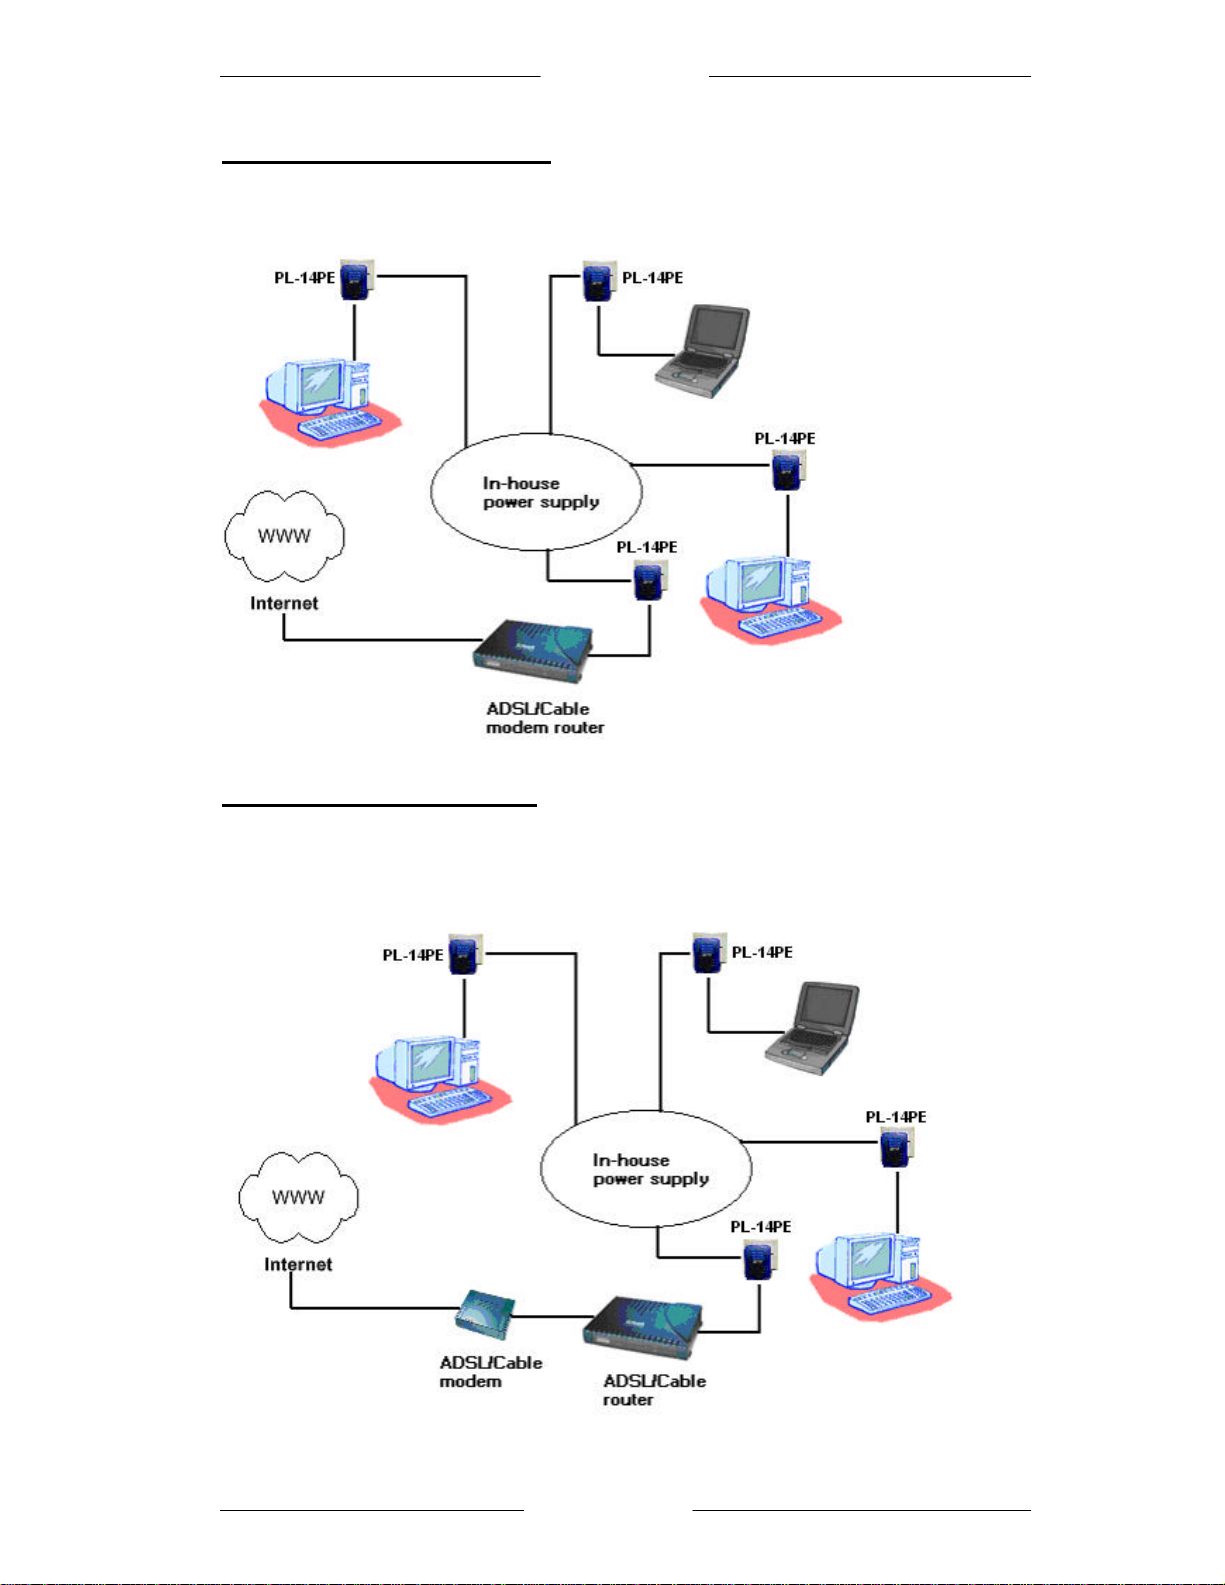
3. If you use a router for Internet access, you will still need to configure it, because
the router dials into the Internet, not the computer.
Under Start Settings Control Panel Network and Dial-up Connections,
and enable the 'Never dial a connection' option. Close the dialogs withOK.
3.1.3 Windows XP
The Windows XP start menu can be configured in different ways. See the Windows
XP documentation for more information.
1. Open the properties of the LAN connection on the connected computers.
Select Start Control Panel Network and Internet Connections. Click with
the right mouse button on the corresponding LAN connection and select
'Properties'.
2. Click the entry for the TCP/IP protocol of the network adaptor and onProperties.
Enable the option 'Obtain an IP address automatically'. You can ignore all other
options: they either remain empty or retain their default settings. Close the dialogs
with OK.
Note: If you cannot find an entry similar to 'TCP/IP' or 'TCP/IP -> Network Adaptor
Name' or 'Internet Protocol (TCP/IP)', you must install the TCP/IP protocol. Under
Install select 'Protocol' and click Add. In the next dialog box select 'Internet Protocol
(TCP/IP)' and confirm withOK.
3. If you use a router for Internet access, you will still need to configure it, because
the router dials into the Internet, not the computer.
Under Start Settings Control/Panel Internet Options, select the
'Connections' tab and enable the 'Never dial a connection' option. Close the
dialogs with OK.
Note: Other Internet applications such as e-mail clients may also need this
information. This generally involves changing a setting with a name like 'Connect to'
or similar to 'LAN'.