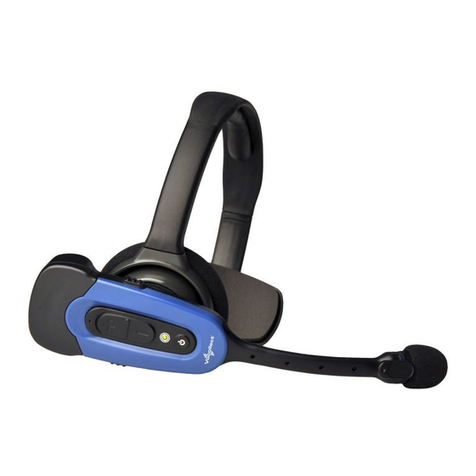
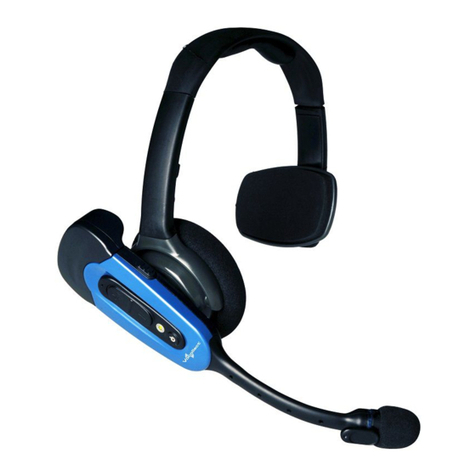
Honeywell SRX-SL User manual

SRX-SL Headset
for use with devices running a Microsoft
®
Windows
®
10 Mobile operating system
User’s Guide

Disclaimer
Honeywell International Inc. (“HII”) reserves the right to make changes in specifications and other information contained in this
document without prior notice, and the reader should in all cases consult HII to determine whether any such changes have been
made. The information in this publication does not represent a commitment on the part of HII.
HII shall not be liable for technical or editorial errors or omissions contained herein; nor for incidental or consequential damages
resulting from the furnishing, performance, or use of this material.
This document contains proprietary information that is protected by copyright. All rights are reserved. No part of this document
may be photocopied, reproduced, or translated into another language without the prior written consent of HII.
© 2017 Honeywell International Inc. All rights reserved.
Web Address: www.honeywellaidc.com
Trademarks
Apple, iPhone, and Siri are trademarks of Apple Inc., registered in the U.S. and other countries.
IOS is a trademark or registered trademark of Cisco in the U.S. and other countries and is used under license.
Android, Google, and other marks are trademarks of Google Inc.
Microsoft, Windows, Windows Mobile, and the Windows logo are registered trademarks or trademarks of Microsoft Corporation
in the United States and/or other countries.
The Bluetooth word mark and logos are owned by the Bluetooth SIG, Inc.
Other product names or marks mentioned in this document may be trademarks or registered trademarks of other companies
and are the property of their respective owners.
Patents
For patent information, please refer to www.honeywellaidc.com/patents.
Contact Customer Support
For contact information, see Customer Support (see page 3-1).
Limited Warranty
See Limited Warranty (see page 3-2) or go to www.honeywellaidc.com.
Product Service and Repair
Honeywell International Inc. provides service for all of its products through service centers throughout the world.
To obtain warranty or non-warranty service, return your product to Honeywell (postage paid) with a copy of the dated purchase
record.
For contact information, see Customer Support (see page 3-1).
Send Feedback
Your feedback is important to the continual improvement of our documentation. To provide feedback about this manual, contact

1
Chapter 1 - Introduction
Honeywell SRX-SL Wireless Headset .................................................................................1-1
Components.........................................................................................................................1-2
Buttons ...........................................................................................................................1-2
LED and Tones ..............................................................................................................1-3
SRX-SL Wireless Headset Specifications............................................................................1-4
Battery Specifications.....................................................................................................1-4
Supported Bluetooth Profiles ...............................................................................................1-4
SRX-SL Compatibility ..........................................................................................................1-4
Chapter 2 - Use the SRX-SL Headset
Out of the Box ......................................................................................................................2-1
Initial Use .............................................................................................................................2-1
Charge the SRX-SL Headset...............................................................................................2-1
Charging Fault................................................................................................................2-2
Fast Charge ...................................................................................................................2-2
Assemble the SRX-SL Headset...........................................................................................2-2
Sharing the SRX-SL Headset ........................................................................................2-2
Pair the SRX-SL Headset ....................................................................................................2-2
Reconnect to Last Device ..............................................................................................2-3
Pair the SRX-SL Headset Using Near Field Communication (NFC)....................................2-3
Care and Use of the SRX-SL Headset ................................................................................2-4
Put On the Headset........................................................................................................2-4
Adjust Headset for Comfort............................................................................................2-5
Clean Headsets..............................................................................................................2-5
Clean the Headband Pad and Ear Pad..........................................................................2-5
Replace the SRX-SL Ear Pad ........................................................................................2-6
Chapter 3 - Customer Support
Technical Assistance ...........................................................................................................3-1
Honeywell - Vocollect Product Documentation ....................................................................3-1
Honeywell - Vocollect Reseller Services..............................................................................3-1
Honeywell - Vocollect Technical Support.............................................................................3-1
Honeywell - Vocollect Customer Service .............................................................................3-1
Honeywell - Vocollect RMA..................................................................................................3-2
Sales and General Inquiries.................................................................................................3-2
Limited Warranty..................................................................................................................3-2
Chapter 4 - SRX-SL Agency information
SRX-SL Important Information.............................................................................................4-1
Safety and Handling.............................................................................................................4-1
Battery Safety Information ...................................................................................................4-1
RF Exposure Statement.......................................................................................................4-1
Radio....................................................................................................................................4-2
Table of Contents
2
Certification and Compliance............................................................................................... 4-2
Statement of Agency Compliance ....................................................................................... 4-2
Federal Communications Commission Compliance............................................................ 4-2
Canadian Compliance Statement........................................................................................ 4-3
European Community Compliance Statement .................................................................... 4-3
EU Declaration of Conformity .............................................................................................. 4-3
European Community Restrictions ...................................................................................... 4-4
Regulatory Approvals for Bluetooth® Radio Devices .......................................................... 4-5
Environmental Information................................................................................................... 4-5
Declaration of Conformity: RoHS ........................................................................................ 4-5
Disposal and Recycling Information .................................................................................... 4-5

1 - 1
1
Introduction
Honeywell SRX-SL Wireless Headset
The Honeywell SRX-SL Wireless Headset is the lightweight wireless headset from Honeywell that has been designed for use in
non-rugged environments such as retail in store, direct store delivery, transportation and logistics, government and on-premise
inspections.
This guide covers the use of the SRX-SL headset with an Android device such as the Dolphin 75e or Dolphin CT50. These
devices may have an Android 4.4 KitKat or Android 6.0 Marshmallow operating system. The SRX-SL headset may also be used
with other commercially available Android devices such as an Android phone though the pairing instructions may differ slightly
from the examples shown in this document. The Android device must support HFP 1.6.
Note: The Dolphin 75e and Dolphin CT50 are also available with Windows operating systems. Those versions are not covered
in this document.
The SRX-SL headset is also compatible with iOS devices such as an iPhone, Windows phones and other devices with a Win-
dows 10 IoT Mobile operating system, and Vocollect wearable mobile devices. For information on using the headset with these
devices, refer to documentation available at https://www.voiceworld.com or www.honeywellaidc.com.
The highlights of the product are:
• Modular design (separate headband and electronics modules) enable sharing of the electronic module across shifts to reduce
costs
• Enhanced comfort and ergonomics for long hours of use
• Intuitive flip-to-mute microphone boom
• Optimized for speech recognition
• Designed for customer-facing use
• Bluetooth 4.1 for compatibility with the latest Android devices
• NFC for touch pairing with compatible devices
• Software updatability for future functionality.
Other features include:
• Simple and intuitive interaction indicators
• Enhanced audio quality
• Increased adjustability compared to other headset designs for larger variety of head sizes and shapes
The SRX-SL Headset is shown with a Dolphin 75e pow-
ered by Android 6.0.

1 - 2
Components
Buttons
There are four buttons on the SRX-SL headset. The buttons are described below:
Button press types for the table below:
•Momentary - Press and release the button(s).
•1 Second - Press and hold the button for at least 1 second, but no more than 4 seconds.
•5 Seconds - Press and hold the button for at least 5 seconds and release.
Headband Assembly eModule
Button Name Function
Volume Up Increase volume one step
Volume Down Decrease volume one step
Power Primary function: Turns headset on and off
See table below for additional functions
Mute Primary function: Microphone mute
See table below for additional functions
Desired Action Button Press Valid In These SRX-SL States
Power On Press and hold Power button for at least 1/2
second
Off
Power Off 5 second press of Power button All except Off
Volume Up Momentary press of Volume Up button All except Off
Volume Down Momentary press of Volume Down button All except Off
Start voice recognition appli-
cation (e.g.: OK Google) on
the connected Android device
1 second press of Power button On, paired and connected, no active call,
voice application, or A2DP stream,
Disconnect, cleared paired
devices, enter pairing mode
Momentary simultaneous press of Volume
Up and Volume Down buttons
All except Off
Answer call Momentary press of Power button Incoming call
Reject call One second press of Power button Incoming call
Hang up call Momentary press of Power button Active call
Transfer audio One second press of Power button Active call
Mute/Unmute microphone Momentary press of Mute button, or
Rotate boom up 90° to mute, rotate boom
down 90° to unmute
Active call or voice application
Ear Pad
T-bar Pad
Volume Down
Mute
LED
Power
Volume Up

1 - 3
LED and Tones
The SRX-SL contains a single LED that signals events to the user. The LED is accompanied by tones to signal these
events when the headset is being worn.
Connect to last device Momentary press of Power button On and paired, but not connected
Reset headset (use to restart
the headset in the rare event
the SRX-SL headset has be-
come unresponsive)
5 second simultaneous press of Power and
Mute buttons
All except Off
Use Case SRX-SL State LED Tones
Pairing mode, default state at
power up.
Discoverable and Connectable. Solid green High pitch double beep at
power up
Powering off Off Solid green for 1 second
then all off.
Low pitch double beep at
power off
Normal operation Paired and connected. Flashing blue.
Flash frequency is 1.5 sec-
onds.
On 20%, off 80%.
Three ascending tones on
connect
Pairing Failure Discoverable and Connectable Solid Green Long Low Tone
Disconnect/clear paired devic-
es/enter pairing mode
Discoverable and Connectable. Brief rapid flashing of
GREEN LED's to acknowl-
edge command, then
green LED on Solid
Volume up Volume increases Normal operation Short single tone (gets
louder as volume increas-
es)
Volume down Volume decreases Normal operation Short single tone (gets
softer as volume decreas-
es)
Mute Toggle Mic is muted, or voice applica-
tion paused
Normal operation Short high tone
Mute reminder tone Mic is muted via Mute button,
with active audio
No reminder tone if muted via
boom rotation.
Normal operation Single short low beep ev-
ery 30 seconds
Incoming call Paired and connected with HFP
device
Three rapid blue flashes at
1 second intervals.
Ascending scale ringtone
Connection dropped Connectable but not discover-
able. Any Bluetooth device can
connect to it if it knows the ad-
dress.
Flashing green.
Flash frequency is 1.5 sec-
onds.
On 20%, off 80%
Three descending tones
when connection dropped
Voice link established e.g. answer call, start voice app Normal operation Two low to high tones
Voice link dropped e.g. hang up call Normal operation Two high to low tones
Audio Transfer Toggle Audio transferred to/from head-
set
Normal operation Short single tone
Normal operation low battery Paired and connected, low bat-
tery.
Flashing Red.
Flash frequency is 1.5 sec-
onds.
On 20%, off 80%.
5 rapid alternating tones lo
hi lo hi lo
Repeats every 5 minutes
USB plugged in USB Charging, Bluetooth dis-
abled.
Solid Red
USB plugged in USB Charging complete, Blue-
tooth disabled
Solid Green
Desired Action Button Press Valid In These SRX-SL States

1 - 4
SRX-SL Wireless Headset Specifications
Note: Packaging varies for product shipments. Generally, packing materials are about 15% of the total shipment weight.
Battery Specifications
The battery is not user-serviceable. The specifications below are for a new battery.
Note: If the battery requires replacement, contact Customer Support (see page 3-1) for information.
Supported Bluetooth Profiles
The SRX-SL headset supports:
• HFP (Hands-Free Profile) version 1.6.
• HSP (Headset Profile) 1.2 for backwards compatibility.
• A2DP (Advanced Audio Distribution Profile) version 1.3.
SRX-SL Compatibility
The SRX-SL headset has been designed for use with the following devices:
• Honeywell Dolphin 75e and Dolphin CT50.
USB plugged in USB not Charging,
Bluetooth disabled
Off (cable not connected to
charger, cable connected
to PC that is in Sleep
mode)
USB plugged in Headset detects fault while
charging
Flashing Red - one sec-
ond on, one second off
See Charging Fault (see
page 2-2)
USB plugged in Device firmware update Starts solid green or red
depending on charger
state, goes off during firm-
ware update, and back to
solid red or green when fin-
ished.
Weight 2.82 ounces (80g)
Operating temperature 32°F to 122°F (0°C to 50°C)
Storage temperature -4°F to 158°F (-20° to 70°C)
Charging Temperature Normal charging: 32°F to 104°F (0°C to 40°C)
Fast Charging: 32°F to 95°F (0°C to 35°C)
Drop Tested 24 drops from 6 feet (1.83 m) at minimum and maximum operating tempera-
tures
Humidity 95% relative humidity, non-condensing
Noise Reduction Rating Not applicable
Capacity 250mAh
Run Time HFP use case: minimum 8 hours at 0°C to 50°C
SRCOMM use case: minimum 8 hours at 23°C.
Charge Time Fully charged in 3 hours at 23°C
Fast charge to 75% capacity in less than 1 hour
Note: For details, refer to Fast Charge (see page 2-2).
Charging Temperature Normal charging: 32°F to 104°F (0°C to 40°C)
Fast Charging: 32°F to 95°F (0°C to 35°C)
Use Case SRX-SL State LED Tones

1 - 5
• Android devices that support HFP 1.6.
• Windows 10 phones
• Apple iOS devices.
• Certain legacy Vocollect devices including A700 and A500.
This guide is for the using the SRX-SL headset with Android devices. Guides for using the SRX-SL headset with other devices
can be found at www.honeywellaidc.com.

1 - 6

2 - 1
2
Use the SRX-SL Headset
Out of the Box
The following items may be packaged separately:
• SRX-SL eModule (electronics module)
• SRX-SL headband
• Optional Micro-USB charging kit
Keep the original packaging material in the event the SRX-SL headset should need to be returned for service.
Initial Use
1. Charge the SRX-SL Headset (see page 2-1) before use.
1. Assemble the SRX-SL Headset (see page 2-2)
2. Turn the headset on by pressing and holding the power button at least 1/2 second and releasing.
3. Pair the SRX-SL Headset Using Bluetooth (see page 2-2) or Pair the SRX-SL Headset Using Near Field Communication
(NFC) (see page 2-4)
4. Put On the Headset (see page 2-5).
5. If the SRX-SL headset is used for an extended period of time and the battery level becomes low, use the Fast Charge (see
page 2-2) to return the headset to service faster (with a 75% recharged battery).
Charge the SRX-SL Headset
The SRX-SL headset contains an internal battery. The battery cannot be removed by the user. If it is necessary to replace the
battery, the headset must be sent to a Honeywell repair center. Customer Support (see page 3-1).
Allow up to three hours to fully charge a depleted SRX-SL battery. The temperature must be between 32°F to 104°F (0°C to
40°C) to charge the battery.
See Fast Charge (see page 2-2) for information on partially charging the SRX-SL battery in a shorter time period.
Note: During the charging process, Bluetooth is disabled on the SRX-SL headset.
To charge the headset:
1. Plug the micro-USB end of the cord into the SRX-SL headset.
2. Plug the other end of the cord into the AC adapter provided with the charging cable. The LED lights solid red while
charging.
3. Allow the SRX-SL headset to charge a minimum of three hours before first use. It may take up to three hours to fully charge.
The LED lights solid green when charging has completed.
4. Unplug the SRX-SL headset from the cord.
5. The SRX-SL headset is powered down when removed from the charging connection.
6. Press the Power button for at least 1/2 second. The SRX-SL headset powers on and is ready for use.

2 - 2
Charging Fault
If the LED and Tones (see page 1-3) indicate a charge fault:
• Unplug the SRX-SL headset from the charging cable and plug back in.
• Verify the temperature is within the safe charging range for normal charging: 32°F to 104°F (0°C to 40°C). If not, move
the headset to a different area and allow it to heat or cool to an allowable charging temperature.
• If the fault persists, contact Customer Support (see page 3-1).
Fast Charge
If the temperature is 32°F to 95°F (0°C to 35°C), the SRX-SL supports fast charging. Fast charging provides 75% of the
battery capacity in less than one hour of charging.
• If the temperature rises above the fast charge threshold (95°F or 35°C) the SRX-SL headset reverts to normal charging
as long as the temperature stays below 104°F or 40°C.
• The 75% capacity is measured from a battery that has reached the point of software shutdown voltage.
Not all chargers support fast charging. For best results use the Honeywell supplied charger. A computer port may provide
sufficient power for fast charge.
Assemble the SRX-SL Headset
The SRX-SL headset consists of an eModule (electronics module) and a headband.
Align the notches on the eModule and the headband and snap together.
Sharing the SRX-SL Headset
By separating the parts of the modular SRX-SL headset, operators can share electronics modules in a multi-shift operation.
• The electronics module detaches easily from the headband.
• The electronics module can be disinfected with an alcohol wipe.
Pair the SRX-SL Headset Using Bluetooth
The SRX-SL enters pairing mode as soon as it is powered on.
• The headset is then discoverable and connectable.
• The headset does not automatically reconnect with the last device (or devices) it was paired with previously.
• Once the SRX-SL headset is powered on, initiate the discovery and pairing process on the computer to which the headset will
be connected.
If the SRX-SL headset is not connected, it powers off after 10 minutes in the disconnected state to preserve battery life.
If the USB cable is attached to charge the internal battery, the SRX-SL headset disconnects (if connected) and battery charging
begins.

2 - 3
The pairing steps below are for Honeywell devices. Other Android devices will be similar. Steps vary slightly by OS version.
Dolphin 75e / Dolphin CT50 powered by Android 4.4 KitKat
1. Make sure the SRX-SL headset is on, is in pairing mode (the LED is solid green) and is in range.
2. Touch All Apps > Settings . Verify the Bluetooth radio is activated .
3. Touch Bluetooth.
4. Touch Search for Devices to refresh the scan started when the Bluetooth radio was first activated.
5. Touch on the name of the device you want to connect to on AVAILABLE DEVICES list.
6. The Bluetooth radio attempts to connect with the headset.
7. When the devices are paired successfully, the device name is displayed under the PAIRED DEVICES heading on the
Bluetooth settings screen.
8. When completed, the headset’s LED will flash blue to indicate it has paired successfully.
Dolphin 75e / Dolphin CT50 powered by Android 6.0 Marshmallow
1. Make sure the SRX-SL headset is on, is in pairing mode (the LED is solid green) and is in range.
2. Touch All Apps >Settings >Bluetooth.
3. Verify the Bluetooth radio is turned On .
4. If the headset does not appear in the list, make sure the headset is turned on and discoverable.
Touch and then select Refresh.
5. Touch on the name of the device you want to connect to on Available devices list.

2 - 4
6. The Bluetooth radio attempts to connect with the headset.
7. When the headset and Android device are paired successfully, the device name appears under the Paired devices
heading on the Bluetooth screen.
8. When connected the headset’s LED will flash blue to indicate it has pair successfully.
Reconnect to Last Device
To reconnect to the last HFP device, press and release the Power button after the SRX-SL headset has powered on.
Pair the SRX-SL Headset Using Near Field Communication (NFC)
Note: Not all Dolphin devices support NFC.
The SRX-SL enters pairing mode as soon as it is powered on.
If the SRX-SL headset is not connected, it powers off after 10 minutes in the disconnected state to preserve battery life.
If the USB cable is attached to charge the internal battery, the SRX-SL headset disconnects (if connected) and battery charging
begins.
Note: Some Android devices may automatically start the music application and start playing music when paired via NFC. This
can be prevented by disabling the music application on the Android device via Settings > Apps.
Dolphin 75e / Dolphin CT50 powered by Android 4.4 KitKat
1. Make sure the SRX-SL headset is on and is in pairing mode (the LED is solid green).
2. Touch All Apps > Settings . Verify the Bluetooth radio is activated .
3. Return to the Home screen.
4. Touch All Apps > Settings .
5. Under Wireless & Networks, touch More.
6. Touch the box next to NFC to enable (check) short-range wireless data exchange.
7. The location of the NFC tag in the headset eModule is under the Power button.
8. Hold the NFC tag on the eModule close to the back of the hand-held device. It may be necessary to move the eModule
up and down the back of the device to get the NFC tag close to the NFC radio in the handheld device.
9. When prompted, select Yes to pair the devices. This prompt is only displayed the first time the devices pair.
10. When the tag is recognized, the hand-held device emits a sound and the tag data is displayed on screen. If the sound
is muted, the hand-held-device vibrates when the NFC tag is detected.

2 - 5
Dolphin 75e / Dolphin CT50 powered by Android 6.0 Marshmallow
1. Make sure the SRX-SL headset is on and is in pairing mode (the LED is solid green).
2. Touch All Apps >Settings >Bluetooth.
3. Verify the Bluetooth radio is turned On .
4. Return to the home screen.
5. Touch All Apps > Settings .
6. Touch More.
7. Touch the switch button next to NFC to turn On short-range wireless data exchange.
8. Verify eSE2 is selected as the default ISO-DEP route.
9. The location of the NFC tag in the headset eModule is under the Power button.
10. Hold the NFC tag on the eModule close to the back of the hand-held device. It may be necessary to move the eModule
up and down the back of the device to get the NFC tag close to the NFC radio in the hand-held device.
11. When prompted, select Yes to pair the devices. This prompt is only displayed the first time the devices pair.
12. When the tag is recognized, the hand-held device emits a sound and the tag data is displayed on screen. If the sound
is muted, the hand-held device vibrates when the NFC tag is detected
Care and Use of the SRX-SL Headset
Proper care and use of these products will ensure that they work well for a long time.
Important: For maximum hygiene, Honeywell discourages sharing headbands among operators.
The design of the SRX-SL Wireless Headset features an electronics module that can be removed from the headband The elec-
tronics module can be shared among operators over multiple shifts, providing some level of hygiene while potentially reducing
costs.
Put On the Headset
Always use headband ear pads with Honeywell headsets to protect the equipment and ensure optimum speech recognition
performance.
1. Put the headset on and adjust the ear pad to fit snugly over your ear.
2. Rotate the microphone into position with the rotating lever at the ear piece.

2 - 6
3. Make final adjustments with the boom so that the microphone is positioned
correctly. Position the microphone as close to your mouth as possible, but
outside of your breath stream. It should be facing your upper lip, and not
touching anything (for example, clothing, skin, or facial hair). There are three
notches at the lower range of the microphone boom swing. Select the one
that best places the microphone near the mouth.
4. Pair the SRX-SL Headset Using Bluetooth (see page 2-2) to the device.
Adjust Headset for Comfort
Honeywell has designed the SRX-SL headset based on data for most head shapes and sizes. Because the headset is the
most personal piece of voice equipment and must remain stable while workers perform very physical tasks, users may ben-
efit from these headset adjustment guidelines.
•Placement of the "T-bar" pad: The SRX-SL headsets have pads called “t-bars”opposite the speaker side of the
headset. The t-bar should be positioned on a part of the head with the least amount of muscle.
As an operator speaks, the muscle above the ear flexes. If the t-bar is placed on this muscle, the headset applies pressure to
the artery and nerves beneath it and can cause the operator some discomfort. The operator can locate this muscle by mov-
ing his or her jaw and feeling the area above the ear for movement. Some operators choose to alternate the headset position
on either side of their heads during their shifts.
Clean Headsets
The foam pads used with Honeywell headsets were designed for both comfort and hygiene. The materials naturally inhibit
the growth of bacteria and can be cleaned by rinsing with water and drying.
Note: Commercial cleaning solvents are not recommended.
• Clean the plastic parts of the headsets with a soft cloth dampened with water. To clean and disinfect the headset plastic,
use a pre-moistened alcohol wipe.
• Do not use unapproved liquids to clean the headset.

2 - 7
Clean the Headband Pad and Ear Pad
Leave the headband in place and simply wipe the headband with a soft cloth. If necessary, use a pre-moistened alcohol
wipe to clean and disinfect the unit.
Replace the SRX-SL Ear Pad
The ear pad can be removed by gently pulling at the elastic band (indicated by the arrow below) to stretch enough to slip
the ear pad from the lip of the eModule.
To replace the ear pad:
1. Locate the notch on the ledge of the eModule.
2. Slip the elastic band over the ledge at the notch.
3. Rotate the earpad while holding the eModule stationary. Apply mild pressure during the rotation process.
4. After a complete 360° rotation, the earpad should cover the ledge. If the ledge is not completely covered, continue to
rotate the earpad with mild downward pressure until the entire ledge is covered.
Contact Customer Support (see page 3-1) for replacement Honeywell ear pads.
Notch
Ledge

2 - 8

3 - 1
3
Customer Support
Technical Assistance
If you need assistance installing or troubleshooting your device, please contact us by using one of the methods below.
Honeywell - Vocollect Product Documentation
Find most Vocollect technical documentation on VoiceWorld, https://www.voiceworld.com. SRX-SL documentation is also
available at www.honeywellaidc.com.
Honeywell - Vocollect Reseller Services
If you purchased equipment or services through a Vocollect reseller, please contact your reseller first for support or to purchase
a support plan.
Honeywell - Vocollect Technical Support
Submit incidents or questions to http://honeywell.custhelp.com or contact Honeywell - Vocollect Technical Support Center:
United States:
E-mail: [email protected]
Phone: 866 862 7877
Americas (outside U.S.), Australia, New Zealand:
E-mail: [email protected]
Phone: 412 829 8145, Option 3, Option 1
Europe, Middle East, and Africa:
E-mail: [email protected]
Phone: +44 (0) 1344 65 6123
Japan and Korea:
E-mail: vocollectJapan@honeywell.com
Phone: +813 3769 5601
Honeywell - Vocollect Customer Service
Contact Honeywell - Vocollect Customer Service for order placement, order status, returns, Return Material Authorization
(RMA) status, or other customer service issues:
United States:
E-mail: vocollectRequests@honeywell.com
Phone: 866 862 6553, Option 3, Option 2
Americas (outside U.S.), Australia, New Zealand:
E-mail: vocollectRequests@honeywell.com
Phone: 412 829 8145, Option 3, Option 2
Europe, Middle East, and Africa:
E-mail: [email protected]

3 - 2
Phone: +44 (0) 1344 65 6123
Japan and Korea:
Email: vocollectJap[email protected]
Phone: +813 6730 7234
Honeywell - Vocollect RMA
To return equipment for repair contact Honeywell - Vocollect RMA to request an RMA number.
Email: ACSHSMVocoll[email protected]
Sales and General Inquiries
For sales or any other inquiry, email vocollectinfo@honeywell.com or call 412 829 8145.
Limited Warranty
Honeywell International Inc. (“HII”) warrants its products to be free from defects in materials and workmanship and to conform
to HII’s published specifications applicable to the products purchased at the time of shipment. This warranty does not cover any
HII product which is (i) improperly installed or used; (ii) damaged by accident or negligence, including failure to follow the proper
maintenance, service, and cleaning schedule; or (iii) damaged as a result of (A) modification or alteration by the purchaser or
other party, (B) excessive voltage or current supplied to or drawn from the interface connections, (C) static electricity or electro-
static discharge, (D) operation under conditions beyond the specified operating parameters, or (E) repair or service of the prod-
uct by anyone other than HII or its authorized representatives.
This warranty shall extend from the time of shipment for the duration published by HII for the product at the time of purchase
(“Warranty Period”). Any defective product must be returned (at purchaser’s expense) during the Warranty Period to HII factory
or authorized service center for inspection. No product will be accepted by HII without a Return Materials Authorization, which
may be obtained by contacting HII. In the event that the product is returned to HII or its authorized service center within the
Warranty Period and HII determines to its satisfaction that the product is defective due to defects in materials or workmanship,
HII, at its sole option, will either repair or replace the product without charge, except for return shipping to HII.
EXCEPT AS MAY BE OTHERWISE PROVIDED BY APPLICABLE LAW, THE FOREGOING WARRANTY IS IN LIEU OF ALL
OTHER COVENANTS OR WARRANTIES, EITHER EXPRESSED OR IMPLIED, ORAL OR WRITTEN, INCLUDING, WITHOUT
LIMITATION, ANY IMPLIED WARRANTIES OF MERCHANTABILITY OR FITNESS FOR A PARTICULAR PURPOSE, OR
NON-INFRINGEMENT.
HII’S RESPONSIBILITY AND PURCHASER’S EXCLUSIVE REMEDY UNDER THIS WARRANTY IS LIMITED TO THE
REPAIR OR REPLACEMENT OF THE DEFECTIVE PRODUCT WITH NEW OR REFURBISHED PARTS. IN NO EVENT
SHALL HII BE LIABLE FOR INDIRECT, INCIDENTAL, OR CONSEQUENTIAL DAMAGES, AND, IN NO EVENT, SHALL ANY
LIABILITY OF HII ARISING IN CONNECTION WITH ANY PRODUCT SOLD HEREUNDER (WHETHER SUCH LIABILITY
ARISES FROM A CLAIM BASED ON CONTRACT, WARRANTY, TORT, OR OTHERWISE) EXCEED THE ACTUAL AMOUNT
PAID TO HII FOR THE PRODUCT. THESE LIMITATIONS ON LIABILITY SHALL REMAIN IN FULL FORCE AND EFFECT
EVEN WHEN HII MAY HAVE BEEN ADVISED OF THE POSSIBILITY OF SUCH INJURIES, LOSSES, OR DAMAGES. SOME
STATES, PROVINCES, OR COUNTRIES DO NOT ALLOW THE EXCLUSION OR LIMITATIONS OF INCIDENTAL OR CONSE-
QUENTIAL DAMAGES, SO THE ABOVE LIMITATION OR EXCLUSION MAY NOT APPLY TO YOU.
All provisions of this Limited Warranty are separate and severable, which means that if any provision is held invalid and unen-
forceable, such determination shall not affect the validity of enforceability of the other provisions hereof. Use of any peripherals
not provided by the manufacturer may result in damage not covered by this warranty. This includes but is not limited to: cables,
power supplies, cradles, and docking stations. HII extends these warranties only to the first end-users of the products. These
warranties are non-transferable.
Other manuals for SRX-SL
1
Table of contents
Other Honeywell Headset manuals

Honeywell
Honeywell SYNC WIRELESS IMPACT User manual

Honeywell
Honeywell SYNC WIRELESS ELECTO User manual

Honeywell
Honeywell SRX2 User manual

Honeywell
Honeywell Howard Leight Impact Sport User manual

Honeywell
Honeywell SRX2 User manual

Honeywell
Honeywell SYNC WIRELESS ELECTO User manual

Honeywell
Honeywell SRX3 User manual

Honeywell
Honeywell A700 Operating and maintenance manual

Honeywell
Honeywell SRX-SL User manual

Honeywell
Honeywell HOWARD LEIGHT SYNC ELECTO User manual