manuals.online logo
Brands
  1. Home
  2. •
  3. Brands
  4. •
  5. Hoomeda
  6. •
  7. Toy
  8. •
  9. Hoomeda Life Long Love Pc2011 User manual

Hoomeda Life Long Love Pc2011 User manual

Life Long Love
1
Tips for assembling
1.Picures shown on the package may be slightly different from the actual product.
2.All the materials are taken in the operation step, put the remaining materials back into the original pocket
until the installation is completed.(Avoid material loss during installation)
3.The dimensions indicated in the step diagram are“cm”.
4.If there have template paper material, please cut the material according to the template to avoid mistakes..
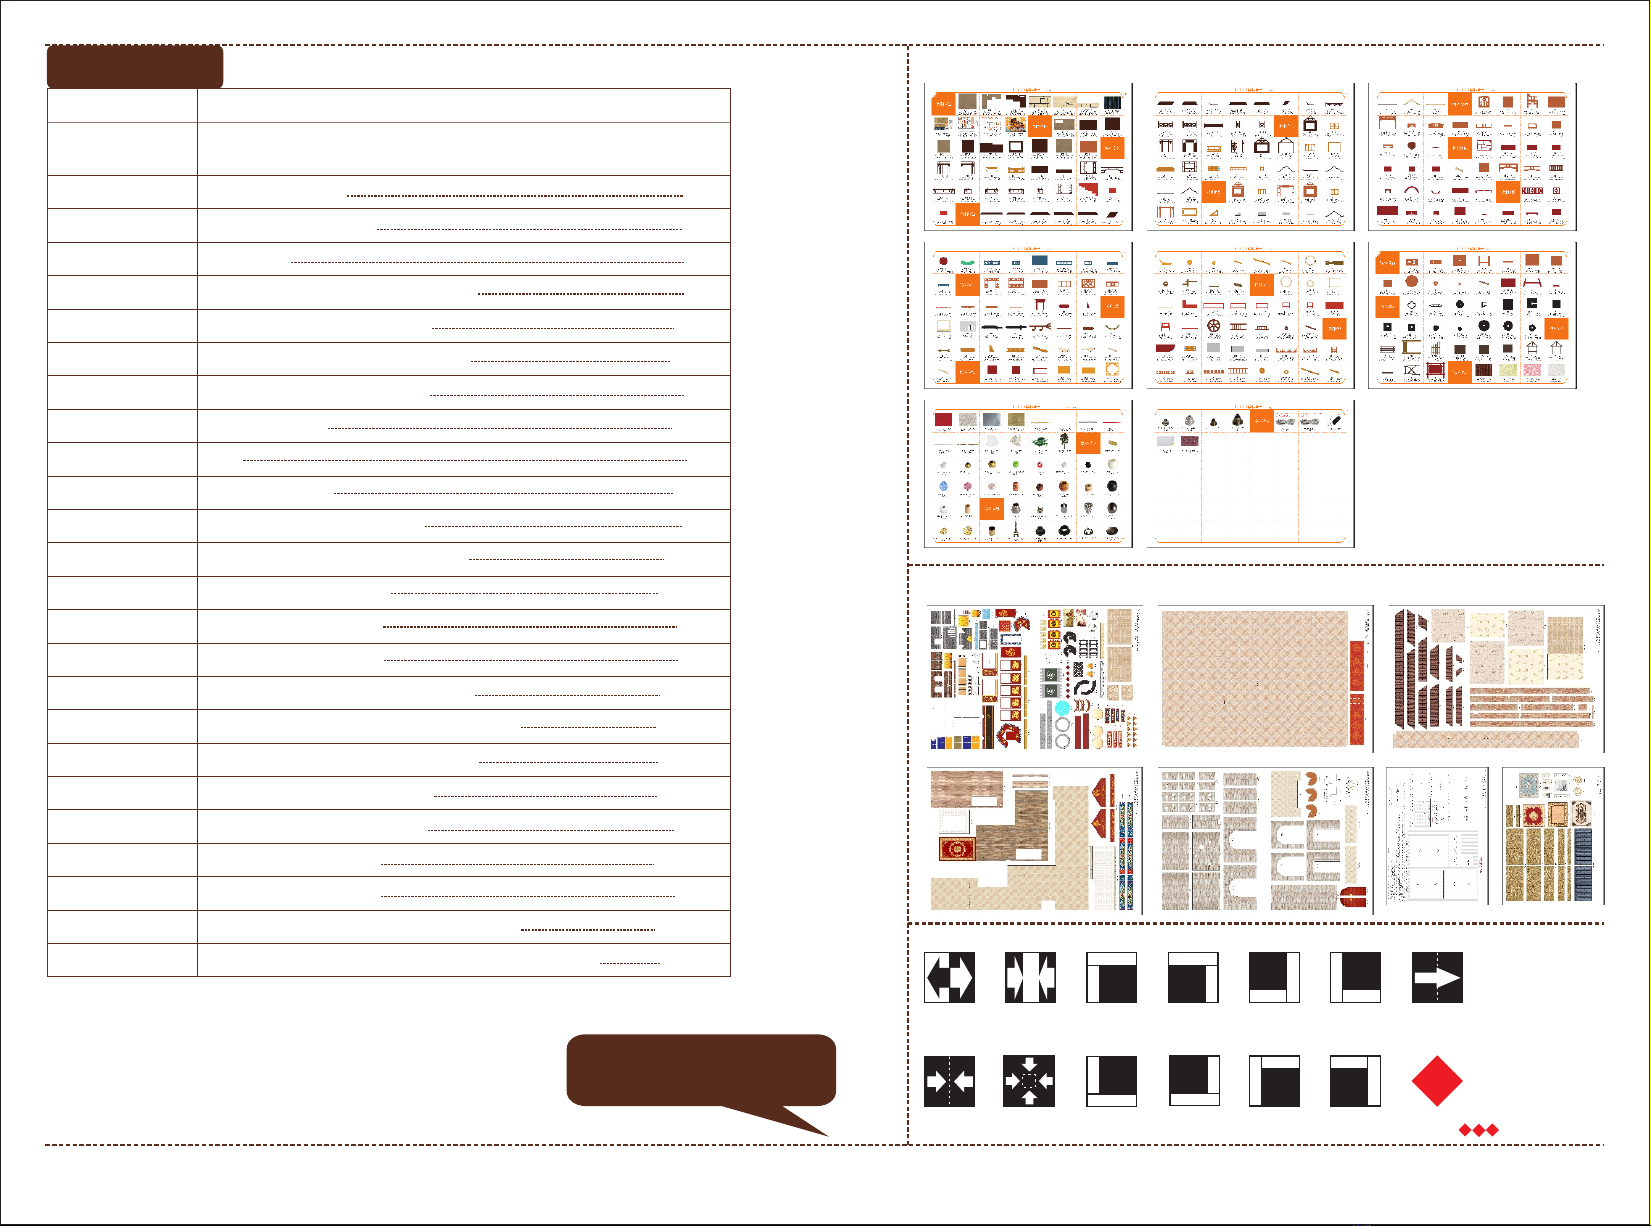
5.According to the part rule example at the bottom of this page, refer to the part on the part number drawing,
find the material object and compare with the material list, confirm and
install.(Wooden parts only)
6.Glue should not be applied too much, so as not to dry longer, overflow will affect the effect of the finished product.
7..Part shapes may differ from the photographs depending on he production batch
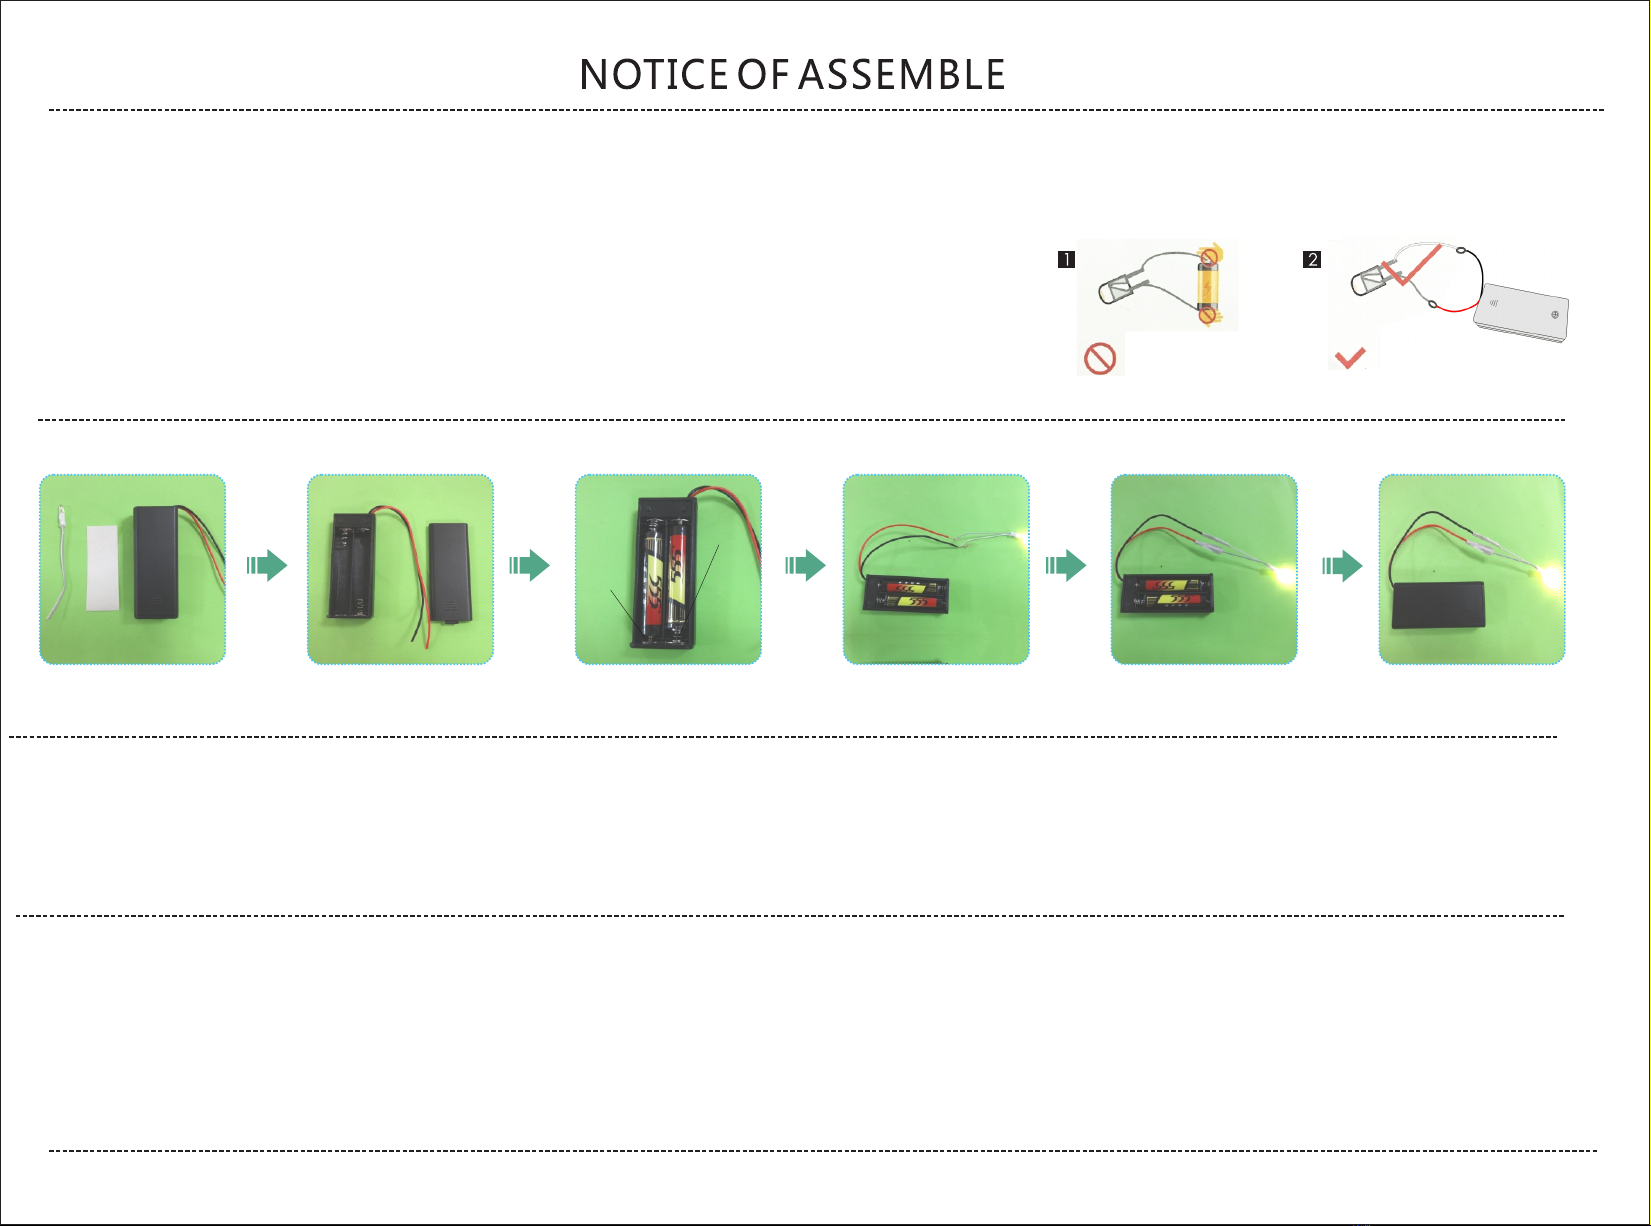
Testing on LED function
Be sure to test the LED lights before making the lighting,
note that the LED white wire to the negative, gray wire
to the positive reference to the following figure
operation test.
DO NOT contact the
LED wire end direct
to the battery cell.
Use the provide battery
holder. Make sue the
correct polarity.
How to assemble the battery holder
1.Material and tools needed:
- Battery holder, LED bulb,
tape, screw driver and 2 piece
AAA size battery(not provided)
2. Use screw driver and
take the lid off from the
battery holder.
3. Insert the battery take
notes on the polarity.
4. Connect the red wire
to grey wire. Connect
the black wire to white
wire.
5.Wrap the exposed wire
with the tapes.
6. Place the box lid and
fastness with screw driver.
A01:The parts are directly in the box: B01: The parts are in the B bag; C01: The parts are in the C bag, and so on (Note: The printing paper is displayed
in the step A08-01and A09-1: The printing paper is placed directly in the box , The part number is A08-01and A09-1)
Examples of parts rule:
About the use of glue
Method for using glue:
1. After applying the glue, let it
dry for a few seconds before pasting.
2. Fix it slightly with your hands, and
finally put it aside to dry;
Tips:
When pasting the plane printing paper, a piece
of waste bank card or telephone card can be
used to wipe evenly after the glue is smeared
on the wood board, and then the printing paper
is pasted to squeeze out the air inside.
Types of glue:
White latex: Used for adhering soft materials,
such as wood and paper.
Alcoholic Glue: Used for adhering hard materials
such as cloth, plastic, beads, wire,
dust cover, etc.
“-”negative
“+”positive
chair
table
sofa
hearth
bookcase
tea table
bath bucket
dressing table
bed
master room bed
chine
armory
bridal sedan
well
steamed bun shop
small cart
battle flay &
war drum
lights
watchtower
bulletin board
steps
rice bag&basket
city wall
outer frame
2
Bag A-A08,A09(all printing and template paper are shown on
A08 and A09 paper, total 5pieces of A3 and 2pieces of A4)
G bag+ printing paper
A bag+H bag+T bag+printing paper
G bag+U bag
J bag
H bag+U bag+V bag+ printing paper
A bag+G bag+U bag+V bag+printing paper
H bag+T bag+U bag+V bag+printing paper
G bag+T bag+U bag+V bag
N bag+U bag+printing paper
J bag+T bag+U bag
A bag+K bag +T bag
A bag+L bag+T bag+U bag+printing paper
K bag+T bag+V bag+printing paper
A bag+M bag+ printing paper
M bag+T bag+printing paper
A bag+N bag +T bag+U bag+printing paper
A bag+P bag+Q bag+T bag+U bag+printing paper
C bag+P bag+S bag+printing paper
R bag+U bag+V bag+W bag +printing paper
A bag+S bag+W bag+printing paper
F bag+P bag+printing paper
T bag+U bag+printing paper
A bag+P bag+Q bag+T bag+W bag+printing paper
A bag+Bbag+C bag+D bag+E bag+F bag+T bag+W bag+printing paper
Contents
Thumbnail of material list (reference only)
Thumbnail of printing paper & template paper (reference only)
A
B
A
B
A
B
A
B
A
B
A
B
A
B
A
B
1
Symbol description used
Install parts
in the opposite
direction
Install the same
parts on both
sides
Pay attention to the direction of installation material B stick to
material A
Pay attention to the direction of installation material A stick to
material B
Fold in half
according
to dotted lin
fold double
edge to center
dotted line
Fold four sides
to the middle 123
combination part
according so on.
Page 3
Page 3
Page 4
Page 4
Page 4-5
Page 5-6
Page 6
Page 6-7
Page 7
Page 7-8
Page 8
Page 8-10
Page 10-11
Page 11
Page 12
Page 12-13
Page 13-14
Page 14-15
Page 15-16
Page 16
Page 16-17
Page 17
Page 18-20
Page 20-28
Name Materials Package
Printing paper
Welcome to the DIY world, now
follow me to start making.
A09-01
G02 ( 2pieces )
G01 ( 2pieces )
G03 ( 4pieces )
G02
G03
G03
G03
G02
G01
Refer to the steps above
to make 2pieces
12 3 4
78 9 10
56
A09-01
chair1 chair 2
All books are made
the same way.
A09-01
A09-01
A09-01
A09-01 A09-01
G04
G06
( 2pieces )
G05 ( 2pieces )
T17
U14
T11
U01
V01
V02
V03 ( 2个)
T09
12 3 4
78 9 10
56
G04
G05
G05
G06
G04
G06
G05
For bending, refer to T11
wire teapot templates
T11
V01
V02
T11
U01
T11
13 14 15 16
11 12
T11
T11
1917 18
T11
T11
Wrap T11 with T09.
T09
Untie one T09 into two.
T09
T09
20 21
V03
V03
teapot
T17
Affix an appropriate
amount of T17 to T11.
U14
T11
T11
T09
Wrap T11 with T09
T09
1.9cm 0.7cm
1.8cm 7cm
3cm
0.9cm
potted
plant
potted
plant
teapot
3
T11
22
Untie one T09 into two.
T09
Chair Table
G07
G10
( 2pieces )
G09
( 2pieces )
G08
G11
( 2pieces )
G12
G13
( 2pieces )
U02 ( 2个)
12 3 4
78 9 10
56
G09
G08
G10
G10
G09
G09
G07
G11
G11
G12
G13
G13
U02
U02 11
A06-05 A06-06 A06-07
( 2pieces )
V12
( 2pieces)
V13(2 pieces)
U02 ( 2个)
U16
( 2pieces)
G14
( 2pieces )
G15
( 2pieces )
A09-04
A09-06
A09-05
A09-07
A09-08
A
0
6
A06-01 A06-02
A06-02
A06-04A06-03
A06-04A06-03
A06-05
A06-06 A06-07
A06-07
A06-08 A06-08
A06-09 A06-10
12 3 4
Locate 1 piece A06-05, 1 piece A06-06
and 2 pieces A06-07 from the A06 block
and grind off the bump.
Rub off the protrusions on both
ends of A06-06 with W05
All wood blocks on A04, A05,
A06 need to be sanded down
to remove protrusion
A06-06
W05
A06-07
A06-06
A06-07
A06-06
78 9 10
56
A06
A06-05
A09-07 A09-07
A09-08
A06-05
A06-05
A09-08 A09-08
A06-05
A09-07 A09-07
A06-05
A09-05
13 14 15 16
11 12
A09-05 A09-04
V12
V12
G14
G15
A09-06
G15
G14
U02
U16
U02
U16
One is used here and
the other is reserved
for later up.
3 3
3
2 2 22
3
V13
V13
H02
( 2pieces )
H03
H05
H06
H01(2 pieces )
H07
H08
( 3pieces)
A09-09 A09-10 A09-11 A09-13
A09-12
U03
( 4pieces)
U05
( 6pieces)
U06
(9pieces)
U13
U15
A09-02
A09-03
H04
12 3
H01
H02
H02
H03
H06
H04
H05
H01
V04
4
G08
back view front
view
G08
A06-06
Sofa Hearth
Paste Left
Paste Left
Bookcase
67 8 9
45
H07
A09-13
H07
H08
A09-10 A09-10
H08
A09-09
12 13 14 15
10 11
16 18
A09-12
V04
V04
U05
U06
A09-11
A09-11
Make two. Use one here and leave
the other for later.
A09-11
U03
U03
A09-03A09-02
A09-02
U13
17
Please refer to the previous steps
for the folding of books.
U15
Make 3pieces.
H08
H08
H08
H08
H08 A09-11
H08
H08
V04
A09-03
H09
H11
( 2pieces )
H12
( 2pieces )
H13
( 4pieces )
H10
( 2pieces )
U01
( 2pieces)
U03
( 2pieces)
V05
( 3pieces)
T10
T14
V06
( 2pieces)
V07 ( 2个)
V08 ( 2个)
V09
V10
V11
A08-21
1
23 4 5
89 10 11
67
14 15 16 17
12 13
T14
H10
H10
H11
H10
H11
H10
H11
6.6cm
T14
A08-21
A08-21
A08-21
V05
V07
V06
V05
V07
U03
T10
2cm
When making, refer to T10
wire teapot template for
bending.
0.7cm
0.8cm
T10
T10
U01
Make two. Use one here and leave
the other for later.
4 4 4
3
Front
fabrication
V08
V08
A09-11
A09-11
5
tea
table
H09
H09
H09
Flip H08 to the other sides.
4
Tea table
20 21 22 23
18 19
2624 25 27
H12
H13
H13
make two pieces.
V09
V11
T14
7.6cm
T14
T14
V05
V10
incense
pot
incense pot
5
5
5
5
5
H14
( 2pieces )
H15
( 2pieces )
H16
H17
( 2pieces )
T15 A09-27
A05-25
12 3 4
78 9 10
56
A09-27
A05-25
H14
H15
H14
H15
T15
H17
H17
H16
66
6
bath
bucket bath
bucket
Please cut out T08 according
to the template paper before making.
J01
( 2pieces )
J02
( 2pieces)
J03
J04
( 2pieces)
J08
J09
( 2pieces )
J10
J11
J05
( 2pieces )
J06
J07
T08-01
U07
U08
U10
U11
U12
4
12 3
78 9 10
56
J11
J03
J01
J02
J02
J01
J01
J04
J05
J05
J04
J06
J07
J10
7
T08-01
6
V09
V09
tea
table
Bath Bucket Dressing table
13 14 15 16
11 12
J11
U07
U08
U10
U11
U12
makeup
case
makeup
case
7
89
9
8
J08
J09
J09
10 10
10
dressing
table dressing
table
J12
J18
J19 ( 2pieces)
J17
( 2pieces)
J16 ( 2pieces)
J14 ( 2pieces)
J13
J15
12 3 4
78 9 10
56
J15
J16
J17
J15
J17
J13
J14
J14
J12
A09-11
Front
fabrication
J18
J19
J19 11 11
11
bed
bed
12 3 4
8 9 10
56
13 14 15 16
11 12
K01
K02
K03
K04
K05
( 2pieces )
K06
( 2pieces)
K07
( 2pieces)
K08
( 2pieces)
K09
K10
( 2pieces )
Please cut out T02, T03 and T04 according to the template paper before making.
T02
( mattress)
T03
( pillow)
T04
( mosquito net)
A06-10
K03
K07
K08
K08
K03
K07
K02
K03
K05
K05
A06-10
T02( mattress)
Fold four sides to the middle
A06-10
A06-10
A06-10
seal the opening with glue.
pillow
T03( pillow)
Fold in half Seal both sides of the red
line with glue.
T03( pillow)
T03( pillow)
T15
T15
Stuff with cotton.
pillow
K06
K06
7
7
J16
J15
K03
Bed Master room bed
19 20 21 22
17 18
12
master
room
bed
12
K10
K09
K10
K04
K01
T04( mosquito net)
K01
A09-28
K13
( 4pieces)
K11
K12
( 2pieces )
T12
V16
( 2pieces)
V17
12 3 4
78 9 10
56
K11
A09-28
K12
K12
K13
K13
K13
K13
T12
3cm
V16
V16
T12
T12
T12
2cm
V16
V16
T12
V17
V17
weapon furnace weapon
rack
bow and
arrow fall station
Before making, please cut out T07 according to the template paper.
L03
( 2pieces)
L04
( 2pieces)
L05
( 2pieces )
L06
( 3pieces )
L07
( 2pieces)
L01
L02
L10
( 2pieces)
L12
( 3pieces )
L13
( 2pieces)
L14
L15
L16 ( 2pieces)
L17
L11
( 4pieces)
L08
L09
A06-01 A06-02 ( 2pieces ) A06-04
( 2pieces )
A06-03
( 2pieces )
T07-1 T07-2T07-3 T07-5 T07-6 T07-8 T07-9
T07-10
A09-14 A09-15 A09-17A09-16 A09-18 A09-19 A09-20 A09-21 A09-22 A09-23 A09-24 A09-26A09-25
T07-4 T07-7
34 5 6
12
910 11 12
78
T13
U04 ( 2pieces)
A06-01
A09-17
A06-01
A09-17 A06-01 A09-22 A06-01
A09-22 A06-01
A06-02
A06-02
A06-01
A09-19
L02
A09-16
A09-14 A09-16
Tie V16 to K11.
K11
Tie another V16 to the K11.Cross V16 with T12.Cross V17 with T12.Tie V17 to K11.
V17
K11
8
12
K11
L02
L02
A09-19
back view front view
Chime Armory
15 16 17 1813 14
21 22 23 2419 20
27 28 29 30
25 26
33 34 35 36
31 32
A09-15
A09-18
A09-18
A09-18
weapon
furnace
39 40 41 42
37 38
45 46 47 48
43 44
A06-04
A06-03
A06-04
A06-03
A06-03
A09-25
L01
A09-21
13
13
L01
L01
L01
A09-24
A09-23
A09-26
A09-24
A09-26
L04
Use T07-2 to make a circle
around the L04 sides.
L04 T07-1 T07-1
Make two. Use one here and leave
the other for later.
L04
L04
L04
L04
L03
Use T07-5 to make a circle
around the L03 sides.
L03
T07-5
T07-4
L03
L03
L03
L03
14
14
weapon rack
L03
L04
L04
L03
L05
L06
L07
L07
L06
L06
L05
3.2cm
T13
T13
L08
T13
L08
L09
L10
L13
L11
L11
10cm
T13
T13
T13
T07-2T07-2
T07-5
T07-3
Flip L04 to the other sides.
Flip L03 to the other sides.
9
Flip the image above to
the other sides.
Make two. Use one here and leave
the other for later.
fall
station
51 52 53 5449 50
57 58 59 6055 56
63 64 65
61 62 66
U04
Refer to the steps above to
make 2pieces.
L12
L12
L12
15 15 15
15
15
L16
A09-20
L16
L16
L16
Refer to above steps to
make 2pieces.
L14
Use T07-8 to circle L14 sides.
L14
L14
L14
L14
L16
L15
Use T07-10 to circle L15 sides.
L15
L15
L15
L15
L16
long knife
long
knife
pike
pike
L17
M01
M02
M04
M05
M06 ( 2pieces )
M03
M07( 8pieces )
M08
M12
( 2pieces)
M10
M11
( 2pieces)
M09
A04-17 A04-18
A09-29
A09-30 A09-36
A09-31 A09-32 A09-35A09-33 A09-34
12 3
7 8 9
456
13 14 15
10 11 12
M02
A09-33
M02
M02
M01
A06-08 ( 2pieces ) A06-09
M06
A06-08
A06-08
A09-30 A09-30
A06-08 make 2pieces.
A06-08 A06-08
A06-08
M02
A09-34
A06-09
A06-08
A06-08
A06-08 A09-31
M04
M05
16 16
T07-8 T07-8
T07-7 T07-6
T07-9
T07-10
T07-9
T07-10
Flip L14 to the other sides.
Flip A06-08 to the other sides.
A06-09
A06-09
10
A09-20
Affix M02 in the middle of M01.
Flip L15 to the other sides.
Bridal sedan
8 9 10
567
2 3 4
1
31 32 33
28 29 30
25 26 27
22 23 24
19 20 21
16 17 18
M03 A09-32 A09-35
Fold A09-35 along the black links.
A09-35
A04-17
Fold A09-29 along the black links.
A09-29
A04-18
A04-18
M07
M07
M07
M07
M08
M10
M09
17
17
M07
M07
M07
M07
A09-36 A09-36
M12
M11
M11
M12
2.8cm
2.8cm
1cm
18
18
M14
( 2pieces )
M15
( 2pieces )
M16
M13
( 2pieces )
M17
M18
T09
A09-37
A09-38
A09-39
A09-40
M13
M13
A09-37
Untie one T09 into two.
T09
T09
10cm
A09-38
M13
M13
M13
A09-38
A09-39
A09-40
M18
M15
M15
T09
M18
M18
M13
M14
M14
M16
M17
19
19
T09
14 15
11 12 13
A04-17
11
A04-17
A04-18
Flip the image above to the other sides.
1cm
Well
A09-41 A09-42 A09-43
N01
( 2pieces )
N02
( 2pieces )
N03 ( 2pieces )
N06
N10
( 2pieces )
N11
( 2pieces )
N07
N08
N09
N04
( 2pieces )
N05
N12 ( 4pieces )
N13( 4pieces )
U06
( 4pieces)
U18
( 4pieces)
U19
( 2pieces)
1 2 3
7 8 9
456
12 13 14
10 11 15
18 19 20
16 17 21
24 25 26
22 23
N05
N06
N10
N10
N07
N08
N09
Plan view
N10
N05
N05
N10
N06
N08
N06
N10
N08
N09
N07
N09
A09-42
N01
U06
U18
20
20 20 20 20
make 4pieces.
20 20
N01
N01
N01
A09-43
N02
N02
20
make 2pieces
4formerly made
N01
N02
N02
U19
U19
N11
N12
N12
N13
N13
22 22 22
make 2pieces.
21
A09-41
A09-41
N03
N04
N03
N04 A09-41 23 23
21
22
22
12 3 4
N14
( 2pieces )
N15
N16
( 2pieces )
A04-11
( 6pieces )
N17 ( 2pieces )
N18
T09
U17 ( 6pieces)
T05 wine jar
A09-44
N18
N14
N17 24 24 24
make 2pieces.
N15
Before making, please cut out
T05 according to the template paper.
12
steamed
bun shop
0.8cm
2.2cm
2.2cm
0.8cm
N03
N03
Steamed bun shop Small Cart
8 9 10
567
14 15
11 12 13
N16
N16
Untie one T09 into two.
T09
T09
6.5cm
A04-11
T05 wine jar
U17
T05 wine jar
T05 wine jar
U17
T09
T05 wine jar
T09
A09-44
wine jar
Make six. Use one here and leave the
other five for later.
wine jar
T12
U03
( 2piec es)
A04-14
( 2pieces )
P13 ( 2pieces )
P14
( 2pieces )
P15
( 2pieces)
P16
( 2pieces)
Q13
Q14( 2pieces )
Q15
( 2pieces )
A04-06
( 4pieces )

A09-46
A09-47
A09-48 A09-49 A09-50
1 2 3
678
4 5 9
12 13 14
10 11 15
18 19 20
16 17 21
T12
12cm
make 2pieces
T12
T12
T12
U03
A09-46
P16
A04-06
Affix 4 pieces of A04-06 together
A09-47
A04-06
A04-06
A04-06
25
25 A09-47 A09-47
A09-50
A09-50
A04-14
A09-49
make 2pieces.
A04-14 A04-14
25 25 25
25
A09-46
25
A04-14
A09-48
A04-14 Faces with
printed paper facing
outward
A04-14
A09-48
26 26
25
P15
P13
P14
Flip 25 to the other sides
25
13
A09-48
Battle flag & War drum
A04-14 Faces with
printed paper facing
outward
22 23 24 25
Q13
Q14
Q14
Q13
26
Q15
Q15
27
27
light No.1( 3pieces)light No.2( 4pieces)light No.3
R03 ( 2pieces )
R04 ( 4pieces )
R05
R06
R07
R01( 4pieces )
R02
R08
R10
R11
R12( 2pieces )
R13( 2pieces )
R14
R09( 2pieces )
W01( 11pieces)
V15 ( 3pieces)
V14 ( 3pieces)
U09( 4pieces)
A09-51 A09-52 A09-53 A09-54 A09-55 A09-59 A09-60
4 5 6
123
10 11 12
789
16 17 18
13 14 15
22 23 24
19 20 21
make 3pieces.
V15
V14
W01
U09
W01
R01
U09
Rotate to tighten the light wired
W01
W01
make 4pieces
R03
A09-60 A09-60
R03
R03
W01
R02
Rotate to tighten the lamp wired.
R03
A09-59 A09-59
R03
R03
W01
R04
R04
R04
R04
R04
R04
R04
W01
W01
W01
W01
W01
R09
W01
14
Flip the image above to the
other sides
26
25
Please pay attention to distinguish the ordinary light wire W01
and the extension light wire W02, and do not use them incorrectly
Lights
light No.4 light No.5 light No.6
light No.1
light No.1
light No.1
light No.1
light No.2
light
No.2
light
No.2 light
No.2
light
No.2
light
No.3
light
No.4
2 3 4
8 9 10
567
40 41 42
37 38 39
46 47 48
43 44 45
28 29 30
25 26 27
34 35 36
31 32 33
A09-55
A09-55
R09
W01
R08
R06 28
28
A09-55
A09-54
R05
A09-54
A09-54
R05
29
R10
R11 29
light No.5
R09
W01 A09-51
A09-51
R09
W01
A09-51
W01
A09-51
R12
R13 30
make 2pieces
30 30
30
A09-52
R14 A09-52
R14 A09-52
30
light No.6
A09-53
A07
w oatcht wer roof
S06
( 2pieces )
S04( 2pieces )
S05
( 2pieces )
S07
( 2pieces )
S08
( 2pieces )
S10( 8pieces )
S09
( 4pieces )
Please cut out A07 according to the
template paper before making.
A09-69
1
S04
A09-69
S05
S06
A07
watchtower roof
S07
W01
W01
R07
W01( 1pieces)
watchtower
No.1
0.15cm
S09
S09
0.15cm
S07
S10
S10
S10
S10
32
31
15
Fold over A09-55 white dotted links Paste the wiring of W01 as shown.
Fold over A09-55 white links
R05
R05
S08
Watchtower
watchtower
No.2
A07
watchtower roof
A07
watchtower roof
15 18
11 13 14
17
12 16
watchtower No.1
watchtower No.2
S04
S04
32
31
32
Refer to the previous steps to
make another
31
31
W01
Paste W01 into 31
31
Paste the light line as
shown in the figures
31
32
32
19
32
31
W01
W01
Paste the lamp line as shown
in the figures
Bulletin
board
City
gate Stairs
C15
C16
( 6pieces )
C17
( 6pieces )
P01( 2pieces ) A09-127
A09-128
S11 A09-56 A09-57
2 3 4
1
8
567
S11
A09-56
S11 back view
A09-57
P01
A09-128
P01
A09-127
P01
P01
9
city gate
bulletin board
C17
C15
C15
C17
C16
C16
C16
C16
C16
C16
C17
C17
C17
C17
C17
stairs
stairs
steps
No.1
A05-19
A05-20
A05-21
F11
( 5pieces )
F12
( 5pieces )
F10
( 5pieces )
F09
( 8pieces )
P03
( 2pieces )
P04
( 2pieces )
P05
( 2pieces )
A09-72
1 2 3
7
4568 9
A05-19
A05-21
A05-20
A09-72
Fold along A09-72 white
dotted links
A09-72
33
33
F09
F09
F10
F12
F11
F09
F09
make 3pieces
F10
F12
F11
make 2pieces.
16
W01
Refer to the previous steps to
make another
Steps
steps No.2(3pieces)
steps No.4
(2pieces) steps No.3
(2pieces)
steps
No.1 steps
No.2
steps
No.2
steps
No.2
steps
No.2 steps
No.3
steps
No.3
steps
No.3
10 11
P03
P04
P05
steps No.4 make 2pieces.
basket
No.1
Before making, please cut out T06
according to the template paper.
T06 rice bags
T09
T11
hook 1
U05
( 14pieces)
U06
( 17pieces)
2
13 4
8
79 106
5
A09-45
T15
T15
Stuff with cotton.
T06 rice bags
T06 rice bags
Fold in half.Seal both sides of the red
line with glue
T06 rice bags
T06 rice bags
Untie one T09 into two.
T09
T09
5cm
T09
T06 rice bags cut off excess T09
T09
T06 rice bags
rice
bag
A09-45
make 4pieces
14
13 15 1612
11
20
19 21 2218
17
T09
T09
26cm
T09
T09
1.6cm
T09
5.2cm
T09
make 2pieces.
wrap with T09.
34
34
34
35 35 35
basket No.1
35
U05
35
U06
T11
4cm 1.5cm
1cm
During fabrication, refer to T11
wire hook 1 template for bending
T11
4cm
During fabrication, refer to T11
wire hook 2 template for bending
24
23
T11
Hook 1
hook 2
1.5cm
T11
0.7cm
1.2cm
1.5cm
17
steps No.4 steps No.4
Rice bag&Basket
basket
No.2
hook 2
rice
bag
rice
bag
rice
bag
rice
bag
Untie one T09 into two.
basket No.2
A04-10
A04-02
A04-01
A04-05
A04-04
A04-03
A04-12 A04-13
A04-08
A04-07 A04-15
A04-16
W02
( 3pieces)
Q08
( 2pieces )
Q10
( 2pieces ) Q11
( 2pieces )
Q09
( 2pieces )
Q12
( 2pieces)
P06
P07
P08
( 2pieces )
P02
P11
( 2pieces )
P09
( 2pieces )
P10
( 2pieces )
Q02
( 4pieces )
Q03
( 2pieces)
Q01 ( 4pieces )
Q04( 4pieces )
Q05
( 4pieces )
Q07
( 2pieces)
Q06
( 2pieces ) A09-66
A09-118 A09-119
A09-113
A09-116
A09-114 A09-115 A09-117 A09-120 A09-121 A09-122 A09-123 A09-124 A09-125
A09-126
10 11 12
4 5 6
22
21 23 2420
19
16
15 17 1814
13
28
27 29 3026
25
A04-02
A04-04
9
8
7
3
2
1Z01
A04-02
Z03
Z03 Z03
A04-02 back view
A04-04
A04-02
A04-02
A08-12
A08-12
A04-04
0.4cm
A04-07
A04-01
A09-113
A09-117
A09-115
Z02
P11
P10
A09-129
A09-130
A09-129
P09
steps No.4 battle
flag
Steps
No.4
battle
flag
A04-01
A04-05 A04-03
A04-05
A04-07
A09-113
A09-116
Note A04-03 missing
corner orientation
A09-114
A09-130
P11
P10
P09 37
36
plan view
A04-13
A04-10 A04-10
A04-12
A04-09
A04-09 A04-09
A04-15 A04-15
A04
-16
A04
-16
A04-08
A04-08
A04-10
A04-10
A04-08
A04-12
A04-15
A04-16
A04-13
A04-16
Before making, please cut out T01
according to the template paper.
T01 lighthouse
roof 1
18
A08-10
City wall
T01 lighthouse
roof 2
upgraded version
(accessories need to be
purchased separately)
Z01 music
movement
(1piece)
Z03 movement
screws
(3pieces)
Z02 movement
handle
(1piece)
46
45 47 4844
43
40
39 41 4238
37
58
57 59 6056
55
52
51 53 5450
49
64
63 65 6662
61
34
33 35 3632
31
A04-15
A04-10
A09-125 A09-121
A09-123
A09-121 A09-125 A09-120
A09-122
A04-09 A04-09
A09-124
P08
P08
P06
A08-10
Q02
Q01
Q01
Q02
Q01 A09-118 A09-119 A09-119 A09-118
Q03
W02
W02
Q04
Q05
Q05
Q04
Q06
T01
lighthouse 1
city gate
front fabrication
P01
P01
Q07
Q08
Q09
19
Flip the image above to
the other sides.
city gate
front fabrication
T01
lighthouse 1
T01
lighthouse 1
T01
lighthouse 2
T01
lighthouse 2

Popular Toy manuals by other brands

Eduard A-26C Invader u/c and exterior quick start guide

Eduard

Eduard A-26C Invader u/c and exterior quick start guide

Hangar 9 Sukhoi SU-31 instruction manual

Hangar 9

Hangar 9 Sukhoi SU-31 instruction manual

Canon Paper Craft Snowy owl (Female) Assembly instructions

Canon

Canon Paper Craft Snowy owl (Female) Assembly instructions

REVELL SnapTite IMPERIAL STAR DESTROYER 1638 manual

REVELL

REVELL SnapTite IMPERIAL STAR DESTROYER 1638 manual

Faller 232225 manual

Faller

Faller 232225 manual

Enabling Devices 7071 user guide

Enabling Devices

Enabling Devices 7071 user guide

Horizon Hobby axial SCX10 III BASE CAMP 1982 CHEVY K10 instruction manual

Horizon Hobby

Horizon Hobby axial SCX10 III BASE CAMP 1982 CHEVY K10 instruction manual

Fisher-Price GEOTRAX M3236 manual

Fisher-Price

Fisher-Price GEOTRAX M3236 manual

Eduard Ju 88A placards quick start guide

Eduard

Eduard Ju 88A placards quick start guide

Eduard MiG-29UB Izdelye 9.51 manual

Eduard

Eduard MiG-29UB Izdelye 9.51 manual

Faller Alpina-Bahn 140410 manual

Faller

Faller Alpina-Bahn 140410 manual

Global Services Extreme-Flyers X350 Series Quick-start and flying guide

Global Services

Global Services Extreme-Flyers X350 Series Quick-start and flying guide

Zipp EASY VEE Building instructions

Zipp

Zipp EASY VEE Building instructions

Spektrum AS3X Guide

Spektrum

Spektrum AS3X Guide

WowWee Untamed Fingerlings user manual

WowWee

WowWee Untamed Fingerlings user manual

Mattel ALIXA DOLL 27494-0920 G3 instructions

Mattel

Mattel ALIXA DOLL 27494-0920 G3 instructions

Hasbro Disc Blast Decepticon Frenzy 82906 instructions

Hasbro

Hasbro Disc Blast Decepticon Frenzy 82906 instructions

LES JOUETS LIBRES HARY instructions

LES JOUETS LIBRES

LES JOUETS LIBRES HARY instructions

manuals.online logo
manuals.online logoBrands
  • About & Mission
  • Contact us
  • Privacy Policy
  • Terms and Conditions

Copyright 2025 Manuals.Online. All Rights Reserved.