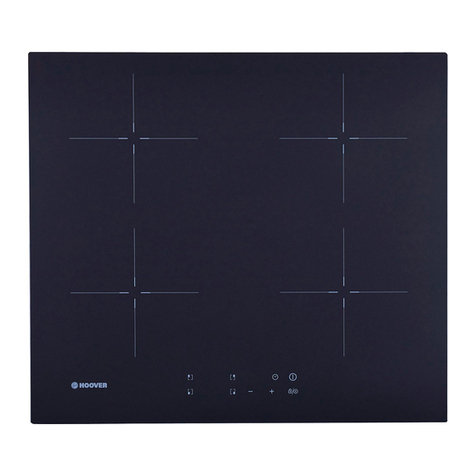
Hoover HTP644DB1 User manual

UK
NORWEGIAN
HTP644DB1
Thank you for purchasing the HOOVER induction hob. Please read this instruction manual
carefully before using the hob and keep it in a safe place for future reference.


3
By placing the CE ( € marking on this product, we declare, on our
own responsibility, compliance to all the European safety, health and
environmental requirements stated in the legislation for this product.
Asapplicable, the parts of this appliance are compliant to:
REGULATION (EC} No 1935/2004 on materials and articles intended
to come into contact with food.
Safety Reminding and Maintenance:
•WARNING: The appliance and its accessible parts become hot
during use. Care should be taken to avoid touching heating
elements.
•Children under 8 Year of age must be kept away from the
appliance unless they are continuously supervised.
•This appliance can be used by children aged from 8 years and
above and persons with reduced physical, sensory or mental
capabilities or lack of experience and knowledge if they have
been given supervision or instruction concerning use of the
•appliance in a safe way and understand the hazards involved.
Children must not play with the appliance.
•Cleaning and user maintenance shall not be made by children
without supervision
•WARNING: Unattended cooking on a hob with fat or oil can be
dangerous and may result in fire.
•NEVER try to extinguish a fire with water, but switch off the
appliance and then cover flame e.g. with a lid or a fire blanket.
•WARNING: Danger of fire: do not store items on the cooking
surfaces.
ENGLISH

4
WARNING: If the surface is cracked, switch off the appliance to
avoid the possibility of electric shock.
Do not use a steam cleaner for cleaning operations
Metallic objects such as knives, forks, spoons and sauce pan
lids must not be placed on the hob surface as they can get hot.
Any spillage should be removed from the lid before opening.
The hob surface must be allowed to cool down before closing
the lid.
After use, switch off the hob element by its control. Do not
rely on the pan detector.
This appliance is not intended to be operated by means of an
external timer or separate remote -control system.
The means for disconnection must be incorporated in the fixed
wiring in accordance with the wiring rules.
The instructions state the type of cord to be used, taking into
account the temperature of the rear surface of the appliance.
If the supply cord is damaged, it must be replaced by the
manufacture,rits service agent or similarly qualified persons in
order to avoid a hazard.
CAUTION: In order to avoid a hazard due to inadvertent
resetting of the thermal cutout, this appliance must not be
supplied through an external switching device, such as a timer
,or connected to a circuit that is regularly switched on and
off by the utility.
WARNING: Use oly hob guards designed by manufacturer of
the cooking appliance or indicated by the manufacturer of the
appliance in the instructions for use as suitable or hob guards
incorporated in the appliance.The use of inappropriate guards
can cause accidents.
- Always use the appropriate cookware.
- Always place the pan in the center of the unit that you are cooking
on.
- Do not place anything on control panel.
- Do not use the surface as a cutting board.

5
Dear Customer:
Thank you for purchasing the HOOVER induction hob. We hope it will giveYany years of good
service.
Ylease read this instructionYanual carefully before using the hob and keep it in a safe place for
future reference.
Product Introduction
The induction hob caters for all kind of cooking,with its electromagnetic cookingzones,
and its micro-computerised controls and multi-functions, making it the ideal choice
today's family.
for
Manufactured with specially iYportedYaterials, the HOOVER induction hob is extreYely user-
friendly, durable and safe.

6
Flush installation: Feasible only if the oven is not installed
under the counter

7
Voltage
Wire
connection
380-415V 3N-
2
•
L
1
•
L2
Black Brown
-
3
-
4
N
BIue
5
_L
Ye11o.v/ Green
220-240V~
L
BIack& Brown
N
Blue
_L
-:-
Yel lo.v/ Gr een
NB: For safety, the gap between the hob and
any cupboard above it should be at least 760
mm.
3.Fix the hob to the worktop using the four
brackets on the base of the hob. The position
of the brackets can be adjusted according to
the thickness of the top.
Figure (3)
If the cable is damaged or needs replacing, this
should be done by an after-sales technician
using the proper tools, so as to avoid any
accidents.
If the appliance is being connected directly to
the mains supply, an omnipolar circuit breaker
must be installed with a minimum gap of 3 mm
between the contacts.
The installer must ensure that the correct
electrical connection has been made and that
it complies with safety regulations.
The cable must not be bent or compressed.
The cable must be checked regularly and only
replaced by a properly qualified person.
Diagram of induction hob:
•
Air entry
Warnings:
(1)
The induction hob must be installed by a
properly qualified person. We have our own
qualified installers. Never try to install the
appliance yourself.
(2)
The induction hob must not be installed above
refrigerators, freezers, dishwashers or tumble
dryers.
(3)
The induction hob should be installed so that
Cerafr!ic plate
Control panel
•
Air vent
optimum radiation of heat is possible.
(4)
The wall and the area above the hob should
be able to withstand heat.
(5)
Toavoid any damage, the sandwich layer
and adhesive should be heat-resistant.
4.
Connection to power supply
The socket should be connected in compliance
with the relevant standard, to a single-pole
circuit breaker. The method of connection is
shown in Figure 3.
Schematic diagram of the control panel
1
5
1
4
2
6 3
1. Heating zone selection controls 2. Power/ Timer regulating key
3. Keylock/Pause control 4. ON/OFF control
5. Timer control
6.
Flexible Area control( Some models are without it)
IJ
l
mini 2 cm

8
Instructions for Use
Preparation before using:
When the power is switched on, the buzzer will
sound once and all the indicators will come on
for one second and then go out. The hob is now
in standby mode.
Place the pan in the centre of the cooking zone.
Operating instructions
When the ON/OFF key is pressed, all the
indicators show "-". Select the power level by
pressing the "+" or "-" key for the relevant
hotplate. To begin with the indicator shows "5".
Adjust up or down by pressing the "+" or "-" key.
If you press the "+" and "-" keys simultaneously,
the power setting returns to "O" and the cooking
zone switches off.
decreases the time by one minute. When the
set time exceeds 99 minutes, it will automatically
return to "O" minutes. If the "-" and "+" keys are
pressed simultaneously, the indicator will display
"O".
Timer confirmation
1.
Select the power level of the cooking zone
and then press the "Timer"key. The timer can
now be set.
2.
When the timing indicator has been flashing
for5 seconds, the set time will be
automatically confirmed.
3.
After selecting a set time, confirm by pressing
the "Timer" key.
4.
Once the “Timer” is confirmed, a dot appears
on the bottom right of the power level of the
selected zone. "
See the table on Page 6 for the power specific
Timer cancellation
to each cooking zone.
NB: When the ON/OFF key is pressed, the
induction hob returns to standby mode if no
other operation is carried out within oneminute
After setting the time again, hold down the
"Timer" key for 5 seconds.This will cancel the
timer and the indicator will revert to "O".
Safety mode
To ensure the safety of children, the induction
hob is fitted with an interlock device.
To lock: hold down the "Interlock" ;
the hob
then
goes
into "Interlock" mode, the timer
shows "Lo " and the rest of the keys are disabled
except the " ON/OFF " key.
Timing function
Press the timing key and the indicator will start
flashing. Then set the time for between 1 and
99 minutes, by pressing the "+" and "-" keys.
Pressing the "+" key once increases the time
by one minute; pressing the "-" key once
Unlocking
Hold down the "Interlock" key for 2 seconds
and the hob will return to normal working.
9
FLEXIBLE AREA
•
This area can be used as a single zone or as two different zones, accordingly to the cooking needs anytime.
•
Free area is made of two independent inductors that can be controlled separately.
As big zone
1.
To activate the free area as a single big zone, Touching the Flexible Area control .
IJ
r1
LI
2.
As a big zone, we suggest the used as the follow:
Cookware: 250mm or 280mm diameter cookware (Square or Oval
cookware are acceptable)
We don't recommend other operations except for above mentioned three operations because it
might effect the heating of appliance
As two independent zones
To use the flexible area as two different zones, you can have two choices of heating.
(a)
Put a pan on the right up side or the right down side of the flexible zone.
(b)
Put two pans on both sides of the flexible zone.
Notice: Make sure the pan is bigger than 12cm.

10
Boost mode
Touching the heating zone selection control, then touching "+"
0
Make sure the display shows "9" .
Touching the
"+"
button again ,the zone indicator show "b" and the power reach Max
+
(
Cancel the Boost mode
Touching the "-" button to cancel the Boost function, then the cooking zone will revert to its original setting.
Touching "-" and "+" control together. the cooking zone switch off and the boost function cancel automatically
+
)
(
•
The cooking zone returns to its original setting after 5 minutes
Note: It is recommended that the cooker hood suction is switched on few minutes prior to
cooking and switched off few minutes after terminating cooking.
Pause Mode
You can pause the heating instead of shutting the hob off.
When entering the Pause mode, all the controls except the ON/OFF control are disabled.
To enter pause mode
Touch the lock/pause control.
I
All the indicator will show"
J J"
To
unlock the controls
Touch the lock/pause control.
When the hob is in the pause mode, all the controls are disable except the ON/OFF
the induction hob off with the ON/OFF control in an emergency.
, you can always turn

11
Power Management Function
•it is possible to set a maximum power absorption level for the induction hob, choosing up
to different power ranges.
•induction hobs are able to limit themselves automatically in order to work at lower power
level, to avoid the risk of overloading.
To enter Power Management Function
Turn on the hob, then Press at the same time the “+” (timer) and key lock.
The timer indicator will show “P5“which means power level 5. The default mode is on 7.0Kw/ 7.1Kw.
To switch to another level
or
Confirmation and Exit Power Management Function
Press at the same time + (timer) and key lock for Then the hob will be turned off.
confirmation.
ENGLISH

12
Enamel stainless
steel kettle
Enamel cooking
utensil
Iron plate
You may have a number of different cooking vessels
This induction hob can identify a variety of cooking vessels, which you can test by
one of the following methods:
Place the vessel on the cooking zone. If the corresponding cooking zone displays
a power level, then the vessel is suitable. If "U" flashes, then the vessel is not suitable
for use with the induction hob.
Hold a magnet to the vessel. If the magnet is attracted to the vessel, it is suitable
for use with the induction hob.
NB: The base of the vessel must contain magnetic material.
It must have a flat bottom with a diameter of more than 14 cm.
Use pans whose diameter is as large as the graphic of the zone selected.
Using a pot a slightly wider energy will be used at its maximum efficiency.If you use
smaller pot efficiency could be less than expected.Pot less than 140 mm could be
undetected by the hob.
The base diameter of induction cookware
Cooking zone
Minimum
Maximum
1 & 2
140
180
3 & 4
140
180
Flexi zone
250
400
The above may vary according to the size of the pan and the material it is made from.
Selection of cooking vessels
Iron oil frying pan
Stainless steel pot
Iron pan
Iron kettle
2
3

13
Customer Care Service
If a fault should occur, before calling After Sales Service, please do the following:
-Check that the appliance is correctly plugged in
-Read the failure and display table above
If you are still unable to resolve the problem, switch off the appliance, do not try to dismantle it,
and call
After Sales Service.
Cleanness and Maintenance
The surface of the induction hob may be easily cleaned in the following way:
Type of contam-
ination
Method of cleaning
Cleaning materials
Light
Immerse in hot water and wipe dry
Cleaning sponge
Rings and lime
scale
Apply white vinegar to the area, wipe with
a soft cloth or use a commercially
available product
Special adhesive for ceramic
glass
Sweetmeat, melted
aluminium or
plastics
Use a special scraper for ceramic glass
to remove residue (a silicon product is
best)
Special adhesive for ceramic
glass
NB: Disconnect the power supply before cleaning.
Failure Display and Inspection
If any abnormality occurs, the induction hob will automatically go into protective mode and display
one of the following codes:
Fault
Possible cause
Solutions
F0/F1/F2
Fan failure
Contact the supplier
F3-F8
Temperature
sensor failure
Contact the supplier
E1/E2
Abnormal voltage in
power supply
Check if power supply is
normal.
Power on after power supply
returns to normal.
E3/E4
Abnormal
temperature
Check the pan
E5/E6
Poor heat radiation
in cooking zone
Restart when cooking
zone cools down
The above table shows how to assess and check common faults.
Do not dismantle the appliance yourself, otherwise you may damage the induction
hob.
ENGLISH

14
Special Declaration
The contents of this manual have been carefully checked. However, the
company cannot be held responsible for any misprints or omissions.
Also, any technical modifications may be included in a revised version of
the manual without notice. The appearance and colour of the appliance in
this manual may differ from the actual one.
This appliance is labelled in compliance with European directive 20 21/
Electrical and Electronic Equipment (WEEE). 1/E9C for Waste
DISPOSAL: Do not dis po s e
this product as unsorted
municipal wa s te. Collection
of such wa ste s eparately for
special treatment is
nece ss ary.
By ensuring that this appliance is disposed of correctly, you will help prevent any po ssible
damage to the environment and to human health, which might otherwis e be cau s ed if it
were disposed of in the wrong way.
The symbol on the product indicate s that it may not be treated as normal hou sehold
wa ste. It s hould be taken to a collection point for the recycling of electrical and electronic
goods.
This appliance require s specialist wa ste dis po s al. For further information regarding the
treatment, recovery and recycling of this product plea s e contact your local council, your
household waste dispo sal service, or the shop where you purcha sed it.
For more detailed information about treatment, recovery and recycling of this product, pleas e contact your local city
office, your household waste disposal service or the shop where you purcha sed the product.

15
Product Information for Domestic Electric Hobs Compliant to Commission Regulation (EU) No 66/2014
Position
Symbol
Value
Unit
Model identification
HTP644DB1
Type of hob:
Electric Hob
Number of cooking zones and/or
areas
zones
4
areas
Heating technology (induction
cooking zones and cooking areas,
radiant cooking zones, solid plates)
Induction cooking zones
X
Induction cooking cooking areas
radiant cooking zones
solid plates
For circular cooking zones or areas: diameter of useful surface area per
electric heated cooking zone, rounded to the nearest 5mm
Rear left
Ø
18,0
cm
Rear central
Ø
cm
Rear right
Ø
18,0
cm
Central left
Ø
cm
Central central
Ø
cm
Central right
Ø
cm
Front left
Ø
18,0
cm
Front central
Ø
cm
Front right
Ø
18,0
cm
For non-circular cooking zones or areas: length and width of useful
surface area per electric heated cooking zone or area, rounded to the
nearest 5mm
Rear left
L
W
cm
Rear central
L
W
cm
Rear right
L
W
cm
Central left
L
W
cm
Central central
L
W
cm
Central right
L
W
cm
Front left
L
W
cm
Front central
L
W
cm
Front right
L
W
cm
Energy consumption for cooking zone or area calculated per kg
Rear left
ECelectric cooking
192,8
Wh/kg
Rear central
ECelectric cooking
Wh/kg
Rear right
ECelectric cooking
193,3
Wh/kg
Central left
ECelectric cooking
Wh/kg
Central central
ECelectric cooking
Wh/kg
Central right
ECelectric cooking
Wh/kg
Front left
ECelectric cooking
200,3
Wh/kg
Front central
ECelectric cooking
Wh/kg
Front right
ECelectric cooking
177,6
Wh/kg
Energy consumption for the hob calculated per kg
ECelectric hob
191,0
Wh/kg
Standard applied : EN 60350-2 Household electric cooking appliances - Part 2: Hobs - Methods for measuring performance
Suggestions for Energy Saving:
•
To obtain the best efficiency of your hob, please place the pan in the centre of the cooking zone.
•
Using a lid will reduce cooking times and save energy by retaining the heat.
•
Minimise the amount of liquid or fat to reduce cooking times.
•
Start cooking on a high setting and reduce the setting when the food has heated through.
•
Use pans whose diameter is as large as the graphic of the zone selected.
These information are to be considered as part of the appliance user manual.
ENGLISH

16
Afhængigt af forholdene er delene i dette apparat
overensstemmende med:
FORORDNING (EF) nr. 1935/2004 vedrørende materialer og
artikler beregnet til at komme i kontakt med fødevarer.
Sikkerhed og vedligeholdelse
ADVARSEL: Apparatet og dets tilgængelige dele bliver
varme ved brug. Undgå berøring med de varme dele.
Børn under 8 år skal holdes fra apparatet, med mindre de
er under konstant overvågning.
Dette apparat kan benyttes af børn fra 8 år og op efter
samt af personer med nedsatte fysiske, sensoriske og
mentale evner eller mangel på erfaring og viden om brug
af apparatet, hvis de overvåges eller får instruktion i brug
og forstår de farer, der kan være i forbindelse med brug.
Børn må ikke lege med apparatet.
Rengøring og vedligeholdelse skal ikke udføres af børn
uden overvågning.
ADVARSEL: Tilberedning af madvarer med fedtstof eller
olie skal holdes under opsyn for at undgå farer eller brand.
Prøv ALDRIG at slukke brand med vand. Sluk derimod
apparatet og dæk flammerne over med f.eks. et låg eller et
brandtæppe.
ADVARSEL: Brandfare: Opbevar ikke genstande på
kogepladerne.

17
ADVARSEL: Hvis overfladen er gået i stykker, sluk for
apparatet for at undgå elektrisk stød.
Benyt ikke en damprenser til rengøringsprocedurer.
Metaldelesom f.eks. Knive, gafler, skeer og låg må ikke
placeres på den varme overflade, da de kan blive varme.
Enhver form for spild bør fjernes fra låget før åbning.
Kogepladens overflade skal køle af, før låget lukkes.
Efter brug , sluk da kogepladene elementer på deres
kontrolknapper i stedet for at stole på detektoren.
Apparatet er ikke beregnet til at blive betjent via en ekstern
timer eller et særskilt fjernbetjeningssystem.
Frakobling overensstemmelse skal ske i de fas te ledninger i
med gældende regler og bestemmelser.
Af instruktionen skal det fremgå, hvilken type ledning, der
skal benyttes og temperaturen på bagsiden af apparatets
overflade skal indtænkes.
Hvis forsyningsledningen er beskadiget, skal den udskiftes
af producenten, dennes serviceagent eller en lignende
kvalificeret person for at undgå fare.
ADVARSEL: For at undgå mulige farer forårsaget af
utilsigtet nulstilling af den termiske afbryder, må dette
apparat ikke forsynes via en ekstern afbryderenhed, som
f.eks. en timer, eller tilsluttes et kredslb, hvor
regelmæssigt tændes og slukkes af forsyningsleverandøren.
DANISH

18
Afbryderanordningen skal være indbygget i den faste
ledningsføring i henhold til reglerne for ledningsføring.
Instruktionerne angiver den type ledning, som skal anvendes i
betragtning af temperaturen af apparatets underside.
ADVARSEL: Brug kun kogesektionsafskærmninger designet af
producenten af kogeapparatet eller angivet af producenten af
apparatet i brugsanvisningen som egnet, eller
kogesektionsafskærmninger indbygget i apparatet. Brug af
uegnede afskærmninger kan medføre uheld.
- Brug altid passende kogegrej.
- Placer altid kogegrej midt på den enhed, du laver mad på.
- Placer ikke noget på kontrolpanelet.
- Brug ikke overfladen som skærebræt.
- Kogesektionens overflade skal køle af, inden låget lukkes.
- FORSIGTIG: madlavningsprocessen skal overvåges. En
kortvarig madlavningsproces skal overvåges kontinuerligt.

19
lnduktionskogetoppen bestar af en elektrisk spole, en plade i ferromagnetisk materiale og et
kontrolsystem. Str0mmen generer et kraftigt elektromagnetisk felt omkring spolen. Dette
skaber en rrekke b0lger som
kogetoppens overflade.
genererer
varmen, der ledes videre til beholderen pa
jerngryde
1•••1
l•••I
magnetisk felt
glaskeramisk kogetop
induktionsspole
◄
►
induktionsstr0m
([I)
◄
►
(ID
Kcere kunde,
tak fordi De har valgt en induktionskogetop fra Rosieres, et produkt som De helt sikkert vii fa
glrede af i mange ar.
Lres denne brugervejledning grundigt igennem, f0r De tager produktet i brug, og opbevar den
omhyggeligt, sa De kan sla op i den, hvis det bliver n0dvendigt.
lndledning
lnduktionskogetoppen kan opfylde de mange forskellige behov som krrever kogning via
eletromagnetisk opvarmning. Takket vrere et micro-computerstyret kontrolsystem
med flere funktioner er den det rette valg til moderne familier.
Denne induktionskogetop er fremstillet i srerlige materialer og er sikker, slidstrerk og srerdeles
nem at bruge.
Sadan virker den
DANISH

20
Flush installation: Kun mulig, hvis ovnen ikke erinstalleret
under disken
Table of contents
Languages:
Other Hoover Hob manuals

Hoover
Hoover H-HOB 300 User manual

Hoover
Hoover HGVL6040 User manual

Hoover
Hoover H-HOB 500 GAZ User manual

Hoover
Hoover HI642DB1 User manual

Hoover
Hoover HGH64SCE B User manual

Hoover
Hoover HGV75 User manual

Hoover
Hoover HI642TTC User manual

Hoover
Hoover HHG6L User manual

Hoover
Hoover H-HOB 500 User manual

Hoover
Hoover HIS642MCTT User manual

Hoover
Hoover HI624TCT User manual

Hoover
Hoover HVW6MW User manual

Hoover
Hoover HI642CWIFITT User manual

Hoover
Hoover 430B Operation manual

Hoover
Hoover HGV75SXV B User manual

Hoover
Hoover HVEF 742 Operation manual

Hoover
Hoover HIS633SCTTWIFI User manual

Hoover
Hoover HI420 User manual

Hoover
Hoover HTPS64MCTT User manual

Hoover
Hoover HVD640C User manual