manuals.online logo
Brands
  1. Home
  2. •
  3. Brands
  4. •
  5. Hoover
  6. •
  7. Vacuum Cleaner
  8. •
  9. Hoover FUTURA S3509 User manual

Hoover FUTURA S3509 User manual

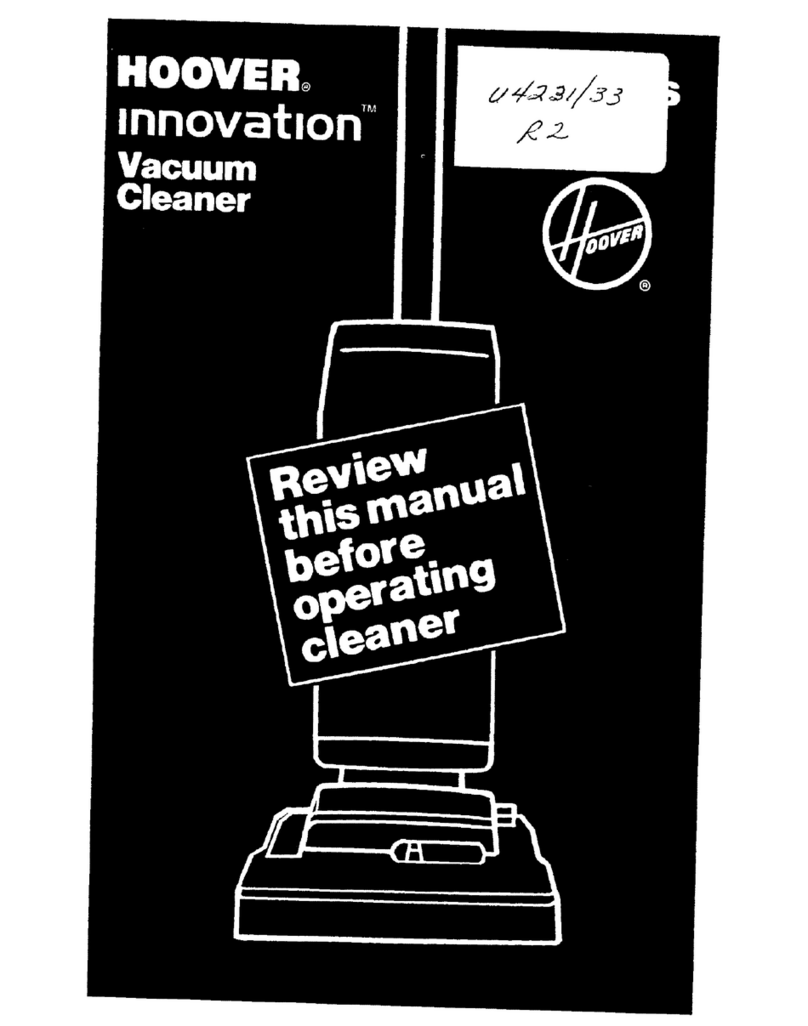
HOOVER.
_LJ"_LJr_/3_,_
Cleaner
Owner's
Manual
Review this manual before
operating cleaner
Fill in and retain
The HOOVERvacuum cleaneryou havejust purchasedis designed
for carpet and floor cleaningand has cleaning tool==for other tasks.
The model and serial number are located on the bottomof the cleaner.
For your personalrecords, please enter the COMPLETEmodel and serial
number Inthe spaces providedand retain this information.
Your cleanerIs model
and has serla! number.
it Is suggestedthat you attach your sales receiptto this owner's manual.
Ver!flcatlor)of date of purchase may be requiredfor warranty service of
your Hoover product.
Save!
Index
Assembling Cleaner ..................................5
CleanerDescdptions ............................3-4
How To Use
Canister cleaner.............................. 6-7
CleaningTools ................................ 8-9
Rug and FloorNozzle......................... 6
To clean stairs................................... 9
if You Have a Problem.I........"........" ......12
Important Safeguards................................2
Lubrication ..............................................12
Maintenance
ugand floor Nozzle.........................12
Secondary Filter................................ 11
Paper Bag ................................... Io-lt
Service ................................................... 13
Storage ................................................... 9
© 1990 The Hoover Company
Important Safeguards
When using an electrical appliance, basic precautions should
always be followed, including the following:
READ ALL INSTRUCTIONS
BEFORE USING THIS APPLIANCE
m II
warning: _Oinjury:reducethe risk of fire, electric shock, or
• Do not use outdoors or onwet surfaces.
• Close sup_ervisionis necessary when any appliance Is used by or near
children. Do not allow vacuum cleaner to be used as a toy or to run
unattended at any time.
• Keep hal,',loose clothing, fingers, and all parts of body away from open-
ings and moving parts.
• Do not pull or carry by cord, use cord as ahand!e, close .d.ooron cord or
pull cord aroun.dsharp eages or comers, uo not run appliance over
cord. Keep cora away Tromneatea surfaces.
not
• Do . pick upany.thingthat is burning or smoking,such as cigarettes,
matcnes, or not asnes.
•Do not use to pick up flammable or combustible liquids such as gasoline
or use in areas where they may De present.
• Avoid picking up hard, sharp,objects with the cleaner. They may
damage the cleaner and the bag.
• Unp!ugcleaner when not In use. Turn off all controls before
unplugging.
• Always disconnect cord from electrical outlet beforeservicing the
cleaner
•Do not use without dust bag and/or filters In place. Change bag fre-
quently when picking up very fine materialssuch as powder.
•Use extra care when cleaning on stairs.
• Do not put any object into openings. Do not use with any opening
blocked; keep free of dust, lint, hair, and anything that may reduceair
flow.
•Graspthe plug to disconnect from wail outlet to avoid damage to
cord, plug, prongs, or receptacle. Never handle plug or appliance with
wet hanas.
• The useof an extension cord is not recommended.
•Do not use with damagedcord or plug. if appliance is notworking as it
should_,hasbeen .d,roppedjd,_.,_ed, left outdoors, or drop.pedinto
water, taKe it to a HooverPactory _ervice L;enter or Authorized Hoover
Warranty Service Dealer (Depot).
•Use vacuum cleaner only for its intended use as described in the
instructions.Use only attachments recommended byThe Hoover
Company; others may cause hazards.
Save these instructions!
Unpacking
Unpack cleaner from cartonand
identify the parts shown. Remove
and dispose of cardboard
pacldngo
A Canister cleaner
B. Rug and floor nozzle
C. Paper bag (Instaibd In canister)
D. Extensionwands and hose
The assembled cleaner will look
like the drawing below.
C
D
2
6
8 9 10
17 16 15
12
1. Deluxe wheeled rug and floor nozzle ( Some models have a deluxe rug
and floor nozzle without wheels).
2. Lig htwelg ht hose
3. Spring latch on metal wands: locks extension wands together or locks
wand to nozzle or tool.
Plastic latch ring on plastic wands: see item #7.
4. Extension wands: used with rug and floor nozzle. One or both wands
may be used with cleaning tools. (Some models have plastic wands;
some models have metal wands.)
5. Hand grip
6. Suction regulator •: set for MINIMUM, MEDIUM or MAXIMUM suction by
rotating plastic ring until raised plastic indicator on ring is directly under
desired setting.
7. Plastic latch ring: located on hand grip and plastic wands; rotate to lock
wands and cleaning tools to hose.
8. Cord hook: rotate hook inward for quick cord release.
9. Dusting brush
10. Crevice tool
11. Furniture nozzle
12. Large wheels: provide easy towing when cleaner is pulled over carpet,
area rugs and door sills.
13.. On-Off pedal: conveniently located on top of cleaner.
14. Bag lid latch: lift to open bag lid.
15. Bag lid
16. Check bag indicator • : shows red when paper bag should be
checked for fullness.
17. Hose connector
18. Carrying handle
This cleaner Is intended for household use.
Operate cleaner only at voltage specified on data plate on bottom of
cleaner.
*Available on some models.
How to assemble
1.Connect hose
With hose toward front of cleaner,
push hose connector into opening
in bag lid. To disconnect hose,
depress buttons on hose connector
and pull up.
2, Attach wands,
tools and nozzle
To attach hose to an extension
wand or tool, turn plastic latch ring
on hand grip until outer slot lines up
with inner slot.
Push hand grip down onto wand or
tool so that button projection fits
into slot. Turn latch ring to lock in
place.
For cleaners with plastic wands, the
second wand and tools are at-
tached in the same manner.
Reverse procedure to remove wand
or tool.
For cleaners with metal wands,
attach wand or tool by pushing the
button projection on one into the
spring latch of the of the other. To
remove, press down on center of
latch and pull out.
How to use
To reduce the risk of electric shock, this appliance has a polarized plug (one
blade is wider than the other). This plug will fit in a polarized outlet only one
way. If the plug does not fit fully in the outlet, reverse the plug. If it still does
not fit, contact a qualified electrician to install the proper outlet. Do not change
the plug in any way.
CORD
HOOK
On-Off pedal
Depress on-off pedal to turn cleaner
on or off. After use, store cord by
wrapping it around on-off pedal,
cord hook and lip on rear of
cleaner. Beforeusing on-off
pedal, release cord by rotating
cord hook inward.
Rug and floor nozzle
The combination rug and floor nozzle has been designed to do an efficient
cleaning job on both carpet and hard surface floors.
Some models come with the deluxe nozzle and others come with deluxe
wheeled nozzle. Both nozzles have constant edge cleaning for cleaning along
baseboards or solid furniture. Both nozzles have a BARE FLOOR setting and a
RUG setting. To change from one setting to the other, refer to the nozzle you
have purchased.
Deluxe nozzle
Lock brushes to clean bare floors
by sliding indicator toward BARE
FLOOR. Release brushes to clean
carpet by sliding indicator toward
RUG.
Deluxe wheeled
nozzle
Lock brushes to clean bare floors
by depressing indicator toward
BARE FLOOR. Release brushes to
clean carpet by depressing
indicator toward RUG.
Check bag indicator
(Available on some models)
The indicator will begin to show red
as bag fills with dirt.
There are three conditions that will
cause the indicator to become
completely red:
1. The bag is full; change the bag.
2. Very fine materials (such as
powder) have been picked up,
clogging the bag pores; change the
bag, even if it is not full.
3. There is an obstruction in the
nozzle, hose, tools or at the bag
opening; remove the obstruction.
CHECK BAG
INDICATOR
Suction regulator
(Available on some models)
The suction regulator is located on
the hand grip and may be used to
increase or decrease suction for
various cleaning tasks.
Set suction regulator to MINIMUM,
MEDIUM or MAXIMUM suction by
rotating plastic ring until raised
plastic indicator on dial is directly
under desired setting.
7
qCleaning tools
\ variety of useful cleaning tools is included with your cleaner. These tools and
heir uses are shown below. The wall/floor brush is available at a nominal cost
rom your Authorized Hoover Dealer (Depot), a Hoover Factory Service Center
)r by writing to The Hoover Company, North Canton, Ohio 44720.
1
I/
3
2
1. Crevice tool may be used in
tight spaces, corners and along
edges in such places as dresser
drawers, upholstered furniture,
stairs and baseboards.
2. Furniture nozzle may be used
for upholstered furniture, draperies,
tapestries, mattresses, clothing,
automobile interiors and carpeted
stairs.
3. Dusting brush may be used for
carved furniture, table tops, books,
lamps, lighting fixtures, Venetian
blinds, baseboards, shutters and
registers.
*4. Wall/floor brush may be used
for walls and very irregular hard
surface floors such as brick and
slate.
*Available at additional cost.
Attaching tools
Attach tools to hand grip and plastic
wands by rotating latch ring until
slots align; insert tool and rotate ring
to lock.
To remove tool, reverse above
procedure.
8
For models with metal wands,
attach tools to wand by pushing
button projection on tool into spring
latch on wand. Depress center of
latch to remove.
Storing cleaner
The cleaning tools are conveniently
stored on top of the cleaner, as
shown.
After use, wrap the cord around the
on-off pedal, cord hook and lip on
rear of cleaner.
To save space, the cleaner may be
stored on end.
CORD
ON/OFF
To clean stairs
Clean stairs by placing cleaner on
end as shown. Clean stairs from
bottom to top.
Maintenance
The following sections are concerned with proper maintenance of the cleaner.
Familiarize yourself with these home maintenance tasks and keep this owner's
manual in a convenient place where you can refer to it when needed. Proper
use and care of your cleaner will ensure continued cleaning effectiveness.
The bag
When to replace
Check bag from time to time. For models with 'CHECK BAG' indicator, check
bag when indicator shows red. When bag is filled with dirt, the cleaner will not
operate efficiently. Discard used bag.
CAUTION: Very fine materials,such as face powder, cornstarch, fireplace
ashes or fireplace soot, may seal the paper bag and may cause it to burst
even though it is only partially full of dirt. When the cleaner is usedto
remove material of this nature, changethe bag often.
What bags to buy
Use HOOVER bag type S with this cleaner.
To assure that your HOOVER cleaner
operates at peak performance, it is
imperative that you use only genuine
HOOVER paper bags made by The
Hoover Company. HOOVER bags can be
identified by these trademarks D
Hoover®
Replacing paper bag
Disconnectcleanerfrom electricaloutlet.
1. Rotate hose to the side, lift bag
lid latch and open bag lid. 2. Carefully pull out used bag.
10
BAG
OPENING SEAL
3. Form new bag into a box-like
shape. Slide bag collar firmly into
holder.
4. Push rear edge of bag into bag
cavity below seal.
Clear bag opening by pushing the
pierced paper through opening
toward bag interior. Do not tear off
paper.
Close bag lid.
Re-attaching bag lid
The bag lid and hinges are de-
signed with a 'break-away' feature.
If the lid is pushed open too far, it
will come off. It can be easily re-
attached by aligning the hinges with
the appropriate slots in the cleaner
as shown.
Secondary filter
To clean filter
Disconnect cleaner from electri-
cal outlet.
The secondary filter, located behind
the grill in the bag compartment,
protects the motor from dirt par-
ticles. If filter becomes dirty, pull off
grill and lift out filter. Wash filter in
warm water or replace it with a new
one. A dry filter must be put back
into cleaner.
Do not operate cleaner without
secondary filter in place.
11
Rug and floor nozzle
To maintain cleaning effectiveness of your rug and floor nozzle, the brushes
may need to be replaced occasionally.
See your nearest Hoover Factory Service Center or Authorized Warranty
Service Dealer (Depot) for new brushes.
Lubrication
The motor is equipped with two bearings that contain sufficient lubrication for
the life of the motor. The addition of lubricant could cause damage. Therefore,
do not add lubricant to the motor or agitator bearings.
If you have a problem
This appliance was inspected thoroughly and was in good operating condition
when it was shipped from the factory. If a minor problem occurs, it usually can
be solved quite easily when the cause is found. Therefore, this check list is
3rovided for your convenience.
Problem
Cleaner
won't
run
Possible cause Possible solution
1. Not firmly plugged in.
2. No voltage in wall plug.
3. Blown fuse/tripped
breaker.
1. Plug unit in firmly.
2. Check fuse or
breaker.
3. Replace fuse/reset
breaker.
Cleaner
won't
pick up
1. Bag full.
2. Bag not opening.
3. Obstruction in nozzle, hose
or attachments.
4. Suction regulator
improperly set.
5. Secondary filter dirty.
1. Change paper
bag.
2. Open by pulling folds.
3. Remove obstruction.
4. Set suction regulator
properly.
5. Clean or replace filter.
Nozzle
won't
pick up
1. Nozzle brush worn. 1. Replace nozzle brush.
12
Service
If the problem persists, check the Yellow Pages of your telephone book under
"Vacuum Cleaners-Household" for your nearest Hoover Factory Service
Center or AuthodzKI Warranty _rvl_ Dealer (Depot) where approved
HOOVER service and genuine HOOVER replacement parts may be obtained.
Provided with this product is a listing of the Hoover Factory Service Centers. If
you are unable to obtain the information you need from the Yellow Pages,
contact a Hoover Factory Service Center to find your nearest Authorized
Warranty Service Dealer (Depot). For service under warranty, follow the
instructions in the warranty provided with this product.
Do not send your cleaner to The Hoover Company in North Canton for service
as this will only result in a delay.
Always identify your cleaner by the complete model number when requesting
information or ordering parts. (The model number appears on the bottom of the
cleaner.)
If furtherassistanceis needed,contactThe Hoover Company Consumer
Response Center, North Canton, Ohio 44720, (2t6) 4994200.
In Canada, contact Hoover Canada, Burlington Ontario, LTR 4A8,
1-600-263-6376.
13
HOOVER and_ are registered trademarks
THE HOOVER COMPANY, NORTH CANTON, OHIO 44720
R2 1 1-93 $3509/1 I/I 5/1 9 Litho USA 56513-303

This manual suits for next models

1

Other Hoover Vacuum Cleaner manuals

Hoover smart R1 User manual

Hoover

Hoover smart R1 User manual

Hoover 7000PH Allergy User manual

Hoover

Hoover 7000PH Allergy User manual

Hoover TSBE2003 011 User manual

Hoover

Hoover TSBE2003 011 User manual

Hoover F8100900 - Platinum Carpet Cleaner User manual

Hoover

Hoover F8100900 - Platinum Carpet Cleaner User manual

Hoover 59144003 User manual

Hoover

Hoover 59144003 User manual

Hoover ONEPWR BH15020 User manual

Hoover

Hoover ONEPWR BH15020 User manual

Hoover SteamVac F6026910 User manual

Hoover

Hoover SteamVac F6026910 User manual

Hoover HOOVER JET & WASH SX 6254 User manual

Hoover

Hoover HOOVER JET & WASH SX 6254 User manual

Hoover FloorMATE H2850 User manual

Hoover

Hoover FloorMATE H2850 User manual

Hoover SteamVac F7440-980 User manual

Hoover

Hoover SteamVac F7440-980 User manual

Hoover Jazz JA1600 User manual

Hoover

Hoover Jazz JA1600 User manual

Hoover WindTunnelTM User manual

Hoover

Hoover WindTunnelTM User manual

Hoover UH70015 - Platinum Collection Cyclonic Bagless Upright... User manual

Hoover

Hoover UH70015 - Platinum Collection Cyclonic Bagless Upright... User manual

Hoover 69 User manual

Hoover

Hoover 69 User manual

Hoover Air cordless User manual

Hoover

Hoover Air cordless User manual

Hoover SmartWash FH52001 User manual

Hoover

Hoover SmartWash FH52001 User manual

Hoover DF71DV08011 User manual

Hoover

Hoover DF71DV08011 User manual

Hoover F5871 User manual

Hoover

Hoover F5871 User manual

Hoover SteamVac F7412-900 User manual

Hoover

Hoover SteamVac F7412-900 User manual

Hoover SteamVac Widepath User manual

Hoover

Hoover SteamVac Widepath User manual

Hoover ONEPWR EVOLVE PET ELITE User manual

Hoover

Hoover ONEPWR EVOLVE PET ELITE User manual

Hoover PurePower Greenray User manual

Hoover

Hoover PurePower Greenray User manual

Hoover Vacuum cleaner User manual

Hoover

Hoover Vacuum cleaner User manual

Hoover H-PURE 700 STEAM User manual

Hoover

Hoover H-PURE 700 STEAM User manual

Popular Vacuum Cleaner manuals by other brands

cecotec CONGA WINDROID 880 SPRAYWATER CONNECTED T instruction manual

cecotec

cecotec CONGA WINDROID 880 SPRAYWATER CONNECTED T instruction manual

LG VC1014GSTVQ manual

LG

LG VC1014GSTVQ manual

PROFILO VCX1 PT Series Instructions for use

PROFILO

PROFILO VCX1 PT Series Instructions for use

Oreck Forever Series Gold user guide

Oreck

Oreck Forever Series Gold user guide

Beko VCC 5424 WI user manual

Beko

Beko VCC 5424 WI user manual

Kogan MX11 PRO user guide

Kogan

Kogan MX11 PRO user guide

Black & Decker BDH1850SM instruction manual

Black & Decker

Black & Decker BDH1850SM instruction manual

SCA 563333 instruction manual

SCA

SCA 563333 instruction manual

Shark ICZ160EU Series instructions

Shark

Shark ICZ160EU Series instructions

Samsung VC-8916VN manual

Samsung

Samsung VC-8916VN manual

Dreame M12 user manual

Dreame

Dreame M12 user manual

TriStar SZ-2186 manual

TriStar

TriStar SZ-2186 manual

Makita DVC260 instruction manual

Makita

Makita DVC260 instruction manual

Linea 2000 DOMO DO1083SV Instruction booklet

Linea 2000

Linea 2000 DOMO DO1083SV Instruction booklet

Vax Match Rapide Classic instruction manual

Vax

Vax Match Rapide Classic instruction manual

Shark CORDLESS VERTEXPRO IZ600 Series owner's guide

Shark CORDLESS

Shark CORDLESS VERTEXPRO IZ600 Series owner's guide

HAEGER Venus 600 User instructions

HAEGER

HAEGER Venus 600 User instructions

XPOtool 61542 Operation manual

XPOtool

XPOtool 61542 Operation manual

manuals.online logo
manuals.online logoBrands
  • About & Mission
  • Contact us
  • Privacy Policy
  • Terms and Conditions

Copyright 2025 Manuals.Online. All Rights Reserved.