manuals.online logo
Brands
  1. Home
  2. •
  3. Brands
  4. •
  5. Hoover
  6. •
  7. Vacuum Cleaner
  8. •
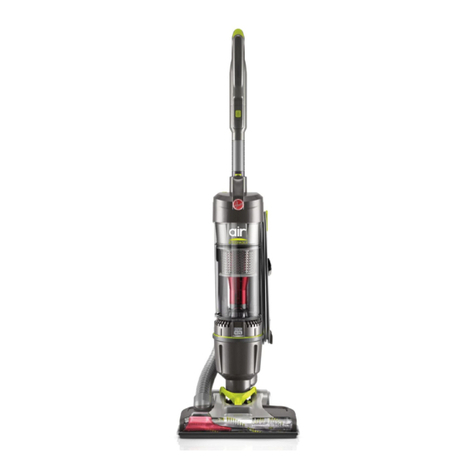
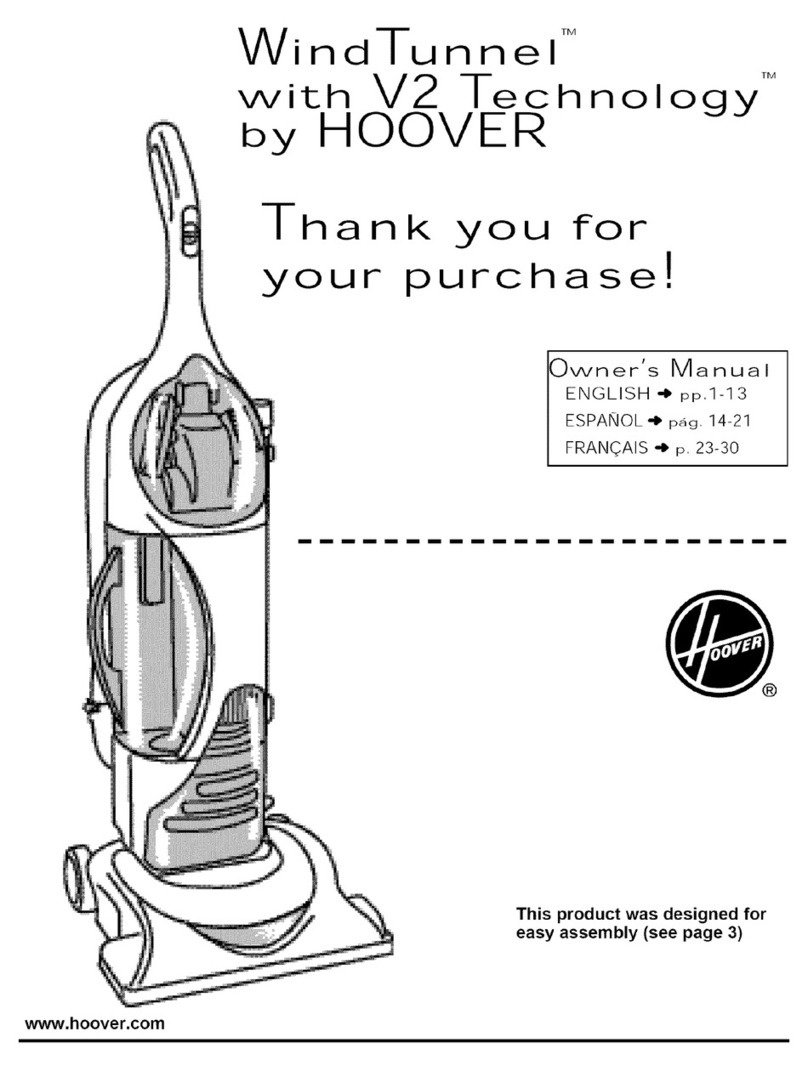
  9. Hoover UH70035B - WindTunnel Cyclonic Upright... User manual

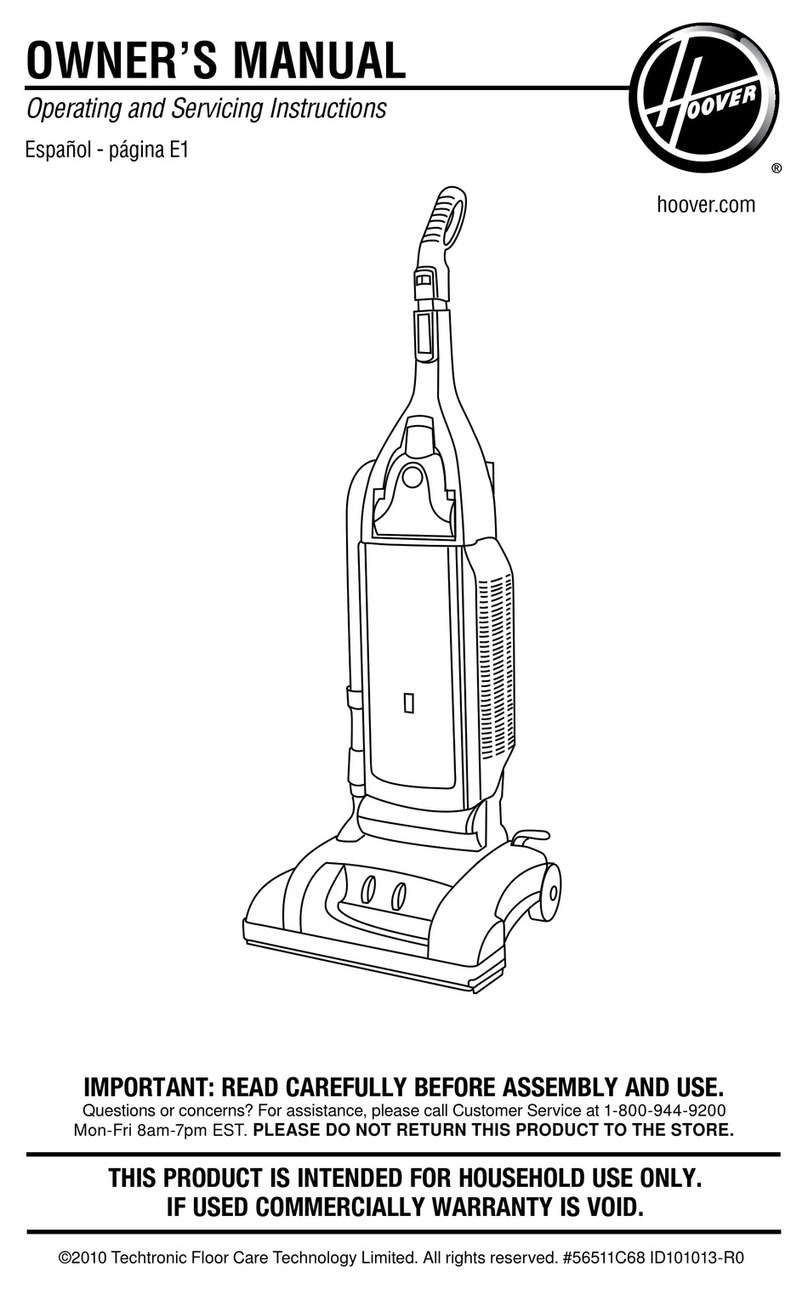
Hoover UH70035B - WindTunnel Cyclonic Upright... User manual

Owner'sManual
0
peroting
ond
Servici
ngInstructions
I r.riliiiiir,l
I rtrtrttl|tl
I a11.ll,
I .
rtt.
1..{,lLir.,..
M
www.hoover.com
@2OO7
Allrightsreserved.
#17-O1-58-058-00-H301
Review
thismanual
beforeoperatingthecleaner. 6l07
Thank
you
forchoosing
Please
enter
thecomplete
model
andserial
numbersinthespaces
provided.
Model
aHOOVER'
product.
SerialNumber
Hint:Attach
your
salesreceiptto thisowner's
manual.
Verificationofdateofpurchase
mayberequired
forwarrantyserviceof
your
H00VER
product.
Be
suretofilloutandreturnthe
product
registrationcardincluded
with
your
cleaner.
Contents
lmportant
Safeguards
CleanerAssembly
Carton
Contents
How
To
Use...
Cleaner
Descriptions.
.. . .
CleaningTools
.
Maintenance.
...
Dirt
Cup
Filters
Headlight
Belt..
Agitator
BrushRoll..
Powered
HandTool
Agitator
BrushRoll
..
PowerHandToolBelt.
Lubrication
ThermalProtector.
Authorized
Service
Troubleshooting
.
ClearingBlockages
Warranty.
Parts
& accessoriesmailreorderform
lf you
need
assistance:
Visitourwcbsiteathoovcr.com.Clickonthe
"Customer
Service"lirrk
to lind
theserviceoutletnearest
you0RCall
l-800-944-9200
foranautonratedreferralofauthorizedserviceoutletlocations(U.S.
orrly]0R
Call
I
-330-499-9499
tospeakwitha
representativeinourConsumcrResponse
Center.
Please
donotreturn
thisnroductto thestorc.
HggYFk@- rtmuilLrilmuuul
;,j;iiu"{:";;#J1"":*ls"r,r
l
lllllllllffl
lllfllllll
ll
9rRrg q{!rF{zc,2o 7- lg88l _15677 4
;iiJ.fl;;"lJ:;*,^,,.,,., /ri\
FlTFKfr'Ot,frTRE crmrbrr ctys
HOWtH4DftPlMtM€NNqT4POWISIKO SED
SERTAtNO/NUMEROSTR/MEAOtrSEn[ XXXX
llllllHffiUilllllllil
n,*ffrrix,o.,
MMYYXXXXXXXX Hdo.noin,'r$iqtrl6orne
\A
\\
Serial
Number
\S
lmportant
Safety
Instructions
When
usinganelectricalappliance,always
follow
basic
precautions,
including
thefollowing:
READ
ALLINSTRUCTIONSBEFORE
USING
THIS
APPLIANCE
WARNINGI Toreducethe
risk
of fire,electricshock,orinjury:
o Donot useoutdoorsor on wet surfaces.
oClosesupervisionisnecessary
whenanyappliance
is
usedby or nearchildren.Do
not
allowvacuum
cleanerto beusedasatoyorto rununattended
atanytime.
oKeephair,loose
clothing,
fingers,feet
andall
parts
of bodyaway
from
openings,rotating
agitator
andothermoving
parts.
oDonotpick
upanythingthatisburningorsmoking,suchas
cigarettes,
matches,
orhotashes.
o
Donotuseto pick
upflammable
orcombustible
materials
suchas
gasoline
orfine
wood
sandingsorusein areaswherethey
may
be
present.
o
Alwaysturn
off this
appliancebeforeconnectingordisconnectinghose.
oUnplugcleaner
beforeconnectingthe
powered
hand
tool.
oDonotuse
withoutdirtcuporfiltersin place.
Emptycupand
clean
filterfrequently
when
picking
upveryfinematerialssuchas
powder.
oUseextracare
whencleaningon stairs.
eDonotputany
object
intoopenings.
Donot usewithanyopening
blocked;
keep
free
of
dust,
lint,
hair,
oranythingthat
mayreduce
air
flow.
oAlways
disconnect
cord
fromelectricaloutletbeforeservicingthecleaner.
oUnplugcleaner
when
notin use.
Turn
off allcontrolsbeforeunplugging.
oDonotunplugbypulling
on cord.
Tounplug,
grasp
the
plug,
notthecord.Neverhandle
plug
orappliance
with
wethands.
o
The
use
of anextension
cord
isnotrecommended.
o
Donot
usewithdamagedcordor
plug.
lf applianceisnot
workingasit should,has
been
dropped,damaged,Ieft
outdoors,ordropped
into
water,takeit to a Hoover
Salesand
ServiceCenter
orAuthorizedHoover
WarrangrServiceDealer
(Depot).
oDonotpull
orcarrybycord,usecordasahandle,
closedooroncordorpull
cord
around
sharpedges
orcorners.Donotrunapplianceover
cord.
Keep
cordaway
fromheated
surfaces.
r Usevacuum
cleaner
only
foritsintended
useasdescribedin theinstructions.
Useonly
attachments
recommended
byHoover;
others
may
causehazards.
oHold
plug
whenrewinding
cordontocord
reel.Donot
allow
plug
to whip
when
rewinding.
WARNING:
o
This
product
contains
chemicals
known
to theStateof Californiato cause
cancerand
reproductive
toxicity.
Wash
hands
after
handling.
oDonotoperate
cleaner
in bare
feet
orwhenwearingopentoe
shoesorsandals.
o
Avoid
picking
uphard,sharpobjectswiththe
cleaner.
Theymay
damagethe
cleaner.
Save
these
instructions
!
Cartoncontents
lN{ \,J
'A l:6
a,
\-fl Fd
t.J
re
|]I -lc
,A
rll-T-(@p
A. Handlcscctiorr
B. Cleanerbaseandupper
housirrg
assembly
C. Clcaningtoolsandwands
D. Powered
Hand'tbol
Rernoveall
parts
frorn
carton
andidentify
eachitem
shown.
Makcsureall
parts
arelocatedbefore
disposingof
packirrg
rnaterials.
Attach
handle
Usinga
Phillips
screwdrivcr,rcrnove
{2)screws
frornthetop
of
theupperhousirrg
assernbly.
Ittserthartdk
sectiorr
(A)
intoupperhousingassembly.Pushdown
l-irmly
until
you
hear
aclick.
Fastcn
(2)
screws
oneithersideofhandle
base.
Position
Tools
Placc
srnallcrdiamctcr
endofwand
(A)
into
bottornofrack.
Snap
warrd
into
clip
at
top.
Repeatwithothcrwand.
Crevicetool
(B)
fitsinto
oneofthc
cxtcnsiorr
wands.
Fit
cornbinationtool
(C)
intostoragearcaonside
ofclcancrasshowrr.
Fit
powered
hand
tool
(A)
intorecessed
areaonfront
ofcleaner.Pivot
toward
harrdle
tosnap
irr
place.
Cleaner
Description
1. SoftTouchrMharrdle
grip
2. 0N/OFFswitch
3. Hose
4. Dirt
cuu
release
buttorr
5. Dirt
cupassembly
6. Hose
harrdle
7. Cord
reel
window
L lleadlight
9. Nozzlc
corrtrol
knob:
turnknob
tocorrcctsettingforheight
of
carpctbcing
cleancd.
10.
Furniture
guard:
helps
prevent
clcaner
from
markinofunriture.
t').
13.
14.
t5.
16.
17.
18.
t9.
20.
21.
22.
Agitator
brushroll
shut-off
pedal
Agitator
brushroll
slrut-off
indicator
Finalfilter
access
Combination
tool
Powered
hand
tool
Crcvicetool
l-losc/toolholdcr
Wands
Cordreel
SoftTouchrM
wheels
Handle
release
pedal:
stcp
onlevcr
to lower
handle
to
opcrating
or
low
positions.
Cord
rcwind
buttorr:prcss
buttorrto rewind
cordfor
storagc.
llold
plug
untilcord
is
rewound.
0peratecleanerorrlyatvoltagespecified
orrdata
plate
on
backofclearrer.
'fhis
cleanerisintendedforhousehold
use.
Polarized
plug
Toreducc
the
risk
of electricshock,thisappliancehas
a
polarizedplug
(one
bladeiswiderthanthe
other).
This
plug
willfit irr
a polarizcd
outlctonlyoneway.
lf the
plug
does
rtotfit fully
irr
theoutlet,reverse
the
plug.
lf it stilldoesrrot
fit,contactaqualified
electriciantoinstall
the
proper
outlet.
Donotchattgc
tlrc
plug
irr
arryway.
ON-OFFSwitch Brush
Roll
Switch
Plug
cord
into
electrical
outlet.
To
turrrcleaner0N,
puslr
0N/0FFswitchonce.
'lb
turrrcleanerOFF,
push
switchagain.
The
cleanerisshipped
withtheagitatorbrush
rollinthe0FF
position.
To
turn theagitator
brush
roll
ON,step
onthe
pedal
(A).
Theindicator
(B)
willshow
red
in tlre
"brush
roll
on"window.
Cord
Rewind Grasp
theend
ofthe
plug
and
pull
to
release
cord
lromcord
reel.After
desiredcord
lengthis
reached,
the
cordwilllock
into
position.
Toreturrr
cordfor
storagc,hold
plug
and
press
orr
button
(A)
attop
ofcord
recl.
To
prevent
cordfrom whipping,
hold
plug
until
cord
is
rewound.
Transportinq
Handle
Clean'er ' Positions
Tomove
your
clcaner
frornroom
to roonr,
put
handle
in
upright
position,
tiltcleaner
back
orr
rear
wheels
and
push
forward.
The
handlc
of
your
clcan
er
has
three
positiorrs;
upright
for
storage
and
when
using
cleaning
tools;
operating
positiorr
for
general
operation
on
carpct
arrdfloors;low
forreaching
undcrlowfurniture.
Stco
onhandlc
releasc
lever
to lower
handle.
Carpet
Heiqht
AdjirstmenI The
cleanirrg
ofcarpetand
rugs
takes
place
atthc
rtozzle
(A).
Forrnaximurn
clcarring
pcrforrnance,
thefollowing
carpetheight
settirrgs
arcrecornrnended:
o Lowest
setting:for
all
types
of
carpct.
Note:
lf theclcaneris
difficult
to
push,
turrrkrrob
tothenexthigher
setting.
o Higher
settings:
for
verydeep
various
carpet
pile
thcnozzle
control
desired
setting.
Whcn
itis
necessary
toraiscand
lower
thc
rtozzlel-or
heights,
turrr
knob
(B)
to thc pile
carpct,
where
easier
pushing
effortis
desired,
whilc
mairrtairring
good
cleaning
performance.
Settings
LiI
-/
Agitator
Brush
Roll
Shut-Off
The
agitator
brushroll
shutsoffautomatically
for
tooluse,
whenthe
cleaner
is
intheupriglrt
position.
Tomarrually
shut
offtheagitator
brushroll
for
cleaning
hard
floors,
stepon thc
pedal
(A).
The
indicator
(B)
willshow
rerl
inthe
"brush
roll
ofl"'window.
To
turntheagitator
brushroll
on,
stcponthe
pcdal
agairr.Theirrdicator
willshowrcd
in the
"brush
roll
on"window.
.".,,,"tllll*
'lools
allowlor
cleanittg
surfacesabovethcfloor
arrd
for
rcachinghard
toclearrareas.
-l-he
cleanerisready
fortool
usewhenhandleisinupright
position.
The
agitatorbrush
roll
willnotrotatc
whcnthe
cleaner
isirr
thcupright
positiorr
or
the
if thcagitator
brusltroll
shut
off indicatorisirr
the0FF
positron
when
thehandleislowered.
Whenusirrg
cleaningtools,
place
clearrer
handlein
tlreupright
position.
The
agitatorbrush
roll
will
not
rotate
whcrr
theclcancris
inthe
upriglrt
positiorr.
Also,
turncleancr
OFFbelorc
disconnccting
and
connectirrghose
to
hose
tubc
(A).
lb usehose
,
lifthose
end
(B)
asshowrr.
Whcn
you
arefirrishcd
clearringwiththe
tools,rcposition
hose
errd
intcl
tube.
Select
Proper
Tool
'Zlffil "/f
Aff (-ll.ilt
ll
n-__a_-JJ
ll-J-.t---j!-'c D
A.Cornbination
tool
usewithbrush
for
carvedfurniture,
tabletops,
books,
lamps,lighting
fixtures,
venctiarr
blirrds,
baseboards,
shutters,
and
registers.
Removebrush
(l'ig.
3-+)
toclearrupholstcredfurniture,
drapcries,rnattresscs,
clothing,and
carpeterlstairs.
B.Poweredhand
tool
may
bcusedfor
upholsteredlurniture,
draperies,
rnattresses,
clothirrg,autornobile
interiors,
and
caroeted
stairs.
C.Crevice
toolrnay
beused
in tight
spaces,corncrs
and
alongedgesinsuch
places
asdrcsser
drawers,upholstered
furniturc,
stairsand
baseboards.
D.
Wands
arcusedtogive
extra
length
to
your
hose.
Use
themwitharryoftheabovetools.
futr-
\-'bw///
A
Attach
toolor
wandtothe
hose
(A).
Attach
Wand
and
Tools
Attach
toollowand
(B)
by
pushing
it
lirmly
orrto
the
warrd.
Twist
wandor
toolslightly
totighterr
orloosen
thc
conne
ctiorr.
How
to
CleanTools
Tcl
cleanthehosearrd
powered
hand
tool,wipeoff dirtwith
aclothdampened
inarnilddetergcrrt.
Rinse
withadamp
cloth.D0NOT
submerge
powered
harrd
tool
in
water.
Cleaningtoolsnray
bewashedirr
warrnwater
witha
detcrgent.Rinse
and
airdrybeforc
usirrg.
Combination
Tool Stair
Cleaning
Usethehoseand
powered
hartdtool
for
stair
clcanirrg.
Clean
frombottomto top.
CAUTION:
Toavoid
personal
injuryorunnecessary
wearto carpet,andto prevent
thecleaner
from
falling,always
place
it atbottom
ofstairs.
Slidc
brushto
rcrnovc.
Toreplacebrushes,alignbottorn
olbrush
with
grooves
(A)
ontool.Slide
brush
into
placc.
ExtraReach"
Hose
(available
atadditionalcost)
TheExLraReach''hosc
provides
easicr
cleanittg
ofstairs
arrdhardto reach
nlaces.
Followthe
stcps
belowforatLachingarrd
detachingthe
ExtraReaclr'nirose.
Turncleaner0FF
bcforcdisconnectingand
conncct.ing
hose.Rcrttovchoseend
from
dirt
duct
(A).
Aligrrendof ExtraReach''hosc
with
projectiorrs
(B)
overslotsondirt
duct
{C).
Slidc
hose
into
slotsand
twisthosetolockit into
place.
Alignerrdofhosewith
projcctiorrs
(D)
ovcr
slots
(E)
on
ExtraRcach'"
hose.
Slide
hoseittto
slots
and
twist
hose
to
lockit into
place.
('lb
detaclr
hosc,
rcversc
proccdurc).
Attach
wands
ortoolsto tlrcotherendof hosc.
Note:Hose
rnustbeconnectedtodirtductand
hosetubeaftcr
rcmoving
ExtraRcach"'hosefor
carpetor
floorcleatting.
Familiarizeyoursclf
withthese
hornemainterrancc
tasksas
proper
useattdcare
of
your
cleanerwill
ensurecorrtinucdcleaninq
effectivcness.
Dirt
Cup
Whento Empty Ernptytlredirtcup
beforethcdirt
reachestlrc
fillline
(A).
Place
thc
clearter
irrtheupright
position
before
retnovittg
thedirtcup.
Disconnectcleaner
from
electrical
outlet.
Donotusecleaner
withoutdirtcup
or
filtersin
place.
CAUTION:
Very
finematerials,suchas
face
powder
or
cornstarch,
maysealthe
filterandcauseareductionin
performance.
When
using
thecleaner
forthistypeofdust,
empty
thecupand
cleanthe
filtersoften.
Dirt
Cup
(cont.)
How
to Empty
Prcss
dirtcuprelease
button
(A)
and
pivot
cupout. Holding
dirtcupover
traslr
receptacle,
press
dirtcupdoorrelcasebuttorr
(A)
toopendirt
cupdoor
(B).
Closcdoorarrd
press
dirtcupdoorreleasc
buttortto latch
dirtcundoorclosed.
Place
bottomofdirt
cup
irrto
cleancr
bodyfirst.Pivotcup
into
cleanerbody.
Press
ondirtcup
releasc
buttonwhilc
firrnly
prcssing
orr
dirtcup.
Releasebuttonirr
order
forit to returrr
topropcr
positiorr
andlock
the
dirt
cupinto
place.
Filters
CyclonicFilter
Assembly:Howto Clean
Disconnect
cleanerfrom
electricaloutlet.
Donot
usecleaner
without
dirtcupor
filtersinplace.
Rernove
dirt
cupasdescribedinFig.4-2.
lwist filterassembly
(A)
courrterclockwise.
Renrovc
asscrnblyfronr
dirtcup.
Dirtarrddcbris
canbeclearred
frorn
the
filterassemblyby
brushirrgwiththecleaner's
combinatiorr
tool.
Place
thc
l'ilter asscmblyonthedirtcup,
aligning
(3)
tabs
(A)
onfilterwith (3)
slotson
dirtcup
(B)
andtwist
it clockwise
to secure
into
position.
Press
dirtcupdoorrelease
button
(C)
tolatchdirtcupdoor
closcd.
Repface
dirtcupasdescribcdin Figs.4-4
t14-r:.
Filters
(cont.)
SecondaryFilter:How
to Clean
Disconnect
cleaner
from
electricaloutlet.
Donotusecleaner
without
dirtcupor
filtersin place.
Rernove
dirtcupasdescribed
inFig.4-2.
Withthunrband
forcfinger,
slide
latch
(A)
located
at
thc
topofthehousingtothe
right
and
pull
down
to
rernove
gray
filterframe.Renroveblackfoarnfilter.Rinse
filtcr
frame
cartridge
andfoamfilterunder
coldwater.
Allow
both
filterframe
and
filterto airdry for 24hours
before
replacingfilter intofilterframe.Reposition
filter
framecartridgebyinsertingtabsirrto
slotsonback
of
housing.Rotatcfiltcr
cartridgc
frarne
uptowardtop
of
housing
andsnapclosed.
SecondaryFilter:Whatto Buy
When
purchasing
a new
secondary
filtercartridge,asktbrH0OVERpartNo.93002517.
'lo purchase
a rrew
black
foarnfiltcr,askforH0OVIR
part
No.93002518.
HEPAFinal
Filter:Howto Clean
Disconnect
cleaner
from
electricaloutlet.
Donot
usecleaner
withoutdirtcup
or
filtersinplace.
Withfingers
irr
slots,
pull
filter
frame
(A)
straightout.
Dirt
anddcbriscan
be
cle
arredfronr
the
filter
cartridgebybrushingwitlr
thecleaner'scombinatiorrtool.
D0 NOTRINSE
0R
WASH
the
HEPAfiltercartridge.
Slideback
into
positiorr
onclcarrcr.
HEPAFinalFilter:What
to Buy
When
purchasing
arrewHEPA
filtcr
cartridge,askforHOOVER
part
No.
91002360.
Headlight
Disconnect
cleaner
from
electrical
outlet.
Removing
Lens
Pressharrdle
rclcasc
pcdal
and
place
handle
irrlow
nosition.
UsingaPhillips
screwdriver,
rernove
the
the
screwasshowrrandliftofflcrrs.
Headlight:What
to buy
l'hisclcaner
usesa l3 volt,
T-3Il4 wedgc
basebulb,Whor
purchasing
a
rrewlightbulb,
ask
l'orHoover
part
No.2731]-107.
Pulloldbulbstraight
outofsocket.
Push
rrew
bulbstraight
irrto
socketuntil
lockedin place.
Excessive
forceis
not required.
Reposition
lens
and
securewiththescrew.
lnstallingBulb Replacing
Lens
Belts
Disconnectcleanerfrom
electricaloutlet.
WARNING:Agitator
brushroll
canstartsuddenly.
Unplug
cleanerbeforeturning
it over.
Thcbeltsarelocated
undcr
thc
bottorrr
platr
ofthcclcancr
andshouldbcchecked
from
timeto time
[o besurrt]rcy
are
in good
corrdition.
ReplacingFlat
Belt
Rcplaccbcltif it is
strctchcd,
cutorbrokcn.
To
clrcckthc
flat
bclt,
rcfcr
to Fig.4-13.
RemovingBottom
Plate Removing
Belt
Withlettering
orr
outsideof belt,
slide
new
beltoverrnotor
shaft
(A).
Place
otherendof
beltoverlarge
pullcy
{B)
whilerollirrg
the
pulley
indirection
showrr.
lurrragitatorbrush
rollrnakirrg
surebelt
turns
frecly
arrd
is
not
pinched
betweerr
agitatorbrush
roll
artdagitatorshield.
Placehandlc
irrlow
positiort
and
turn
clcarrcrover
sobottonr
sidr:isfacing
up.
Rcrnovc
the6screwsas
showrrwithaPhillips
screwdrivcr.
Lift
offbottorn
plate.
Remove
uscdbelt
(A)
frornlarge
pulley
{ll)
anddiscard.
FlatBelt:
What
to Buy
Useonly
gcnuine
ll00VERbcltswith
your
cleaner.When
purchasirrg
a
new
bclt,ask
for
l'latbclt
- llOOVIrR
oart
No.40201-271,
Reposition
bottom
plate
and
6
Phillipshead
screws.
Tighten
screws
sccurcly.
Positioning
Belt
Inspecting
V-Belt
belttoward
groove
(ll)
ThcV-bcltis
dcsigncdtolastforalong
tirneand
isnotnornrallyreplaccd.llowever,if thcV-beltis
cracked,
gouged
orbrokerr,
it shouldbereplaccd.
Slide
flat
beltofflarge
pulley
asshown
inFig.4-14.
Torenrove
V-belt,slidebackof bcltovcr
pullcy
(A).
Thenfirrnly
pull
onbelt
and
"snap"
it out.
Discardusedbclt.
Toinstallncw
belt
(with
lcttcrirrg
orroutsideof
belt),
slide
backofbelt
over
pulley
and
pull
frorrt
ol'
next
to
pulley.
Bclt
will
"pop"
into
place.
V-Belt:
What
to Buy
Use
only
gcnuine
HOOVER
bcltswith
your
cleaner.Whcn
purchasing
a
ttew
bcft, askforV bclt
- H00VER
part
No. 40201-2O0.
Insert
agitatorbrush
roll
throughbelt
and
position
beltirr
groove
(A)
onagitator
brushroll.
Agitator
BrushRoll
Disconnect
cleaner
from
electricaloutlet.
WARNING:
Agitator
brushroll
canstartsuddenly.Unplugcleaner
beforeturningit over.
Replacing
Agitator
BrushRoll
Whenagitator
brushcs
arcworn,thcbruslr
roll
should
bc
rcplaccd.
Inspecting
Agitator
BrushRoll
To
checkconditiorrof
brushes,
rnove
cdgeofa
cardacrossbottom
plate
whileturrrirrgagitator
brushroll.Tomairrtairr
cleanirrgclfcctivencss,
replace
agitatorbrush
rollil'brushrs
dorrot
touchcard.
lnscrt
agitatorbrush
roll
throughbeltarrd
position
belt
ingroove
(A)
onagitatorbrushroll.
RemovingAgitatorBrushRoll
Turn
carpetheight
adjustment
knob
to
lowest
sctting.Turn
cleanerover
andrctnove
bottom
plate
(Fig.
a-13).
Liftupagitator
brush
roll
andslide
V-bclt
(A)
offagitator
brushroll.
Brush
Roll
Crasp
agitatorbruslr
rollfirnrly
andfit itinto
position
bylirst
sliding
errdopposite
thebcltinto
thcrcctarrgular
slot
(A)
onsideof
cleaner.
Pull
othersidc
ofagitator
brush
roll
(B)
into
place.
Belt
nrayfitloosely
when
propcrly
installcd.
Rcpositionflat
beltarrd
bottorn
plate
(Figs.
4-15
to4-16).
Agitator
BrushRoll:What
to Buy
Whcrr
purchasirrg
anewAgitatc-rrIJrushlloll,
ask
forl-l0OVERpart
No.
93002361.
Positioning
V-Belt Installing
Agitator
Powered
HandTool
Replacing
AgitatorBrush
Roll
Wherragitator
brushcsareworn,thebrushroll
shouldbercplaccd.
How
to Replace
l'urrr
toolsobottorn
faccs
up.
Press
the
latchesorrcither
sideof
toolarrdrcrlrovcbottorrr
platc
(A).
Unscrcw
thetwo Phillips
scrcwsand
rcrnove
belt
guard
(A).
Powered
HandTool
(cont.)
Replacing
Agitator
BrushRoll
How
to Replace
Rernove
agitator
including
end
plates
(AJ
anddiscard.
Inspect
belttoensure
thatit isirr
good
condition.lfbeltis
cracked,
gouged
or
brokcn,replaceit (see
following
scction).
lnsertbrushroll
through Replace
belt
guard
(A)
makirrgsurenot
to
pinch
brush
bristlesin
guard.
Turn
agitator,
to
make
sureit rotates
frecly.
Replace
and
tighten
screws.
AgitatorBrush
Roll:What
to Buy
Whcn
purchasing
arrew
PowcredHand
Tool
Agitator
BrushRoll,
ask
forH0OVERpart
No.
48414-088.
BeltReplacement
Thc
powered
hand
toolbelt
is
designedto lasta long
timeandisnotnormallyrrplaccd.
Howevcr,
if
thebeltiscracked,
gouged
orbroken,
it shouldbereplaced.
bcltand
position
bclt
over
gear
teeth
(B)
on
brushroll. With
curvedends
down,slidc
crrd
plates
(A)
of brushrollinto
slots
(B)
on
tool.
Toreplace
bottorn
plate,
insert
the
lour
tabsorr
edgeofbottorn
plate
into
slotsonfrorrtoftool.
Pivot
bottorn
plate
dowrr
andsnap
closed.
Inspecting
the
Belt
The
beltcanbc
seen
through
tlretopol the
nozzle
orby
rcrnoving
thebottom
plate
and
bclt
guard
(Figs.
4-23
to4-24).
Replacing
the
Belt
Graspturbine
(A)
and
pull
firmlytoremove.
Rcrnovc
bcltfronr
turbine
pulley
(B).
Replacc
withncw
bclt.
Withflatsides
of
turbirteretainers
{A)
pointing
dowrr,
slide
retairrersinto
grooves
(B)
in
tool
housing
and
snapinto
placc.
Replace
brushroll,
belt
guard,
andbottom
plate
asdescribedin
Figs.
4-25through
4-28.
PoweredHandToolBelt:
What
to Buy
When
purchasing
a
ncw
PoweredHand
Tool
Belt,
ask
for
HOOVER
part
No.
38528-037.
Lubrication
Thcrnotor
is
cquipped
withbearings
thatcontain
sulficient
lubrication
for
thelilc
of tlre
rnotor.
'fhe
addition
of lubricarrt
could
causedanragc.
Therel'ore,
do
not
add
lubricant
to
rnotor
bearings.
The
agitator
brush
rollis
equippedwith
twoball
bearings
that
should
be
lubricated
pcriodically
byaHoover
Salcs
andService
Centeroran
Authorized
Hoover
Warranty
ScrviccDealer.
Thermal
Protector
Aninternal
thermal
protcctor
has
bccn
designed
irtto
your
cleancr
toprotcct
it frorn
overheatirrg.
When
thetherrnal
protcctor
activatcs,
theclearrer
willstoprunrrirrg.
lfthishappens,
proce
cdas
follows:
l. Turrr
thc
cleanrr0FFarrd
disconnectit frorn
the
electrical
outlet.
2.Chccksecorrdary
and
firral
filtersl'or
dirt
accumulatiorr.
l. Refer
to"Clearing
blockages"
section.
4.Wherr
cleaner
is
unpluggcdand
themotor
coolsfor
30minutes,
the
therrnal
protector
autornatically
rcse
tsand
clearrirrg
rnay
corrtirrue.
lf thethcrrnal
protector
contirrues
toactivate
afterfollowirrg
the
abovcstcps,
your
clcarrerlnay
need
servicirrg
(see"Service"
scctiorr).
Service
Toobtain
approvedH00VER
service
and
genuinc
l-l00VER
parts,
locate
thcnearest
Hoovcr
Sales
andScrvice
Cerrter
orAuthorized
Hoover
Warrarrtv
Service
Dcalcr
(Depot)
by:
o chccking
theYellowPages
under
"Vacuum
Cleaners
- Household"
-0R-
o chcckingthc
Servicescctiorr
of l-loovcr
on-line
athoover.corn -oR
-
. callingl-800-944-9200
for
anautomated
refcrral
ofauthorized
service
outletlocatiorrs
(U.S.
only).
Do
notscnd
your
clcarrer
tolloover
irr
Clerrwillow,
0hiolor
service,
thiswill
only
result
in
dclay.
lf further
assistancc
isneeded,
contact
thc
Hoover
CorrsurncrResporrse
Cerrter,
Phonc
: 1
-330-499-9499.
Irr
Canada:
CarsorrBuilding;
100
Carson
5t.;
Etobicokc,
0N;MBW3R9;
l-800-263
-637
6.
Alwaysidcntifyyour
clcaner
by
the cornplete
nrodel
nurnber
wherrrequesting
inforrnation
or
ordering
parts.
(Thc
rnodel
rrurrrber
appears
on
the
backofthe
cleaner.)
PROBLEM POSSIBLEREASON POSSIBLE
SOLUTION
Cleanerwon'trun 1.Power
cord
not firmlyplugged
intooutlet.
2. Blownfuse
ortrippedbreaker.
4. Thermal
Protector
activated.
l. Plug
unitin firmly.
2. Check
fuse
orbrcakerin horrre.Rcplace
fuse/
reset
breakcr.
4. Unplug
andallowcleaner
to coolfor 30minutes.
(This
willlreset
thethermal
protector)
Cleanerwon't
pick
uporlowsuction l. Blockageirr
air
flow
passages.
2. Dirtcupfull.
3. AgitatorllrushRoll
worn.
4. Broken
or worn belt.
5. Cloggedfilter.
6. Nozzle/dirt
passage
hoseclogged.
7.
Carpet
licight
scttingisincorrect.
B.
Agitator
BrushRollis
0FF.
l. Clcarblockage
- Pg.16.
2. Empty
dirtcup- Pg.
9.
3. ReplaceAgitator
IlrushRoll
- Pg.10.
3. Replace
belt
- Pg.
12.
5. Rernovefilter
andclearr
- Pg.
9-10.
6. Remove
lowerhose;remove
obstruction
- Pg.16.
7. Set
carpet
height
adjustment
to appropriate
setting
for
carpet
beingcleaned
- Pg.
6.
B.
Steponpedal
to turnAgitatorBrush
Roll
on-
P9.
6.
Dust
escaping
fromcleaner 1.Dirt
cup
full.
2. Dirt cup
not installed
correctly.
3. Hosenotinstalled
correctly.
4. Filternotinstalled
completely.
l. Empty
dirtcup
- Pg.
9.
2.Review
dirtcupremoval
& replacement
-
Pg.
9.
3.Rcviewhoseinstallatiorr
- P9.4.
4. Reviewfilterremoval
& replacement
- Pg.9-,|0.
Headlightnot
working l. Bulb
burntout.
2. Loose
electrical
wires.
l. Replace
bulb
- Pg.10.
2. Call
l-800-944-92OO
fornearest
authorized
Hoover'dealer.
Cleaneris
difficult
to
push
orwon't
move
forward
l. Carpet
height
settingisirrcorrect. l. Sctcarpetheight
adjust
lever
to appropriate
settingfor
carpetbeirrgclearred
- Pg.
6.
PoweredHand
Tool
BrushRollwon't
turn
l. Toomuch
pressure
beingapplied
to tool.
2.Blockagcirr
turbine
channel.
3. Brokenorwornbelt.
4. Low
cleanersuctiorr.
l. Continueusing
toolapplyinglight pressure.
2. Rernove
blockage
- Pg.
16.
3. Replace
belt
- Pg.13.
4.
Check
iterrrs
under'Clearrer
worr't
pick
or
low
suction."
Smoky/burning
smell
detected l. Belt
brokenorstretched. l. Replace
agitatorbrushroll
belt
- Pg.l2
15
Clearing
Blockages
Disconnect
cleanerfromelectrical
outlet.
Low
suction
or
pick
uprnay
bc
due
toablockageirr
thesystern.
Relcr
tothe
followirrg
stepstocheck
for
blockages
continuingwitlr
caclrstepuntiltheblockageisfound:
Fullness
of
Dirt
Cup Check
Airflow
Path
Checkl'ullrress
ofdirt Plug
clcancr
in
andturn0N. Chcck
cup;crnptyif rrccdcd for
suctiorratend
of
hose
(A).
lf
thcrc
is
suctionturnclcaner
OFF
andurrplug.
Checkconnection
at
Itose
tube
(B);
rernoveany
blockage.
CheckSecondary
Filter
Rernove
arrd
cleansecondary
filter
(Fig.
a-8,
p.
l0).Replace
filtcr.
CheckHoseInlet
Tube Checking
Under
Bottom
Plate
'lurrr
cleancr0FF
and
unplug.
lfblockage
canbesccn
irr
tubc
(AJ,
rcmovc
5
screwsusingaPhillips
scrcwdriver.
Pull
tubefrorn
clcancr,
rrrnove
blockagc.
Re
positiorr
tubc
orrback
of
clcarrer,
rcplace
5
screws.
Turrr
cleaner
0FFand
urrplug.
Ilcmovc
bottom
plate
(Fig.
a-l3)
arrdagitator
brushroll
(liig.
a-20).
Look
into
openirrg
(A),
irr
channels
(ll)
and
around
lincr
(C)
andrcrnovc
arry
accurnulated
debris.
Replacc
agitator
brush
roll
andbottom
platc.
Blockage
in Powered
HandTool
Discorrnecl
powercd
hand
toolfromhosc.
Rernove
bottom
plate,
bclt
guard
and
turbirreasdescribedinFigs.
4-24,4-2tt
and4-31.
Rcmove
arryblockage
from
turbine
chanrrcl.
Replacebelt
turbirre,brushroll,
bclt
guard
arrdbottom
platc.
Full
One
Year
Warranty
(Domestic
Use)
Your l-l00VER"
appliancc
is warranted
in norntal
household
use, in accordancewith thc 0wtter's
Manual againstoriginal defects
in ntatcrialand
worknranship
for a period
of 1'his
warranty
provides,
at lro costto y0u, all laborand parts
to place
this
appliarrce
in correctoperatingcondition
duringtlte
warrarrted
period.
This warrantyapplieswlten the
appliance
is
purchased
in thcUnited
States
includirtg
its territories
arrd
possessions,
or in Canadaor frottt
a U.5. MilitaryExcharrge.Appliartces
purchascd
elsewhcrearecovered
by a linritedolre
ycal warratlty
whichcoversthecostof
parts
only.
Thiswarrantydoes
rrot
apply
if theappliancc
is
uscd
in a cornrnercial
or
rerrtal
application.
'f
hiswarrantyonly
applieswherrIhe
product
isinuse
irr
thecountryorterritoryirrwhichit is
purchased.
Warrantyservicccan
only
beobtainedby presenting
the appliance
to one of the followirrgauthorizcd
warrantyscrvice
outlets.
l'roof of purchase
will be
rcouircd
beforeserviceis
rendered.
l. Hoover
SalesandServiceCenters.
2.llooverAuthorized
Warrant.y
ServiceDealers.
For
arrautornated
referralofauthorizedserviceoutlets
irr
theU.S.A..
phorre
l-U00-944-9200
0Rvisit
Hoover
on-lineat hoovcr.cont
This warranty does not cover pick up, delivcry,or
house
calls;
however,if you mail
your
applianceto a
Hoovcr
SalesandServiceCenter
forwarranty
service,
transportationwillbc
paid
oneway.
Whilethis
warranty
givesyou specific
lcgalrights,
you lnayalsohavcother
rights
whichvary
fronr
state
tostate.
lf further
assistance
isneeded,
or
if thereare
questiorrs
corrcerningthiswarrarrtyorthe
availabilityof warrarrtyserviceoutlets,
phonc
theHoover
Corrsumer
ResponseCcntcr,
r
-330-499-9499.
ln Canada,
please
call
l-800-261-6376.
4
Partsand
Accessories
MAILORDERFORM
Detachthisscctionand
nail to:
TheHooverCompany
7005Cochranlload
r Glenwillow,
Oltio
o44139
Attn:Salestt ServiceCerrter
Item
Description Part
No. Qty/
Pk. Price/Pk.
atl,. Total
HEPA
Finaltilter 93002360 1$
8.99
Secondaryfiltercartridge 9300251
71$
6.99
Foamfilter
(secondary
filte) 93002518 2$
3.99
Headlight 27313
107 I$
2.49
FlatBelt 40201271 2( ?qq
V-Belt 40201200 2$
4.99
TOTALMERCHANDISE)
APPLICABLESTATE
TAX+ $
SHIPPING&HANLDING+ $
7.s0
TOTALCOST $
t7
OrderDate
Parts
andAccessories
RETAINTHIS
SECTIONFOR
YOUR
RECORDS
Received
Date 4
ItemDescription Part
No. Qty/Pk.Price/Pk.atv. Total
HEPAFinalFilter 93002360 I{9,44
Secondaryfilter
cartridge 930025t7 1$
6.99
Foam
filter
(secondary
filter) 930025|
B 2 $
3.99
Headlight 27313r07 I$
2.49
FlatBelt 40201271 2$3.99
V-Belt 4020r
-200 2$
4.99
TOTALMERCHANDISE)
APPLICABLE
STATETAX- $
SHIPPING
&
HANLDING
+5
7.50
TOTAL
COST $
Ship to: (please
print
clearly)
Name
Street City_State_ Zip
_
Payment
Method:
tr Check
orMoney
Ordermade
payable
to:TheHoover
Company
tr Visa E Mastercard E Discover
Number Exp.Date
Name
onCard Day
Phone
( )
Signature
(req.)
Replacement
parts
and
accessory
items
maybe
purchased
from
yourAuthorized
Hoover
Dealer,
Leading
Retailers,Hoover
Sales
&ServiceCenters,on-line
at
www.hoover.c0m,
orbycompleting
this
orderform.
Mail
orderslimited
t0U.5.
residents
only.tn
Canacla,
plcasc
call
t-800-263-6rzo
OR
on-lineathoover.ca
Please
allow
3-4weeksfor
deliverv.

Other Hoover Vacuum Cleaner manuals

Hoover Guardsman C1631 User guide

Hoover

Hoover Guardsman C1631 User guide

Hoover Performance Floors & All HU86-FAL-S User manual

Hoover

Hoover Performance Floors & All HU86-FAL-S User manual

Hoover TRE 1410 User manual

Hoover

Hoover TRE 1410 User manual

Hoover HANDY SJ72WD6A/1 User manual

Hoover

Hoover HANDY SJ72WD6A/1 User manual

Hoover ELITE SWIVEL XL PET UH75250 User manual

Hoover

Hoover ELITE SWIVEL XL PET UH75250 User manual

Hoover Elite Rewind Elite Rewind Upright Cleaner User manual

Hoover

Hoover Elite Rewind Elite Rewind Upright Cleaner User manual

Hoover UH70601 User manual

Hoover

Hoover UH70601 User manual

Hoover SPRINT EVO User manual

Hoover

Hoover SPRINT EVO User manual

Hoover SteamVac F7428-900 User manual

Hoover

Hoover SteamVac F7428-900 User manual

Hoover Flash User manual

Hoover

Hoover Flash User manual

Hoover PowerDash FACCW21R0K User manual

Hoover

Hoover PowerDash FACCW21R0K User manual

Hoover Wind Tunnel User manual

Hoover

Hoover Wind Tunnel User manual

Hoover U5473-900 User manual

Hoover

Hoover U5473-900 User manual

Hoover Stick Vacuum User manual

Hoover

Hoover Stick Vacuum User manual

Hoover HC1600 Installation guide

Hoover

Hoover HC1600 Installation guide

Hoover Athos series User manual

Hoover

Hoover Athos series User manual

Hoover Elite Rewind User manual

Hoover

Hoover Elite Rewind User manual

Hoover Bagged Tempo U5145-900 User manual

Hoover

Hoover Bagged Tempo U5145-900 User manual

Hoover FloorMate, SpinScrub Floor Mate Spin Scrub Hard Floor... User manual

Hoover

Hoover FloorMate, SpinScrub Floor Mate Spin Scrub Hard Floor... User manual

Hoover BF70VS010 User manual

Hoover

Hoover BF70VS010 User manual

Hoover $5541 User manual

Hoover

Hoover $5541 User manual

Hoover FloorMate SpinScrub Hard Floor Cleane User manual

Hoover

Hoover FloorMate SpinScrub Hard Floor Cleane User manual

Hoover ST71 ST20011 Synthesis User manual

Hoover

Hoover ST71 ST20011 Synthesis User manual

Hoover S2220 User manual

Hoover

Hoover S2220 User manual

Popular Vacuum Cleaner manuals by other brands

Kärcher CVH 2 manual

Kärcher

Kärcher CVH 2 manual

Triple S LYNX 26 owner's manual

Triple S

Triple S LYNX 26 owner's manual

CleanMax ZM-200 user manual

CleanMax

CleanMax ZM-200 user manual

VONROC VC509AC Original instructions

VONROC

VONROC VC509AC Original instructions

Panasonic MC-V5504-00 Service manual

Panasonic

Panasonic MC-V5504-00 Service manual

Shark Rocket UV345CCO owner's guide

Shark

Shark Rocket UV345CCO owner's guide

Craftsman 113.170200 owner's manual

Craftsman

Craftsman 113.170200 owner's manual

Fieldmann FDU 2002-E manual

Fieldmann

Fieldmann FDU 2002-E manual

CleanMax CMBP-6 operating instructions

CleanMax

CleanMax CMBP-6 operating instructions

RIDGID WD1850 owner's manual

RIDGID

RIDGID WD1850 owner's manual

Bosch 3931A - 13 Gallon Wet/Dry Vacuum Cleaner Operating/safety instructions

Bosch

Bosch 3931A - 13 Gallon Wet/Dry Vacuum Cleaner Operating/safety instructions

Sebo Automoatic XP1 instruction manual

Sebo

Sebo Automoatic XP1 instruction manual

Kenmore 116.24212 owner's manual

Kenmore

Kenmore 116.24212 owner's manual

Philips FC6230 manual

Philips

Philips FC6230 manual

Russell Hobbs UV Pro RHBV1001 manual

Russell Hobbs

Russell Hobbs UV Pro RHBV1001 manual

Bissell PROHEAT PET TURBO manual

Bissell

Bissell PROHEAT PET TURBO manual

Pool Blaster MAX Li 30000ML Operator's manual

Pool Blaster

Pool Blaster MAX Li 30000ML Operator's manual

Logik L14VR12 instruction manual

Logik

Logik L14VR12 instruction manual

manuals.online logo
manuals.online logoBrands
  • About & Mission
  • Contact us
  • Privacy Policy
  • Terms and Conditions

Copyright 2025 Manuals.Online. All Rights Reserved.