manuals.online logo
Brands
  1. Home
  2. •
  3. Brands
  4. •
  5. Hotpoint
  6. •
  7. Range
  8. •
  9. Hotpoint RA511J Owner's manual

Hotpoint RA511J Owner's manual

This manual suits for next models

9

Other Hotpoint Range manuals

Hotpoint RB787 User manual

Hotpoint

Hotpoint RB787 User manual

Hotpoint RB790 - 30 in. Electric Range User manual

Hotpoint

Hotpoint RB790 - 30 in. Electric Range User manual

Hotpoint SA2840PIX Installation and operation manual

Hotpoint

Hotpoint SA2840PIX Installation and operation manual

Hotpoint RGBS200DMWW Manual

Hotpoint

Hotpoint RGBS200DMWW Manual

Hotpoint RGB532BEAWH Service manual

Hotpoint

Hotpoint RGB532BEAWH Service manual

Hotpoint RB740BHCT User instructions

Hotpoint

Hotpoint RB740BHCT User instructions

Hotpoint RGB540SEHSA User manual

Hotpoint

Hotpoint RGB540SEHSA User manual

Hotpoint RGB746GEN Installation guide

Hotpoint

Hotpoint RGB746GEN Installation guide

Hotpoint RB787BHBB - 30" Electric Range User instructions

Hotpoint

Hotpoint RB787BHBB - 30" Electric Range User instructions

Hotpoint RGB530DEP - 30 in. Gas Range User guide

Hotpoint

Hotpoint RGB530DEP - 30 in. Gas Range User guide

Hotpoint RGA720 Operating instructions

Hotpoint

Hotpoint RGA720 Operating instructions

Hotpoint RB526CWW User instructions

Hotpoint

Hotpoint RB526CWW User instructions

Hotpoint RB747GJ User manual

Hotpoint

Hotpoint RB747GJ User manual

Hotpoint RB526CCC User instructions

Hotpoint

Hotpoint RB526CCC User instructions

Hotpoint RA720 Operating instructions

Hotpoint

Hotpoint RA720 Operating instructions

Hotpoint RB761G Installation instructions

Hotpoint

Hotpoint RB761G Installation instructions

Hotpoint RB740G Installation guide

Hotpoint

Hotpoint RB740G Installation guide

Hotpoint RB800BJBB User guide

Hotpoint

Hotpoint RB800BJBB User guide

Hotpoint RGB747GER Installation guide

Hotpoint

Hotpoint RGB747GER Installation guide

Hotpoint RB790SHSA User manual

Hotpoint

Hotpoint RB790SHSA User manual

Hotpoint RB792SRSA User instructions

Hotpoint

Hotpoint RB792SRSA User instructions

Hotpoint RB757DPWH User manual

Hotpoint

Hotpoint RB757DPWH User manual

Hotpoint RB536BCCT Service manual

Hotpoint

Hotpoint RB536BCCT Service manual

Hotpoint RB787DPWW - Electric Range User manual

Hotpoint

Hotpoint RB787DPWW - Electric Range User manual

Popular Range manuals by other brands

Maytag MGR5875QDW - 30 Inch Gas Range Use and care guide

Maytag

Maytag MGR5875QDW - 30 Inch Gas Range Use and care guide

Frigidaire FFGF3024SS use & care

Frigidaire

Frigidaire FFGF3024SS use & care

Capital Precision Series GCR484W Specifications

Capital

Capital Precision Series GCR484W Specifications

Officine Gullo GGS8P Installation and use instruction

Officine Gullo

Officine Gullo GGS8P Installation and use instruction

LG LSD4913 Series owner's manual

LG

LG LSD4913 Series owner's manual

Kenmore 4101 - Elite 30 in. Slide-In Electric Range installation instructions

Kenmore

Kenmore 4101 - Elite 30 in. Slide-In Electric Range installation instructions

Moffat Blue Seal Evolution G576 Technical data sheet

Moffat

Moffat Blue Seal Evolution G576 Technical data sheet

CornuFé C1NF user guide

CornuFé

CornuFé C1NF user guide

GE JGS650SEFSS Dimensions and installation information

GE

GE JGS650SEFSS Dimensions and installation information

LG LDG3015ST Manual De Propietario

LG

LG LDG3015ST Manual De Propietario

Whirlpool RF350PXP Use and care guide

Whirlpool

Whirlpool RF350PXP Use and care guide

Samsung FCQ321HTUW Service manual

Samsung

Samsung FCQ321HTUW Service manual

Kenmore 790.45712 Use & care guide

Kenmore

Kenmore 790.45712 Use & care guide

Wolf CHR CHSSR owner's manual

Wolf

Wolf CHR CHSSR owner's manual

Smeg Built-in Microwave Oven Instructions for the user

Smeg

Smeg Built-in Microwave Oven Instructions for the user

Zanussi ZCG054G user manual

Zanussi

Zanussi ZCG054G user manual

GE JCSS630 quick start guide

GE

GE JCSS630 quick start guide

Samsung NX58M9960P series installation manual

Samsung

Samsung NX58M9960P series installation manual

manuals.online logo
manuals.online logoBrands
  • About & Mission
  • Contact us
  • Privacy Policy
  • Terms and Conditions

Copyright 2025 Manuals.Online. All Rights Reserved.

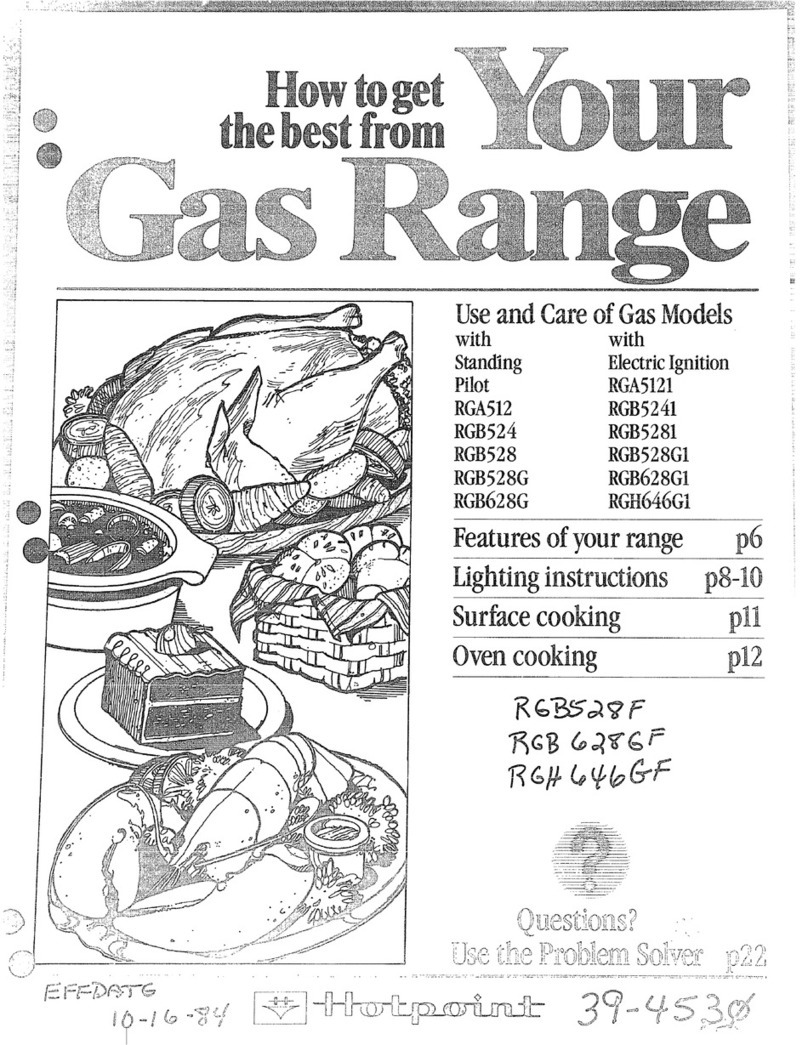
gthebestfrom
Howto
useandcareof
AluminumFoil 20 —
Anti-TipBracket 3,5
ADDlianceRegistration 2models
C~hningTips-
Care and Cleaning 22-24
Clock/Timer 14
Energy-SavingTips 5
Features 6-9
IInstallationInstructions 5
1Leveling 5
Modeland SerialNumbers 2
Oven 15-21
Baking, BakingGuide 16,17
~roi]ing, BroilingGuide ~o>z!
———
Control Settings 15
Door Removal 22
Light; Bulb Replacement 15,22
Roasting,RoastingGuide 18>19
Thermos@tAdjustment 23
VentDuct 22
Problem Solver 25
ReDairService 27
Safety Instructions 3,4
Sur-faceCooking 10-13
—.._
‘; -)
Readthisbookcarefully.
Itisintendedtohelp youoperate
andmaintainyournewra~lge
properly.
Keepit handyfor answersto your
questions.
If youdon’tunderstandsomething
or needmore help, write (include
yourphonenumber):
ConsumerAffairs
Hotpoint
AppliancePark
Louisville,KY40225
writedownthemodel
YOU’11findthem on alabelon
the front ofthe rangebehindthe
ovendoor.
These numbersare also onthe
Consumer Product Ownership
RegistrationCard that came with
yourrange. Beforesendingin this
card, please write these numbers
here:
Model Number
Serial Number
Use these numbers in any
correspondence or service calls
concerning your range.
Immediatelycontactthe dealer (or
builder)d~atsoldyoutilerange.
Checkthe Problem Solveron
page25.It listscausesofminor
operatingproblemsthat youcan
correct yourself.
,
I
2
ANTI-TIPbracketsuppli~. To
check if tie bracketis inswd
andengagedproperly,removetie
drawer (onmodelsso equipped)
and inspecttie rear levelingleg.
Make sure it fitssecurelyinto
tie slotin tie bracket.
For modelswithoutastorage
drawer,carefilly tip @erange
forwardto checkif tie ANTI-
TIP bracketis engagedwiti tie
Ievelhg leg.
If youpullthe rangeoutfrom tie
waflfor any reason, make sure
tie rear leg is re~rned to its
positionin tie bracketwhenyou
push he rangeback.
.
..
.,
.._.-—-—... ... --..————-----.
.-
.
...
call Setfle intoSoitfloor ioverings
such as !cushion@d vinylor
{:arpeting. When movingthe range
on thistypeof flooring,use care,
andit isrecommendedthat these
simpleandinexpensiveinstructions
be followed.
The rangeshouldbe installedon
asheetofplywood(or similar
material)as follows:men the
floor coveting endsat $hefront of
the mnge, the area thatthe range
willrest on shouldbe builtup with
pIywoodto the samelevelor higher
thanthe floor covering.This will
allowthe range to be movedfor
cleaningor servicing.
Q
~~~ velingscrews are located on
‘-ach corner ofthe base of the
range. Removethe bottom drawer
(onmodels so equipped) and you
can levelthe range on an uneven
floor with the use ofanutdriver.
To remove drawer, pull dra’wer-
Qzlt all the way, tilt up the front
and talfe it out.ToK’eplaee
drawer, insert gliciesat back of
~~r~lverbeyondstopon range glides,
Ljftdrawer if necessary to insert
easily.I.et front of drawer down,
then “push in to close.
*Use cookwareofmediumweight
alumIinum,withtight-fittii~gcovers,
andflat bottomswhichcompletely
covertheheatedportionofthe
surfaceunit.
@Cookfresh vegetableswitha
minimum.amountofwaterin a
coveredpan.
@Watchfoodswhen bringingthem
quicklyto tooting temperaturesat
HIGH heat. When foodreaches
cookingtemperature, reduceheat
immediatelyto lowestsettingthat
willkeep it cooking.
*Use residud heatwith surface
tooting wheneverpossible.For
e-pie, w-hencookingeggsin the
shell, bring waterand eggstoboil,
thenturn to OFF positionand
coverwith lid to completethe
cooking.
@Use correct heatforcookingtask:
HIGH—tostart cooking (iftime
allows,do not useHIGH heat to
start).
MEDIUM HI—quickbrowning.
MEDIUM—slowfrying.
LOW—finishcooking most
quantities, simmer—doubleboiler
heat, finish cooking, and special
for small quantities.
WARM—tomaintain serving
temperature of most foods.
*Whe~Iboiling water for tea or
coffee, heat only amount needed.
1$is not economical to boil a
container full of water forone
or two cups.
OveaCoo]iimg
@
Preheatoven o131ywhen
necessary.Idost foodswillcook
satisfactorilywithoutpreh~ating.
if youfindpreheatingis ncc~ssary,
watchthe indicatorIight,and put
foodin ovenpromptlyafterthe
lightgoesout.
@Alwaystirn ovenOFF before
removingfood.
@Duringbaking, avoidfrequent
door openings.Keep dooropen as
shortatime aspossibleif it is
opened.
@Cook completeovenmeals
insteadofjust one fooditem.
Potatoes,other vegetables,and
somedessertswill cook together
with amain-dishcasserole, ~meat
loaf, chickenor roast. Choose
foodsthat cook at the same
temperature and in approximately
the same time.
@Use residualheat in the oven
wheneverpossibleto finish
tooting casseroles, ovenmeals,
etc. Also add.rolls oxprecooked
desserts to warm oven,using
residualheat to warm them.
.. -
.--
—-
---.-—.-.—.-.—-...... ...
—-—--—-—-
-.
—-——.—v....
_..
r_——
..
..O 1
+
.,
o
“..-
.
*
**
Modelsm5m, M5UJ
*One su~ace unit ONindicator light on
Rfi5-ilJ, 4onRA513J(one overeach surface
unit control)
*“No ovenlight on RA511J
,/
@
Model
RB524J
@
e
1Modeland SerialNumbers i
2SurfaceUnitControls
3“ON” IndicatorLight/Lights
forSurfaceUnits
4OvenSetControl
5OvenTernpControl
6OvenCyclingLight
7AutomaticOven Timer,
Clockand MinuteTimer 14
23 ]36-in. 36-in.
Clock&
MinaTlrner
36-in. 36-in.
18-in. 18-in.
8Stay-UpCalrod@SurfaceUnit
(,Mayberaisedbutnotremoved
whencleaningunderunit.)
9Plug-InCalrod@SurfaceUnit
(Maybe removedwhencleaning
underunit.)
36-in.
18-in.18-in. 18-in.
23
22
22 44
22 @ @
26-in.
28-in.
4
10 Chrome-PlatedTrimRings
andPorcelainDrip Pans
11 Chrome-PlatedTrimRingsand
AluminumDripPans
I
I12 OvenVentDuct(Locatedunder
rightrearsurfaceunit.)
22 e
15
Q
I13 OvenInteriorLight(Comeson
automaticallywhendoorisopened.)
Q
I14 OvenLightSwitch @
I15 BroilUnit
e@
I16 l~akeUnit(Maybeliftedgently
forwipingovenfloor.)
2I2
/17 OvenShelves I
I18 Ovei~SheifSup~~orts(LettersA, B,Cand ‘
1Dindicalecookingpositionsforshelvesas
z-ecommcndedon cookingguides.)
QIQ
I20 StorageDrawer j~~
II I
—:
,
..
.
e
..
.
Model RS42J
(slide-In)
7..
.,:
.{
-,
-. a
.}
... ]2SurfaceUnitControls I10
103“ON” IndicatorLight/Lights
for SurfaceUnits
4OvenSetControl
22
15 e
,1 5 OvenTempControl
6Oven CyclingLight
I7AutomaticOven Timer,
Clock andMinute Timer
I8S&y-UpCalrod” SurfaceUnit
(Maybe raised but notremoved
when cleaningunder unit.)
9Chrome-Plated Trim Ringsand
AluminuinDrip Pans
10 Oven VentDuct (Located under
right rear surface unit.)
I11 OverIInterior Light (Comeson
Iautomaticallywhen door is opened.)
15
15
14
I
e
36-in.
18-in.
23 36-in. 36-in.
1$-in. 1$-in.
22 44
ee
4
22
22
L12 Oven Light Switch 15 @
I13 Broil Unil 20
I14 Bake Unit (Maybe liftedgently
for wiping ovenfloor.)
I15 Oven SheIves 2I2
15
15
16 Oven Shelf Supports (Letters A, B, Cand
Dindicatecooking positionsfor shelves
as recommended on cooking guides.)I
17 Broiler Pan and Rack
18 Storage Drawer
20
24
1
19 Anti-TipBracket
(See Installation Instrl]ctions) 3,5
=.,
“j
..-
1)
1
,
,0
Yoursurfaceunitsand controls
aredesignedtogiveyouaninfinite
choiceofheatsetiingsforsurface
unitcooking.
AtbothOFF andHIGH positions,
thereisaslightnichesocontrol
“clicks”atthosepositions;“click”
onHIGH marksthehighestsetting;
thelowestsettingisbetweenthe
wordsWARMafidOFF. Inaquiet
kitchen,youmayhear slight
“clicking”soundsduringcooking,
indicatingheatsettingsselected
arebeingmaintaind.
Switchingheatstohigher settings
alwaysshowsaquickerchangethan
switchingtolowersettings.
Step 1:Graspcontrolknoband
pushin.
Step 2: Turneither clockwiseor
counterclockwisetodesiredheat
setting.
control mustbe pushed intoset
only fromOFF position. when
control isinany position other
than OFF, it maybe rotated
without pllshing in.
Besureyouturn controltoOFF
whenyoufinishcooking.An
indicatorlightwill glowwhen
ANY heatonanysutiaceunitison.
Quickstartforcooking;
bringwatertobofi.
Fastfry,panbrofl;mair~ti
fastboilonlargeamount
offood.
Sauteandbrown;maintain
slowboilonlargeamou~~t
offood.
{;ookafierstartingat
HIGH; cookwithlittle
waterincoveredpan.
WARM Steamrice, cereal;
maintainserving
temperatureofmostfoods.
NmE:
1. AtHIGH, MED HI, neverleave
foodunattended.Boiloverscause
smoking;greasyspilloversmay
catchfire.
2. AtWA~, LOW,meltchocolate,
butteronsmallunit.
.—— —..
--—--———---------
-,
-
.....