manuals.online logo
Brands
  1. Home
  2. •
  3. Brands
  4. •
  5. Hotpoint
  6. •
  7. Range
  8. •
  9. Hotpoint RS734GN Installation instructions

Hotpoint RS734GN Installation instructions

.... ....., ......m.— —. .—.—.— ..——.—. . . .. —————
—.
--
-J
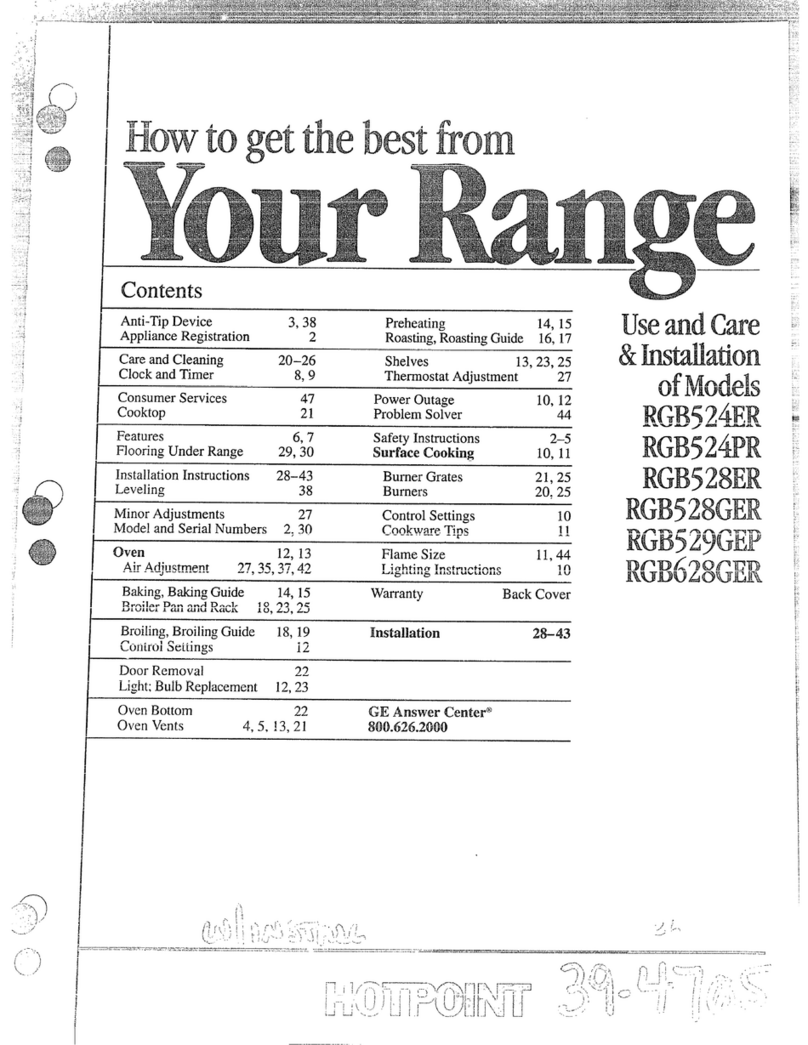
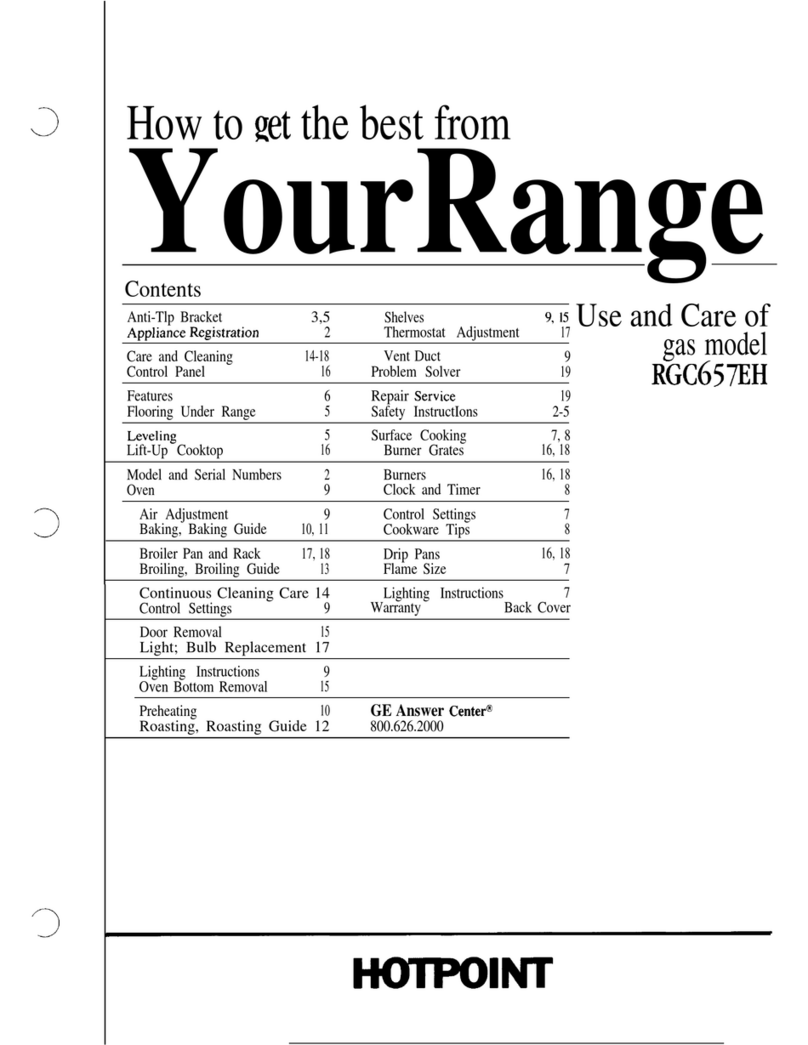
Howbgetthe best from
AluminumFoil 18 ProblemSolver 26
Anti-TipDevice 3SafetyInstructions 2-4
ApplianceRegistration 2SurfaceCooking 8-11
CanningTips 9ControlSettings 8
Care and Cleaning ‘20-25 CookingGuide 10,11
Clock/Timer 13 Cootiare Tips 10,11
useandcareof
models
RS734BN
B744GN
—
-,=....“
Consumer Services 27 Warranty Back Cover
Electronic Controls 13
Energy-SavingTips 5
Features 6,7
Model and SerialNumbers 2
Oven u
Babng, Bating Guide 14-16
Broiling, BroilingGuide 18,19
Control Settings 13,14
Door Removal 21
Light; Bulb Replacement 12,21
Preheating 5, 16
Roasting,RoastingGuide 17
Self-CleaningInstructions 22-24
Shelves 12,21 GE Answer ceRter@
Thermostat Adjustment 24 800.626.2000
—.——
..——. .—.—.
EI@Ip3iwhelpyou.@.
A
Beforewingyourrange? “
readthkbookcarefully.
Itis intendedtohelp youoperate
andmaintainyournewrange
properly.
Keepit handy for answersto your
questions.
Ifyoudon’tunderstandsomething
or need more help, write(include
yourphone number):
Consumer Affairs
Hotpoint
AppliancePark
Louisville,KY40225
Wrik down the model
~~~ s~~i~l nmberse
You’llfind themon alabelon
the front ofthe range behindthe
storagedrawer. See Features of
YourOven onpages 6and7.
These numbers are alsoon the
Consumer Product Ownership
RegistrationCard that came with
your range. Beforesendingin this
card, please write thesenumbers
here:
—-———-—
Model Number
Serial Number
Use these numbers in any
correspondence or ser~~icecalls
concerning your range.
~- you received
adamagedrange..*
Immediatelycontactthe dealer(or
builder)thai soldyoutherange.
Sal’e time and money.
Before you request
Sertiee o‘e
Checkthe ProblemSolveron
page26.It listscausesofminor
operatingproblemsthat youcan
correctyourself.
Ifyoll need service.8e
Toobtainservice, seethe
ConsumerServicespagein the
back ofthisbook.
We’reproud ofour service and
wantyouto be pleased. If for some
reasonyou are nothappywith the
serviceyoureceive, here are three
stepsto followfor further help.
FIRST, contactthepeople who
servicedyour appliance. Explain
why youare notpleased. In most
cases, thiswill solvethe problem.
NEXT, ifyou are stillnotpleased,
write allthe details-including
your phonenumber—to:
Manager, Consumer Relations
Hotpoint
Appliance Park
Louisville,Kentucky40225
FINALLY, if yourproblem is still
not resolved, write:
Major Appliance
Consumer Action Panel
~QNorth Wacker Drive
Chicago, Illinois 60606
@P#ace oven shelfindesired
positionwMe oven kcool, If
shelvesmust be han&ledwhen
hot, do not let pot holder contact
heating units in the oven.
/).”
.,,
!
.
-..”.....,......-—- .—. . . . . . . . .,.. ”.. .-. ..— .——.—
——— —..— .—,— ......
--
—..—
——
co~~erthe heatedportion ofthe
surfaceunit.
~Cookfresh vegetableswitha
minimumamountof waterin a
coveredpan.
@IVatchfoodswhen bringingthem
quicklyto cookingtemperaturesat
highheat. When food reaches
cookingtemperature, reduceheat
immediatelyto lowestsettingthat
willkeepit cooking.
@L~seresidualheat with surface
cookingwheneverpossible. For
example,when cooking eggsin
theirshell, bringwater and eggs
toboil, then turn knob to OFF
positionand covercoobare with
Iidto completethe cooking.
@Usecorrect heatfor cookingtask:
HI—forrapid boil (iftime allows,
do notuse high heat to start).
MEDIUM HI—quickbrowning.
k~ED—slowfrying.
J114RM—tofinishcooking most
quantities, simmer-double boiler
heat, and special for small
quantities.
LO—tomaintain serving
temperature ofmost foods.
QJVhen boiling water for tea or
coffee,heat only amount needed.
It isnoteconomical to boil a
containerfill of water for one
or twocups.
ovenCooting
@Preheatovenonlywhen
necessary.Mostfoodswillcook
satisfactorilywithoutpreheating.
If youfindpreheatingis necessary,
listenfor the bkep,andput foodin
ovenpromptlyafterthe ovenis
preheated.
~Alwaysturn ovenoffbefore
removingfood.
*During baking,avoidfrequent
dooropenings.Keepdoor open as
shortatime aspossibleif itis
opened.
~Be sureto wipeup excessspillage
beforestartingthe self-cleaning
operation.
@Cook completeovenmeals
insteadofjust one fooditem.
Potatoes,other vegetablesand
somedesserts willcook together
with amain-dishcasserole, meat
loaf, chickenor roast. Choose
foodsthat cook at the same
temperatureand in approximately
the same amountoftime.
@Use residud heat in the oven
wheneverpossibleto finish
cookingcasseroles, ovenmeals,
etc. Also add rolls or precooked
dessetis to warm oven,using
residualheat to warm them.
d
...--—....-— —.— .—
,
\“\v
-
-——_. —— —
-,
Explained
on page
21,25
——. 2
&a 1StorageDrawer
%& —
2ModelandSerialNumbers
25
3BakeUnit
4BroilUnit
.
.-
.—
.—
5OvenInteriorLight
8
6“ON” IndicatorLightforSurfaceUnits
8
21
7SurfaceUnitControls
8Lift-UpCooktop
(supportrodholdsituptosimplify
cleaningunderneath)
20,25
9ChromePlatedDrip Pans
=
—
8,20,25
10 Plug-InSurfaceUnits
11 OvenVent(locatedunderrightrear surfaceunit)
3
12 Anti-TipDevice
13, 14
13 oven CANCEL button
(pushittocancelanyovenoperation) 13,14
14
14 ElectronicControls
AutomaticOvenTimer
(turnsyourovenon andoffforyouautomatically)
OvenControlandTherrnostit
clock
Minute/SecondTimer
(letsyoutimeanykitchenfunction, evenwhen
theovenisin use)
15 Oven “On” Indicator
16 Electronic DisplayPanel
17 SetKnob
(letsyou setoventemperature, clocktimer
andHI or LO broil)
18 OvenLight Switch
(letsyou turn interior ovenlightonandof~
19 OvenShelf Supports
13,14
13
13
13,14
20 OvenShelves
(easily removedor repositioned onshelfsupports)
—
2~~~movableoven Door
22 Oven Door Gasket
.—
23 Br~i~erPa~~and ~a~k
3
/,.
,.~..—.’:-—
...
L:.’r
P=%.,
~:-“-’
:1
!. ,:
... .“
,.J’
12,21,22
21
22,25
18,21,25
,=
j
—. —. ....—.—.—
—.—..— —..
,,,.
‘
. .
..,—.——.—.—
surfacecooHngtith
IntititeHeatControk
Yoursurfaceunitsandcontrols
aredesignedtogiveyouaninfinite
choiceofheatsettingsforsurface
unitcooking.
AtbothOFFandHI positions,there
isaslightnichesocontrol“clicks”
atthosepositions;“click”onHI
marksthehighestsetting;thelowest
settingisbetweenthe wordsLO and
OFF.In aquietMtchen,youmay
hearslight“clicking” sounds
duringcooking,indicatingheat
settingsselectedarebeing
maintained.
Switchingheatstohigher settings
alwaysshowsaquickerchangethan
switchingtolowersettings.
HowtosetthecontroIs
(
Step 1:Grasp controlknoband
pushin.
Step 2: ~rn eitherclockwiseor
counterclockwisetodesiredheat
setting.
control mustbe pushedintoset
Ody fromOm position.when
contF@R
isinany positionother
than Om, it maybe romted
tithout pushingin.
Besureyouturn controlknobto
OFF when youfinishtooting. An
indicatorlightwillglowwhen
ml~eaton.anysufice unitison.
CooldwGuidefor
Usiu Heatsettings
HI—Q~~icks~rt forcooking;bring
waterto boil.
m~~m HI(settinghalfway
betweenHI and MED)—Fdstfry,
panbroil; mai~]tainfastboilon
largeamountoffood.
mD—Saute andbrown; maintain
slowboil on largeamountoffood.
W- (sitting halfwaybetween
MED and LO)—Steanlrice,
cereal; maintainserving
temperatureofmostfoods.
LO–Cook after startingat HI;
cook with littlewaterin covered
pan.
NmE:
1. AtHI and MEDIUM HI
settings,never leavefood
unat~nded. Boiloverscause
smoting; greasy spilloversmay
catch fire.
2. AtWAW and LO settings,
melt chocolateand butter on small
surfaceunit.
.4. Yes,butonlyusecookware
.designedforcanningpurposes.
Checkthe manufacturer’s
-.
—instructionsand recipesfor
preservingfoods.Besurecanner
isfiaf-bottomedand fitsoverthe
centerofthe surfaceunit. Since
canninggenerateslargeamountsof
steam,be carefulto avoidburns
fromsteamor heat. Canningshould
onlybedone on surfaceunits.
Q. can ICovermy drip pans with
foil?
A. No. Clean asrecommendedin
CleaningGuide.
A. Cookwarewithoutflatsurfaces
isnotrecommended.The lifeof
the surfaceunitcanbe shortened
andtherangetopcan be damaged
fromthehighheat neededforthis
typeofcooking.
Q. Why am Inotgettingtheheat
1need from my surfaceunits
eventhough I havetheknobs on
therightsetting?
A. After turningsurfaceunitsoff
andmaking surethey are cool,
checkto make surethatthe plug-in
unitsare securely fastenedintothe
surfaceconnection.
A. Becausethe surfaceunitisnot
flat. Make surethatthe “feet” on
thesurfaceunitis sittingtightlyin
the rangetop indentationandtlIe
reflectorring isflaton the range
surface.
A. If yousetthe surfaceunithigher
thanrequired forthe cookware
material, and leaveit, tilefinish
maysmoke, crack, pop orburn,
dependingon the typeofcookware.
Also,cookingsmallamountsofdry
foodor cookingat high neatfor
longperiods maydamagethe
cookware’sfinish.
HomeCanningmps
Potsthat extend beyondoneinch of
cookingelement’strim ring are not
recommended formost surface
cooking. However,when canning
with water-bath or pressure canner,
large-diameterpotsmay be used.
This isbecause boilingwater
temperatures (evenunder pressure)
are notharmful to cooktop surfaces
surrounding the surface units.
HOWEVER,DoNOTUSE
LARGE-DIAMETER CANNERS
OR OTHER LARGE-DIAMETER
Pms FOR FRmG OR BolLmG
FOODS QTHER THAN WATER.
lVlostsyrup or sauce mixtures—
Qnd a~~types offrying—cook at
temperatures much higher than
[~oili~~gwater. Such temperatures
could eventually harm cooktop ,
surfaces surrounding the surface
~1[~~~~.
observeFollowingPoints
incanning
1. Be sure the canner fitsoverthe
center ofthe surfaceunit. If your
rangeor itslocationdoes not allow
the canner to be centered on the
surfaceunit, use small-diameter
potsfor good canningresults.
2. Flat-bottomed canners must
be used. Do not usecanners with
flangedor rippled bottoms (often
foundin enamelware) because they
don’tmake enough contact with the
surface unit and taketoo long to
boil water.
mGHT $VRONG
3. When canning, use recipesand
procedures from reputablesources.
Reliablerecipes and procedures are
availablefrom the manufacturer of
yourcanner; manufacturersof
glassjars for canning, such as Ball
and Kerr; and the United States
Department ofAgriculture
Extension Service.
4. Remember that canning is
aprocess that generates large
amountsof steam. To avoid.burns
from steam or heat, be careful
when canning.
N~E: If your range is being
operated on lowpower (voltage),
canning may take1onger than
expected, even though directions
havebeen carefully followed. The
process time will be shortened by:
(1)using apress~~ec~~~e~,and
(2)starting with HOT tap water for
~asiesthe;ing oflarge quantities
ofwater.
—.. ——.——-.—-.
—..-
-.
..
—..-.. .—..——
2. Toconservethemostcooking
v
HI—Highestsetting.
N~DIW HI—Settinghalfway
betweenHI and MED.
NIED—Mediumsetting.
}VAM—Setting halfwaybetween
uenergy,pansshouldbe flaton the
bottom,havestraightsidesand
tightfittinglids. Matchthe sizeof
the sauccparttothe sizeofthe
surfaceunit.Apanthatex~e~]ds
morethanan inchbeyondtheedge
ofthedrip parttrapsheat which
causesdiscolorationrangingfrom
blueto dark grayon chrome drip
pans.
1, Use~nediunl-orheavy-weight
cookware.Aluminumcookware
conductsheat fasterthan other
metals.Cast ironandcoatedcast-
ironcookwareisslowto absorb
heat,butgenerallycooksevenlyat
Lo to M~D settings.Steelpans
mayaopkunevenlyif not
combinedwith othermetals.
MED andLO.
LO—Lowestsetting.
Dlrectkmsand Setting
toStartCooking 1
SettingtoComplete
Cooking
WARMor LO, thenadd cereal.
Finish timingaccording
topackagedirections.
MED. Cook 1or 2minutes
tocompletelyblendingredients.
WARMto maintaingentlebut
steadyperk.
WARM.Cookonly 3to4
minutesfor softcooked;
15minutesfor hard cooked.
Continue cookingat MEDIUM HI
until whitesarejust set, about
3to 5more minutes.
WARM,theo addeggs. When
bottoms ofeggshavejust set,
carefilly turn overto cook other
side,
WARM. Carefiliy add eggs.
Cook uncoveti about S
minutes at MEDIUM HI.
MED. Addeggmixtum.
Cook, stirring todesired
doneness.
Cookware Comments
Food
Cereal
Cornmeal, grits,
oatmeal H1.Incoveredpan, bring
waterto boilbeforeadding
cereal.
HI. Stir togetherwateror
milkandcocoa ingredients.
Bringiustto aboil.
Cerealsbubbleandexpandas
theycook; use largeenough
saucepanto preventboilover.
Covered
Saucepan
Milkboils overrapidly.Watchas
boilingpoint approaches.
Cocoa Uncovered
Saucepan
Percolate8to 10minutesfor
8CUPS,less for fewercups.
Coffee
Eggs
Cookedin shell
Percolator HI. Atfirst perk, switch
heatto WARM.
Covered
Saucepan HI. Covereggswithcool
water,Coverpan, cook
until s~aming.
MEDIUM HI. Melt butter, add
eWs andcoverskillet. If youdo not coverskillet, baste
eggswith fattocook tops evenly.
Fried sunny-side-up Covered
Skillet
Fried overeasy Uncovered
Skillet HI. Melt butter.
Removecookedeggswith slotted
spoonor pancaketurner.
Poached Covered
Saucepan HI. Incoveredpanbring
water toaboil.
Eggscontinue to set slightly after
cooking. For omelet, do not stir
last fewminutes. When set, fold
inhalf.
Fresh fruit: Use 1/4to 1/2cup
waterper pound offruit.
Scrambled or omelets Uncovered
Skillet HI, Heat butter until light
golden incolor.
Covered
Saucepan HI. Incoveredpan bring
fruit and water to boil. WARM. Stir occasionally and
check for sticking. Dried fruit: Use water as package
directs. ~~medepends on whether
fruit hasbeen presoaked. If not,
allow more cookin~time.
Meats,Poultry
Braised: Pot roasts of
beef, lamb or veal;
pork steaksand
chops
WARM. Simmer until fork
tender, lMeatcan be seasoned and floured
beforeit is browned, if desired.
Liquid variations for flavor cou!d
be wine, fruit or tomatojuice or
meat broth.
Timing: Steaks ito 2-inches: 1to
2hours. Beef$tew: 2to 3hours.
Pot Roast: 21/2to 4hours.
Panfrying is best for thin steaks
andchops. If rare is desired,
preheat skillet before adding meat.
Covered
Skillet HI. Melt fat, theq add
Meat. Switchto MEDIIJM HI to
brownmeat. Add water or
other liquid.
Pan-fried: Tender
chops: thin steaks up
to 3f4-inch; minute
steaks; hamburgers;
franks and sausage:
[bin ilsh fillets
Uncovered
Skillet HI. Preheat skil!et, (hen
grease iightly. MEDIUM HI or MED. Brown
and cook todesired donevess,
turning overas n=ded.
.—...——.—
.———. —.— k
., RiGHT WRONG
clta-nfromaccurnulaiedgr-ease.
—— —
DirectionsandSetting
toStartCooking SettingtoCornplRte
Cooking
INARM.Coverskilletand
cookuntiltender.
Uncoverlastfewminutes.
Comments
.Forcrispdry chicken,coveronly
afterswitchingtoWARMfor 10
minutes.Uncoverandcook,turning
occasionally10to20minutes.
Amore.attention-freemethod
istostartandcookat MED.
Food
FriedChicken
Cookware
HI. Meltfat. Switchto
MEDIUM HItobrown
chicken.
Covered
Skillet
MEDIUM HI. Cook,turning
overasneeded.
Panfriedbacon Uncovered
Skillet HI. Incoldskillet,arrange
baconslices. Cookuntil
startingto sizzle.
HI. Meltfat. Switchto
MEDtobrownslowly. Meat maybebreadedor
marinatedin saucebeforefrying.
Covered
Skillet WARM.Coverandcook
untiltender.
Sauteed:Less tender
thinsteaks(chuck.
round,etc.); liver;
thickor wholefish
Simmeredor stewed
meat;chicken;corned
beet smokedpork:
stewingbeet tongue;
etc.
Nlekingchocolate,
WARM.Cookuntilfork
tender.(Watershould
slowlyboil.)For verylarge
Ioads,mediumheat may
beneeded.
Addsaltorotherseasoning
beforecookingif meathasnot
beensmokedorotherwise
cured.
Covered
DutchOven,
Kettleor
Large
Saucepan
HI. Covermeatwith water
andcoverpanor kettle.
Cookuntilsteaming.
Whenmeltingmarshmallows,add
milkorwater.
LO.Allow 10to15minutesto
meltthrough. Stirtosmooth.
Small
Uncovered
Saucepan.
Usesmall
surfaceunit
-butter, marshmallows
‘v”
Cwk 2to3minutesperside.Pancakesor
~renc~toast Thickbattertakesslightlylonger
time, Turnpancakesoverwhen
bubblesrise tosurface.
Skilletor
Griddle MEDIUM HI. Heatskillet 8to
10minutes.Greaselightly.
Pasta
Nc>odlesor spaghetti HI. Incoveredkettle,bring
saltedwatertoaboil, uncover
andaddpastaslowlyso
boilingdoesnot stop.
MEDIUM HI. Cookuncovered
unti1tender.For large
amounts,HI maybe
neededtokeepwaterat
rollingboilthroughout
entirecookingtime.
MEDIUM HI forfoodscooking
10minu~sor less.MED for
foodsover10minutes.
WARM.Tofinishcooking.
Uselargeenoughkettleto
preventboilover.Pastadoubles
insizewhencooked.
Covered
LargeKettle
orPot
Cookershouldjiggle2to3times
perminute.
Pressure
Sookeror
~anner
HI. Heatuntil firstjiggle is
heard.
I)ressur-eCooking
HI. Bringjust toboil. Stir frequentlytoprevent
sticking.
Jncovered
lauccpan
HI.Measure 1/2to 1inch
~vaterinsaucepan. Add
;altandpreparedvegetable.
[ncoveredsaucepanbring
oboil.
HI. Measure waterandsalt
asabove.Addfrozenblock
ofvegetable.Incovered
saucepanbring toboil.
HI. Inskillet melt fat.
MED. Cook 1pound 10
to30or moreminutes,
dependingontenderness
ofvegetable.
Uncoveredpanrequiresinore
waterandlongertime.
:overed
;aucepan
Brealcup or stir asneeded while
cooking.
;overed
aucepan \3~ARM.Cook accordingto
timeonpackage.
MED. Addvegetable,
Cook untildesired
tendernessis reached.
LO. Coverandcook
accordingtotime.
Turnoveror stir vege&ableas
necessaryforevenbrowning.
Incovcrcd
killct
S:ll]tccd:Onions:
~r~’cnpeppers;
nl:lshroorns:cc!c]y;C(C.
_-...-..— Rice andgrits triple involume
after cooking. Timeat Lo.
Rice: 1cup rice a~ld2cups
water-25 minutes.
Grits: 1cup grits and4 cups
water- do nlinutc~.
‘]
3
.. ,.3:-_–.—....——- ],]
—.. .—. ——
—- .. ... ....- ...—.—-—
..—. —...
-usingYouroven
BeforeusingYouroven
1. Look atthecontrols.Besure
youunderstandhowto setthem
properly.Read overthedirections
forthe ElectronicControlssoyou
understandhowto usethem.
2. Check oveninterior. Look at
theshelves.Takeapractice run at
removhgandreplacingthemproperiy,
to givesure, sturdy SUppOrt.
3. Readoverinformationand tips
thatfollow.
4. Keepthis book handy soYOUc?n
referto it, especially duringthe
firstweeksofgetting acquainted
with yourrange.
ovenshelves shelfPositiom
The ovenhas fourshelfsuppotis—
A(bottom),B, Cand ~(t~p).
Shelfposi~ion~forcooking-are
sug~estedonBakingand ~oasting
pages.
The shelvesare designedwith stop-
locksso whenplaced correctly on
the shelfsupports,theywill stop
beforecoming completelyoutof
the ovenand will nottilt when you
are removingfoodfrom them or
placingfood on them. oven Light
When placingcookwareon ashelf,
pullthe shelf out tothe “stop” Use the switchon the controlpanel
position. Place the cookwareon to turn the Iighton and off.
~heshelf, then slidethe shelfback
intothe oven, This willeliminate
reaching intothe hot oven.
To remove the shelves from the
oven,pullthem towardyou, tilt
frontend upwardandpullthem out.
To replace,place shelfon shelf
support with stop-locks(curved
extensionof shelf) facingup and
towardrear ofoven.Tiltup front
and push shelf towardback ofoven
untilit goes past “stop” on oven
wall.Thenlowerfrontofshelfand
pushitallthewayback.
-_._—,..——--- —-
Theword “ON” is displayed
whenBAKEor BROIL buttonis
energized.It goesoutwhen oven
CANCELbuttonispushedor when
ovenshutsoffautomatically.
Theovenoperationis controlled
electronically.The following
instructionstellyouhow to operate
theelectroniccontrols.
1. Push CLOCK button.
a- Turn SET knobto correct time
-f day.Clock isnow set. The clock
mustbe set to thecorrect time of
ayfor accurate automaticoven
Tosetthe
Minute/seeondmer
1. Push TIMER button.
2. Turn SET knobto desired
amountoftime (upto 9hours and
59 minutes). The Minute/Second
Timer willbegin to countdown
within afewseconds.
3. Whentimeisup,the.End-of-Cycle
Tone(3 longbeeps) will soundand
the displaywill again showthe time
ofday.
Note: The Minute/SecondTimer is
areminderonly md wH1notopemte
the oven.
Youcan use the Minute/Second
Timer whether or not the ovenis
being used. The Minute/Second
Timer does not interfere with oven
operations.
TO ~~~e~l ~~~ ~mer
Push and hold TIMER button for
three seconds. This will clear the
Minute/Second Timer function.
...- ..—
....-.
ToBake
1. PushBAKEbutton.
2. ~rn SET knobuntildesired
temperatureisdisplayed.
Aone-secondbeep will sound
whentheovenhas preheatedtoand
stabilizedat selectedtemperature.
3. When finishedbaking,push
ovenCANCEL button.
Note: Torecall whattemperature
youhaveselectedwhile therising
temperatureisbeing shown,push
andholdthe BAKEbutton. The
actualoventemperaturewillbe
shownafter afewseconds.
Youcan push the CLOCK button
to displaytime ofdaywithout
canceling the ovenoperation.
r
Youcan changethe selected
temperatureat any timeby
pushingthe BAKEbutton and
turningthe SET knob.
ToBroil
1. Push BROIL button.
2. Turn SET hob untilyour
choiceofHI BROIL or LO BROIL
isvisiblein the display.
When finished broiling, push the
ovenCANCEL button.
(coutinuedrzextpage)
-
—
Automaticovenmmer
Theoventimer willautomatically
startand stopyourovencookingor
self-cleaningoperationforyou,
For automatic ovencooking:
1. PushCOOK TIME button.
2. TurnSET knobto setlengthof
bakingtime.
3. PushBAKEbutton.
4. T~lrnSET knobto setdesired
temperature.
Whencook timeis reached, the
End-of-CycleTonewill soundand
theovenwill turn off.
During automatic Cooting:
~Youcanpush the S’IOPTIME
buttonto find outwhen theEnd-of-
CycleTonewill sound andtheoven
willturn off.
@Youcan push the CLOCK button
todisplaytime ofday without
canceling theovenoperation.
ToDelaySmrtingan
Aummatie ovenOpemtion
If adelayedCookingoperation
isdesired:
1. Push COOKTIME button.
2. Setlengthofbakingtimewith
SET’knob.
3. Push STOPTIME button.
4. ~rn SET knobtotime ofday
whenbaking shouldbe completed.
Do not setastoptimethat is less
than the lengthofcookingtime
plusthe current timeof day.
5. Push BAKEbutton.
6. ~rn SET knobto desired
temperature.
When stoptime isreached, the
End-of-CycleTonewill soundand
the ovenwill turn off.
caution: Never let food sit in the
Tones
.m.
-
End-of-CycleTone(3 loIIgbeeps—
onesecondon, onesecondof~:
showsthat atimedovenoperation
l~asreached STOPTIME or that
the Minute/SecondTimer l~as ~;
counteddown.
Attention Tonti(seriesofshort
beeps, l/4-secondo~~,l/4-seconcl
off, untilproper responseisgiven):
will soundifovenhas onlybeen
partiallyprogrammed.Forexample,
if youhaveselectedacooktimebut
notemperature, youwill hear the
AttentionToneuntilyouselecta
~emperatureorpush~A.NCEL.
Notification Tone(single,one-
secondbeep): indicatesovenhas
stabilizedat selectedtemperature.
Key Tone (single, I/lO-second
beep): soundswhen anybutton
ispushed.
cooking star~. Roomtemperature
is idealfor the growth ofharmful
bacteria. Be sure ovenlightis off
becauseheat from the bulb will
speed bacteria growth.
Note: Youcan pushthe S~P
TIME buttonto find out when the
ovenwill turn off. Push and hold
the COOK TIME buttonto find out
when the ovenwillturn on.
If adelayed self-cleaning oven
operation is desired, see page23.
Function Error Tone (series of
ovenfor more thanl4houm before very rapid beeps, I/$-secondon,
Howtochange
aRogrm
When afinction has been
entered, you can recall what has
been programmed bypushing
thecorrespondingfinction
button.Themessagesinthe
displayshowyouwhichfimction
iscurrentlybeingdisplayed.
Whilethefunctionisdisplayed,
youcanchangeitwiththeSET
bob. Youcanchangeany
programmedfunctionatany
time.
l/4~sec~ndoffi: displaywill showa
failurecode. CancelFunctionError
Tonebypushingthe CA1qCEL
button, If the FunctionError ‘Tone
startsagah [afterabout15seconds),
cdl forservice.Disconnecttherange
electrical supplyto stopthe tone.
If the functionerror occurred
while youwere programming the
Electronic Control, push the
CANCEL buttonand try again.
To cancel the Tonee*QIf you.don’t
wantan audibletonewhen youpush
abutton, youcan eliminatethe I<ey
Toneby pushing and holding the
CANCEL button untilyou hear a
short beep (in approximatelytwo
.
seconds).Toactivatethe toneagiin,
push and hold the ICANCELbutton
‘
once more untilyouhear ashort
beep. Canceling or activatingtile
toneshouldody bedonewhenthere
isnoovenoperation programmed.
Pushing the CANCEL bufio~~will
clear all functions excepttl~eClock
and Minute/Second Ti~mer.
!, —...— ..—.——-—..
!i~l~?to~~t~OUF~~~~~
ffjrBaiting
i. Position[heshelfor shelvesin
theoven. If cookingon twoshelves
atthesametime, staggerthepans
fi}rbestheat circulation,
2. Closeovendoor.
3. Pushthe BAKEbuttonand
turnthe SET knobuntildesired
[temperatureisdisplayed.If
preheatingis desired, do notput
foodin the ovenuntilaone-second
beepsoundstotellyou the ovenis
preheated.
4. Open door andplace foodin
ovenon center ofshelf. Allowat
least2inchesbetween edgeof
bakewareand ovenwallor adjacent
cookware.
5. Close ovendoor.
6. Check foodfor donenessat
minimumtime on recipe. Cook
longerif necessary.Push CANCEL
buttonand removefood.
shelf Positiom
hiost baking isdone on the second
shelfposition (B)from the bottom.
FVhenbaking three or four items,
usetwo shelvespositioned on the
second and fourth sets of supports
(B& D) from bottomof oven.
Bakeangel food cakes on first shelf
position (A) from bottom ofoven.
Baking mps
~FOI1OWatestedrecipe and
measurethe ingredientscarefu~ly.
1fyouare usingapackage mix,
f{)llowlabel directions.
@Donotopentheovendoorduring
abakingoperation—heatwillbelost
andthebakingtimemightneedto
beextended.Thiscouldcausepoor
bakingresults.Ifyoumustopenthe
door,openitpartially-only 3or4
inches–-andcloseitasquic~y as
possible.
~DOnotdisturbtheheatcirculation
intheovenwiththeuseofaluminum
foil.Iffoilisused,placeasmall
sheetofit, about10by 12incl~esat
themost, onalowershelfseveral
inchesbelowthefood.Donot place
foil012the ovenbottom.
~0~~0~ ~~ti~~ Problem
andPossibleSolwtiom
Pms
Burningaround
edges
e~dge~Ofcrusttoothin.
oInc~rre~tbakingtemperature.
Bottonl Crustsoggyand unbaked
eA~~owcrustand/orfillingtoCOO1
sufficientlybeforefillingpieshell.
@
Fillingmaybe toothinorjuicy.
@
Fillingallowedto standinpie shell
beforebaking. (Fillpieshellsand
bakeimmediately.)
~Ingredientsandproper measuring
affectthequalityofthecrust. Use a
testedrecipe andgoodtechnique.
Makesurethereare notinyholesor
tearsinabottomcrust.“Patching”
apiecrustcouldcausesoaking.
Mefillingruns over
~Top and ~)o~torn crust not we~~
sealedtogether.
oEdgesofpiecrust notbuiltUP
highenough.
~TOOmuch filling.
~Check sizeofpieplate.
Mstry istough; ‘crustnot flaky
~Toomuch handling.
QFat toosofior CUtintoo fine.
Rolldoughlightlyandhandleas
littleaspossible.
o‘cTSiH~warpedpans. !
cakes Cracking011tap
*~velltemperaturetoo tiigh.
Q~atter toothick,followrecipe
orexactpackagedirections.
oCheckforpro~e~ she]fpositiOn.
@Checkpansizecalledforinrecipe.
@Impropermixingc}fcake.
Caka falls
eToomuchSllofiening,sugaror
liquid.
~Checkleaveningagent,baking
powderor bakingsodatoassure
freshness.Makeahabittonote
expirationdatesofpackaged
ingredients.
*Cakenotbakedlongenoughor
bakedatincorrecttemperature.
eIf addingoiltoacakemix, make
certaintheoilisthetype and
amountspecified.
crustishard
o~heck temperature.
@~hec~ shelfposition.
Cake has soggylayer or streak at
bottom
e~nde~ixi~g ingredients,
~~h~rteningtoosofiforproper
creaming.
s~00much liquid.
eOOmS ~B~SC[R~S
Doughy center; heavy crust on
surface
@Check temperattlre.
@Check shelfposition.
~~o~~owbating instructions
carefullyas giveninreliable recipe
or onconveniencefood.package.
sFlat cookie sheetswill givemore
evenbakingresulk. Don’tov~rc~awd
foodsona~aking sheet.
.—..— —.- —.—-..-———-----, ---
.—
...-—.—— .—
.-..——.——.- —. -—
B~akiHlgGuide
..
1.Aluminurnpanscgnductheat 2. Darker non-shinyfinishesand
quit.tiy,Formostconventional glasscookwaregenerallyabsorb
bating,light,shinyfinishesgivebest heat, whichmayresultindry,crisp
resultsbecausetheyhelpprevent crusts.Reduceovenheat25”F.if
overbrowning,Forbestbrowning lightercrustsaredesired.Mpid
results,werecommenddullbottom browningofsomefoodscanbe
surfacesforcakepansandpieplates. achievedbypreheatingcastiron
3.Preheatingtheovenisnotalw~ys
necessary,especiallyforfoods
whichcooklongerthan30to40
minutes.Forfoodwithshort
cookingtimes,preheatinggives
bestappearanceandci-ispn~~~.
4. Opentheovendoortocheck
foodaslittleaspossibletoprevent
unevenheatingandtosaveenergy.
cookware.
..—
comments
Shelf
Wsition
B,C
B
B
B
B
B
B
A, B
B
B
oven
Temperature
400°-4750
350°-4000
400°-4500
350°
400°-4250
375°
350°-3750
375°-4250
375°-425°
350°-3750
Time,
Minutes
15-20
20-30
20-40
45-55
20-30
45-60
45-60
45-60
10-25
20-30
Food Con@itter
Bread
Biscuits(!4-in. thick) Canned,refrigeratedbiscuitstake
2to4 minuteslesstime,
ShinyCookieSheet
ShinyMetalPanwith
satin-finishbottom
CastIronorGlass
ShinyMetalPanwith
satin-finishbottom
ShinyMetalMuffinPans
DeepGlassorCastIronCups
Coffeecake
Cornbreadormuffins
Gingerbread Preheatcastironpanforcrispcrust.
Decreaseabout5minutesformuffin
mix,or bakeat450°F,for25minutes,
thenat350°F,for 10to 15minutes.
Muffins
Popovers
QuickIoafbread
Yeastbread(2loaves) MetalorGlassLoafPans
Metalor GlassLoafPans Dark metalor glassgivedeepest
browning.
Forthinrolls,ShelfBmaybeused.
Forthin rolls, ShelfBmaybe used.
Plainrolls
Sweetrolls
Cakes
ShinyOblongorMuffinPans
(withoutshortening)
Angelfood
Jellyroll AluminumTubePan
MetalJelly RollPan
Metalor CeramicPan
325°-3750
375”-400°
325°-3500
30-55
1o-15
45-60
Two-piecepanisconvenient.
Linepanwithwaxedpaper.
A
B
A
Sponge
Cakes Metalor CeramicPan
ShinyMetalMuffinPans A, B
B
A, B
B
B
B
B,C
B,C
B,C
B,C
B
B
B
A
B
A, B
B
B
325°-3500
350°-3750
275°-3000
350°-3750
350°-3750
350°
325°-3500
350°-4000
400°-4250
375°-4000
350°-4000
300°-3500
325°
400°-4250
325°-3500
400°-4250
400°-4250
450°
325°-4000
325°-3750
300°-3500
45-65
20-25
2-4hrs.
20-35
25-30
40-60
Bundtcakes
Cupcakes Paper linersproducemoremoist
crusts.
Use300°F,andShelfBforsmallor
individualcakes.
Metalor GlassLoafor
rubePan
~hinyMetalPanwith
satin-finishbottom
ShinyMetalPanwith
satin-finishbottom
MetalorGlassLoaf Pans
Fruitcakes
Layer
Layer,chocolate
Loaf
Cookies
Brownies
Drop
Refrigerator
MetalorGlassPans
CookieSheet
CookieSheet
CookieSheet
25-35
10-20
6-12
7-12
Barcookiesfrom mixusesametime.
UseShelfCand increasetemp.
25°F.to50°F.formorebrowning.
Roffc~or siiced
Pruihs,
OtherDesserts
Bakedapples
Custard 30-60
30-60
50-90
45-70
15-25
40-60
40-60
12-15
60-90
30-60
30-75
Glassor Metal Pan
GlassCustard Cupsor Casserole Reducetemp.to 300”F.forlarge
custard. Cookbreador ricepudding
with custardbase 80to90minutes.
I(setinpanof hotwater)
Puddings,Rice Glass Custard Cupsor
andCustara Casserole
fies
Frozen IFoilPanonCaokie Sheet Largepiesuse400”F.andincrease
time,
Toquicklybrownmeringue, use
400”F.for 8to 10minutes,
Custard fillingsrequire lower
temperature. longertime.
.Meringue ISpreadtocrust edges
Onecrest Glass or Satin-finishMetal
Twocrust Glass or Satin-finishMetal
Pastryshell Glass orSatin-finish Metal
?]liscellaneous
Bakedpotatoes Set onOvenShelf
Scallopeddishes Glassor Metal Pan
souffles Glass
—
B
B
B
Increasetimefor largeamou]lt
or size.
... . ! . . . . . . bQ.-_.......A=—.*. -,- .e%- x....——-——...———
—-
.—.
.. ....—_
..
q~:-~ ~jt~stillgiscookingbydry heat.
.*~$~ .under meator poultry canbe
roasteduncoveredin youroven.
spatteringto aminimum. When
roasting,it is notnecessaryto sear,
baste,coveror add watertoyour
meat. Roastingiseasy,just follow
thesesteps:
Step 1:Positionovenshelfat
secondfrom bottomposition(B)
forsmallsize roast (3 to 5lbs.) and
atbottomposition (A) for larger
roasts.
RoastingGuide —
‘Fy~
bleat
Tendercuts; rib, highquality
sirloin tip, rump or top round*
Lambleg or bone-in shoulder*
\bal shoulder, leg or loin*
R)rk loin, rib or shoulder*
[;:~nl,pre-cooked
1+:irn,raw
‘For boneless rolled roasts over 6-inches
thick. add 5to 10minutesper lb, to times
gil.cnabove.
!]{)llltry
C-hickenor Duck
~-!lickcnpieces
I’i]rkcy
.—.
Step 2: Check weightofroast.
Placemeatfat-side-upor poultry
breast-side-uponroastingrack ina
shallowpan. The meltingfatwill
bastethemeat. Selectapan as
closetothe siie ofthemeatas
possible.(Broilerpan witi rack isa
goodpan for this.)
Step 3: Push BAKEbuttonand
turn SETknob untildesired
temperatureisdisplayed.Checkthe
RoastingGuidefortemperaturesand
approximatecookingtimes.
Oven
Temperature
325°
325°
325°
325°
325°
325°
323°
350°
325°
Step 4: Mostmeatscontinueto
coo-kslightlywhilestandingafier
beingremovedfromthe oven.
Standingtimerecommendedfor
roastsis 10to 20 mintltes.This
allowsroaststo firm up andw.zkes
themeasierto carve. lfiternal
temperaturewill riseabout5“to
IO”F.;tocompensatefortemperature
rise, ifdesired, removeroast from
ovenwhen the internaltemperature
isat 5°to 10°F,lessthan the
temperatureshownon the Roasting
Guide.
RozenRoash
Frozenroastsofbeef, pork,
lamb, etc,, can be startedwithout
thawing,but allow 15to 25 minutes
additionaltime per pound (15
minutesadditionaltime per pound
for roastsunder 5pounds, more
time forlarger roasts).
Thaw mostfrozenpoultry before
roastingto ensure evendoneness.
Somecommercial frozenpoultry
can be cooked successfullywithout
thawing.Followdirectionsgiven
onpacker’slabel.
Approximate Romting Time
Doneness in Minutesper Pound
Rare:
Medium:
WellDone:
Wre:
Medium:
WellDone:
WellDone:
WellDone:
ToWarm:
Well Done:
3to5-lbs.
24-33
35-39
40-45
21-25
25-30
30-35
35-45
35-45
6to $-lbs.
18-22
22-29
30-35
2~-23
24-28
28-33
30-40
30-40
17-20minutesper lb. (any weight)
Under 10ibs. 10to 15-lbs.
27-35 24-27
WellDone:
Well Done:
Well Done:
3to 5-lbs. over 5ibs.
35-4@ 30-35
35-40
10to 15-ibs. over Blbs.
18-25 15-20
130”-140°
150°-160’
170°-1850
130°-1400
150°-1600
170°-1850
170°-180°
170°-1800
115°-1250
—
—.—..———— .——.—.— -,...”..-
...————. ————
Broilingiscookingfoodbyintense
radiantheatfromtheupperunitin
theoven.Mostfishandtendercuts
ofmeatcanbebroiled.Followthese
stepstokeepspatteringand
srnotingtoaminimums
Step 1:Ifmeathasfator gristlenear
edge,cutvetiical slashesthrough
bothabout2“apart. Ifdesired, fat
maybetrimmed, leavinglayer
about1/8”thick.
Step 2:Placemeatonbroilerrack
inbroilerpan thatcomeswith
range.Alwaysuserack sofatdrips
intobroilerpan; otherwisejuices
maybecomehotenoughtocatchfire.
S&p3:~sition shelfonrecommended
shelfpositionassuggestedinBroiling
Guide~noppositepage.Mostbroiling
isdoneonDposition.
—
Step 4: Leavedoorajarafewinches
(exceptwhen broilingchicken).
Thedoor staysopenbyitself, yetthe
propertempera~re ismaintainedin
theoven.
Step 5: Press theBROILbuttonand
turn theSET knob untilyourchoice
ofHI BROILor LO BROILis
displayed.Note: Chicken and ham
are broiled atLO BROIL inorder to
cook foodwithout over-browningit.
-—
—
Step 6:Turn foodonlyonceduring
cooking.Timefoodsforfirstside
perBroilingGuide.
Turnfood,thenusetimesgivenfor
secondsideas aguidetopreferred
doneness.(Wheretwothicknesses
andtimesare giventogether,use
firsttimesgivenforthinnestfood.)
Step %When finishedbroiling,
pushtheCANCELbutton. Serve
foodimmediately,andleavepan
outsideoventocoolduringmeal
foreasiestcleaning.
use of Aluminum Foil
/
1. Ifdesired, broilerpan maybe
linedwith foil, andbroiler rack may
becoveredwith foilfor broiling.
ALWAYSBE CERTAIN~MOLD
FOIL THOROUGHLY m
BROILER WCK, AND SLIT
FOIL ~CONFORM WITH
SLITSIN RACK. Broiler rack is
designedto minimizesmobng and
spattering, and tokeepdrippings
coolduring broiling. Stoppingfat
andmeatjuices from draining to
thebroiler pan preventsrack from
servingitspurpose, andjuices may
become hot enoughtocatch fire.
2. DO NOT place asheet of
aluminum foilon shelf. Todo so
mayresult in improperly cooked
foods, damage toovenfinish and
increase in heat onoutside surfaces
oftheo‘en.
QuestiolE&Answers
Q. why shouldIleavethe door
closed when broiling chicken?
A. Chickenistheonly food
recommendedforclosed-dtior
broiling.This isbecausechickenis
relativelythickerthan otherfoods
youbroil. Closingthe doorholds
moreheatin theoven,whichallows
chickento cook evenlythroughout.
Q. when broiling, is it necessary
to alwaysuse arack in the pan?
A. Yes.Using the rack suspends
the meatoverthepan. Asthe meat
cooks,thejuices fallintothe pan,
thuskeepingmeatdrier. Juices
are protectedbythe rack and stay
cooler, thuspreventingexcessive
spatterand smoking.
Q. Should Isalt the meat before
broiling?
A. No. Saltdrawsoutthejuices
and allowsthemto evaporate.
Alwayssalt aftercooking. Turn
meat with tongs;piercing meat
with afork also allowsjuices to
escape. When broilingpoultry
or fish, brush each sideoften
with butter.
Q.why are my meatsnotturning
outasbrown as they should?
A. In some areas, the power
(Volbge)totherangemaybelow.
In these cases, preheat the broil
unit for 10minutesbefore placing
broiler pan with food in oven.
Check to see if youare using the
recommended shelfposition. Broil
for longestperiod oftime indicated
in the Broiling Guide. Turn food
only once during broiling.
Q. Do Ineed to grease my broiler
rack to prevent met from Stictig?
A. No. The broiler rack isdesigned
to reflect broiler heat, thus keeping
the surface cool enough to prevent
meatstickingtotie surface.However,
sprayingthebroiler rack lightlywith
avegetablecooking spray before
cooking will make cleanup easier.
.
!,. !. . .-_-.L:.-!~A%~w%-w–w . . .
-x=—-—-,-.——---——-——-——— ——...
...........———
60Broilerdoesnotneedtobe
preheated.However,forverythin
foods,ortoincreasebrowning,
preheatifdesired.
7. FroxemSteak5canbe
convent~onallybroiledby
positioningtheovenshelfatnext
lowestshelfpositionandincreasing
cookingtimegiveninthisguide
11Atimesper side.
Toslash,cutcrosswisethrough
outerfatsurfacejusttotheedgeof
themeat.Usetongstoturnmeat
overtopreventpiercingmeatand
losingjuices.
3!ilat cOH~es withyouroven.Itis
~%%
dcsiune~ to minimize smoking and
._r.==
-s[]at%ring by trappi~gjui~es in the
shielded lower part ofthepan. 4. Ifdesired, marinatemeatsor
chickenbeforebroiling.Orbrush
withbarbecuesaucelast5to 10
minutesonly.
2. Ovendoorshouldbe ajarforall
foods ~xce~t c~ic~en; thereisa
specialpositionondoorwhich
holdsdooropencorrectly. 5, Whenarrangingfoodonpan,
donotletfattyedgeshangover
sides,whichcouldsoilovenwith
fatdripping.
3, Forsteaksandchops,slashfat
evenlyaroundoutsideedgesofmeat.
FirstSide
Time,Minutes
5
SecondSide
Time,Minutes
Quantityand/or
Thickness Shelf
~sition HI or
LOBroil Comments
Arrangeinsinglelayer.
Food 1Y’lb. (about8
thin slices)
1lb. (4patties)
*A-to %-in. thick
l-inchthick
(1to IH lbs.)
l~z-in.thick
(2to2% Ibs.)
1whole
(2tc2filbs.),
split lengthwise
2to4slices
1pkg. (2)
2(split)
2-4
DHIBacon
Spaceevenly.
Upto 8pattiestakeaboutsametime.
GroundBeef
\VellDone 6-7DHI 8-9
BeefSteaks
fire
\iedium
JYellDone
Rare
>ledium
\VellDone
Steakslessthan 1inchcookthrough
beforebrowning.Panfryingis
recommended.
Slashfat.
7
6-7
8-9
6-7
9-12
16-18
18-20
D
D
D
D
D
D
HI 9
12-13
13
10
15
25
Reducetimesabout5to 10minutesper
side forcut-upchicken.Brusheachside
with meltedbutter,Broilwithskin
downfirstandbroil withdoorclosed.
BLC) 28-30
chicken(450°)
2-3
3-4
Bakery Products
Bread(Toast)or
ToasterPastries
EnglishMuffins
Spaceevenly.PlaceEnglishmuffins
cut-side-upandbrushwithbutter,if
desired.
Cut throughbackofshell. Spread
open. Brushwith meltedbutter
before andafterhalfoftime.
Y2-1
D
D
c
HI
HI 13-16 Do not
turn over.
LobsterTails
(6t080z. each)
5Handle andturnverycarefully.
Brush withlemonbutter beforeand
during cookingif desired. Preheat
broiler toincreasebrowning.
HI 5
l-lb. fillets %-to
lA-in.thick
Ham Slices(450°)
7
~prccooked)
Pork Chops
}\’e]IDone
Increase times5to 10minutesper side
for 1M-inchthickor home-cured.
LO 88
4-5
8-9
l-in. thick
2(lAinch)
2(l-in. thick) Slash fat.
D
c
D
D
D
c
HI 10-12
12-13
1
HI 4-7
10
4-6
12-14
1-2
Slash fat.
8
10
10
17
2(1 inch) 1
about 10to 12oz.
2(Ifi inch)
about 1lb.
i
HI If desired. split sausagesin!~alf
lengthwise; cut into5-to 6-inchpieces
6
-------...-
.— .— .— —.—...- ———
Propercaregndcleaningare
importantso yourrangewillgive
youefficientand satisfactory
service.Followthesedirections
carefullyin caring for ittohelp
assuresafeandpropermaintenance.
BE sum ELECTNC PomR
ISOTFBEFOW CLEAmG
ANYP’T OF THER~GE.
controlRnei
It’sagoodidea to wipethecontrol
panelclean after each useofthe
oven.Foramorethoroughcleaning,
theknobscan be removedbyptiing
themoffthe knob stems. Ifknobs
are removed,do not allowwaterto
run downthe insidesurfaceofthe
glasswhilecleaning. Clea~with
mild soapand water,rinse with
clean waterand polishdry with
asoficloth.
Do not use abrasivecleansers,
strongIiquidcleaners or oven
cleaners on the controlpanel—
they willdamage the finish.
control Knobs
The control knobsmay be removed
for cleaning.
Toremoveknob, pull it straight
off the stem. If knob is difficultto
remove,place athin cloth (likea
handkerchie~ or apiece ofstring
under and around the knobedge
and pull up.
Washknobs in soap and waterbut
do not soak.
Toreplace knob, locatethe groove
in each sideof the knobstem.One
ofthegroovescontainsaspring clip
and the other grooveis clear. Locate
the molded rib insidetheknob.Fit
themoldedrib ofthe knobintothe
cleargrooveontheknobstem.
(seecleaning Guide,page25.)
Plllg”InStlrfaceUllib
Cleanthearea underIhedrippa~~s
often.Built-upsoil,especially
grease, maycatchfire.
Tomakecleaningeasier,theplug-
in surfaceunitsareremovable.
Liftaplug-inunitabout1“abovethe
drip pan—justenoughto grasp it—
and youcan pull itout.
Donotlift aplug-in unitmore
than 1:’If youdo,it may notlie
fiatonthedrip panwhenyou
plug it backin.
RepeatedRiftingoftheplug-in
unitmorethan 1“abovethedr~p
pancanpermanently damagethe
recepbcle.
caution:Besureall Controls are
turned toOYF andsurfaceUtits
arecoolbeforeattemptingto
removethem.
Afier removingaplug-inunit,
removethe drip pan under the unit
and clean it accordingto directions
in the CleaningGuide. Wipearound
the edgesof the surface unit
opening. Clean the area belowthe
unit. Rinse all washedareas with a
damp clothor sponge.
Receptacle
Torepiaceaplug-inUunit:
@The dri~Danmustbe placedinto
the surfa;e’cavityfirst. Make sure
theopeningin thedrip pan linesup
withthe receptacle.
@Insert the terminalsofthe plug-in
unitthroughthe openingin the drip
pan and intothe receptacle.
@Guidethe surfaceunit intoplace
soit fitsevenlyintothe drip pan.
CAUTION
~Do notattemptto clean plug-in
surfaceunits in an automatic
dishwasher.
@Do not immerse plug-in surface
unitsin liquidsofany kind.
@Do notbend theplug-in surface
unitplugterminals.
@Do not attemptto clean, adjust
or in any wayrepair the plug-in
receptacle.

This manual suits for next models

1

Other Hotpoint Range manuals

Hotpoint RGA624PF User instructions

Hotpoint

Hotpoint RGA624PF User instructions

Hotpoint RB747GJ User manual

Hotpoint

Hotpoint RB747GJ User manual

Hotpoint RB740BHCT User instructions

Hotpoint

Hotpoint RB740BHCT User instructions

Hotpoint RGB524PPAWH User instructions

Hotpoint

Hotpoint RGB524PPAWH User instructions

Hotpoint RB524 Installation guide

Hotpoint

Hotpoint RB524 Installation guide

Hotpoint RA720K User manual

Hotpoint

Hotpoint RA720K User manual

Hotpoint RB754N User manual

Hotpoint

Hotpoint RB754N User manual

Hotpoint RA720 Operating instructions

Hotpoint

Hotpoint RA720 Operating instructions

Hotpoint RGA724EKWH - R 24 Inch Gas Range User manual

Hotpoint

Hotpoint RGA724EKWH - R 24 Inch Gas Range User manual

Hotpoint RGBS200DMWW Manual

Hotpoint

Hotpoint RGBS200DMWW Manual

Hotpoint RGB501 Installation guide

Hotpoint

Hotpoint RGB501 Installation guide

Hotpoint RGB751GEL User manual

Hotpoint

Hotpoint RGB751GEL User manual

Hotpoint RB525HCT User manual

Hotpoint

Hotpoint RB525HCT User manual

Hotpoint RH960G User manual

Hotpoint

Hotpoint RH960G User manual

Hotpoint RB536BCAD Service manual

Hotpoint

Hotpoint RB536BCAD Service manual

Hotpoint RGB508 Installation guide

Hotpoint

Hotpoint RGB508 Installation guide

Hotpoint RGA520EW User manual

Hotpoint

Hotpoint RGA520EW User manual

Hotpoint RB526HCC - 30 Inch Electric Range User manual

Hotpoint

Hotpoint RB526HCC - 30 Inch Electric Range User manual

Hotpoint RGA720EK Service manual

Hotpoint

Hotpoint RGA720EK Service manual

Hotpoint RGB745DEP Manual

Hotpoint

Hotpoint RGB745DEP Manual

Hotpoint RGB528PEHWW Manual

Hotpoint

Hotpoint RGB528PEHWW Manual

Hotpoint RGB745 Manual

Hotpoint

Hotpoint RGB745 Manual

Hotpoint RGB530DEP - 30 in. Gas Range User guide

Hotpoint

Hotpoint RGB530DEP - 30 in. Gas Range User guide

Hotpoint RGA820 Original instructions

Hotpoint

Hotpoint RGA820 Original instructions

Popular Range manuals by other brands

Maytag Precision Touch Control 700 Use and care guide

Maytag

Maytag Precision Touch Control 700 Use and care guide

Maytag MGT8655XB02 Use & care guide

Maytag

Maytag MGT8655XB02 Use & care guide

Zanussi Z9GCGH4CGL quick guide

Zanussi

Zanussi Z9GCGH4CGL quick guide

KitchenAid KERC507 Use and care guide

KitchenAid

KitchenAid KERC507 Use and care guide

GE JBP89DM installation instructions

GE

GE JBP89DM installation instructions

Dacor Contemporary DOP48C86D Series installation instructions

Dacor

Dacor Contemporary DOP48C86D Series installation instructions

Frigidaire TEF364AQC Use & care manual

Frigidaire

Frigidaire TEF364AQC Use & care manual

Lofra Dolcevita RXCS30M0G500 manual

Lofra

Lofra Dolcevita RXCS30M0G500 manual

Amana EvenAir ARTC8600 Series owner's manual

Amana

Amana EvenAir ARTC8600 Series owner's manual

Domino HDMC 32400T user manual

Domino

Domino HDMC 32400T user manual

Whirlpool STANDARD CLEANING GAS RANGE Use & care guide

Whirlpool

Whirlpool STANDARD CLEANING GAS RANGE Use & care guide

Whirlpool WGI925C0B Use & care guide

Whirlpool

Whirlpool WGI925C0B Use & care guide

Whirlpool WE-345P Use & care guide

Whirlpool

Whirlpool WE-345P Use & care guide

Amana AGR5725RDQ Use & care guide

Amana

Amana AGR5725RDQ Use & care guide

GE JSP42SNSS Dimensions and installation information

GE

GE JSP42SNSS Dimensions and installation information

Whirlpool 9762358A Use and care guide

Whirlpool

Whirlpool 9762358A Use and care guide

KitchenAid KSEG950ESS user manual

KitchenAid

KitchenAid KSEG950ESS user manual

Whirlpool Polara GR556 Use & care guide

Whirlpool

Whirlpool Polara GR556 Use & care guide

manuals.online logo
manuals.online logoBrands
  • About & Mission
  • Contact us
  • Privacy Policy
  • Terms and Conditions

Copyright 2025 Manuals.Online. All Rights Reserved.