manuals.online logo
Brands
  1. Home
  2. •
  3. Brands
  4. •
  5. Hotpoint
  6. •
  7. Refrigerator
  8. •
  9. Hotpoint 22 Series Operating instructions

Hotpoint 22 Series Operating instructions

Other manuals for 22 Series

3

This manual suits for next models

1

Other Hotpoint Refrigerator manuals

Hotpoint FF7190TX User manual

Hotpoint

Hotpoint FF7190TX User manual

Hotpoint ENXTM 19 F Series User manual

Hotpoint

Hotpoint ENXTM 19 F Series User manual

Hotpoint No-frost models Owner's manual

Hotpoint

Hotpoint No-frost models Owner's manual

Hotpoint FFA97 User manual

Hotpoint

Hotpoint FFA97 User manual

Hotpoint RFA52K User manual

Hotpoint

Hotpoint RFA52K User manual

Hotpoint FFUL 1913 P User manual

Hotpoint

Hotpoint FFUL 1913 P User manual

Hotpoint CTF14C Installation instructions

Hotpoint

Hotpoint CTF14C Installation instructions

Hotpoint HTS18GBS User manual

Hotpoint

Hotpoint HTS18GBS User manual

Hotpoint 8215 User manual

Hotpoint

Hotpoint 8215 User manual

Hotpoint RLAV21P User manual

Hotpoint

Hotpoint RLAV21P User manual

Hotpoint FF4D SB User manual

Hotpoint

Hotpoint FF4D SB User manual

Hotpoint HTH16BBXLCC - 15.5 cu. Ft. Top-Freezer... User manual

Hotpoint

Hotpoint HTH16BBXLCC - 15.5 cu. Ft. Top-Freezer... User manual

Hotpoint FFU4DG K User manual

Hotpoint

Hotpoint FFU4DG K User manual

Hotpoint XUL85 series User manual

Hotpoint

Hotpoint XUL85 series User manual

Hotpoint RL150G User manual

Hotpoint

Hotpoint RL150G User manual

Hotpoint Foot Adjustment Adjustment User manual

Hotpoint

Hotpoint Foot Adjustment Adjustment User manual

Hotpoint 39-6240 Installation instructions

Hotpoint

Hotpoint 39-6240 Installation instructions

Hotpoint MSZ802DF User manual

Hotpoint

Hotpoint MSZ802DF User manual

Hotpoint HTM18IBPSA - 18' Refrigerator Assembly instructions

Hotpoint

Hotpoint HTM18IBPSA - 18' Refrigerator Assembly instructions

Hotpoint E4DG AA X MTZ User manual

Hotpoint

Hotpoint E4DG AA X MTZ User manual

Hotpoint CTX18EACAA User manual

Hotpoint

Hotpoint CTX18EACAA User manual

Hotpoint 25 Series Operating instructions

Hotpoint

Hotpoint 25 Series Operating instructions

Hotpoint ENERGY STAR HTJ17CBB Manual

Hotpoint

Hotpoint ENERGY STAR HTJ17CBB Manual

Hotpoint RLA34 User manual

Hotpoint

Hotpoint RLA34 User manual

Popular Refrigerator manuals by other brands

Frigidaire FRS26TS7DW2 Use & care manual

Frigidaire

Frigidaire FRS26TS7DW2 Use & care manual

Fisher Scientific 10ECEEFSA manual

Fisher Scientific

Fisher Scientific 10ECEEFSA manual

Summit FF22BDRSS user manual

Summit

Summit FF22BDRSS user manual

Frigidaire FFRU17B2QWE use & care

Frigidaire

Frigidaire FFRU17B2QWE use & care

Hitachi R-SG28KPH instruction manual

Hitachi

Hitachi R-SG28KPH instruction manual

Dometic RMH 7390 L operating instructions

Dometic

Dometic RMH 7390 L operating instructions

AEG S71700TSW0 user manual

AEG

AEG S71700TSW0 user manual

Electrolux ENB3669 Instruction book

Electrolux

Electrolux ENB3669 Instruction book

Electrolux ERN 2930 Instruction book

Electrolux

Electrolux ERN 2930 Instruction book

Beko GNE 60520 X user manual

Beko

Beko GNE 60520 X user manual

Jenn-Air JUR248LBES00 Use & care guide

Jenn-Air

Jenn-Air JUR248LBES00 Use & care guide

Dometic RGE 4000 Installation and operating manual

Dometic

Dometic RGE 4000 Installation and operating manual

Dometic L-0191B Brochure & specs

Dometic

Dometic L-0191B Brochure & specs

LG LRBP1031W - 10 Cu. Ft. Cabinet Depth Bottom Freezer... owner's guide

LG

LG LRBP1031W - 10 Cu. Ft. Cabinet Depth Bottom Freezer... owner's guide

Daewoo RN-33 Series user manual

Daewoo

Daewoo RN-33 Series user manual

Haier RF-8888-174 Service manual

Haier

Haier RF-8888-174 Service manual

Blaupunkt 5CK2 Series user manual

Blaupunkt

Blaupunkt 5CK2 Series user manual

Beko B5RCNE366HG user manual

Beko

Beko B5RCNE366HG user manual

manuals.online logo
manuals.online logoBrands
  • About & Mission
  • Contact us
  • Privacy Policy
  • Terms and Conditions

Copyright 2025 Manuals.Online. All Rights Reserved.

o
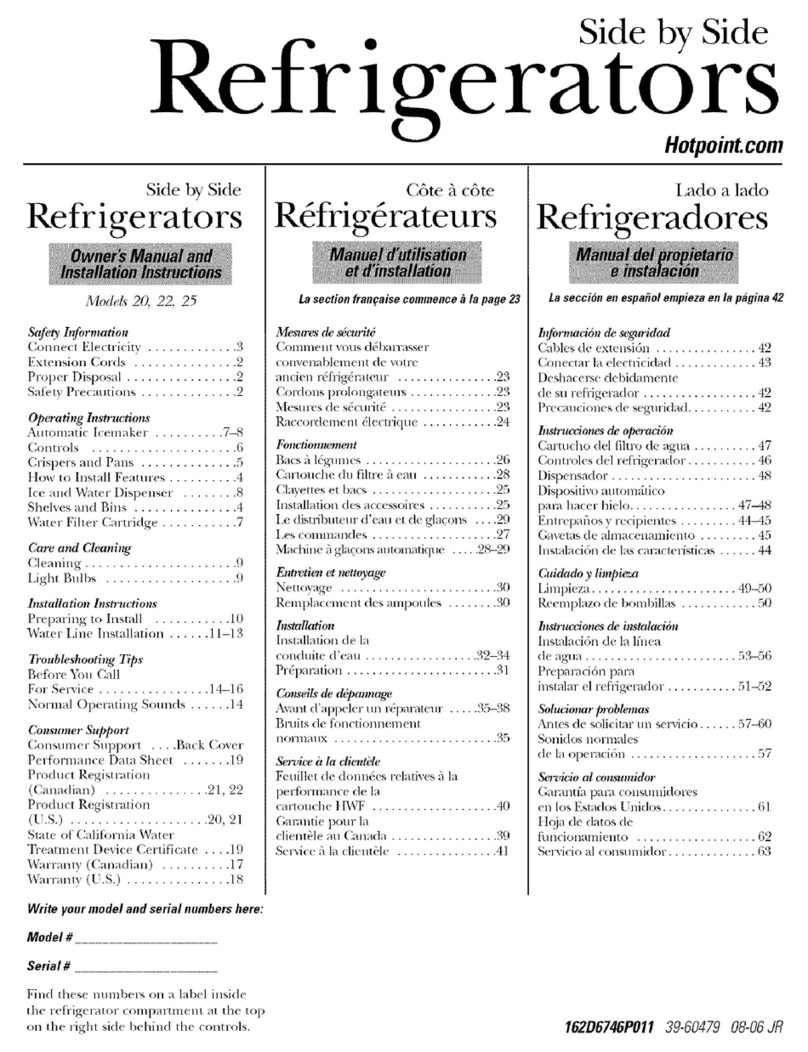
Side by
Re fr lge rato {’ld
Hotpoint.com
Side by Side
Refrigerators
Models 20, 22, 25
Safety Information
Connect Electricity- .............
3
Extension Cords ...............
2
Proper Disposal ................
2
Safety Precautions ..............2
Operating Instructions
Automatic Icemaker ..........
%8
Controls .....................
6
Crispers and Pans ..............
5
How to Install Features ..........
4
Ice and Water Dispenser ........
8
Shelves and Bins ...............
4
Water Filter Cartridge ...........
7
Care and
Cleaning
Cleaning ......................
9
Light Bulbs ...................
9
Installation Instn~ctions
Preparing to Install ...........
10
Water Line Installation ......
11-13
Troubleshooting Tips
Before You Call
For SezMce ................
14-16
Normal Operating Sounds ......
14
Consumer Support
Consumer Support ....
Back Cover
Performance Data Sheet .......
19
Product Registration
(Canadian) ...............
21, 22
Product Registration
(u.s.)
....................
20, 21
State of California Water
Treatment Device Certificate ....
19
Warrant), (Canadian) ..........
17
Warranty (U.S.) ...............
18
Write your model and serial numbers here:
Model #
Serial #
Find these numbers on a label inside
the refrigerator compartment at the top
on the right side behind the controls.
C6te fi c6te
Rdfrig6rateurs
La section franFaise commence ~ la page 23
Mesures de s~curitg
Comment vous d~barrasser
convenablement de von-e
ancien r4frigdrateur ................
23
Cordons prolongateurs ..............
23
Mesures de s4curitd .................
23
Raccordement dlectrique ............
24
Fonctionnement
Bacs ~ ldgurnes .....................
26
Cartouche du filtre ~ eau ............
28
Clayettes et bacs ....................
25
Installation des accessoires ...........
25
Le distributeur d’eau et de glaqons ....
29
Les commandes ....................
27
Machine fi glaqons automafique .....
28-29
Entretien et nettoyage
Nettoyage .........................
30
Remplacement des ampoules ........
30
Insta/~ion
Installation de la
conduite d’eau ..................
32-34
Pr{paration ........................
31
Con~dls de dgpamu~ge
Avant d’appeler un rSparateur .....35-38
Bruits de fonctionnement
non-naux ..........................
35
Service g~ la clientele
Feuillet de donnSes relatives fi la
performance de la
cartouche t-IWF ....................
40
Garantie pour la
clientele au Canada .................
39
Service fi la clientele ................
41
Lado a lado
Refrigeradores
La secci~n en espafiol empieza en la p~gina #2
Informaci6n de seguridad
Cables de extensi6n ................
42
Conectar la electricidad .............
43
Deshacerse debidamente
de su refrigemdor ..................
42
Precauciones de se~zridad ...........
42
h~trucciones de operad6n
Cartucho del filtro de agua ..........
47
Controles del refrigerador ...........
46
Dispensador .......................
48
Dispositivo automdtico
para hacer hielo .................
47-48
Entrepafios y recipientes .........
44-45
Gavetas de almacenamiento .........
45
Instalaci6n de las caracteristicas ......
44
Cuidado y limpieza
Limpieza .......................
49-50
Reemplazo de bombillas ............
50
Instrucciones de instalaci&z
Instalad6n de la lfnea
de agua ........................
5~-56
Preparaci6n pm-a
instalar el refrigerador ...........
51-52
Soh~ionar problemas
Antes de solicitar un servicio ......
57-60
Sonidos normales
de la operaci6n ....................
57
Seroicio al consumidor
Garant~a para consumidores
en los Estados Unidos ...............
61
Hoja de datos de
funcionarniento ...................
62
Servicio al consumidor ..............
63
162D6746P010 39-60457
O4-O~JB
IMPORTANT SAFETY INFORMAtiON.
READ ALL INSTRUCtiONS BEFORE USING.
WARNING!
Use this appliance only for its intended purpose as described in this Owner’s Manual
SAFETY PRECAUTIONS
When using electrical appliances, basic safety precautions should be foflowed, including the following:
I~This refrigerator must be properly installed
and located in accordance with the Installation
Instructions before it is used,
~Do not allow children to climb, stand or hang
on the shelves in the refrigerator. They could
damage the refrigerator and seriously injure
themseh,es.
Do not touch the cold surfaces in the freezer
compartment when hands m’e damp or wet. Skin
may stick to these extremely cold surfaces.
~Do not store or use gasoline or other flammable
vapors and liquids in the vicinity of this or any
other appliance.
I~Setting the freezer control to the 0 (off) position
does not remove power to the light circuit.
I~Do not refreeze frozen foods which have thawed
completely.
[]
In refrigerators with automatic icemakers,
avoid contact with the moving parts o£ the
ejector mechm~ism, or with the heating element
that releases the cubes. Do not place fingers or
hands on the automatic icemaking mechanism
while the refrigerator is plugged in.
~Keep fingers out of the "pinch point" areas;
clearances between the doors and between
the doors and cabinet are necessarily small.
Be careful closing doors when children are
in the area.
glUnplug the refrigerator before cleaning and
making repairs.
NOTE:
We
strongly recommend that any servicing be
performed by a qualified individual.
DANGER! RISK OF CHILD ENTRAPMENT
PROPER DISPOSAL OF THE REFRIGERATOR
Child entrapment and suffocation are not problems
of the past_Junked or abandoned refrigerators are
still dangerous...even if they will sit for "just a few
days." If you are getting rid of your old refrigerator,
please follow the instructions below to help prevent
accidents.
Before You Throw Away Your Old Refrigerator
or Freezer.
[] Take off the doors.
[]
Leave the shelves in place so that children may
not easily climb inside.
Refrigerants
All refrigeration products contain refrigerants,
which under federal law must be removed prior
to product disposal. If you are getting rid of an
old refrigeration product, check with the company
handling the disposal about what to do.
2
USE OF EXTENSION CORDS
Because of potential safety hazards under certain conditions, we strongly recommend
against the use of an extension cord.
However, if you must use an extension cord, it is absolutely necessary that it be a UL-listed (in the United
States) or a CSA-listed (in Canada), 3-~4re grounding type appliance extension cord having a gaounding
type plug and outlet and that the electrical rating of the cord be 15 amperes (minimum) and 120 volts.
wvvw.Hotpoint com
WARNING!
HOW TO CONNECT ELECTRICITY
Do not, under any circumstances, cut or remove the third (ground) prong from the power cord. For
personal safety, this appliance must be properly grounded.
[]
The power cord of this appliance is equipped with a 3-prong (grounding) plug
which mates with a standard 3-prong (grounding) wall outlet to minimize the
possibility of electric shock hazard fl’om this appliance.
~
Have the wall outlet and circtfit checked by a qualified electrician to make sure the
outlet is properly grounded.
~
If the outlet is a standard 2-prong outlet, it is your personal responsibility and
obligation to have it replaced with a properly grounded 3-prong ~11 outlet.
INSURE PROPER GROUND
EXISTS BEFORE USE
The refrigerator should always be plugged into its own
individual electrical outlet which has a voltage rating that
matches the
rating
plate.
This provides the best performance and also prevents
overloading house wiring circuits which could cause a
fire hazard from overheated wh-es.
Never unplug your refrigerator by pulling on the power
cord. Always grip plug firmly and pttll straight out from
the outlet.
Repair or replace imznediately all power cords that have
become frayed or otherwise damaged. Do not use a cord
that shows cracks or abrasion damage along its length or
at either end.
[]
When moving the refrigerator away from the
wall, be careftfl not to roll over or damage the
power cord.
READ AND FOLLOW THIS SAFETY INFORMATION CAREFULLY.
SAVE THESE INSTRUCTIONS
3
How to install features. (Not all features
are on all models.)
(~)
TOP FREEZER SHELF
Make sure the shelf front locks into
position.
Top Freezer Shelf
~ FREEZER DOOR SHELF FRONTS
Make sure that the shelf front locks
into position.
NOTE;
On dispenser models, the
longer shelf fronts go in the top
two positions.
Shelf Front
Door
Shelf
To
remove:
Lift the shelf extender
su~ight up, then pull out.
To replace:
Engage the shelf
extender in the molded supports
of the door and push in. It wi!l
lock in place.
(~)
FILTER CARTRIDGE
Remove Bypass Plug
Install Filter Cartridge
(~) DAIRY COVER
BOTTLE RETAINER
(~)
LOWER FIXED DOOR BINS
Make sure the bin fronts lock into position.
Lower Door Bin
ADJUSTABLE
DOOR BINS
DOOR BIN SNUGGERS
To remove:
Lift the
front of the bin up,
then pull out.
To replace or relocate:
Engage the bin in the
molded supports of
the door, and push
in. Bin will lock in
place.
About the shelves and bins. (Not all features
are on all models.)
Rearranging the Shelves
Refrigerator Shelves:
To Remove To Replace
4
Freezer Pan:
To Remove
Remove the pau by pttllhag it
forward, lifting up the front
and sliding it past the
stop
location.
Freezer Shelves:
To
Remove
wz4a~.Hotpointcom
Slide-Out Spil/proof Sheff (on some models)
The slide-out spillproof shelf allows you to
reach items stored behind others. The
special edges are designed to help prevent
spills from dripping to lower shelves.
NOTE: Make sure you push the shelves all the
way back in before you close the door.
Spillproof Shelves
(on some models)
Spillproof shelves have special edges
to help prevent spills from dripping to
lower shelves.
About the crispers and pans. (Not all oat, r,s
are on ~// models.)
Adjustable Humidity Crispers and Snack Pan
(on some models)
Slide the control all the way to the
High
setting to provide high humidity
recommended for most vegetabIes.
Slide the control all the way to the
Low
setting to provide lower hnmidity levels
recommended for most frtfits.
Convertible Meat Pan (on some models)
The convertible meat pan has its own cold
air duct to allow a stream of cold air from
the freezer compartment to flow around
the pan.
The variable temperature control regtflates
the air flow from the freezer compm-tment.
Set control lever
up
to convert the pan
to normal refrigerator temperature and
provide extra vegetable storage space, Cold
air duct is turned off, Variable settings
between these extremes can be selected.
Set control lever
down
to the coldest setting
to store fresh meats. Iflever is left in meat
position for a long period of time, SOl~le
frost may form on the inside of the pan.
When replacing the crispers, make
sure you s/Me them through
the
crisper guides.
Crisper Removal
Crispers can easily be removed by tildng up
slighdy and pulling past
stop location.
If the door prevents you from taking out
the crispers, the refrigerator will need to
be rolled forward until the door opens
enough to slide the crispers out. In some
cases, when you roll the refrigerator out,
you will need to move the refrigerator to
the left as you roll it out.
5
About the controls on the refrigerator.
Your controls will look like one of the following:
Startup Steps for Proper Temperature Control
STEP 1--Set Fresh Food Control on "5."
STEP 2--Set Freezer Control on "5."
STEP 3~WAIT 12HOURS for temperatttre to stabilize.
STEP 4--If a change is needed, move the control one number at a time and allow 12 hours
for temperature to stabilize.
NOTE:
Setting the controls to the 0 (off) position does nbt remove power to the fight drcuit.
Control settings will vary based on personal preferences, usage and
operating
conditions and may
require
more than one
adjustment.
To Change Temperature Control Setting with Touch Pads:
¯ Freezer setting is on the left side o[ the display.
¯ Fresh Food setting is on the fight side of the display.
--
Press the warmer or colder pad for comparmaent and direction desixed.
--
Present control setting number ~I illuminate.
--
Each time the pad is touched, compartment setting changes one number.
A display of 1 is warmest and 9 is the coldest setting.
NOTE:Setting the controls to the O (off) position does not remove power to the light circuit.
Control settings will vary based on personal preferences, usage and
operating conditions and may require more than one adjustment.
6
About the water filter cartridge. (o, some models.)
Water Filter Cartridge
The water filter cartridge is located in the back upper right
corner of the refrigerator compartment.
~
hen to Replace the Filter on Models With a
eplacement Indicator Light
There is a replacement indicator light for the water filter
cartridge on the dispenser. This light will turn orange to/ell
you that you need to replace the filter soon.
The filter cartridge should be replaced when the
replacement indicator fight turns red or if the flow of water
to the dispenser or icemaker decreases.
When to Replace the Filter on Models Without a
Replacement Indicator Light
The filter cartridge should be replaced evezy
six months
or earlier if the flow of water to the water dispenser or
icemaker decreases.
Removing the Filter Cartridge
If you are replacing the carn-idge, first remove the old one
by slowly turning it to the left. Oo notpull down on the
cartridge. A small amount of water may drip down.
Installing the Filter Cartridge
O
If you are replacing a
SmartWater cartridge
with an adapter, it must
be removed before
installing the carlridge.
To remove the adapter,
turn it to the left about
1/4 turn.
ffyou are replacing a
(appearance may vary)
Water by Cull&an
cam-idge,
leave the adapter in place. This adapter will stay in the
refrigerator when you replace future cartridges.
On models without a replacement indicator light,
apply the month and year sticker to the new cartridge
to remind you to replace the filter in
six
months.
Fill the replacement cartridge with water from the tap
to allow for better flow from the dispenser immediately
after installation.
Line up the arrow on the cartridge and the c.artridge
holden Place the top of the new cartridge up inside the
holder.
Do notpush
it up into the holdel:
Slowly tum it to the right
until the filter cartridge
stops.
DO NOT OVERTIGHTEN.
As you turn the cartridge, it
will automatically raise itself
into position. The ca~ridge
will move about 1/9 turn.
~
Run water from the dispenser for 3 minutes (about 1-1/2
gallons) to clear the system and prevent sputtering.
Filter Bypass Plug
You must ttse the filter bypass plug when a replacement filter
cartridge is not available. The dispenser and the icemaker
will not operate without the filter or filter bypass plug.
To use the filter bypass plug
on
Water by Culligan
models,
you must fwst remove the filter adapter from the cartridge
holder by turning it to the left.
l_f you have questions---visit our Website
at www.hotpoint.com,
or call 1.800.GE.CARES (1.800.432.2737).
Replacement filters:.
To order additional filter cartridges in the United States,
visit our Website at wvvw.hotpoinLcom, or call GE Parts and
Accessories, 800.6262002.
MWF
Suggested Retail $38.95-47.95
Customers in Canada should consult the yellow pages for
the nearest Mabe Service Center.
Customers outside of the United States or Canada should
contact the local distributor.
About the automatic icemaker.
A newly-installed refrigerator may take 12-24 hours to begin making ice.
Automatic Icemaker (on some models)
When the refrigerator has been connected
to the water supply, set the power switch to
the I (on)
position.
The icemaker will fill with water when
it cools to 15°E When the bin fills to the
level of the feeler arm, the icemaker will
stop producing ice.
Be sure nothing interferes with the sweep
of the feeler arm.
Throw away the first few batches of ice to
allow the water line to dear.
The icemaker will produce seven cubes
per wde--approximately 100-130 cubes
in a 24-hour period, depending on freezer
compartment temperature, room
temperature, number of door openings
and other use conditions.
You will hear a buzzing sound each time
the icemaker fills with water.
7
About the automatic icemaker.
It is nol~nal for several cubes to be joined together.
If ice is not used frequently, old ice cubes will
become cloudy, taste stale, and shrink.
NOTE:
In homes with lower-than-average water pressure,
you may hear the icemaker cycle multiple times when
making one batch of ice.
Icemaker A ccessory Kit
If your refl-igerator did not come already
equipped with an automatic icemaker, an
icemaker accessory kit is available at extra cost.
Check the back of the refrigerator for the specific
icemaker kit needed for your model.
About the ice and
Spill Shelf
water dispenser, some
To Use the Dispenser
¯ ¯ ¯
Press the glass gently against the top of the
dispenser cradle.
The spill shelf is not self-draining. To
reduce water spotthag, the shelf and its
grille should be cleaned regulm’ly.
If no water is dispensed when the refrigerator is
first installed, there may be air in the water line
system. Press the dispenser arm for at least two
minutes to remove trapped air from the water line
and to fill the water system. To flush out impurities
in the waterline, throwaway the first six glassfuls
of water.
CAUTION:
Never put fingers or any other
objects into the ice crusher discharge opening.
Locking the Dispenser
(on some models)
¯
--~
Press the
LOCK CONTROL
pad
~
|
for 3 seconds to lock the
Lock
3
dispenser and conlxol panel.
To unlock, press and hold the
Hold 3 seconds pad again for 3 seconds.
Dispenser Light
¯
This pad turns the
nightlight
(~L
~ in the dispenser on and off.
ig ht
A
The fight also comes on when
the dispenser cradle is pressed.
If this light burns out, it should
be replaced with a 6 watt
mmdmum, 12 volt DG bulb.
Ice Storage Drawer on Dispenser Models
To remove:
Set the icemaker power switch to the
0
(off)
position.
Pull the ch-awer straight out and then lift past the
stop
position.
To replace:
When replacing the drawer, make sure to push it
firmly into place. If it does not go all the way back,
remove it and rotate the drive mechanism 1/4 tmn.
Then push the drawer back again.
Important Facts About Your Dispenser
[]
Do not add ice from trays or bags to the storage bin. It
may not crush or dispense well.
I~I
Avoid overfilling glass with ice and use of narrow glasses.
Backed-up ice can jam the chute or cause the door in the
chute to freeze shut. If ice is blocldng the chute, poke it
through ~qth a wooden spoon.
[]
Beverages and foods should not be quick-chilled in the
ice storage bin. Cans, bottles or food packages in the
storage bin may cause the icemaker or auger to jam.
[]
To keep dispensed ice from missing the glass, put the
glass dose to, but not touching, the dispenser opening.
8
[]
Some crushed ice may be dispensed even though you
selected
CUBED.
This happens occasionally when a few
cubes have been left in the cnzsher.
~tlAfter crushed ice is dispensed, some water may drip from
the chute.
[] Sometimes a small mound of snow will form on the door
in the ice chute. This condition is normal and usually
occurs when you have dispensed crushed ice repeatedly.
The snow will eventually evaporate.
[]
The first glass of water dispensed may be warmer than
the following ones. This is normal.
[]
Dispensed water is not ice cold. For colder ,~,ater, simply
add crushed ice or cubes before dispensing water.
Care and cleaning of the refrigerator,
oi, com
Cleaning the Outside
The dispenser drip area,
(on some models)
beneath the grille, should be wiped oh3,. Water
left in this area may leave deposits. Remove
the deposits by adding undiluted vinegar to
the well. Soak until the deposits disappear
or become loose enough to rinse awe):
The dispenser cradle
(on some models).
Before cleaning, lock the dispenser by
pressing mad holding the
LOCK CONTROL
pad for 3 seconds. Clean with warm water
and baking soda solution--about a
tablespoon (15 ml) of baking soda to a
quart (1 1) of water. Rinse thoroughly
and wipe dry.
The door handles and trim.
Clean with
a
cloth dampened with soapy water. Dry
with a soft cloth.
Keep the outside clean.
Wipe with a clean
cloth tightly dampened with kitchen
appliance wax or mild liquid dish detergent;
Dry and polish with a dean, soft cloth.
On not wipe the refrigerator with a soiled dish
cloth or wet towel These may leave a residue
that can erode the paint. Do not use scouring
pads, powdered cleaners, bleach or cleaners
containing bleach because these products can
scratch and weaken the paint finish.
Cleaning the Inside
To
help prevent odors, leave an open box of
baking soda in the refrigerator and freezer
compartlnents.
Unplug the refrigerator before cleaning. If tiffs
is not practical, wring excess moisture ant
of sponge or cloth when cleaning around
switches, lights or controls.
Use warm water and baking soda solution--
about a tablespoon (15 ml) of baking soda
to a quart (1 1) of water. This both cleans
and neutralizes odors. Rinse mid wipe dI
7.
After cleaning the door gaskets, apply a
thin layer o£ petroleum jelly to the door
gaskets at the hinge side. This helps keep
the gaskets from sticking and bending out
of shape.
Drain opening in freezer compartment
During yearly cleaning, remove bottom
freezer pan and flush a solution of baking
soda--1 teaspoon (5 ml) and 2 cups (500
ml) of hot (not boiling) water-- through
the drain line with the help era meat
baster. This will help eliminate odor and
reduce the likelihood of a clogged drain
line. If dlain becomes clogged, use a meat
baster and baking soda solution to force the
clog through the drain line.
Avoid cleaning cold glass shelves with hot water
because the extreme temperature difference may
cause them to break. Handle glass shelves carefully.
Bumping tempered glass can cause it to shatter.
Do not wash any plastic refrigerator parts in the
dishwasher.
Behind the Refrigerator
Be careful when moving the refrigerator away from the
wall. All types of floor coverings can be damaged,
particularly cushioned coverings and those with embossed
surfaces.
Pull the refrigerator suaight out and return it to position by
pushing it straight in. Moving the refrigerator in a side
direction may resiflt in damage to the floor covering or
refrigerator
When pushing the refrigerator back, make sure you do#troll over
the power cord or icemaker supply line (on some models].
Preparing for Vacation
For long vacations or absences, remove food and unplug
the refrigeratOl: Clean the interior with a baking soda
solution of one tablespoon (15 ml) of baking soda to one
quart (I I) of water. Leave the doors open.
Set the icemaker power switch to the 0
(off)position and
shut off the water supply to the refl’igerator.
Preparing to Move
Secure all loose items such as grille, shelves and drawers by taping them securely in place to prevent damage.
Be sure the refrigerator stays in an upright position during moving.
Replacing the Light Bulbs
Turning the control to the 0 (off) position does not remove power to the light circuit.
O Unplug the refrigerator. O Replace with an appliance bulb of the same
or lower wattage.
~ Remove the shel£just below the light shield.
~ Reinstall the shelf and plug the refrigerator
back in.
9
Normal operating sounds.
Newer refrigerators sound different from older refrigerators. Modem refrigerators have
more features and use newer technology.
Do you hear what I hear? These sounds are normal.
~:;~;~ :’:!~iZ:~!!!i?51?;~ili:ii!i!!i ~!5~i~71!i!i~ii:i ~.!i~ii~::~:,ii~i::Uiiiiii
The new high efficiency compressor runs faster and will have a higher pitch hum
or pulsating sound while operating.
fan circulating air inside the freezer which keeps the temperatures
throughout.
dropping on the defrost heater causing a sizzling, hissing or popping
sound during the defrost cycle.
, The flow of refrigerant through the freezer cooling coils sounds like boiling
water or a gurgling noise.
, Cracking or popping of cooling coils caused by expansion and conu~tction
during defrost and refrigeration following defrost.
as it melts from the evaporator and flows to the drain pan
during the defrost cycle.
Icemaker
(on some models)
The icemaker water valve will buzz when the icemaker fills with water. If the
power switch is in the I (oa) position it will buzz even if it has not yet been hooked
up to water. Keeping the power switch in the I lot0 position before it is hooked
up to water can damage the icemaker. To prevent this, set the power savitch to the
0 (off)
position. This will stop the buzzing.
The sound of cubes dropping into the bin and water running in pipes as
icemaker refills.
These sounds are normal and are due mostly to highly efficient operation.
Before you call for service...
Troubleshoob’ng 17ps
Save time and money! Review the charts on the following
pages first and you may not need to call for service.
Possible Causes
What To Do
Refrigerator in defrost cycle.
¯ Wait about 30 minutes for defrost c~cle to end.
Freezer control
¯ Move the fi-eezer control to a temperature setting.
in
0 (Off)
position.
Refrigerator is unpluff~ed. ¯ Push ~he plug completely into the outlet.
The fuse is blown/circuit
¯ Replace fuse or reset the breaker.
breaker
is tripped.
Temperature control not set
¯ See
About the controls.
co,d
Warm weather or frequent ¯ Set the temperatttre control one step colder.
door openings.
See About the controls.
Door left open.
¯ Check to see if package is holding door open.