HotWire X brand User manual

Thank you for purchasing an Xbrand 360° height adjustable laptop stand.
Please fill out the warranty registration online at www.xbrandproducts.com
Features & how they function
Display height adjustment (Actuator Button): Pressing the Actuator Button allows you to
adjust the position of the Cooling Cradle and thereby your laptop’s display height to any one of
four preset positions.
To change positions perform the following steps:
1. Clasp the corner of your laptop and the bottom of the Cooling Cradle so your laptop and the
Cooling Cradle are firmly grasped between your thumb and fingers.
2. Press down on the Actuator Button (located on unit’s base) with your other hand.
3. Push the Cooling Cradle forwards or backwards approximately 1⁄2 inch and release pressure
on the Actuator Button. When you hear a “click”, the Cooling Cradle has firmly locked into one
of the four preset positions.
4. Release your clasp on the Cooling Cradle and your laptop once you are certain the Cooling
Cradle has locked into position.
5. Repeat steps 1-4 to raise or lower system to next preset position.
Front drive access (Folding Retainer): The Folding Retainer located on the bottom of the
Cooling Cradle allows you to gain quick access to drives, bays or buttons located on your
laptop’s front edge.
1. Lower the Cooling Cradle to its lowest position.
2. Push the ‘slide switch’ (on front of Cooling Cradle) towards the right and, gently pull the
retainer towards you. When finished, push the retainer back to its original position to lock it
into place. Do not push on the retainer to adjust height of the Cooling Cradle.
360° rotation: Non-skid rollers on the bottom of your unit allow
it to rotate 360° to share your laptop’s display or access rear
connections.
Cooling Cradle: Your laptop sits on top on the Cooling Cradle
and is held securely in place with a series of non-skid surfaces.
It has been designed to increase airflow of cool ambient air
around your laptop. This accelerates laptop cooling which can aid in increasing your laptop’s
performance, battery life and even longevity.
Integrated 4 Port USB 2.0 hub (USB hub equipped models only): A 4-port USB 2.0 Hub is
built into your unit. All 4 ports are located at the rear of the unit. Use these ports to attach USB
powered peripherals: external keyboards, mice, printers, scanners, hard drives, optical drives, etc.
Placement of your 360° height adjustable laptop stand
Proper configuration of your workstation may help relieve back, shoulder and neck strain
that often accompany long hours of working on a laptop computer. For a complete set of
instructions on how to properly set up your workstation, see the US government’s CDC website:
http://www.cdc.gov/od/ohs/Ergonomics/compergo.htm.
LCD screen: Adjust height so the top of your laptop’s display is at or just below eye level when
you are properly seated in an upright position. Move the unit so that your laptop’s LCD screen is
approximately 18-30 inches from your eyes.
Keyboard & mouse: An external keyboard and mouse are highly recommended when using
this product. Adjust keyboard height so your forearms are parallel to the floor (approx 90° angle
at elbow). Adjust the slope of your keyboard so that the backs of your wrists are flat (in a neutral
position), and not bent back while typing. Your mouse should be at the same height.
360° Height Adjustable
Laptop Stand
user’s guide
models: XB-1001 & XB-1002
ONLY ACCESS FRONT EDGE DRIVES WHEN COOLING
CRADLE IS IN ITS LOWEST POSITION.
DO NOT REMOVE HAND FROM COOLING CRADLE UNTIL YOU
HEAR THE “CLICK”, INDICATING IT HAS LOCKED INTO POSITION.
front drive access display height adjustment
1.
2.
2.
18” - 30”
placement comfort
3.
1.
brand
user's guide.indd 1 9/29/05 1:56:03 PM
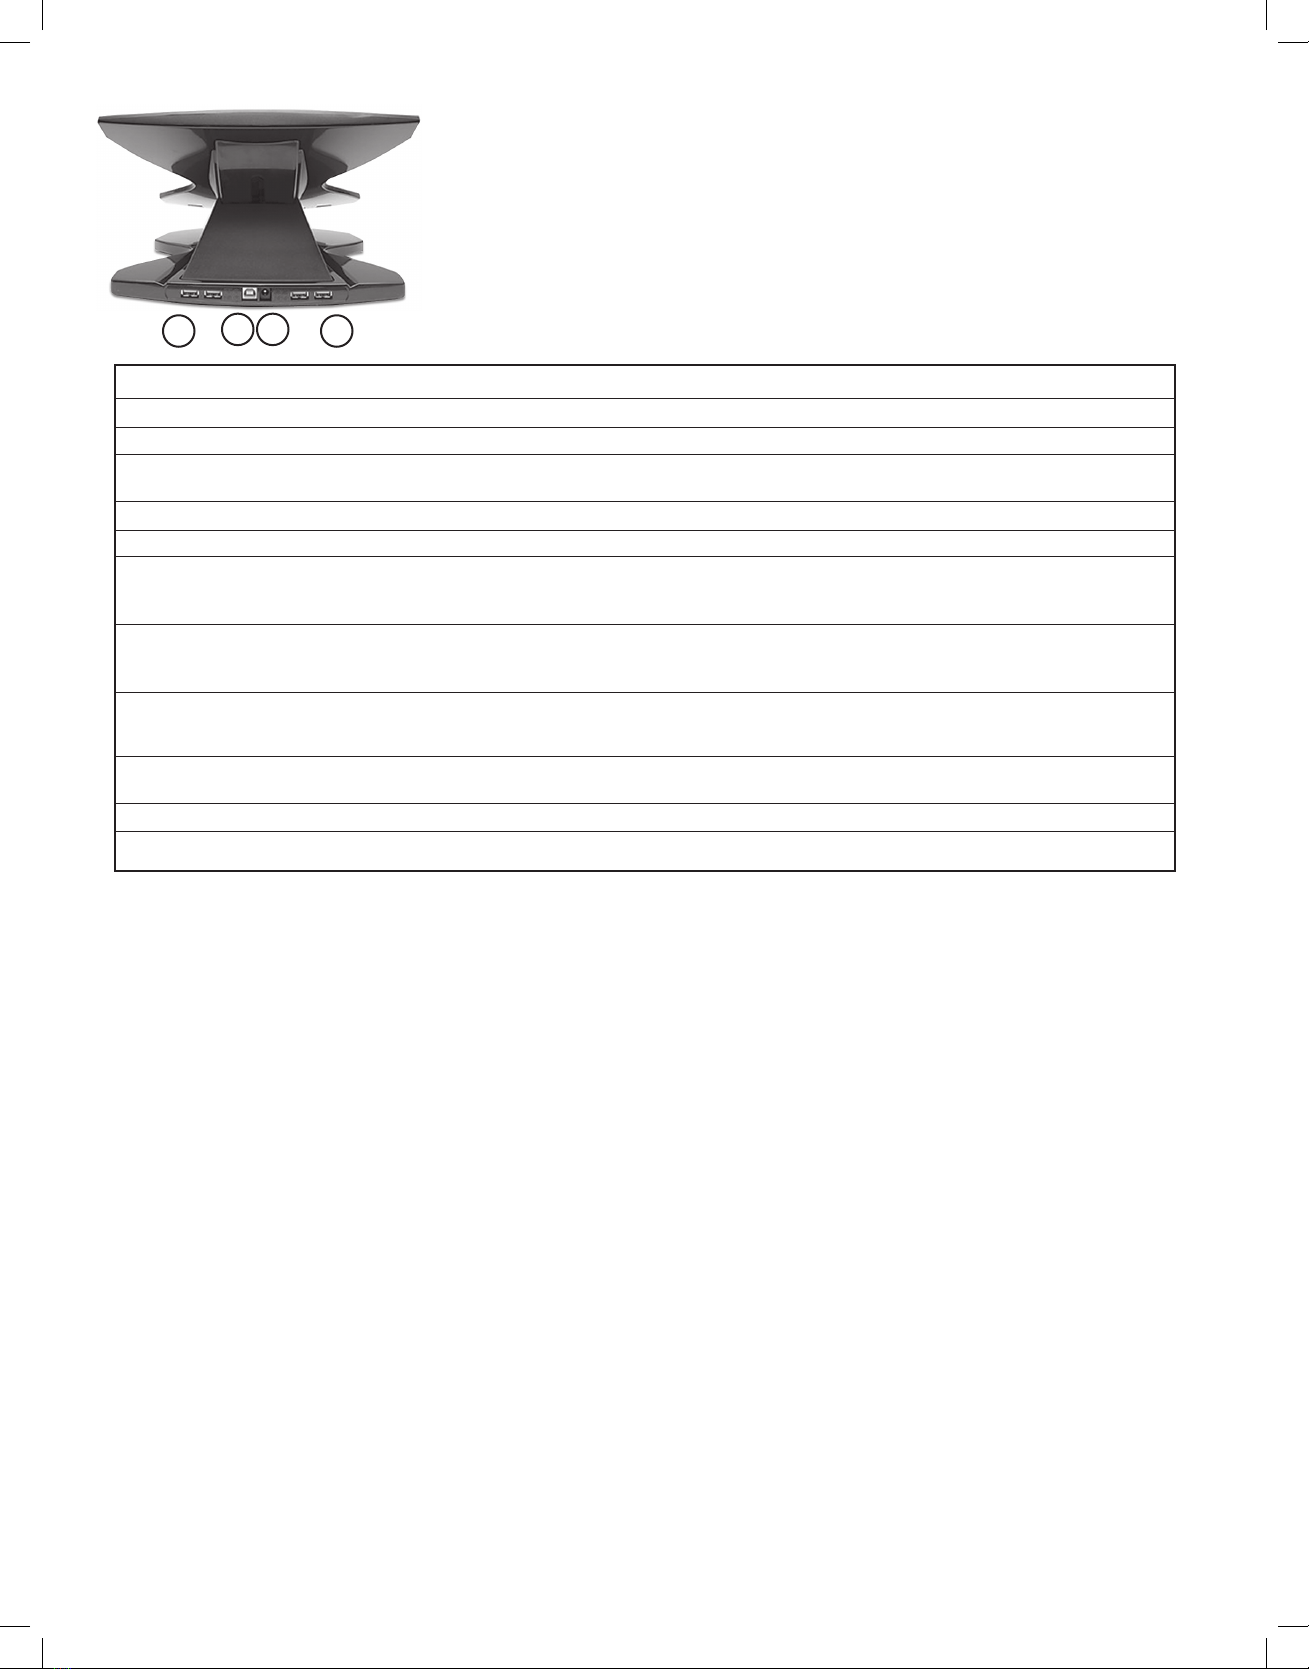
Connecting your USB 2.0 hub (USB hub equipped models only)
1. Supply AC power: Plug AC power adapter (included) into wall socket. Plug other end into the square
black connector on rear of unit. This step MUST be done first, or the hub may not function.
2. Connect the USB 2.0 cable: Insert rectangular end of the 2 ft USB 2.0 cable (included) into your
laptop’s USB port. Connect the square end to the white “HOST” port on the rear of the laptop stand.
3. Connect USB devices: Use any of the four USB 2.0 ports located on the back side of the unit’s base.
Specifications (subject to change without notice)
Model Number XB-1001-XX XB-1002-XX
Weight (not inc. packaging) 1.81 lbs (.82 kg) 3.08 lbs (1.4 kg)
Dimensions 11.8 x 11.0 x 4.8 / 8.5 in 11.8 x 11.0 x 4.8 / 8.5 in
L x W x H(low)/H(high) 300 x 280 x 121 / 217mm 300 x 280 x 121 / 217mm
Warranty 1 year 1 year
USB Hub Certifications n/a CE, FCC Class B
USB Hub Environmental n/a Humidity: 0-80%RH, Noncondensing
Operating Conditions Operating Temp 5°C-40°C,
Storage Temp -20°C-60°C
USB Hub Connections n/a 4 self powered Hi-Speed USB 2.0 ports.
USB 2.0 Type B uplink port for connection to notebook.
power input connector
USB Connection Types n/a 2 ft Hi-Speed USB 2.0 cable.
USB Type A connection at notebook
USB Type B connection at USB 2.0 hub
USB Data Transfer Rate n/a USB 2.0 peripherals at 480Mbps max.
USB 1.1 peripherals at 1.5Mbps max.
USB Port Peripheral Compatibility n/a USB 2.0 compatible, backwards compatible with USB 1.1 peripherals.
USB Hub OS Compatibility n/a Windows 98SE, ME, XP, 2000; MAC OS 9.0 or higher
Product support & contact information
Please visit our website at www.xbrandproducts.com for the most current product support and contact information.
LIMITED WARRANTY
Xbrand is a trademark of Hotwire Development LLC. Hotwire Development LLC warrants this product to be free from defects in materials and workmanship for a
period of one year from the date of purchase. This warranty is limited to repairing or replacing, at Hotwire Development’s sole option, any such defective products. To
obtain service under warranty you must obtain a Return Material Authorization (RMA) number from an Xbrand representative. The product must be returned with
transportation charges prepaid and must be accompanied by a brief description of the problem encountered and proof of date and place of purchase. This warranty
does not apply to equipment which has been damaged by accident, negligence, or misapplication or has been altered or modified in any way. This warranty applies
to the original purchaser who must have properly registered the product within 10 days of purchase. EXCEPT AS PROVIDED HEREIN, HOTWIRE DEVELOPMENT MAKES
NO WARRANTIES, EXPRESSED OR IMPLIED, INCLUDING WARRANTIES OF MERCHANTIBILITY AND FITNESS FOR A PARTICULAR PURPOSE. Some countries do not permit
limitation or exclusion of implied warranties; therefore, the aforesaid limitation(s) or exclusion(s) may not apply to the purchaser. EXCEPT AS PROVIDED ABOVE, IN NO
EVENT SHALL HOTWIRE DEVELOPMENT BE LIABLE FOR DIRECT, INDIRECT, SPECIAL, INCIDENTAL, OR CONSEQUENTIAL DAMAGES ARISING OUT OF THE USE OF THIS
PRODUCT, EVEN IF ADVISED OF THE POSSIBILITY OF SUCH DAMAGE. Specifically, Hotwire Development is not liable for any costs, such as lost profits or revenue, loss
of equipment, loss of use of equipment, loss of software, loss of data, costs of substitutes, claims by third parties, or otherwise. This warranty gives you specific legal
rights and you may also have other rights which may vary from location to location.
1.
2.
3. 3.
© 2005 Hotwire Development. All rights reserved. Patents Pending.Xbrand is a trademark of Hotwire Development LLC. All other trademarks are the property of their respective owners.
user's guide.indd 2 9/29/05 1:56:03 PM
This manual suits for next models
2
Table of contents


